
DIY Paper Garland: 5 Ideas for a Pretty Home Touch

Are you searching for an easy craft project with a big impact? These DIY Paper Garland ideas will help you create beautiful handmade decorations with simple paper, colors, and creative designs.
When I first started decorating my home for a small celebration, I thought I needed expensive decorations to make the space feel special.
After seeing countless store-bought ideas, I wanted something more personal, so I decided to try making a DIY Paper Garland.
My first attempt was far from perfect. The shapes were uneven, the colors didn’t match, and I had more paper scraps than a finished decoration.
But with a few tries, I discovered that the charm comes from choosing the right colors, adding creative details, and making something unique.
The best part about paper garlands is their versatility. From birthdays and seasonal decor to kids’ rooms and everyday spaces, a simple combination of paper, string, and creativity can create a beautiful handmade touch without expensive supplies or complicated skills.
5 DIY Paper Garland Ideas
Ombre Watercolor Circle Garland With Gold Accents
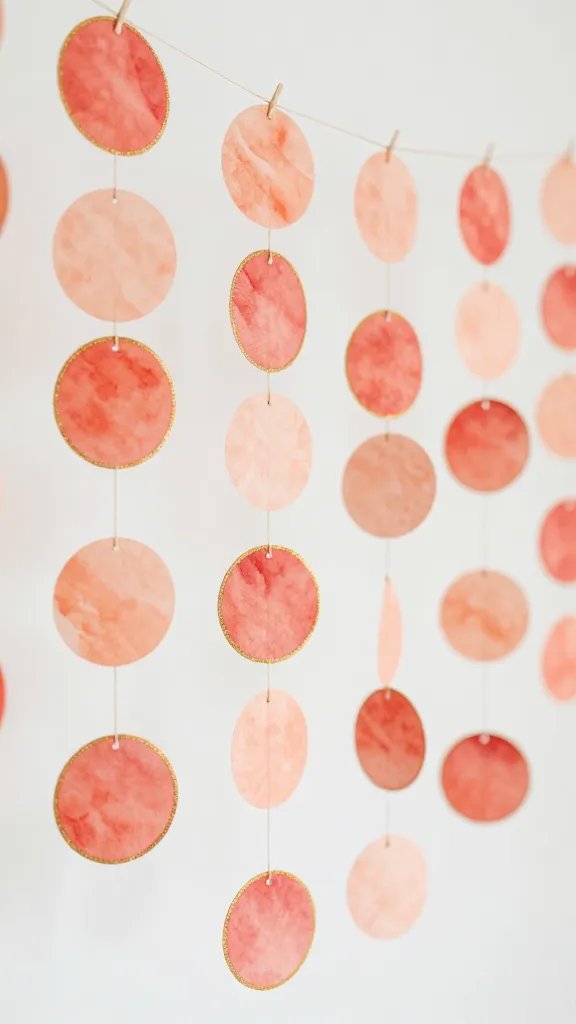
Picture this: delicate paper circles that fade from deep coral to soft peach, each one kissed with metallic gold edges, swaying gently above your dining table.
This garland is absolutely stunning and gives off major boho-chic vibes that’ll have your guests asking where you bought it.
The secret is in the gradual color shift. You’ll create about 5-7 shades using watercolor paints, starting with your darkest hue and gradually adding more water to lighten each batch. It’s like painting a sunset, but way easier!
Materials Needed
- Watercolor paper or heavy cardstock
- Watercolor paints in your chosen color family
- Gold leafing pen or metallic marker
- Circle punch (2-3 inch diameter works great)
- Needle and thread or thin twine
- Paintbrush and water cup
How to Make It
Start by painting large sections of your paper in graduating shades, letting each section dry completely.
Once dry, punch out your circles—you’ll want at least 40-50 for a decent length garland.
Here’s where the magic happens: use that gold pen to trace around the edge of each circle, or add fun dots and details.
Thread your needle and carefully pierce through the center of each circle, spacing them about an inch apart.
Alternate your shades from dark to light and back again for that gorgeous ombre effect.
Styling Ideas
This garland looks incredible draped across a mantel, hung vertically in a corner, or even wrapped around a mirror frame.
The watercolor effect catches the light beautifully, and those gold accents? Seriously gorgeous.
This is perfect for a bridal shower, spring party, or just to make your living room feel extra special on a random Tuesday.
Vintage Book Page Flower Garland
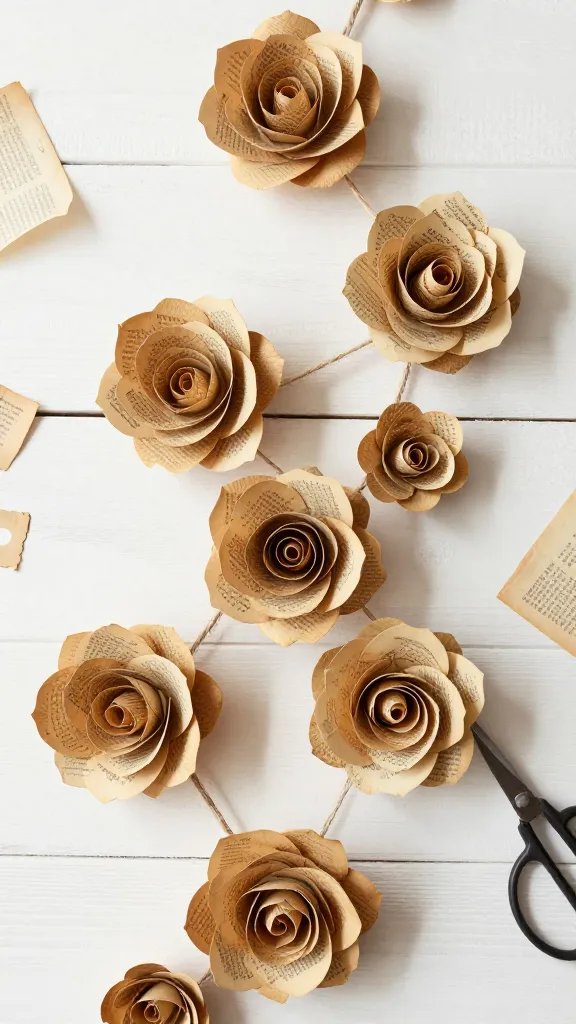
Got old books that are falling apart or outdated encyclopedias gathering dust? Give them new life with this charming floral garland that’s equal parts rustic and romantic.
The aged paper creates an instantly vintage aesthetic that you literally can’t buy in stores.
These aren’t your basic paper flowers—we’re talking dimensional blooms with layered petals that actually look like roses.
Each flower takes about 5 minutes to make once you get the hang of it, making this a perfect Netflix-and-craft project.
Materials Needed
- Old book pages or sheet music
- Scissors
- Hot glue gun and glue sticks
- Twine or ribbon (jute twine looks especially good)
- Small wooden beads (optional, for spacing)
How to Make It
Cut your book pages into circles of varying sizes—about 2, 3, and 4 inches in diameter.
For each flower, you’ll stack three circles together (largest on bottom) and cut petal shapes around the edges without reaching the center.
Crumple each layer slightly to add texture, then layer them together with a dot of hot glue in the middle.
For extra dimension, roll a small strip of book page tightly for the center and glue it right in the middle.
Attach your finished flowers to the twine by gluing them directly or threading the twine through the back.
Pro Tips
Mix in some flowers made from sheet music or pages with illustrations for visual interest.
You can also tea-stain plain white paper if you don’t have vintage books—just brew strong tea, dip your paper, and let it dry.
This garland is absolutely perfect for a library wedding, a cozy reading nook, or gifting to your book-loving bestie.
Modern Geometric Paper Diamond Garland
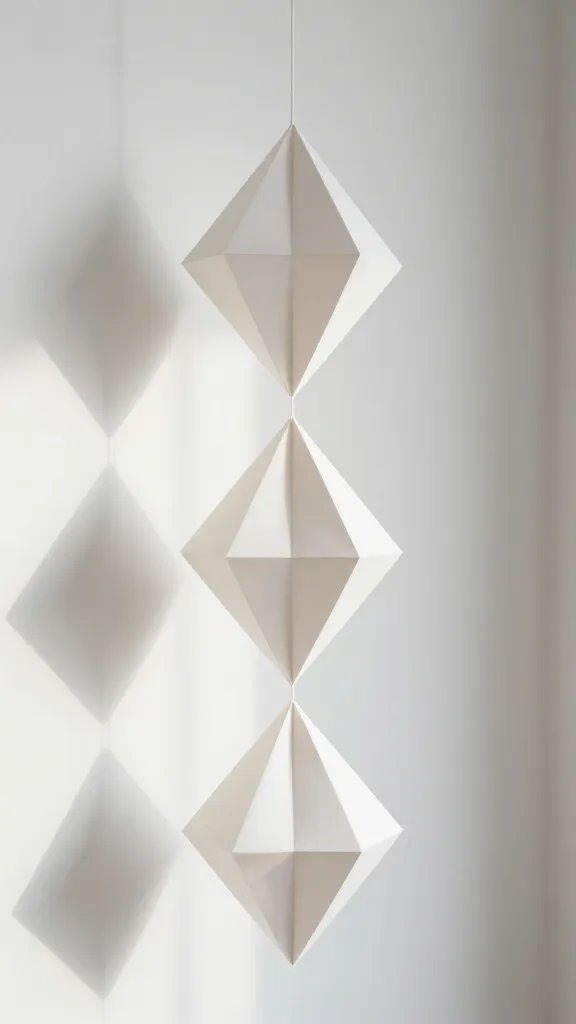
If minimalist modern decor is more your style, these three-dimensional paper diamonds will make your heart skip a beat.
They look like trendy store-bought decor but cost practically nothing and come together surprisingly quickly. FYI, everyone will assume you’re way craftier than you actually are.
The geometric shapes catch light from every angle, creating beautiful shadows and adding architectural interest to any space.
Choose a monochromatic color scheme for maximum sophistication, or go rainbow for a playful kid’s room.
Materials Needed
- Cardstock in your chosen colors
- Diamond template (easily found free online)
- Scissors or craft knife
- Glue stick or double-sided tape
- Fishing line or thin white string
How to Make It
Print your diamond template onto cardstock and carefully cut out each shape. Score along the fold lines using a ruler and the back of a butter knife—this makes folding crisp and professional-looking.
Fold all your tabs and edges, then glue the tabs to form your three-dimensional diamond shape.
Let each diamond dry completely before stringing. Thread your fishing line through the top point of each diamond, knotting it in place so they don’t slide around.
Styling Ideas
Hang these at varying heights for a mobile effect, or string them in a straight line across a window.
The fishing line makes them appear to float, which is incredibly striking. This garland works beautifully for modern baby showers, minimalist Christmas decor, or as permanent decoration in a contemporary home office.
Tissue Paper Tassel Garland With Fringe Detail
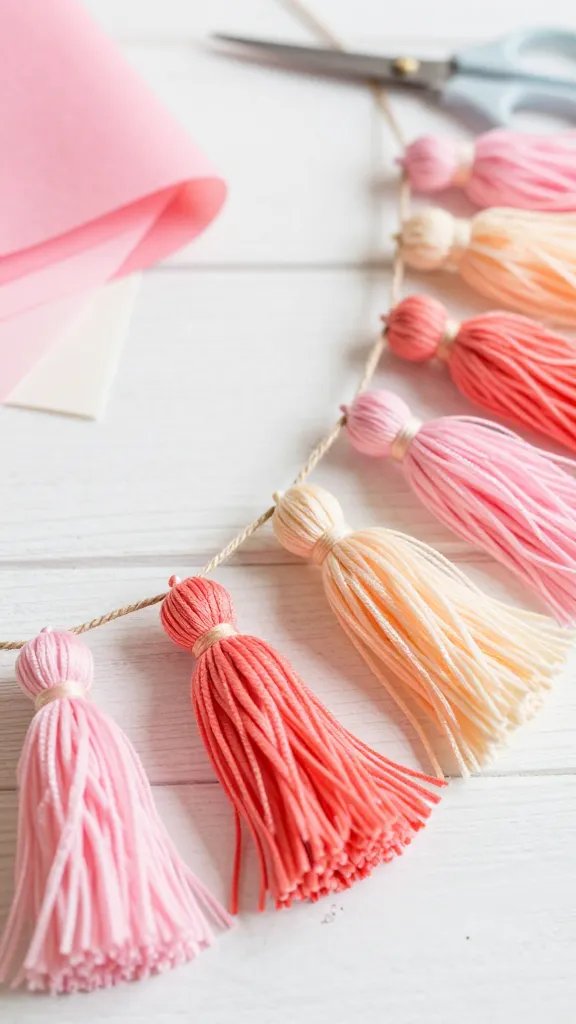
Want maximum impact with minimum skill required? Tissue paper tassels are your answer!
These fluffy, festive beauties are literally impossible to mess up, and they photograph like a dream for parties and celebrations.
The movement and texture of tissue paper creates such a fun, playful vibe. You can make a 6-foot garland in under an hour, which makes this perfect for last-minute party prep or when you need instant gratification from your crafting.
Materials Needed
- Tissue paper in coordinating colors (at least 3-4 shades)
- Scissors
- Ribbon, baker’s twine, or string
- Ruler (optional, for uniformity)
How to Make It
Stack 4-5 sheets of tissue paper together and fold them in half lengthwise. Cut fringe along the folded edge, leaving about an inch uncut at the top.
Unfold, then tightly roll the uncut section to create the tassel top, twisting as you go.
Fold the twisted section in half so the fringe hangs down, then secure by wrapping a small piece of tissue around the top or tying with thread. Fluff out all those fringes to create volume—don’t be shy about this step!
Pro Tips
Alternate colors in a pattern or go totally random—both look great. Metallic tissue paper adds a glamorous touch for New Year’s or birthday parties.
These tassels are party decor gold and work for everything from kids’ birthdays to elegant bridal showers.
Seriously, I’ve made these in every color combination imaginable and they never disappoint.
Accordion-Fold Honeycomb Star Garland
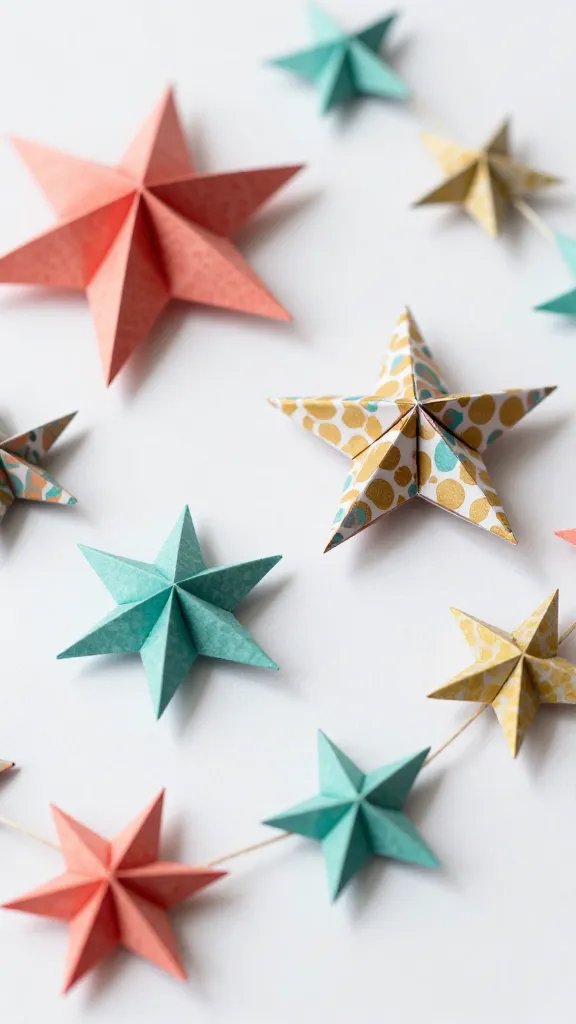
These dimensional stars have that intricate, delicate look that makes people wonder how you possibly made them by hand.
The honeycomb folding technique creates gorgeous depth and shadow, and they spin beautifully when hung near a window or air vent.
This project does require a bit more patience than the others, but the results are absolutely worth it. Each star is like a little piece of art, and stringing them together creates something truly special.
Materials Needed
- Patterned scrapbook paper or lightweight cardstock
- Star template (5-pointed works best)
- Scissors
- Glue stick
- Ribbon or embroidery thread
- Pencil and ruler
How to Make It
Cut two identical stars from your paper. On each star, use your ruler to draw accordion-fold lines from the center to each point—this is your roadmap. Carefully fold along these lines, creating pleats that radiate from the center.
Apply glue to the back of one folded star and press the second folded star on top, aligning perfectly.
The accordion folds create that beautiful honeycomb texture. Once dry, gently pull apart the layers slightly to enhance the dimensional effect.
Styling Ideas
These stars look magical in metallic papers for the holidays or in soft pastels for a nursery.
Mix different sizes for visual interest—try 3-inch, 4-inch, and 5-inch stars on the same garland.
This is absolutely perfect for Christmas decor, Fourth of July celebrations, or creating a celestial theme for a baby shower or kids’ room. You’ll love how sophisticated and polished this garland looks!
Time to Create
There you have it—five completely different ways to create gorgeous paper garlands that’ll elevate your space without emptying your wallet.
Whether you’ve got 30 minutes or a whole afternoon, there’s a project here calling your name.
Pick your favorite, grab some paper, and get ready to transform your space into something absolutely magical. Happy crafting!






