
How to Make a DIY Macrame Wall Hanging That Actually Looks Professional

A macrame wall hanging is a textile made entirely from knotted cord — no weaving, no sewing, no tools beyond your hands and a dowel.
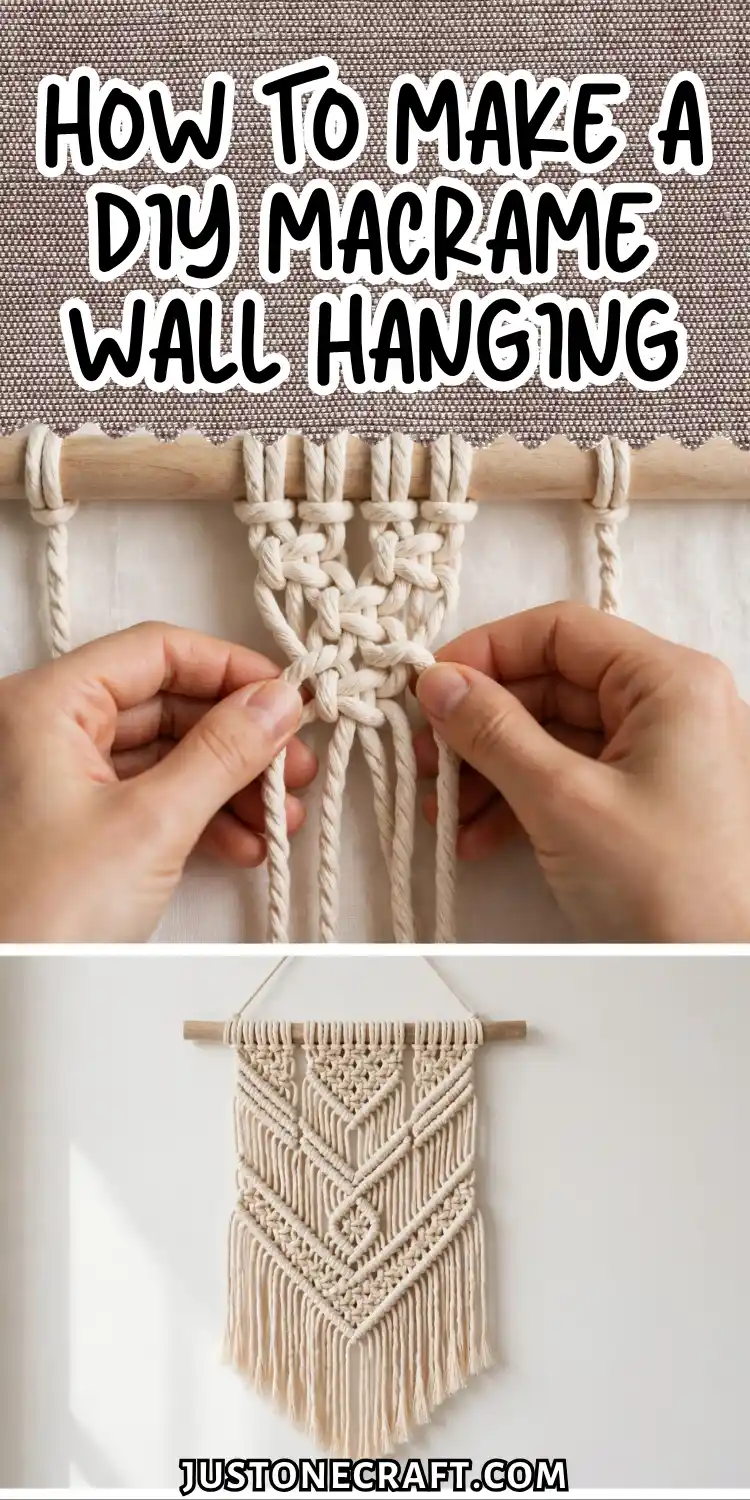
The reason it’s worth learning is that two knots, repeated in different sequences, can produce dozens of distinct patterns and textures.
The Logic Behind Knotted Textiles
⬜ Square Knot
Flat, balanced patterns
〰️ Half Hitch
Lines & curves
Macrame works through friction. As the cord wraps around itself and is pulled tight, the fibers grip each other to hold the knot securely.
Soft cotton cord is the most popular choice because it provides enough texture for a strong hold while remaining easy to tie.
Most macrame designs are built from two basic knots: the square knot, which creates flat, balanced patterns, and the half hitch, which forms lines and curves.
The key to a neat, professional finish is keeping your knot tension consistent from start to finish.
What You Need
- 3mm Macramé Cord – Use single-strand or 3-ply twisted natural cotton cord. Avoid polyester. About 50m is enough for a 30 × 45cm beginner wall hanging.
- 40cm Wooden Dowel – Choose a dowel about 1cm thick to support the cord without bending.
- Measuring Tape – Essential for cutting cords to the correct length.
- Sharp Scissors – Use fabric scissors for clean cuts and neat fringe.
- Wall Hook or Clothes Rack – Hang your project vertically to keep knots even and consistent.
- Comb or Pet Slicker Brush – Brush out the fringe for a soft, full, finished look.
Step-By-Step Instructions
1. Cut Your Cords to Length
Cut 20 cords, each 2.5 meters long. This 4:1 ratio — cord length to finished piece length — is the standard starting point.
📏 The 4:1 Rule
4× cord length : 1× finished piece length
Dense patterns? Cut at 5:1 instead
The cords will be folded in half and mounted, giving you 40 working strands and a finished length of approximately 45cm after knots and fringe.
Lay all cut cords together before you start; a tangle mid-project wastes more time than careful prep.
2. Mount the Cords onto the Dowel Using a Lark’s Head Knot
Fold one cord in half. Place the folded loop over the front of the dowel, then pull both tail ends through the loop from behind and downward. Pull snug.
You should see a clean horizontal loop sitting flush against the dowel with two equal tails hanging below. Repeat for all 20 cords.
You’ll now have 40 tails hanging from the dowel. Common mistake: mounting cords unevenly spaced.
Push each lark’s head knot against the last so they sit evenly across the 30cm dowel width — roughly 1.5cm apart.
3. Hang the Dowel at Eye Level
Hang your dowel on your clothes rack or wall hook before knotting a single knot. The piece must hang freely for the entire process.
If it shifts or rotates while you work, tie a short piece of cord around each end of the dowel and fix it to the rack so it can’t spin.
4. Tie the first row of square knots
Group your 40 cords into sets of 4. In each group, the 2 outer cords are your working cords; the 2 inner cords are your filler cords.
To tie a square knot: bring the left working cord over the 2 fillers and under the right working cord. Then bring the right working cord under the 2 fillers and up through the loop on the left.
Pull both working cord ends outward firmly and evenly — you’ll feel the knot compress and see the filler cords disappear inside it.
That’s the first half. Repeat the motion in mirror image (right over, left under) to complete the full square knot.
You should have 10 square knots in a clean horizontal row, each sitting approximately 3cm below the dowel.
5. Tie the Second Row as Alternating Square Knots
Leave the first 2 cords and the last 2 cords unused for this row. Take 2 cords from the right of group 1 and 2 cords from the left of group 2 — these become your new group of 4.
Tie a square knot 4cm below the first row. Repeat across, creating 9 knots. This offset pattern is what creates the classic diamond mesh texture.
Common mistake: not dropping low enough between rows. If the gap between rows is less than 3cm, the pattern closes up and you lose the open diamond effect.
📐 Gap Check: Keep at least 3–4cm between row centers, or the diamond pattern closes up and loses its open mesh look.
6. Repeat Alternating Rows 3 to 4 More Times
Continue the pattern — row of 10, row of 9, row of 10, row of 9 — until your knotted section reaches 20 to 25cm in length.
Consistency is everything here. Each time you complete a row, step back and look at the piece from 1 meter away.
Uneven tension shows at a distance before it’s obvious up close; this is your chance to loosen or re-tie knots while they’re still accessible.
7. Trim and Brush the Fringe
Once knotting is complete, trim all hanging tails to a uniform length or at a diagonal angle for a V-shape hem.
Use your comb or slicker brush to brush each tail downward firmly — 5 to 8 strokes per cord — until the twisted fibers separate into soft, fluffy fringe.
The piece will look dramatically more finished after brushing. Trim again lightly after brushing to clean up any uneven fibers.
Aftercare
Macrame is dust-prone. Shake the piece gently every 2 to 3 weeks or use a handheld vacuum on the lowest setting held 5cm from the surface.
If a cord gets soiled, spot clean with a damp cloth and mild soap, then allow to air dry completely before hanging — damp cotton cord shrinks slightly as it dries, which can distort your knotwork.
Keep the piece out of direct sunlight; natural cotton yellows and weakens with prolonged UV exposure.
Variations
Boho Leaf or Feather Shape
Instead of a rectangular grid, mount cords in decreasing groups from the center outward and use diagonal half hitches rather than square knots.
This produces curved, organic shapes that mimic leaves or feathers — same two knots, different geometry.
Color-Dip Fringe
After the piece is finished, dip the bottom 10cm of the fringe into fabric dye diluted in a shallow tray.
The gradient effect (ombré) happens naturally as the dye wicks upward. No extra knotwork required.
Shelf Hanging
Replace the wooden dowel with a straight branch from a garden, sanded smooth. The natural irregularity of the branch changes the entire visual tone — same knotting technique, completely different aesthetic. Choose a branch at least 2cm in diameter so it doesn’t flex under load.
Geometric with Horizontal Bars
Add a second dowel 20cm below the first and incorporate it mid-piece using lark’s head knots. This creates a two-tier structure and lets you change cord color between sections cleanly.
Troubleshooting
| Problem | Likely cause | Fix |
|---|---|---|
| Knots slipping loose over time | Polyester or synthetic cord used | Re-tie in natural cotton; synthetic cord lacks surface grip |
| Diamond pattern is closed and dense | Rows tied too close together | Maintain a minimum 3–4cm gap between row centers |
| Piece is wider at the bottom than the top | Tension loosened as work progressed | Re-tie the bottom half, pulling each knot to match the firmness at the top |
| Fringe looks stringy, not fluffy | Cord not brushed, or wrong brush used | Use a pet slicker brush; brush each tail individually for 5–8 strokes |
| Cord ran out mid-project | Cords cut too short | Always use the 4:1 ratio; for dense patterns, cut at 5:1 |
| Dowel bowing under cord weight | Dowel too thin for cord weight | Replace with a 1cm diameter hardwood dowel; balsa and thin craft wood flex |
One Final Thought
🎯 Golden Rule: Check tension after every row, not every few rows — the knots are easy, consistent firmness is the real craft.
Every problem in macrame is a tension problem. If the piece looks wrong — uneven, loose, off-center — the answer is never in the pattern.
It’s in how firmly you pulled the last 10 knots. Train yourself to check tension after every row rather than every few rows, and you’ll spend far less time undoing work.
The knots themselves are almost impossible to get wrong. The firmness you apply to them is the entire craft.






