
How to Make 3D Flowers on Nails That Look Salon-Perfect

3D nail flowers are sculpted acrylic or gel petals built directly on the nail surface — raised, textured, and dimensional in a way no nail sticker or stamping plate can replicate.
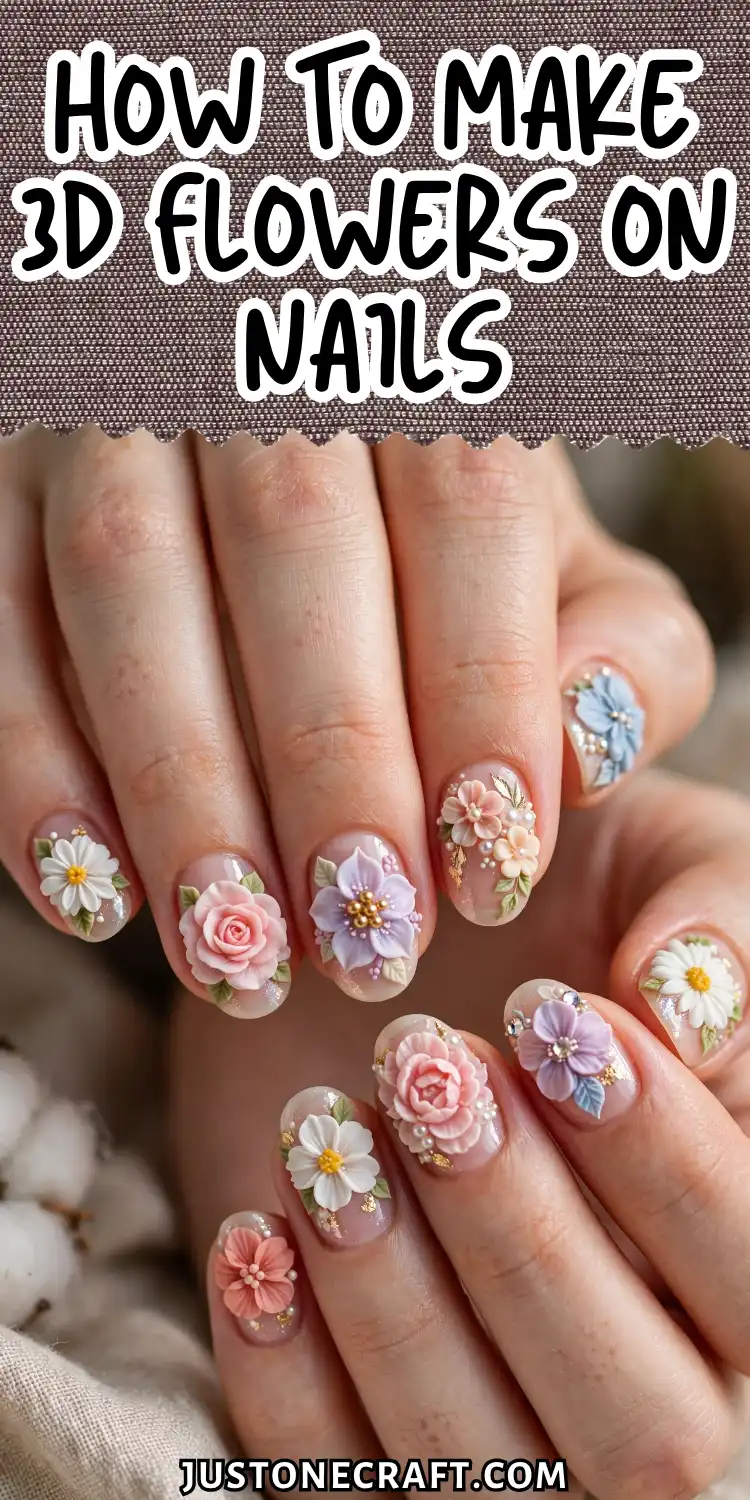
Once you understand the material, you can create them freehand in under five minutes per flower.
The Science Behind It
3D nail flowers are usually made with acrylic powder and liquid monomer. When mixed, they begin a process called polymerization, turning from a soft, moldable bead into a hard, durable design in about 30–60 seconds.
Surface tension helps the acrylic bead keep its shape, allowing you to press and sculpt realistic petals without the material spreading. Thicker beads create bold petals, while thinner beads work well for delicate details.
For the best results, work in a room between 70–75°F (21–24°C). Cooler temperatures slow curing, while warmer conditions make the acrylic set faster.
🌡️ Ideal Working Temp
70–75°F
Cooler = slower cure • Warmer = faster set
Gel 3D flowers are shaped the same way but only harden under a UV or LED lamp, giving you unlimited sculpting time.
However, cured gel is usually a bit softer than acrylic, making it less ideal for very raised floral designs.
What You Need
- 3D acrylic nail powder – Use a 3D or hard sculpting powder (white or pastel) that holds its shape.
- Acrylic liquid monomer – Use an EMA-based, MMA-free monomer for proper curing.
- Kolinsky sable brush (Size 8) – Provides the best control for picking up and shaping acrylic beads.
- Nail base – Apply fully cured gel polish or completely dry regular polish before sculpting.
- UV/LED lamp (for gel polish) – Cure gel completely before adding 3D flowers.
- Dotting tool or fine liner brush – Helps shape petals and add flower details.
- Top coat – Seal the design with a no-wipe gel or fast-dry top coat for protection.
Step-by-step instructions
1. Prep and Cure Your Base Color
Apply two thin coats of gel polish in your chosen base color and cure each coat under your LED lamp for 60 seconds. Wipe away any tacky inhibition layer with a lint-free wipe and 91% isopropyl alcohol.
The surface must feel completely dry and solid — run your finger across it. If it drags or feels tacky, cure for another 30 seconds.
2. Plan Your Flower Placement
Decide where each flower will sit before you touch the acrylic. Use a dotting tool to lightly mark the center point of each flower with a tiny dot of gel and cure for 10 seconds.
This anchor point stops the first petal from sliding when you press it down. Most beginners skip this and lose control of petal placement immediately.
3. Mix Your First Bead — Get the Ratio Right
Dip your size 8 brush into monomer, then wipe it lightly on the edge of the dappen dish to remove excess.
Touch the tip to your acrylic powder and pick up a bead approximately the size of a small lentil — about 3mm in diameter.
The bead should look smooth, not wet and shiny (too much liquid) and not dry and crumbly (too little). A correct bead sits on the brush with a slight dome.
Shiny, spreads freely
Smooth dome shape
4. Press and Shape the First Petal
Place the bead on the nail, approximately 2mm from your center anchor point. Press down gently with the flat belly of the brush, then drag the brush tip away from center to elongate the bead into a petal shape 5–7mm long.
The petal should taper at the tip and be thicker at the base. You have about 45 seconds before it sets.
If the acrylic drags without spreading, you have too little liquid. If it spreads immediately with no resistance, you have too much.
5. Build Petals Around the Center
Repeat step 4 for each petal, placing them evenly around the anchor point. A five-petal flower needs petals at approximately 12, 2:30, 5, 7:30, and 10 o’clock positions.
5-petal placement guide
Work quickly — pick up a fresh bead for every single petal. Do not try to reshape a petal that has already begun to set; you’ll drag the surface and create a matte, cloudy patch.
6. Add the Flower Center
Pick up a small bead (2mm) of a contrasting color — yellow, gold, or white work well. Place it directly over your anchor point and press gently with the dotting tool to flatten it into a circle roughly 3mm wide. For a raised center, skip the pressing and let the bead cure in its natural dome shape.
7. Allow to Fully Cure or Air-Dry
For acrylic: leave the flower untouched for 2 minutes. It should feel completely hard and make a light clicking sound if you tap it with your fingernail. For gel: cure under your LED lamp for 60 seconds.
8. Seal with Top Coat
Apply a thin layer of no-wipe gel top coat over the entire nail, flowing it gently over and around the flower. Cure for 60 seconds.
Don’t glob top coat on top — pool it in the recesses between petals rather than painting thick strokes over the raised surface.
Aftercare
3D nail flowers are more fragile than flat nail art at the tips. Avoid using fingertips with 3D flowers as leverage points when opening cans, typing forcefully, or peeling stickers.
Reapply a thin layer of gel top coat over the flowers every 5–7 days to maintain shine and protect the petals. If a petal chips, don’t peel — soak in acetone for 10 minutes and remove gently.
Variations
Rose Coil Flower
Instead of flat petals, pick up a slightly wetter bead and use your brush tip to roll it into a thin snake 8mm long.
Coil it inward from the outside, creating a spiral rose shape. The wetter consistency allows the coil to fuse to itself rather than sitting as separate beads.
Gel Flower (builder gel method)
Use a thick builder gel (consistency of cold honey) in place of acrylic. Pick up a small amount with a gel brush, place it on the nail, and shape each petal before curing.
Gel gives you unlimited shaping time — work one petal at a time, curing for 10 seconds between each one to lock it in place before starting the next.
Ombre Petal Flower
Load your brush with two acrylic colors at once — pick up pink powder first, then white at the tip.
The resulting bead will have a gradient that transfers to each petal, creating an ombre bloom without any blending steps.
Micro Flower Accent
Use a size 4 brush and 2mm beads to build a cluster of tiny flowers (3 petals each) across multiple nails.
At this scale, each flower takes under 30 seconds and the effect reads as textured rather than sculpted — ideal for nail art that needs to feel delicate rather than dramatic.
Troubleshooting
| Problem | Likely cause | Fix |
|---|---|---|
| Petals spread flat instead of holding shape | Monomer ratio too high, or wrong powder (self-leveling formula) | Wipe excess liquid from brush; switch to 3D sculpting powder |
| Acrylic sets before petal is shaped | Room too warm, or working too slowly | Work in a cooler room; pick up one bead at a time and shape immediately |
| Petals look cloudy or matte | Brush dragged over partially-set acrylic | Never rework a bead once it starts to firm; pick up a fresh bead |
| Flower center sinks into petals | Petals weren’t fully set before adding center bead | Wait 90 seconds after last petal before placing center |
| Top coat pools unevenly over raised petals | Too much product applied in one pass | Apply top coat in two thin passes; let it settle by gravity between coats |
| Flowers pop off after a few days | Base surface was tacky or oily before sculpting | Re-prep: wipe base with isopropyl alcohol; ensure base coat is fully cured before building |
One Final Thought
Every 3D flower problem comes down to liquid ratio. Too much monomer and the acrylic flows; too little and it drags.
🔑 The Golden Rule: Every flower problem traces back to liquid ratio. Master a consistent bead, and shaping becomes pure geometry.
Before you blame your technique or your powder, check your bead. A correct bead is the whole game — once you can pick one up consistently, the shaping is just geometry.






