DIY Spooky Mason Jar: 23 Ideas That Turn Empty Glass Into Halloween Magic

Every year the same question comes up: what do you do with all those empty jars sitting in the cabinet? Turns out, a lot.
This list pulls together twenty three DIY Spooky Mason Jar ideas, from candlelit ghosts wrapped in cheesecloth to tiny specimen vials filled with painted eyeballs, glowing jack-o-lanterns, mummy jars wrapped in gauze, and even drinkware built for iced coffee on a porch.
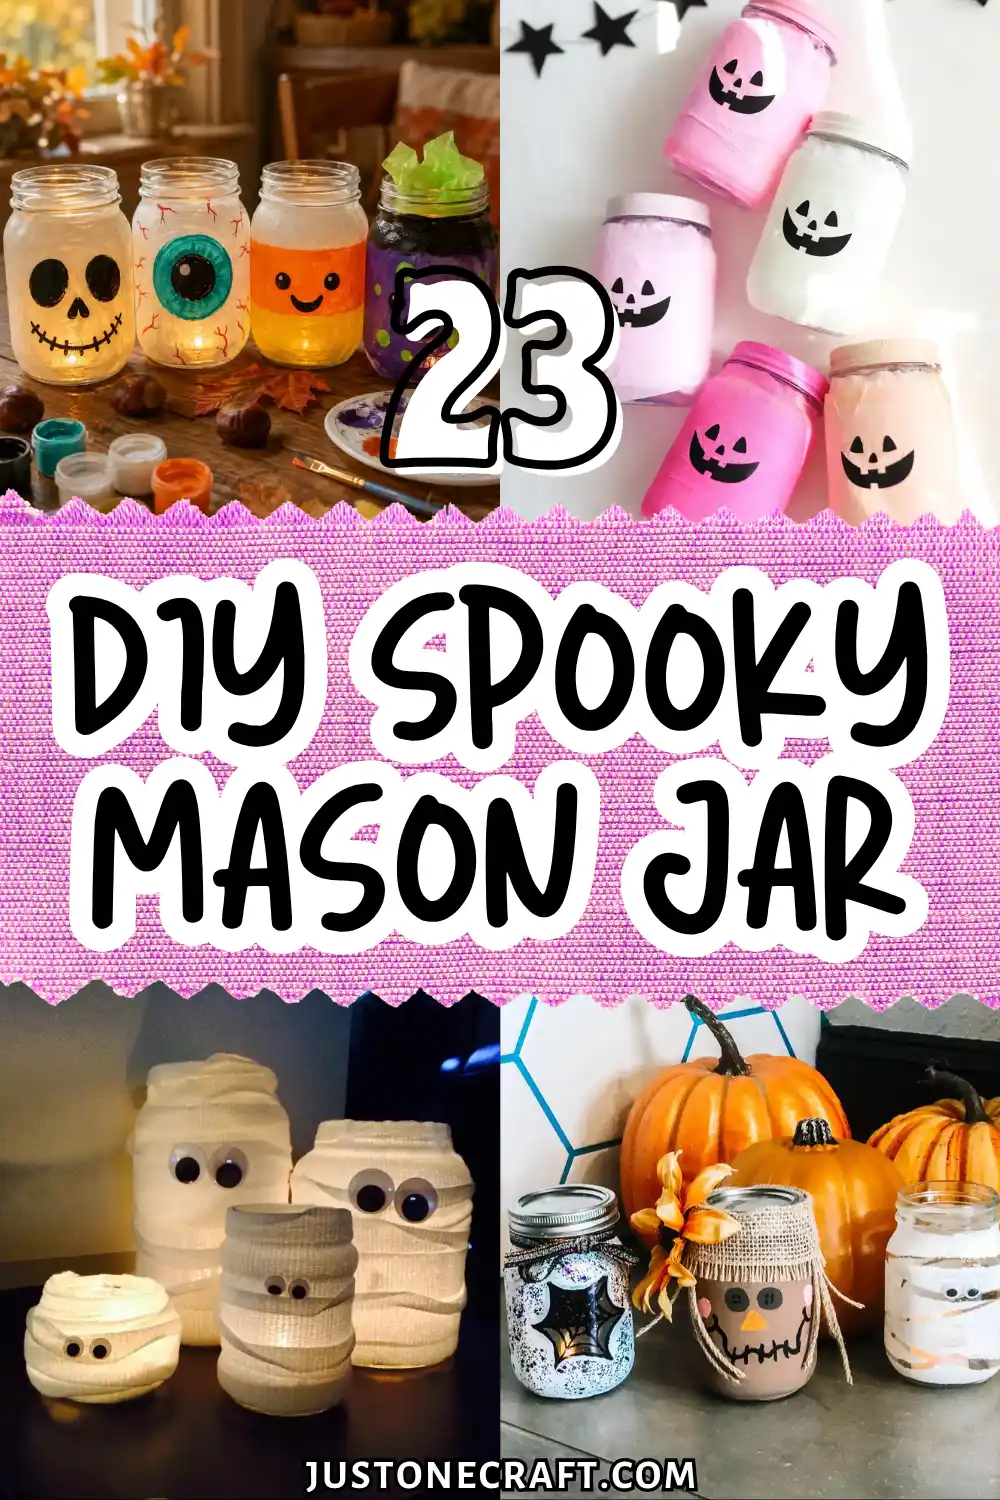
Some lean full haunted house, others go soft and pastel, and a few skip Halloween cliches entirely for something closer to a woodland fairy scene.
Whether you want a whole shelf of matching lanterns or one small jar to gift a friend, there’s a version here that fits your afternoon and your leftover glass.
Grab some paint, pull out the glue gun, and start with whichever one catches your eye first.
1. Spider-Wrapped Glow Jar Paired With a Googly-Eye Jar
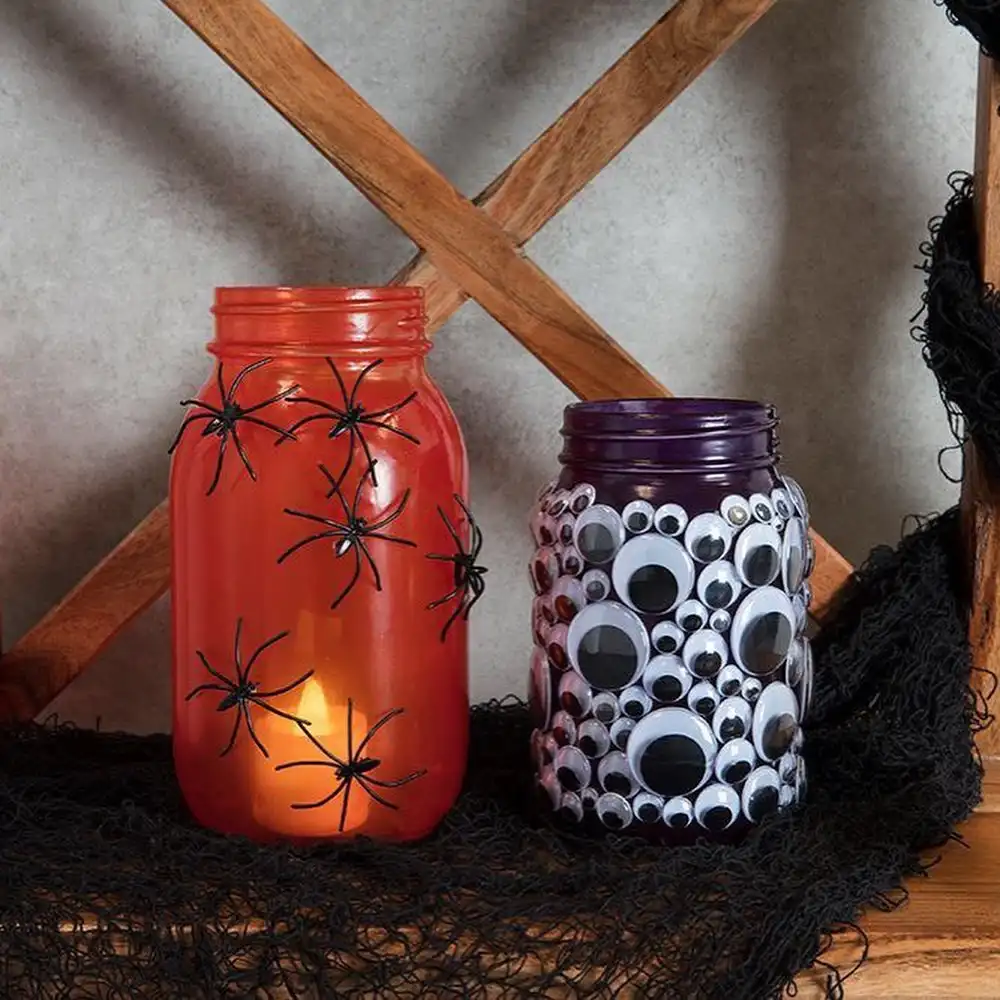
Two painted jars sitting side by side prove that spooky mason jars don’t need to match to color-block their way into a display.
The left jar is painted a warm translucent red-orange, with plastic spiders crawling up the glass around a flickering LED candle so the light glows straight through the spider legs.
The right jar goes purple and gets covered edge to edge in stacked googly eyes of different sizes, packed tight so no glass shows through.
Setting them together on a mantel with cheesecloth webbing underneath and a wooden X-frame behind them turns two simple crafts into a mini scene.
The trick is picking one jar to be the “glow” piece and one to be the “texture” piece, so they play off each other instead of competing for attention.
2. A Full Halloween Jar Family: Web, Scarecrow, Mummy, and Leaf
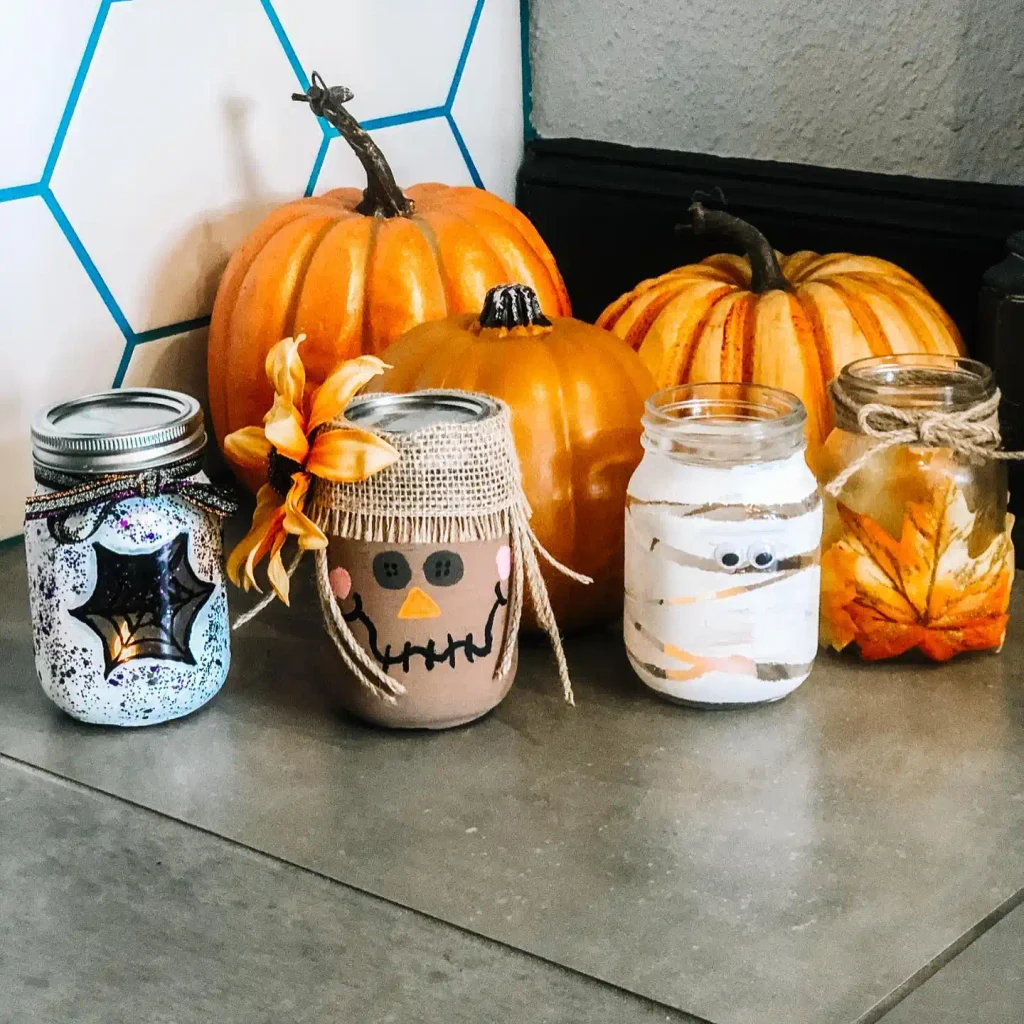
Four jars lined up here show how far one paint set and a glue gun can stretch.
There’s a glitter-speckled jar with a black spider web painted right on the glass, a scarecrow jar with a burlap “hat” lid and a stitched button-eyed face.
A mummy jar wrapped in torn strips of white paint with googly eyes peeking through the bandages, and a simple jar dressed up with a single glittered maple leaf tucked inside.
Each one uses a different technique, so together they read like a set instead of four random crafts.
- Glitter web jar: black paint pen web over a speckled base
- Scarecrow jar: burlap fabric glued as a hat, painted button face
- Mummy jar: torn white paint strips plus stuck-on eyes
- Leaf jar: one pressed leaf and twine, no paint needed
Pick two or three styles from this set rather than all four if you want a shelf that still feels curated.
3. Wood Charm Boo Tag Jar With a Hidden Candy Filling
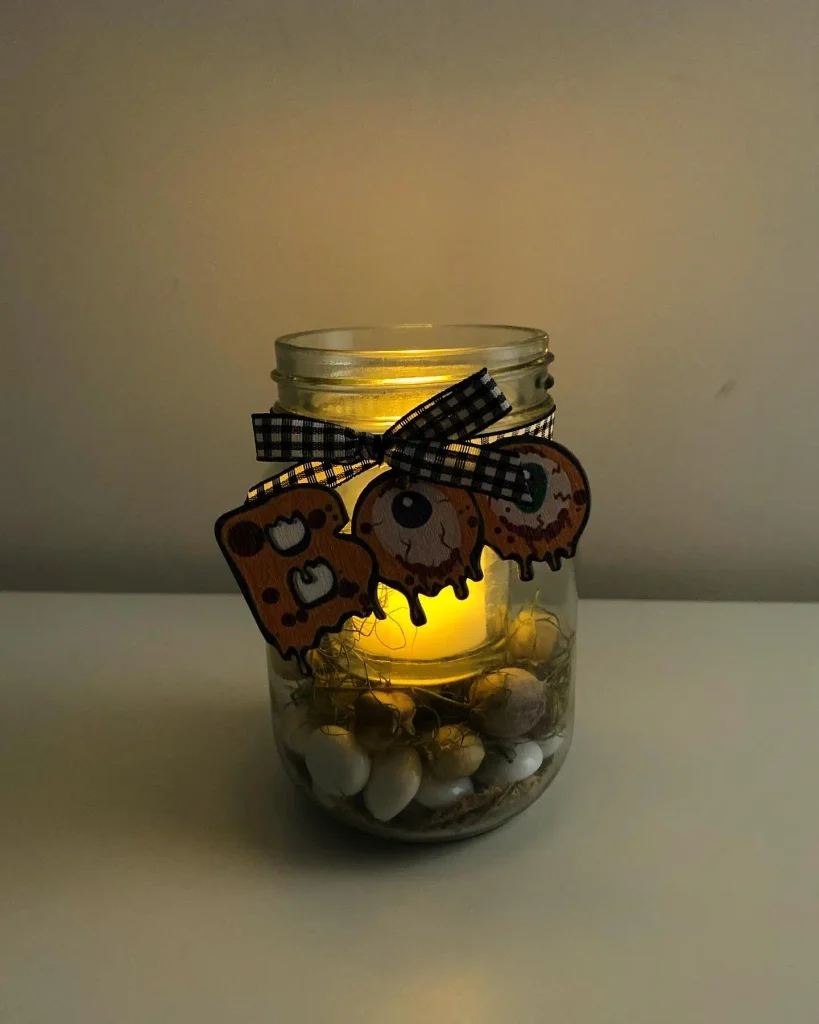
This one is small, and that’s the point.
A short jar holds a flameless candle nested in Spanish moss and speckled candy eggs, so the light glows warm through a layer of texture instead of sitting bare against glass.
What sells the whole thing is the topper: a gingham ribbon tied in a simple bow, holding three laser-cut wood charms shaped like a dripping “BOO” and a pair of melty eyeballs.
Because the charms hang loose on the ribbon, they shift a little every time the jar is moved, which keeps it from looking too stiff or staged.
📌 Good To Know
Wood charms like this are easy to find pre-cut at craft stores, or you can trace a simple shape onto thin craft wood and cut it with a hobby knife.
4. Cork-Topped Candle Jar With Tiny Ghost Figures on the Lid
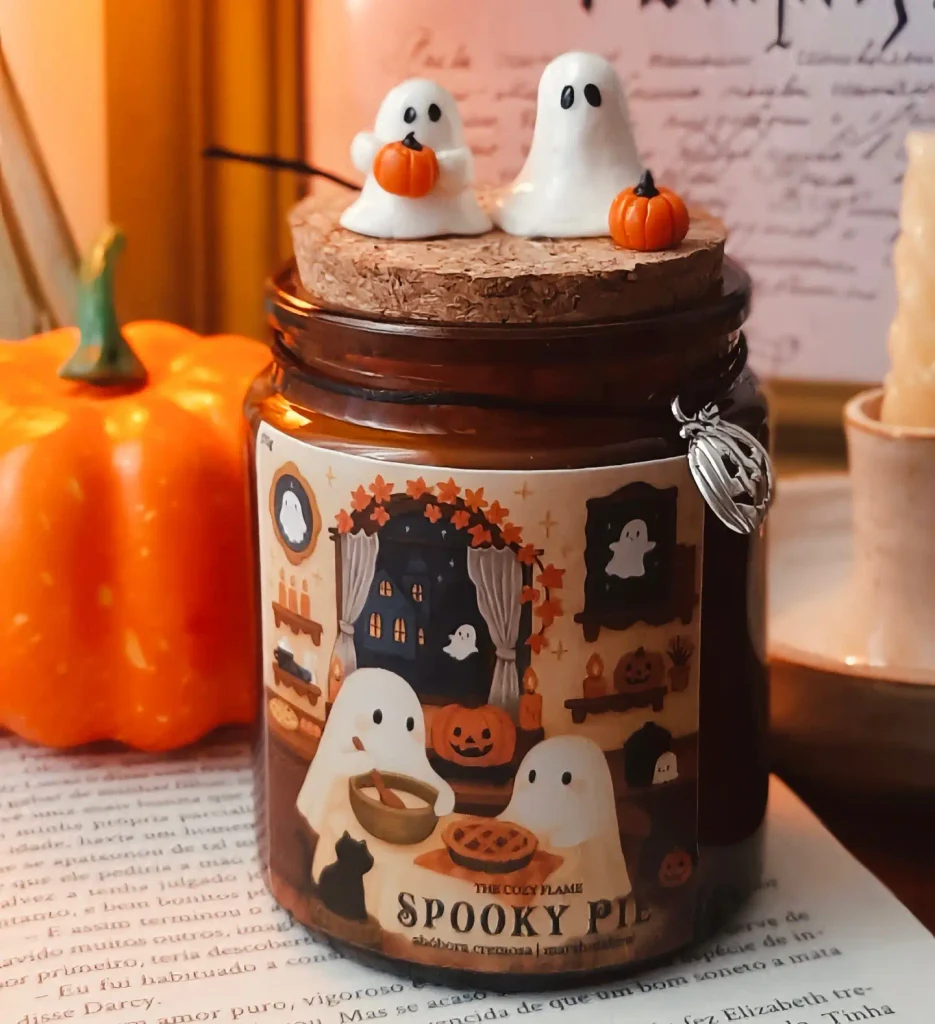
Instead of decorating the glass, this idea decorates the lid. An amber apothecary jar gets a natural cork stopper, and two small clay ghost figures sit balanced on top, one holding a mini pumpkin, one standing next to it.
The jar itself carries a printed label wrapped around the glass showing a cozy illustrated scene, and a tiny pumpkin charm dangles off the neck on a bit of black cord.
A plain cork-topped jar with a label and nothing else going on.
Two clay ghost figures on the cork turn the jar into its own little scene.
5. Ghost-Shaped Jar With a Witch Hat Lid
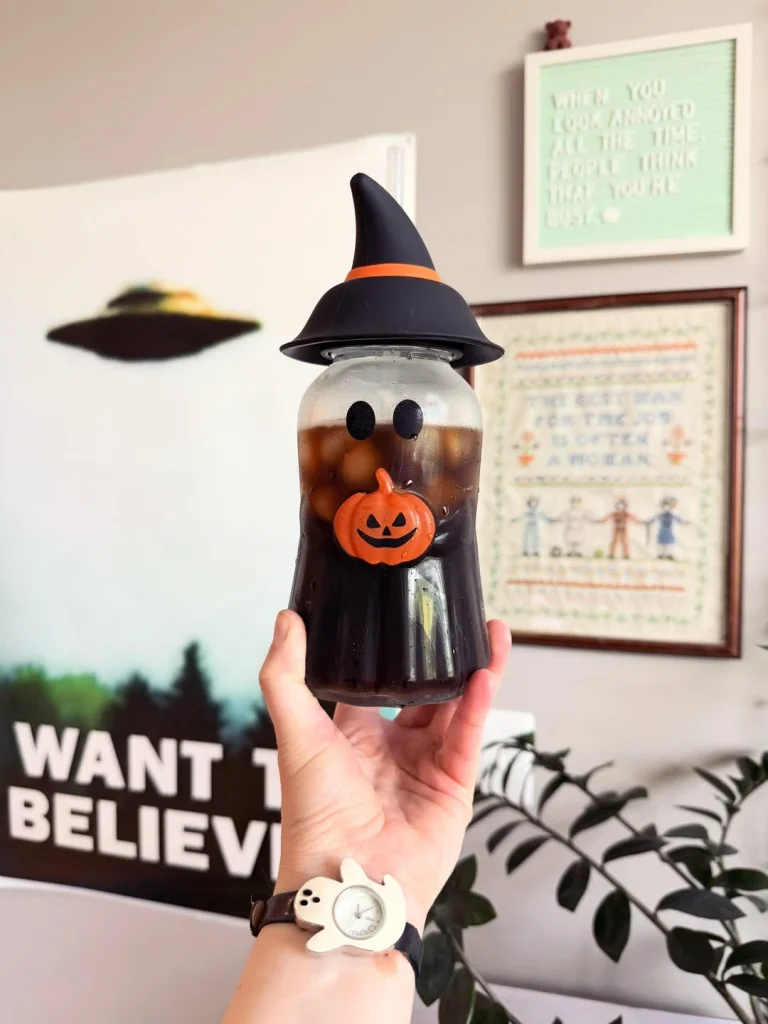
This is where the lid does all the character work. A rounded glass jar gets two round black eyes and a small jack-o-lantern charm stuck to the front, and the actual mason lid gets swapped for a molded silicone topper shaped like a witch hat with an orange band.
Filled with cold brew and ice, the dark drink shows through the glass like a ghost’s robe. It works just as well empty as a straight-up decor piece on a shelf.
Stick on two round black eyes near the top of the jar.
Add a small pumpkin charm below the eyes for a mouth.
Finish with a witch-hat lid so the jar reads as a full character.
6. Pumpkin-Shaped Mug Jar Personalized With a Name in Bats
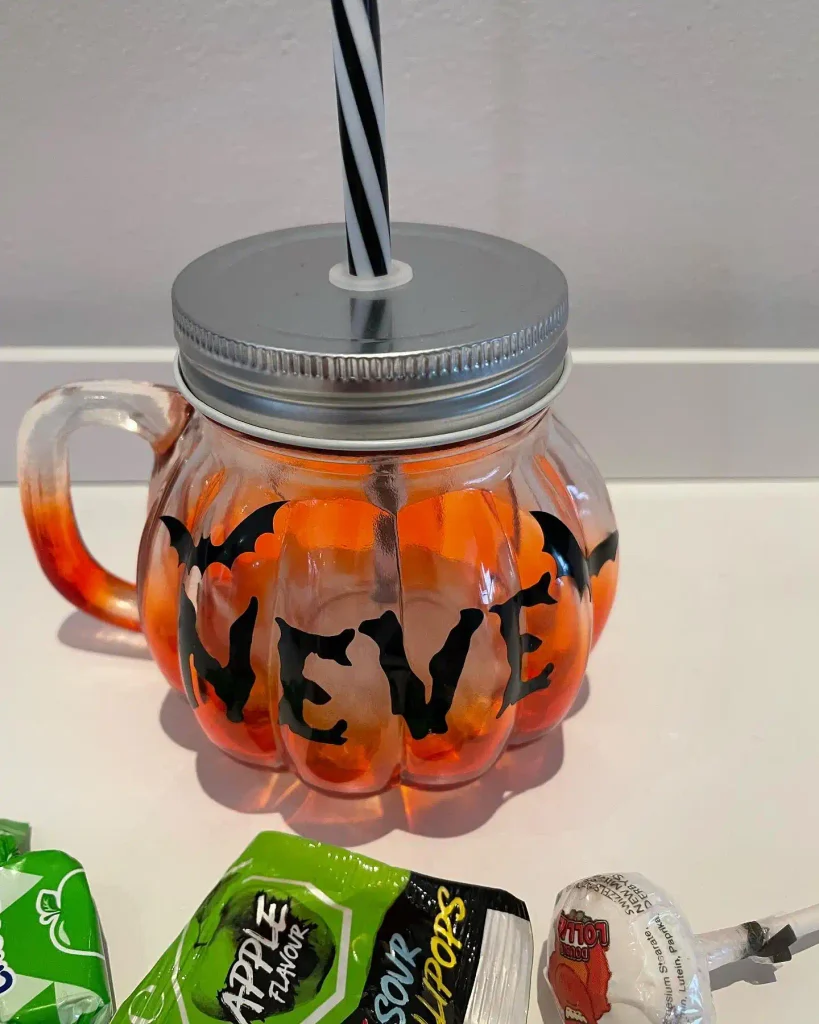
A pumpkin-shaped glass jar already looks the part before anyone touches it, with its ribbed sides and built-in handle.
What makes this one memorable is the vinyl decal: a name spelled out in a bat-shaped font, plus two extra bats flying above the letters.
It’s filled here with a Halloween drink and a candy corn striped straw, but the same technique works for treat storage or a gift jar.
A personalized name on a Halloween mug jar makes it feel less like a decoration and more like something that belongs to one specific person.
| Plain Pumpkin Jar | Personalized Jar |
|---|---|
| Looks like store decor. | Reads as a one-of-a-kind gift. |
| Works for anyone. | Works for one person, made with them in mind. |
7. “Spooky Season” Ghost Decal Jar With a Matching Keychain
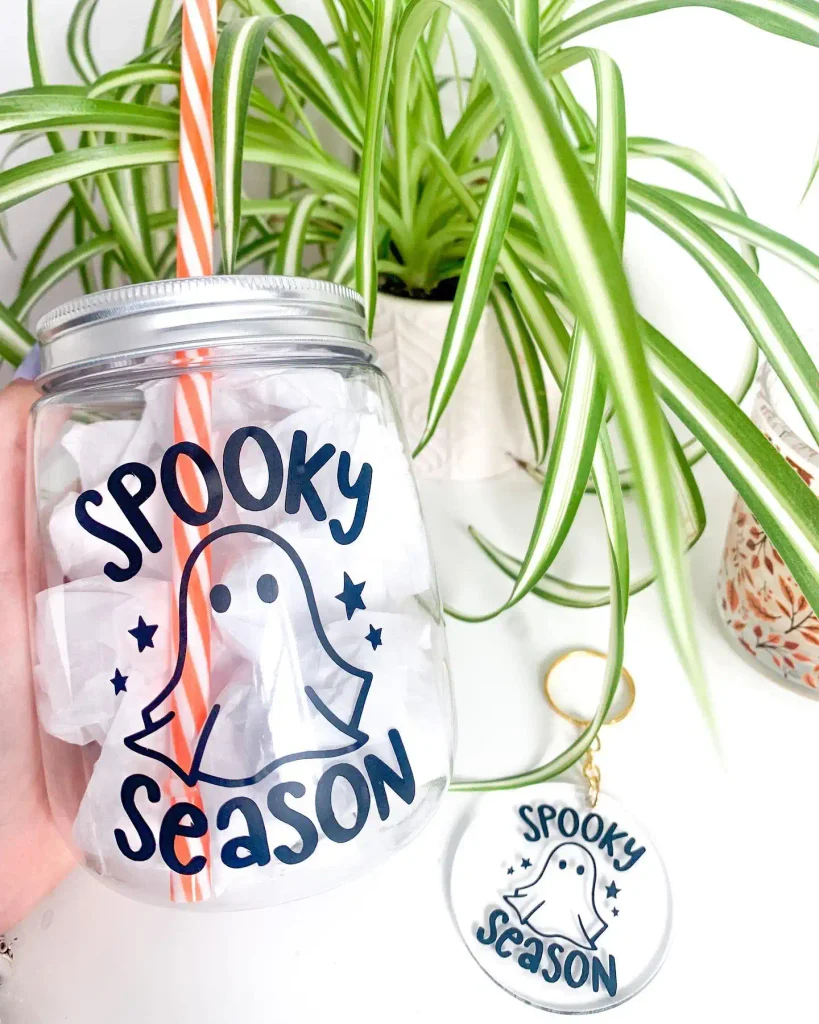
Matching sets sell better than single items, and this jar shows exactly why.
A vinyl decal reading “Spooky Season” wraps around a friendly cartoon ghost and a scatter of tiny stars, stuffed with white tissue paper so the design pops against a light background.
Next to it sits an acrylic keychain carrying the same ghost and the same wording.
Building the jar and a small matching item together, instead of just the jar alone, turns one craft into a two-piece set that photographs better and gives you a small giveaway or gift add-on for free.
Build the matching set
8. Frosted Purple Jar With a Haunted House Silhouette
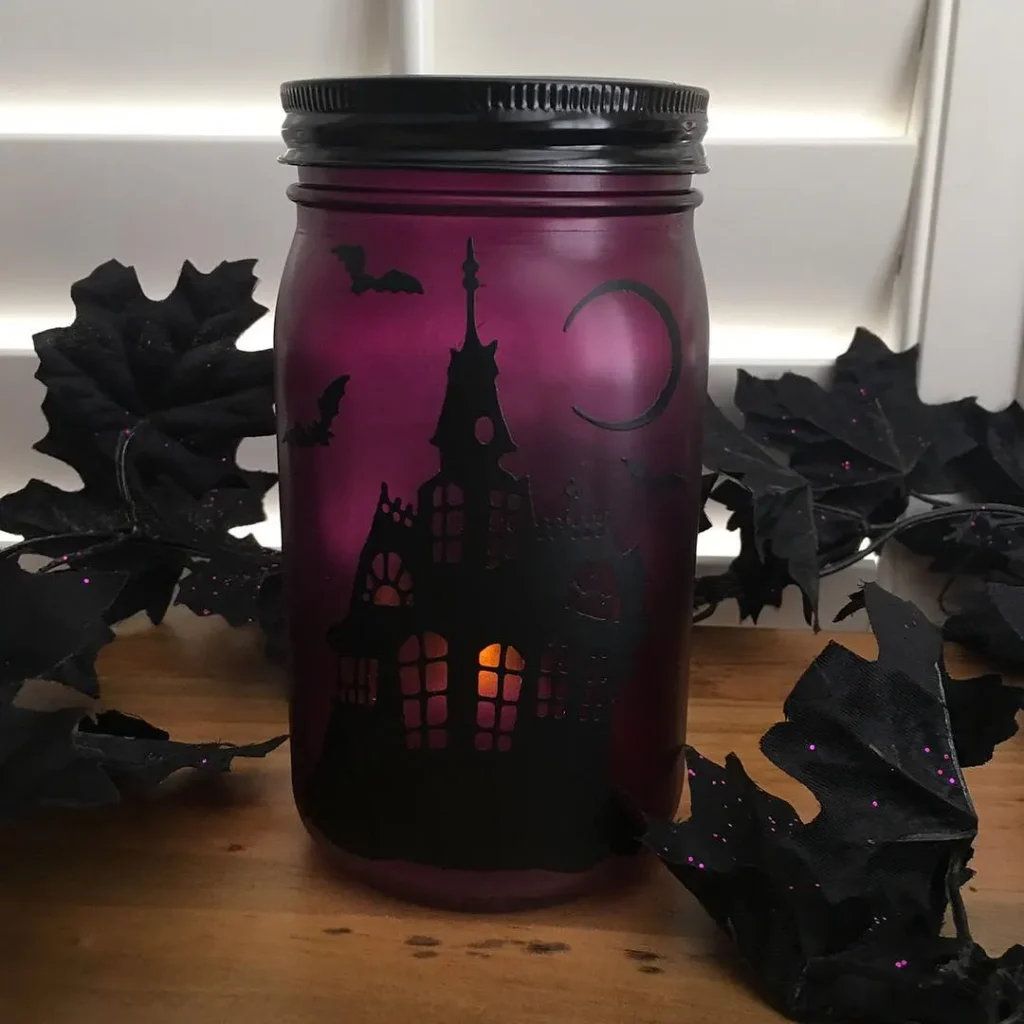
Frosted glass in a deep magenta-purple sets the mood before the design even shows up.
A cut vinyl silhouette of a haunted house, complete with turrets, arched windows, and a crescent moon overhead, wraps around the front, with bats flying loose near the top corners.
Once a candle goes inside, the lit windows of the house glow while the rest of the silhouette stays solid black, giving the whole jar a layered, almost stained-glass look.
Black glittered leaf garland tucked around the base finishes the display without competing with the jar itself.
⚠️ Watch Out
Frosted glass spray needs several thin coats, not one heavy one, or it drips and dries streaky. Let each layer dry before adding more.
9. Spooky Specimen Jars: Heart, Eyeball, and Brain in Liquid
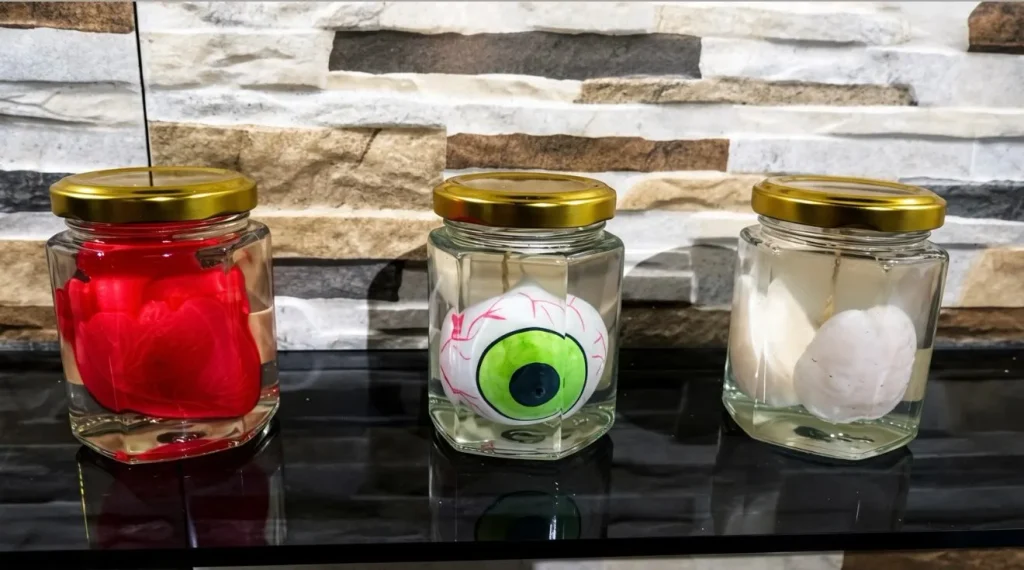
Three small jars sit in a row here, each one styled like something pulled from a mad scientist’s shelf.
One holds a red silicone or gel “heart” suspended in tinted red liquid, one holds a painted eyeball floating in clear liquid, and one holds a pale, lumpy shape meant to read as a brain.
Gold screw lids tie the three together visually even though the contents are completely different.
Grouped along a stone backdrop, they turn a simple crafts table into something closer to a Halloween lab display.
- ▸Jar 1: a red “heart” shape in tinted liquid.
- ▸Jar 2: a painted eyeball floating in clear water.
- ▸Jar 3: a pale shape styled to look like a brain.
10. Pumpkin-Faced Jack-O-Lantern Candle Jar With a Curled Wick
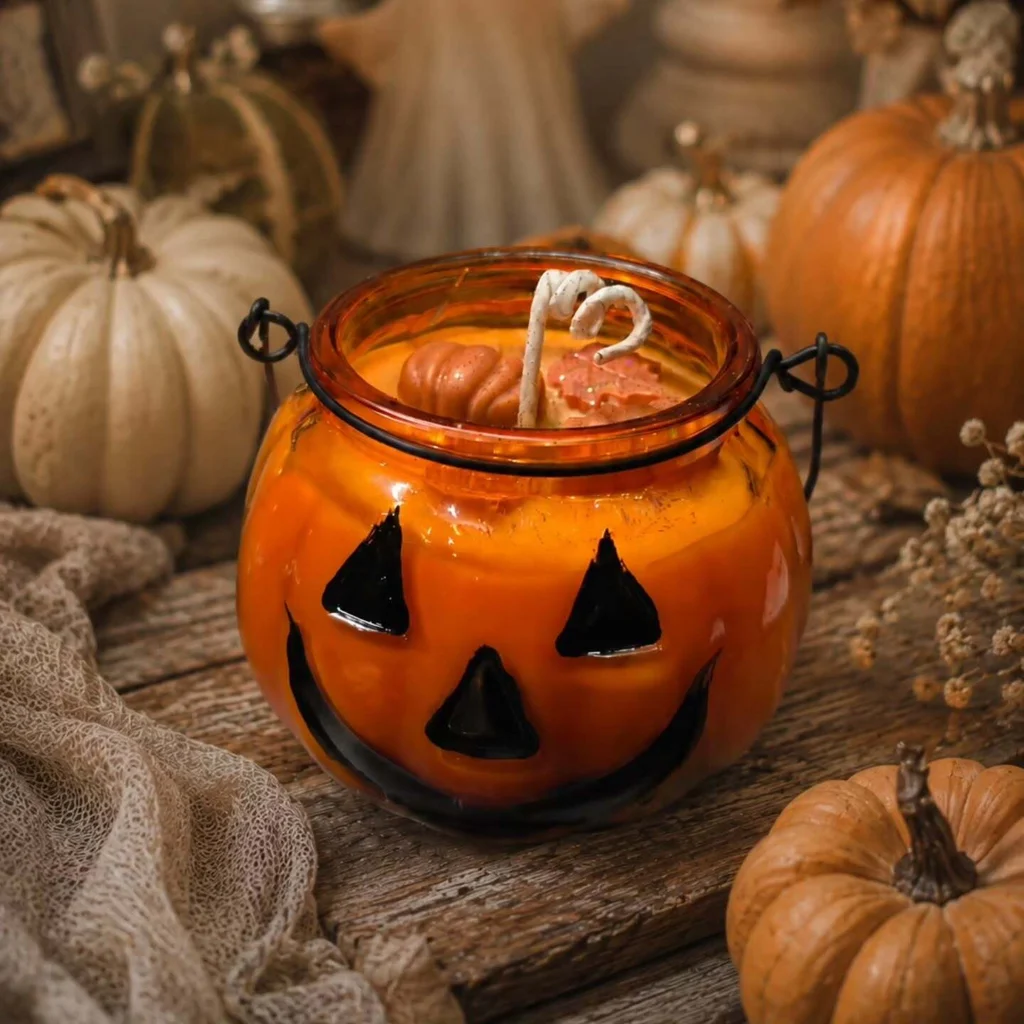
An orange glass jar shaped like a squat little pumpkin, complete with a black wire handle, gets painted with a full jack-o-lantern face right on the glass, triangle eyes and nose, a wide crescent smile.
Instead of a plain wax top, this one has a small pumpkin-shaped wax topper and a curled taper-style wick sticking up, so it looks less like a poured candle and more like a tiny sculpted piece.
Set among a cluster of real and faux mini pumpkins, it disappears right into the display until the glow gives it away.
A pumpkin-shaped jar plus a painted face does the disguise work before you even light it, so it blends with real pumpkins on a shelf.
11. Mason Jar Mug With a Bat Decal and Custom Text
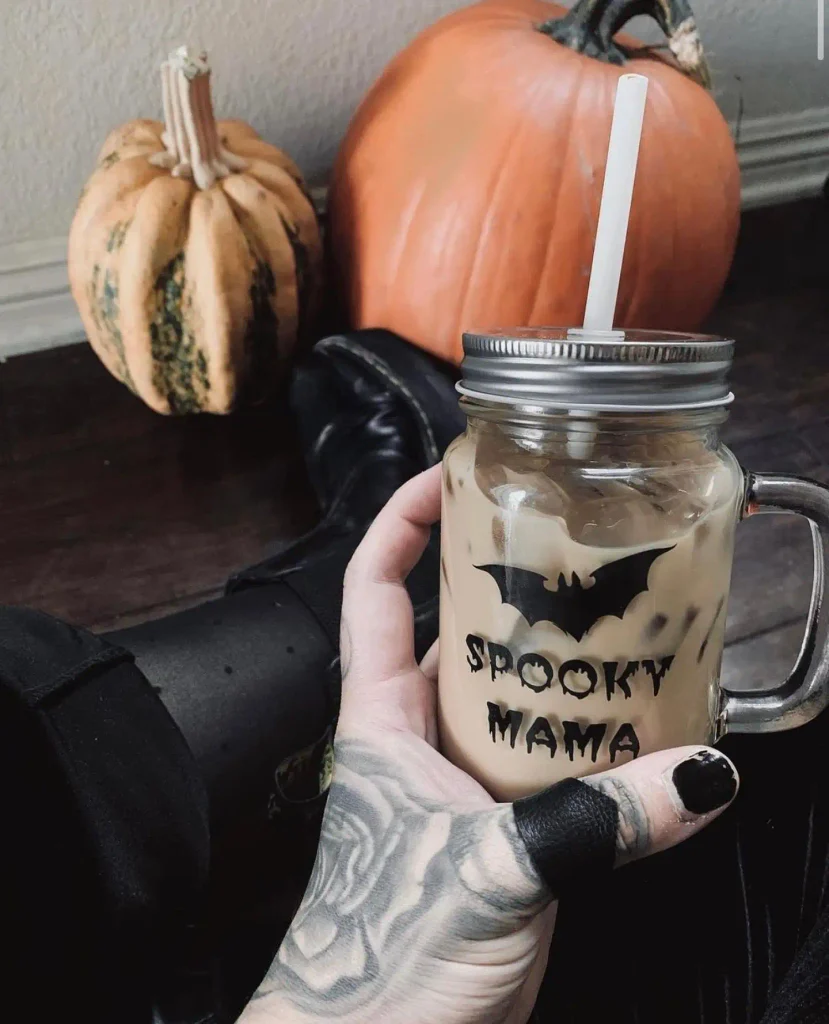
A classic handled mason jar mug gets the drinkware treatment here. A single bat silhouette sits above two lines of dripping, hand-lettered style text, applied as black vinyl straight onto the glass.
Filled with iced coffee and topped with a metal straw lid, the jar reads as ready-to-use drinkware rather than pure decor, which is exactly the appeal.
Pumpkins and dark boots in the background hint this is part of a bigger fall aesthetic, not a one-off craft.
Center the design low enough to clear the handle.
Use a mason jar mug with a handle built for daily use.
Skip decals with tiny text if the jar will go in the dishwasher.
Skip glossy paint under the decal, it peels faster.
12. Hand-Painted Ceramic Pumpkin Jars With Expressive Faces
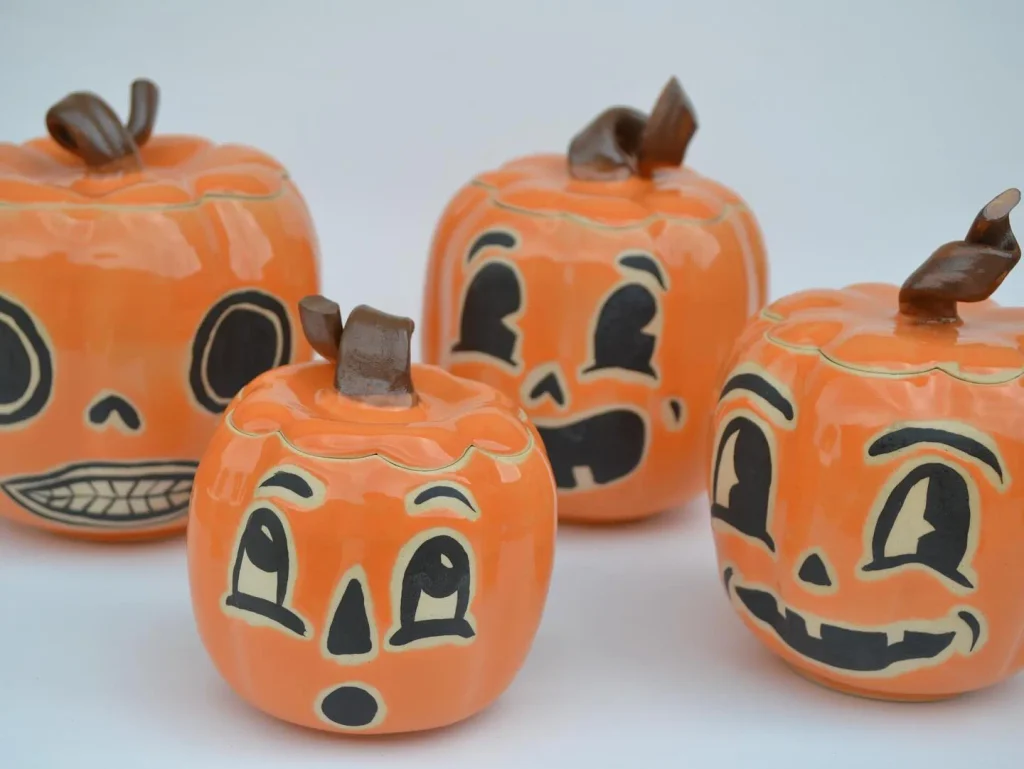
These lean more sculptural than the average craft jar, but the idea translates well to glass too.
Four rounded pumpkin-shaped jars, each with a twisted clay stem, get a different painted expression: a wide open-mouth grin, a surprised round-eyed look, a lopsided smirk, and a wink.
The black paint sits inside carved outlines so the faces stay crisp against the bright orange glaze.
Giving every jar in a set its own personality, instead of repeating one face, is what makes a row of them worth photographing together.
13. Celestial Pumpkin Patch Jar With a Ghost and Mushrooms
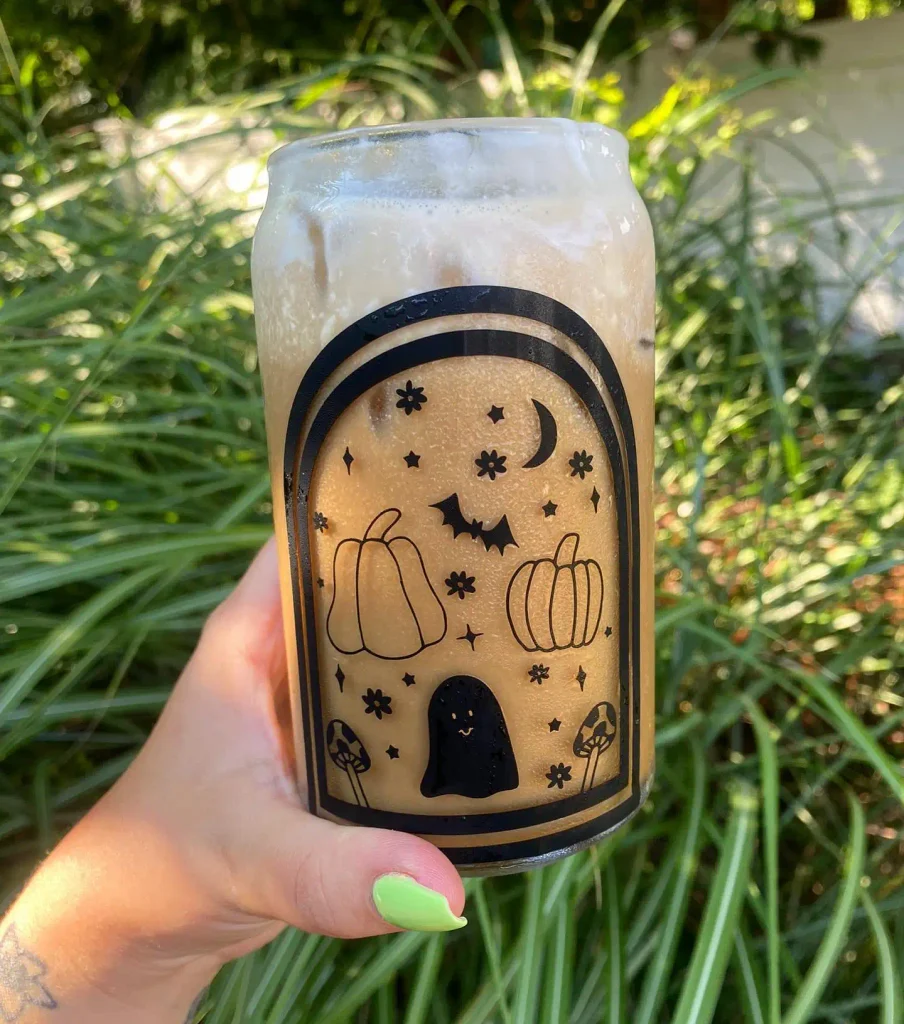
Fine linework separates this design from the bolder decals in this list.
A can-shaped glass, filled here with iced coffee, carries a black arched panel showing a night scene: two pumpkins, a crescent moon, scattered flowers, a smiling ghost, and a pair of tiny mushrooms tucked in the corners.
Every element stays thin and detailed instead of solid, so the design reads more like a tarot card illustration than a typical Halloween sticker.
On a shelf without a drink inside, it holds up just as well as a standalone glass display piece.
- Fine, thin-line vinyl or paint pen work, not bold blocky shapes
- An arched frame border to contain the whole scene
- A mix of Halloween icons (pumpkin, moon, ghost) and cottagecore icons (mushrooms, flowers)
Save this style for jars you want to look intricate up close, not ones meant to be seen from across a room.
14. Gold “BOO” Jars Cut Out to Show Light Through the Letters
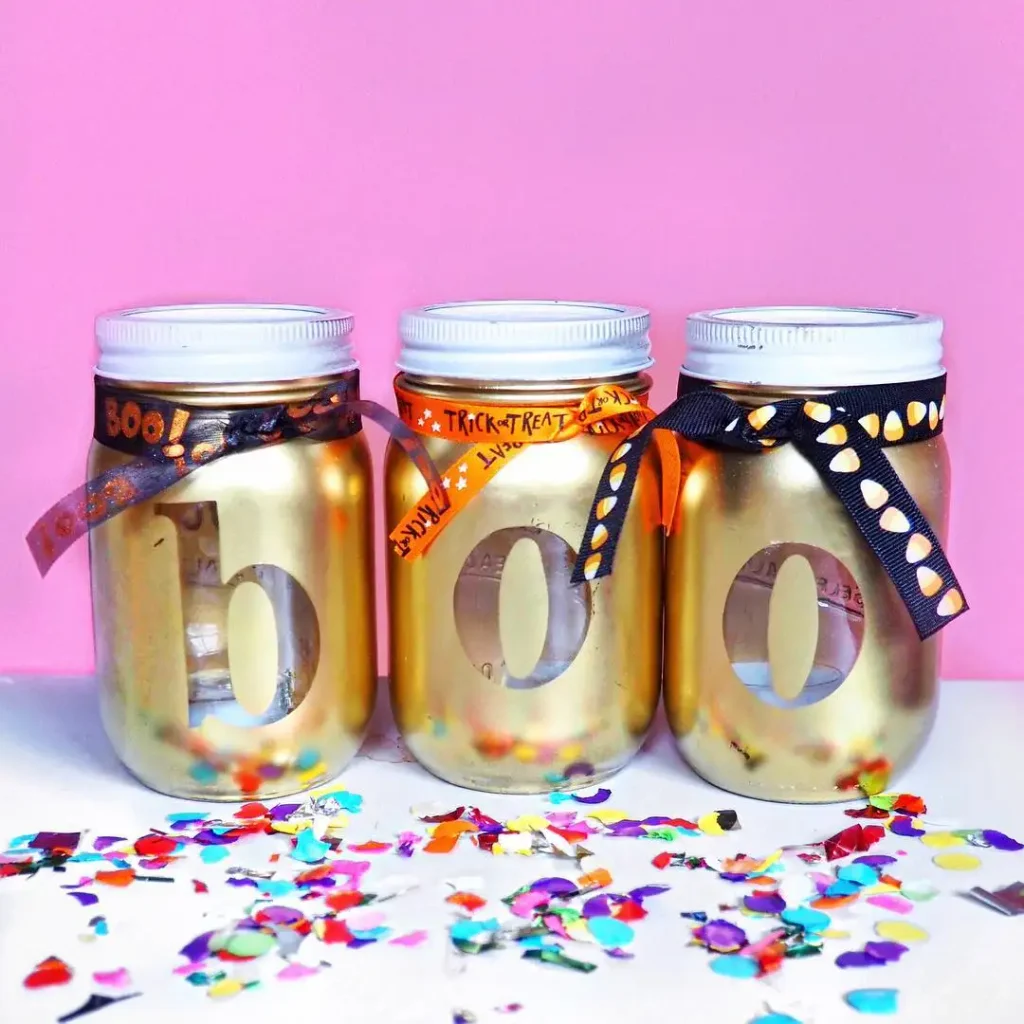
Three matching jars line up here, each painted a shiny metallic gold, with one letter cut clean out of the paint so the bare glass spells “BOO” across all three.
Confetti sits loose in the bottom of each jar, catching light through the cutout letters and the clear glass edges. Ribbon tied around each neck in a Halloween print finishes the set.
Because the letters are cut rather than painted on, light passes straight through them, which gives the set a lit-up look even without a candle inside.
| Painted-On Letters | Cut-Out Letters |
|---|---|
| Flat look in daylight. | Light passes through, glows from inside. |
| Easier for beginners. | Needs a stencil and steady hand. |
15. Glowing Jar With a Fairy Silhouette Trapped Inside
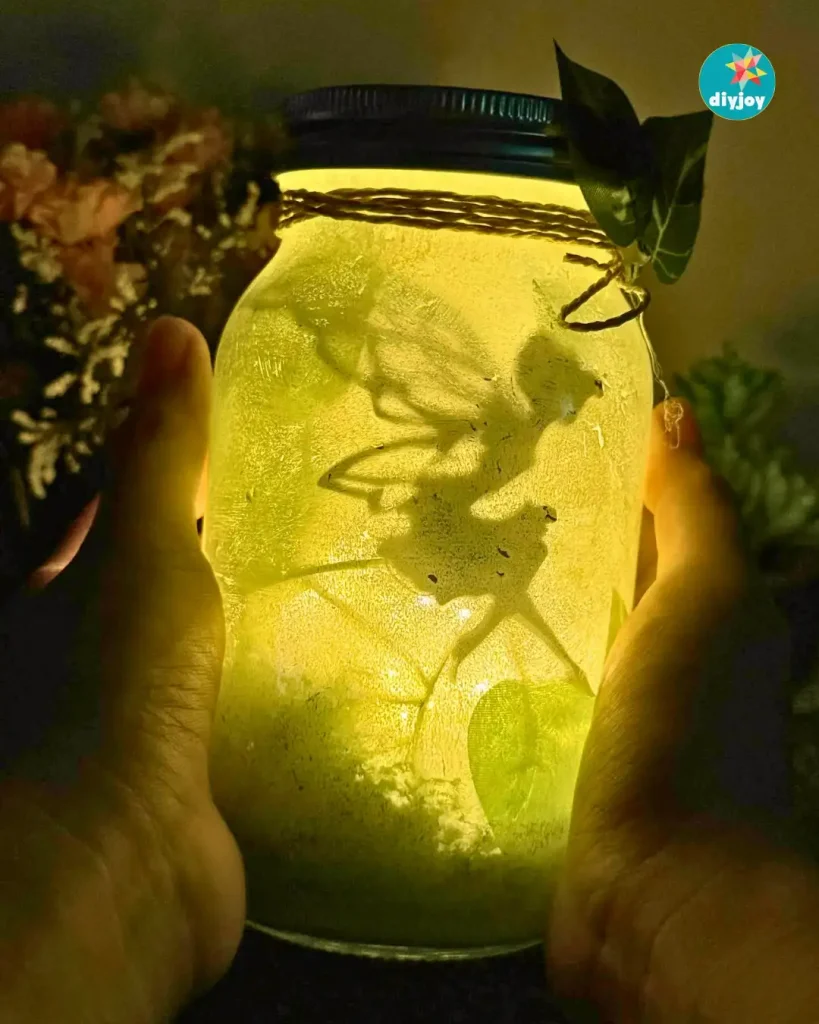
Held up against warm light, this jar shows off a textured frosted finish with a fairy shape appearing to hover inside, wings spread mid-flight.
The frosting looks brushed on unevenly on purpose, giving it a worn, almost weathered surface instead of a smooth factory finish.
Twine wrapped around the neck and a single real leaf tucked under the string add a natural touch that keeps it from feeling too polished.
Less overtly Halloween than the rest of this list, it fits well as the whimsical, softer piece in an otherwise bold spooky lineup.
The uneven, brushed-on frosting is what sells the illusion, a perfectly smooth coat would flatten the glow and lose the silhouette effect entirely.
16. Pastel Tissue-Wrapped Jars With a Classic Jack-O-Lantern Face
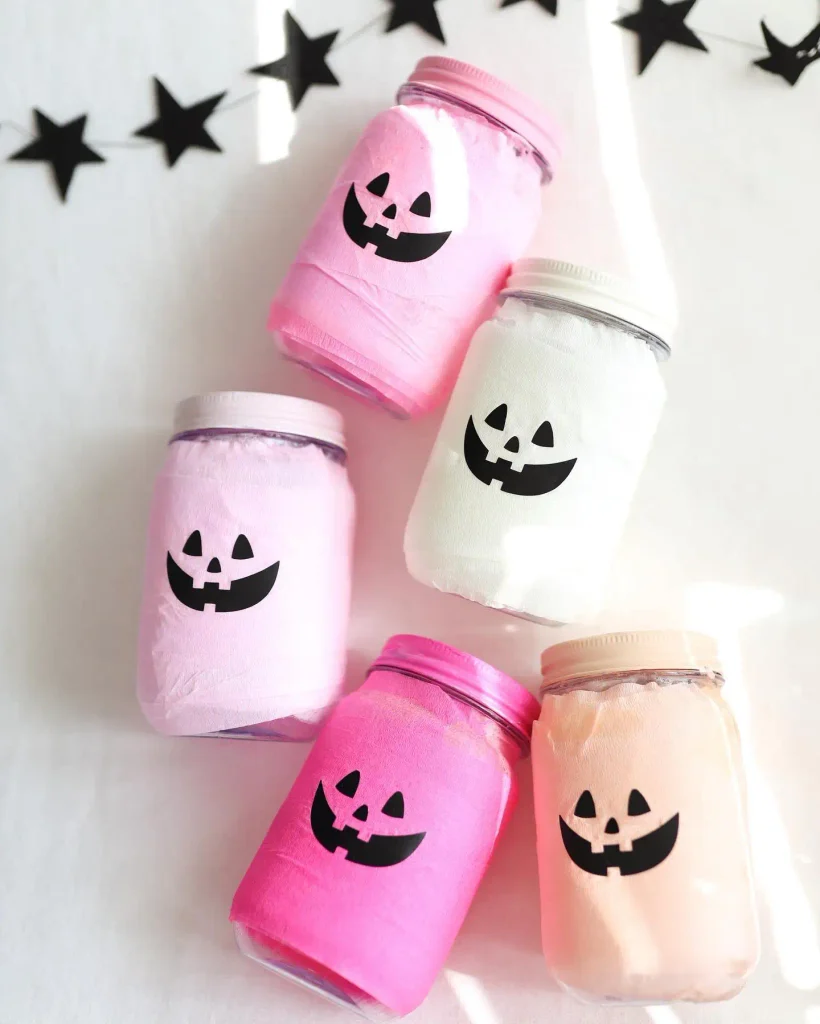
Halloween doesn’t have to stay orange and black, and this set proves it.
Five jars get wrapped in crinkled tissue paper in shades of blush pink, hot pink, cream, and soft peach, with a plain black vinyl jack-o-lantern face stuck on the front of each one.
The tissue paper is loose and a little wrinkled instead of glued flat, which gives every jar texture without any extra painting step.
Lined up together on a plain white backdrop with paper star garland strung overhead, the pastel lineup reads more “cute Halloween party” than “haunted house,” which makes it a good pick for kids’ rooms or a candy buffet.
| Traditional Colors | Pastel Version |
|---|---|
| Orange and black paint. | Crinkled tissue in pink, cream, peach. |
| Reads spooky. | Reads cute, party-friendly. |
17. Behind-the-Scenes LED Jack-O-Lantern Jars With Visible Wiring
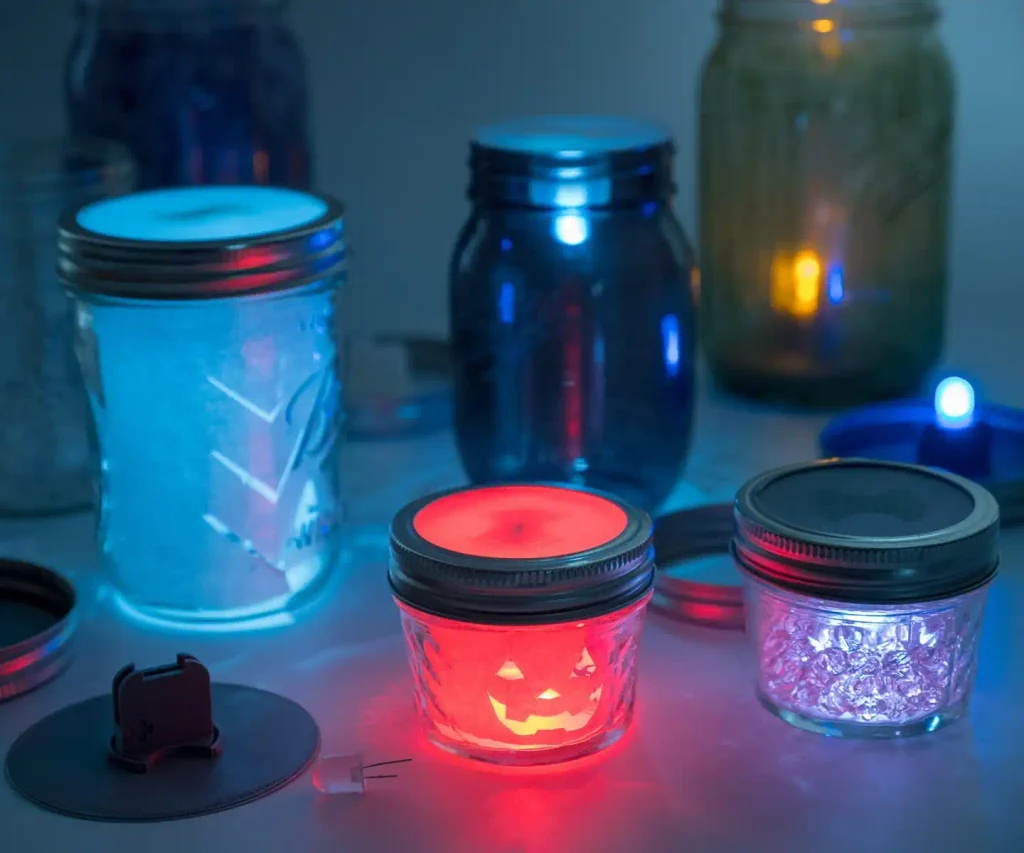
This one is less about the finished glow and more about how it gets there.
A handful of jars sit in a dim room glowing blue, red, and amber, and next to them sits the actual hardware: a coin battery holder, a bare LED bulb, and a switch, all laid out before being tucked inside.
One small jar even shows an orange LED shining straight through a hand-painted jack-o-lantern face, so you can see exactly how the light hits the design once it’s assembled.
Building your own light source instead of relying on a store-bought candle means you control the color, and a warm white or red bulb changes the whole personality of a jar.
18. A Painted Jar Cast of Characters: Bride of Frankenstein, Owl, Web, and Pumpkin Patch
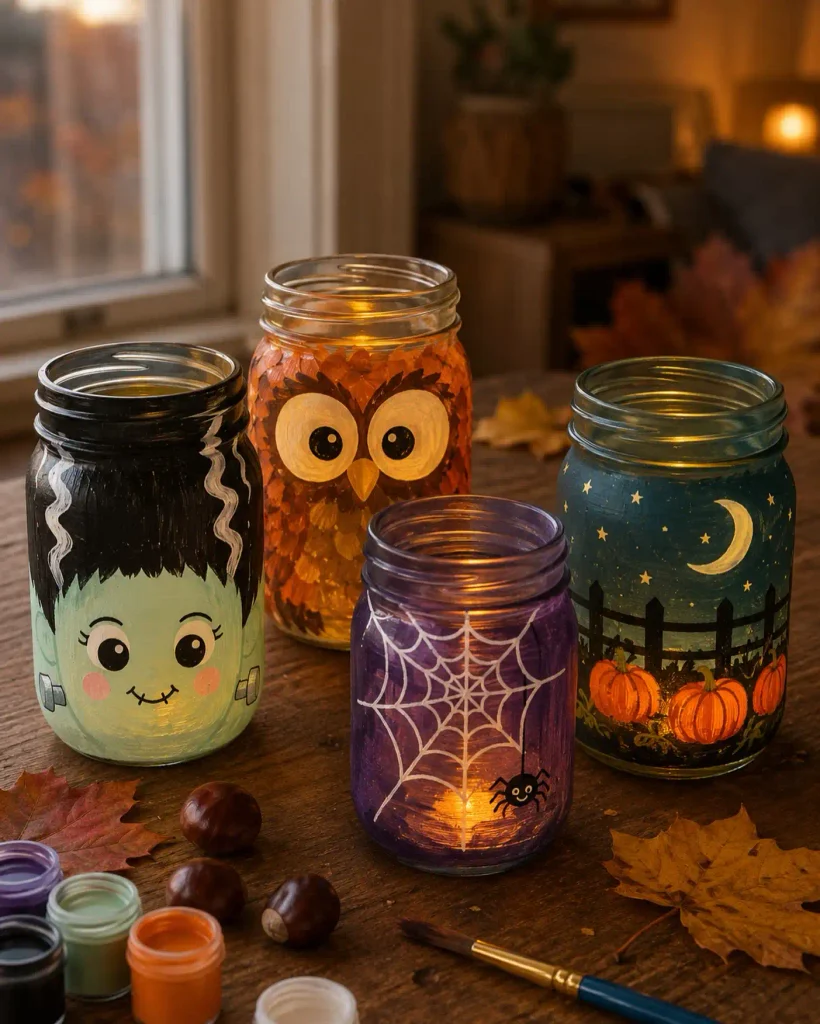
Four jars, four completely different painting styles, all lit from inside with a warm candle glow.
One jar carries a soft green Bride of Frankenstein face with painted stitched hair streaks, one is layered with tiny painted feathers to build an owl with huge round eyes, one keeps it simple with a single white spiderweb and a small hanging spider on deep purple.
And the last shows a full nighttime scene with a crescent moon, stars, a picket fence, and a row of pumpkins.
Grouped on a wood table next to open paint pots and a brush, this is clearly the kind of set built one jar at a time over an afternoon, not rushed out in one sitting.
Pick one character a week if you want to build a set slowly instead of all at once.
💡 Quick Tip
Basecoat the whole jar in your background color first, let it dry completely, then add fine details like feathers or web lines on top so they stay crisp.
19. Textured Painted Jars: Skull, Eyeball, Candy Corn, and Googly Monster
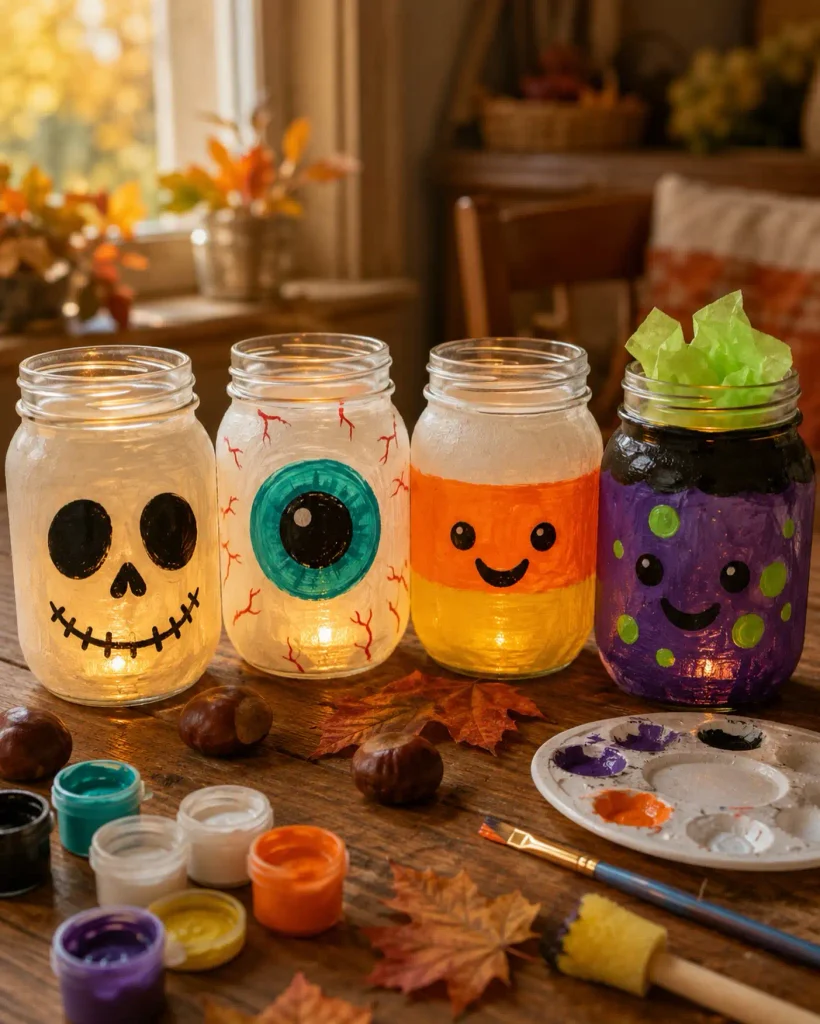
Rough, sponge-textured paint sets this set apart from smooth painted jars.
A skull face sits in plain white and black, an eyeball jar adds thin red veins radiating out from a teal iris, a third jar splits cleanly into an orange and yellow candy corn stripe with a small smiling face.
And a purple polka-dotted monster jar gets topped off with a burst of crumpled green tissue paper instead of a lid.
Lit from inside, the bumpy texture on each jar catches the candlelight in a way a flat-painted jar doesn’t.
Grouped with the paint pots and a sponge dauber still sitting nearby, this reads as a project made for an afternoon of painting with kids just as easily as a solo craft session.
Basecoat each jar with a stippling sponge instead of a brush for texture.
Let it dry, then add the face or pattern with a small brush.
Finish the monster jar with crumpled tissue paper stuffed into the open top.
20. Tiny Ghost Specimen Vials With Handwritten “Ghost Jar” Tags
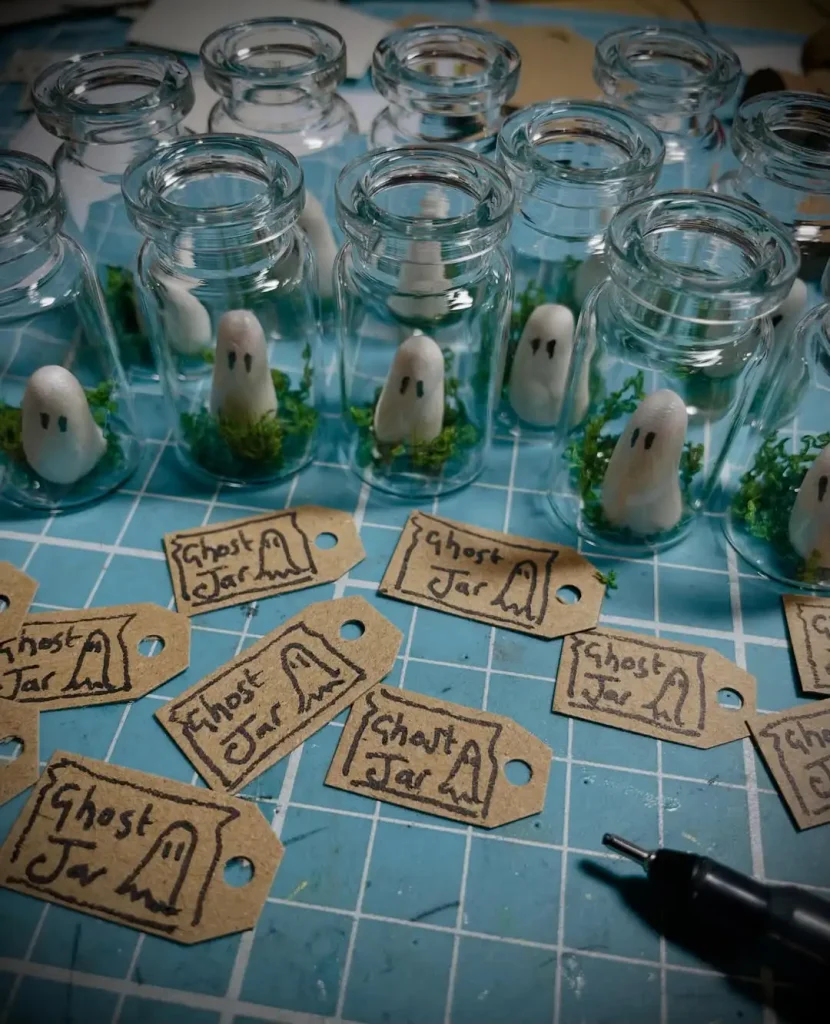
Scale is what makes this idea stand out. Rows of small glass vials, barely bigger than a finger, each hold one miniature sculpted ghost sitting on a bed of green moss, with the classic two-dot eyes and open mouth.
Beside them sit little kraft paper tags, hand-drawn with the same ghost outline and labeled “Ghost Jar” in marker, with a punched hole ready for string.
Made in a batch like this, it stops being a single decoration and turns into party favors, trick-or-treat table fillers, or tiny gifts that don’t take up any shelf space at all.
What each vial needs
21. Single Mini Ghost in a Corked Glass Vial
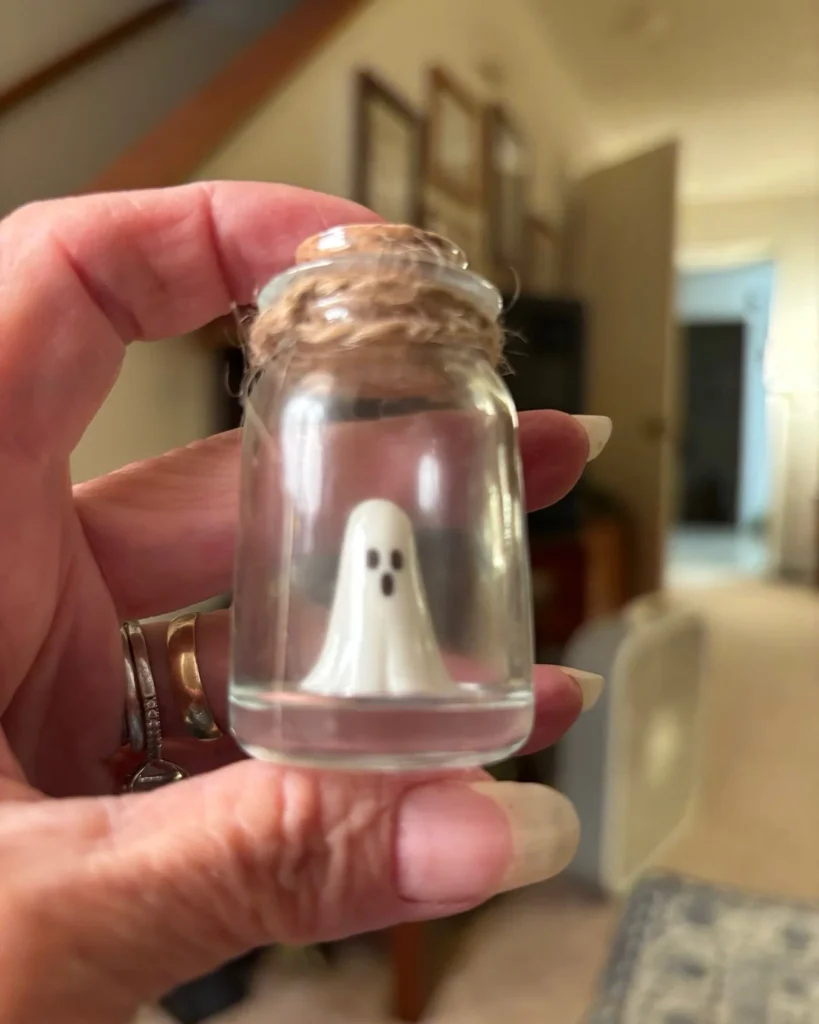
Held between two fingers, this jar is small enough to disappear in your palm, which is exactly the charm of it.
A single hand-painted ghost figure with a rounded body and a surprised open mouth stands inside a clear glass vial, sealed with a natural cork wrapped in a few loops of jute twine.
There’s no glitter, no extra paint on the glass, and no crowd of accessories, just one tiny figure and clear glass doing all the work.
This is the version to make when you want a Halloween favor that fits in a stocking, a lunchbox, or a card instead of on a shelf.
22. Glowing Cheesecloth Ghost Trio With Felt Eyes and a Burlap Bow
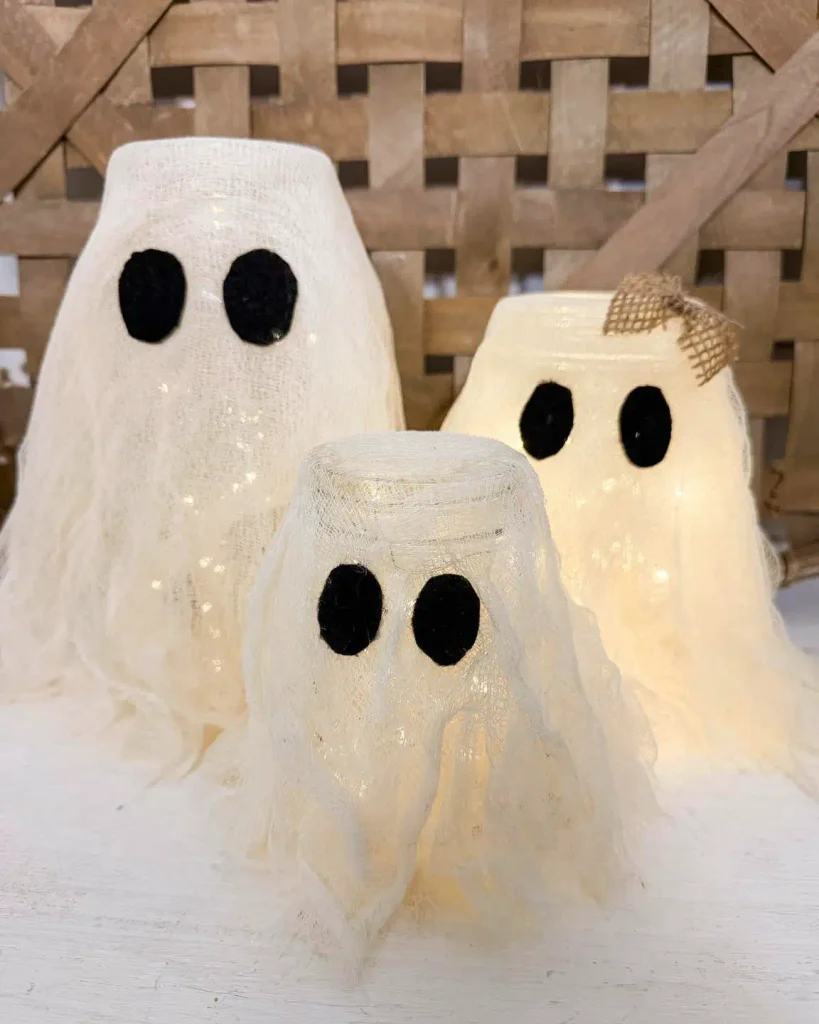
Layers of loosely draped cheesecloth turn three plain jars into a family of standing ghosts, tall, medium, and short, each one lit from inside so the fabric glows soft and warm rather than stark white.
Two round black felt circles serve as eyes on every ghost, sewn on or glued just above where the fabric bunches at the “shoulders.”
The tallest ghost stays plain, but the middle one gets a small burlap bow tied near its head, a tiny detail that keeps the trio from looking too identical.
Draping the cheesecloth unevenly, letting some strands hang lower than others, is what gives these their floaty, movement-caught-mid-drift look instead of a stiff, uniform shape.
Drape the cheesecloth loosely and unevenly.
Vary jar heights so the group looks like a family.
Skip pulling the fabric taut, it kills the floaty look.
Skip identical eye placement on every ghost.
23. Glowing Mummy Jar Family Wrapped in Gauze Strips
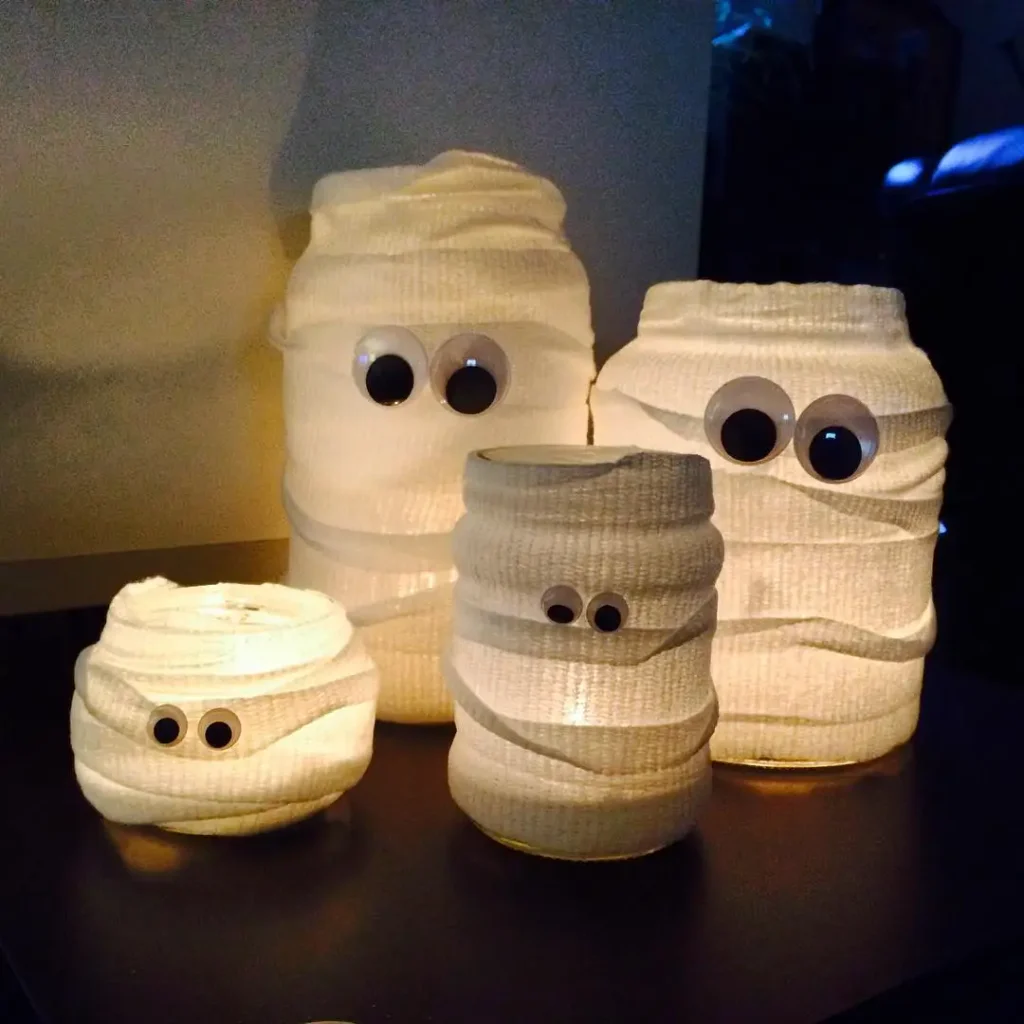
Four jars of different sizes get fully wrapped in strips of white gauze bandage, criss-crossed loosely so gaps of glowing light peek through between the layers.
Each one gets a pair of mismatched googly eyes stuck somewhere in the wrapping, some centered, some off to one side, which gives the group a slightly chaotic, genuinely mummy-like feel instead of looking too neat.
Photographed in a dark room, the warm light glowing through the bandage gaps does more work than any paint could.
Building this as a family of different heights, rather than four matching jars, is what makes it worth photographing as a group instead of one at a time.
- ▸Wrap gauze loosely and criss-crossed, not flat and even.
- ▸Leave gaps so the inside light shows through.
- ▸Stick googly eyes at slightly different heights on each jar.