21 Thanksgiving Cards Ideas That Go Way Beyond a Basic Turkey

Most Thanksgiving cards fall into one of two piles: a plain printed turkey, or something so busy it’s hard to know where to look first.
This list sits in the middle. You’ll find loose water color pumpkins next to a bold gold foiled “thankful,” a gatefold card wrapped in ribbon next to a tiny two inch square with one stamped acorn.
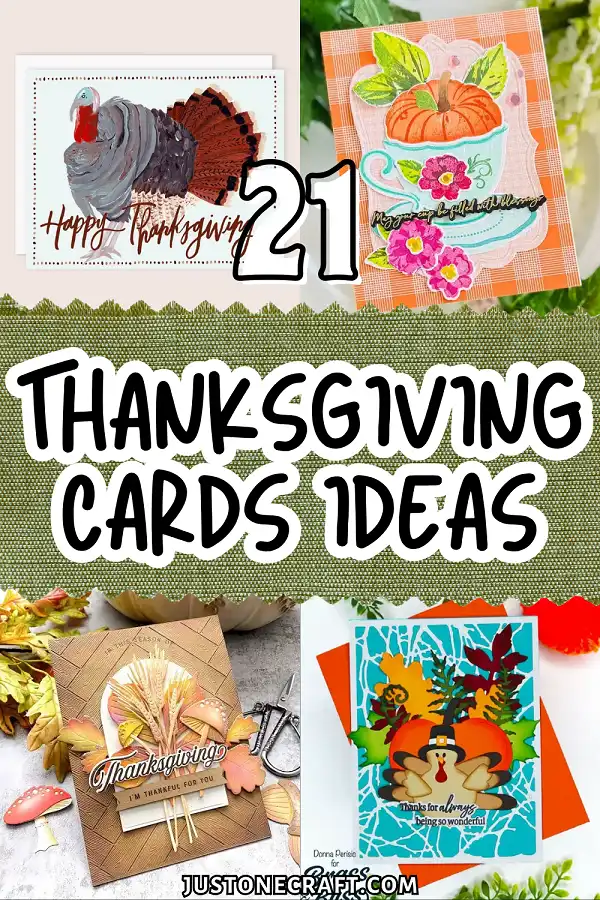
Some use a single die cut and a lot of white space. Others stack layer after layer of flowers, leaves, and berries until the whole front is full.
Whether you card make for fun or you’re planning gifts to mail, there’s a mix of styles here worth stealing, from quick weeknight projects to ones you’ll want a full afternoon for.
1. Stack a Pumpkin Right Into the Teacup
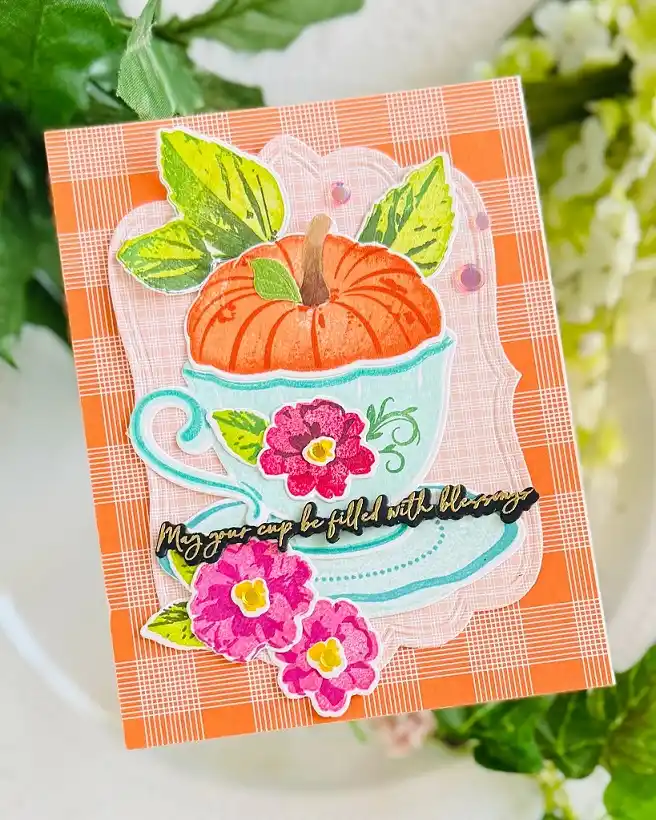
Orange plaid paper turns this one into an instant favorite.
A stamped teacup and saucer hold a layered pumpkin where the flowers usually sit, with soft green leaves fanning out behind it and a gold foiled sentiment running across the middle in a loose script.
Small iridescent sequins scattered near the top catch the light without pulling focus.
What makes it work: swapping the tea for a pumpkin is a small twist, but it changes the whole read of the card from cozy autumn tea party to Thanksgiving gratitude.
Try it with a floral stamp set you already own by simply subbing a pumpkin die for the flower that usually fills the cup.
2. Let a Grumpy Turkey Carry the Joke
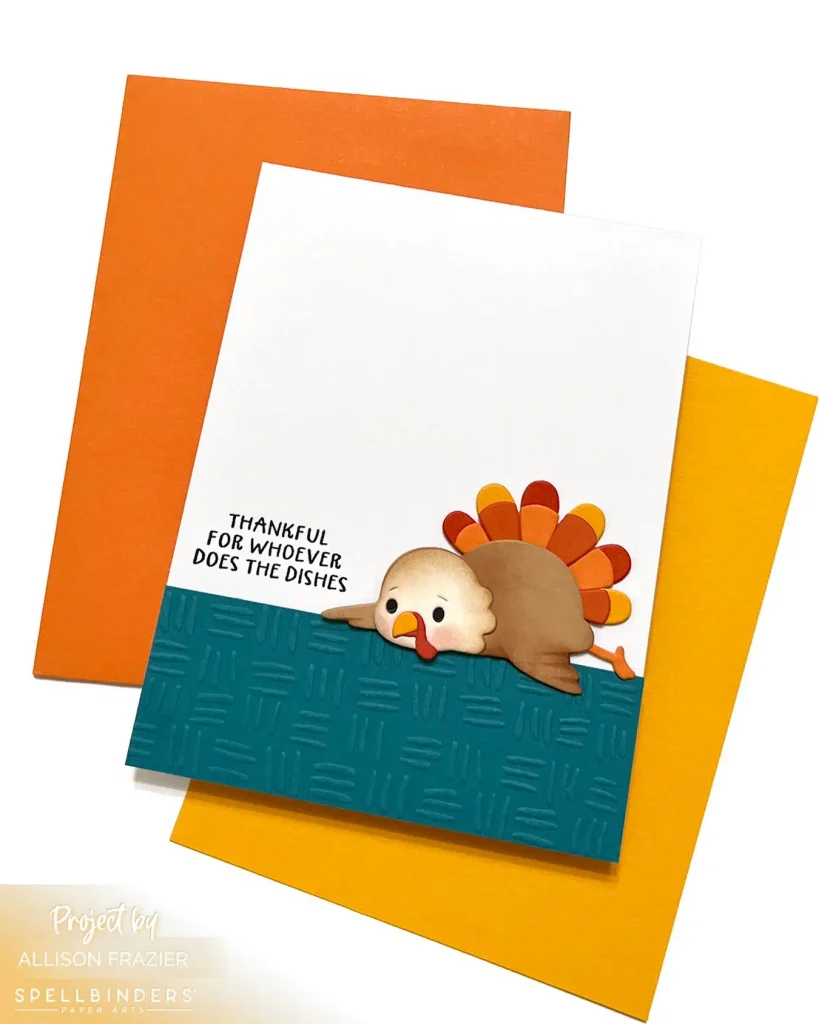
Humor sells fast on Pinterest, and this one nails it.
A face-planted turkey peeks over a teal embossed strip, feathers fanned out in warm reds and golds, next to a hand-lettered line that reads “thankful for whoever does the dishes.”
The white card front keeps the joke front and center with no extra clutter around it.
Here’s how to get this look:
Die cut a turkey with its body tipped forward like it just collapsed.
Emboss a textured strip along the bottom for it to lean on.
Write a one liner that pokes fun at the holiday, not the reader.
3. Frame a Single Sentiment in Layered Ovals
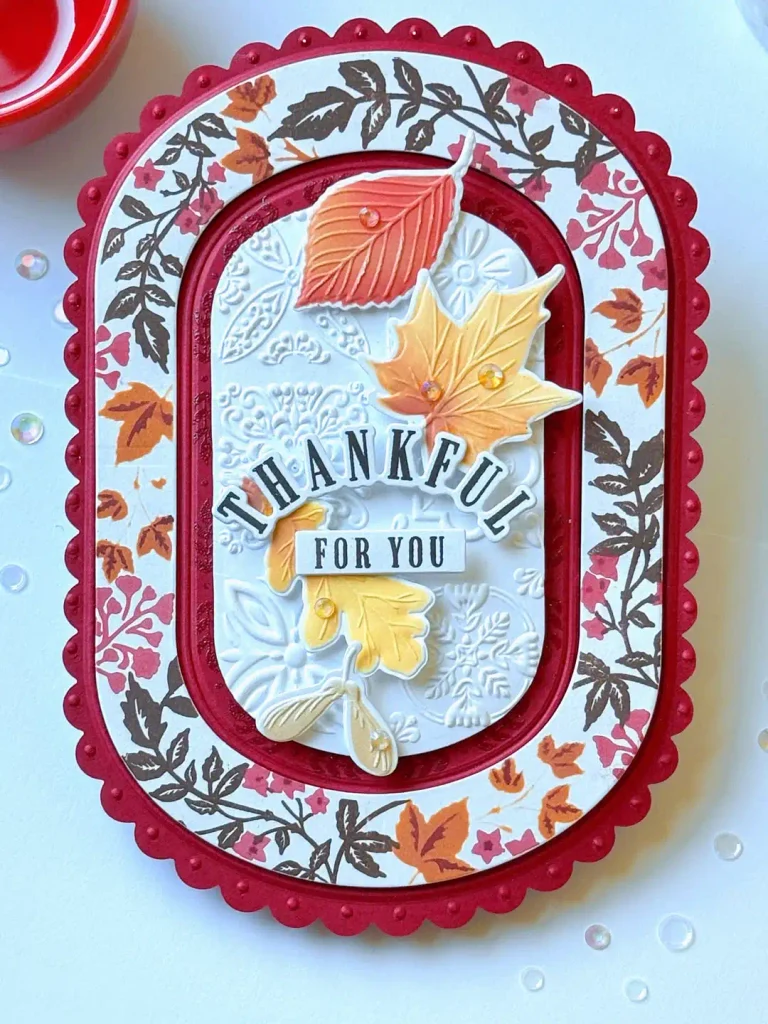
Nested die cut frames give a small phrase serious presence.
A scalloped red outer oval holds a floral patterned border, then a solid red mat, then a white embossed inner panel where the word “thankful” arches over a small tag reading “for you.”
Maple and oak leaves tucked at the top add just enough color without crowding the sentiment.
💡 Quick Tip
Layer three or four die cut frame sizes before adding any focal image. The extra depth makes even a small card front feel intentional.
4. Keep It to One Leaf and One Word
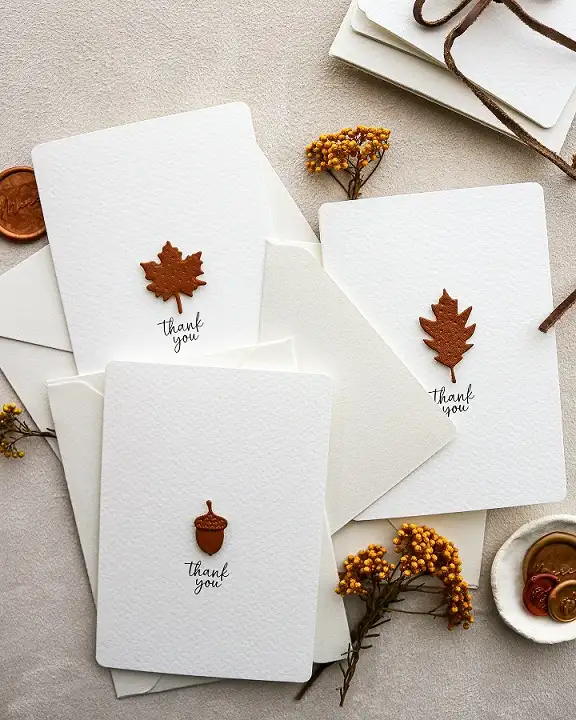
Sometimes the quietest card in the stack gets saved the longest.
A single embossed maple leaf, oak leaf, or acorn sits centered on plain white cardstock above a small cursive “thank you,” nothing else on the page.
Warm copper foil on the die cut is the only pop of color against all that white space.
Piling on multiple die cuts, patterned paper, and a long message at once.
One die cut, one word, generous white space around both.
5. Design One Pumpkin, Print It in Four Moods
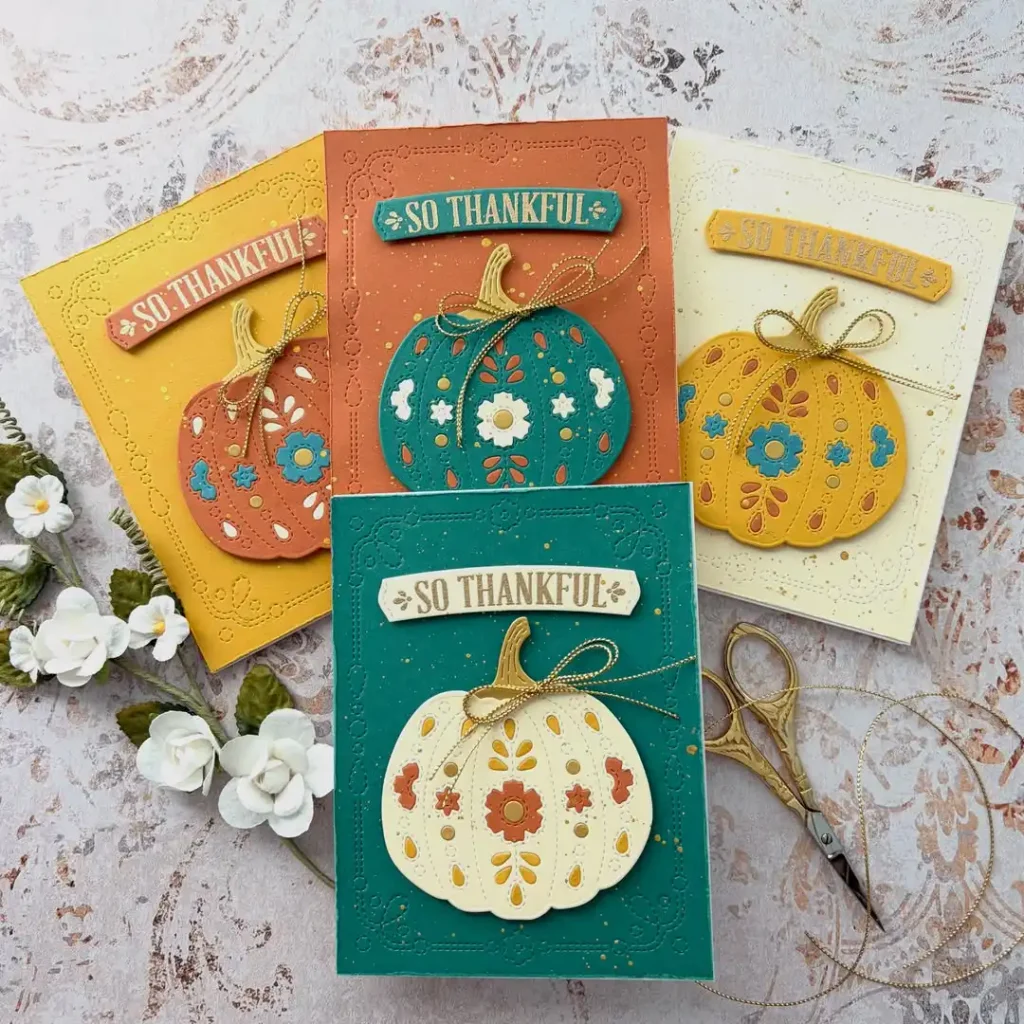
Four backgrounds, one pumpkin shape, four totally different feelings.
The same folk art pumpkin die, cut with floral and dot patterns and tied with a gold twine bow, gets stamped onto yellow, orange, teal, and cream card fronts, each topped with a “so thankful” arched banner.
The gold speckling across every version ties the whole set together.
6. Layer Pressed-Look Florals Over a Pastel Pumpkin
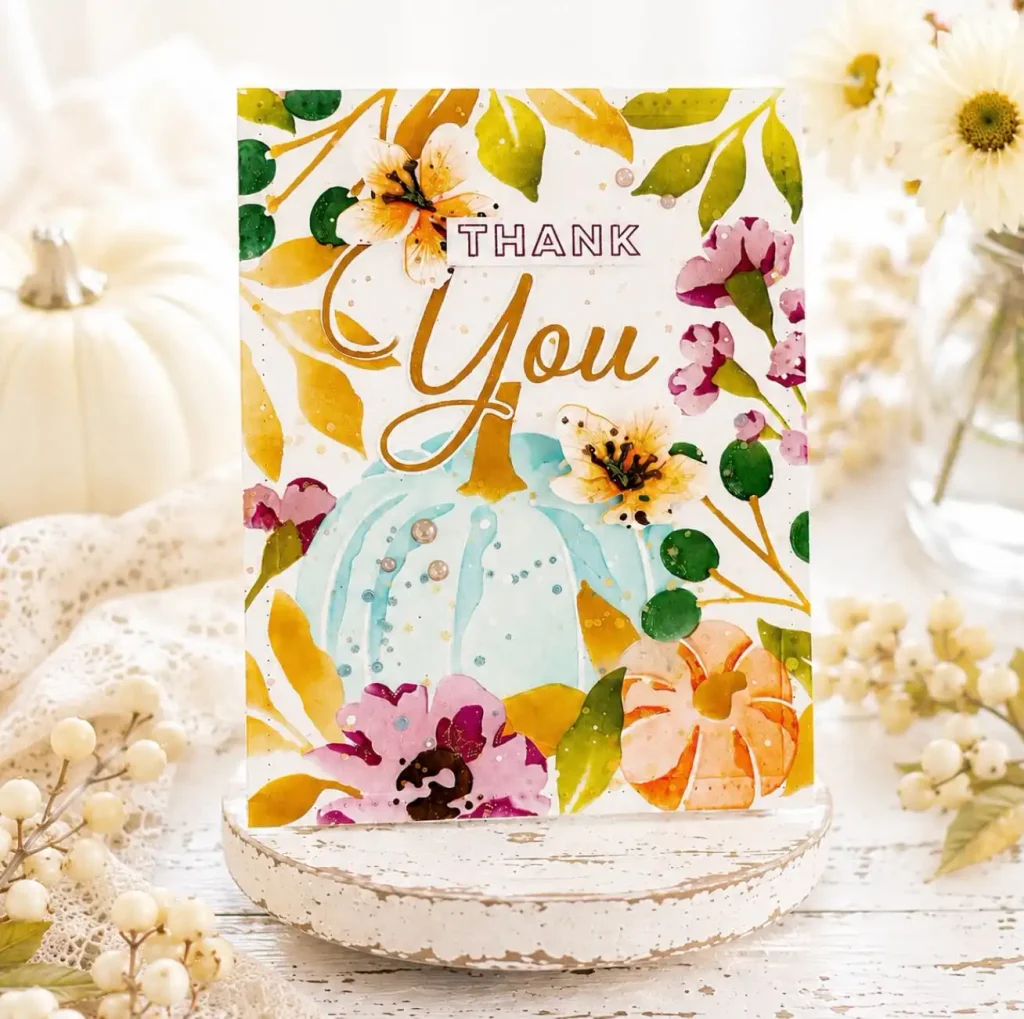
Vellum-style layering turns a plain card front into something worth framing.
A soft blue pumpkin sits low on the page while gold leafy branches, deep pink blooms, and a small dimensional butterfly spread out around it.
A gold cursive “You” curls beneath a boxed “Thank” stamp, the whole thing finished with tiny clear droplet accents.
Recreate this look
7. Paint a Trio of Pumpkins in Unexpected Colors
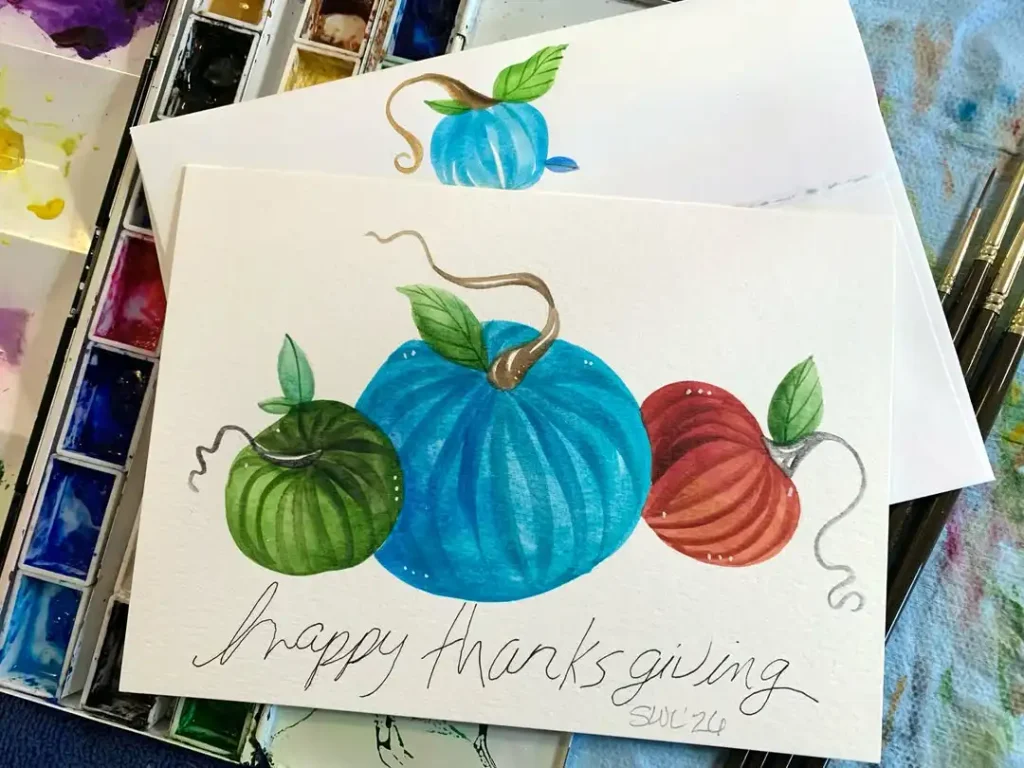
Color is doing all the work in this handmade favorite.
A green, a blue, and a rust colored pumpkin sit side by side with curling watercolor stems, painted loosely enough that brush texture still shows.
Below them, a handwritten “happy thanksgiving” finishes the card, and a matching envelope carries a single small blue pumpkin in the corner.
Pumpkins do not have to be orange. Painting them in green and blue makes a familiar shape feel new again.
8. Give the Turkey a Fine Art Portrait
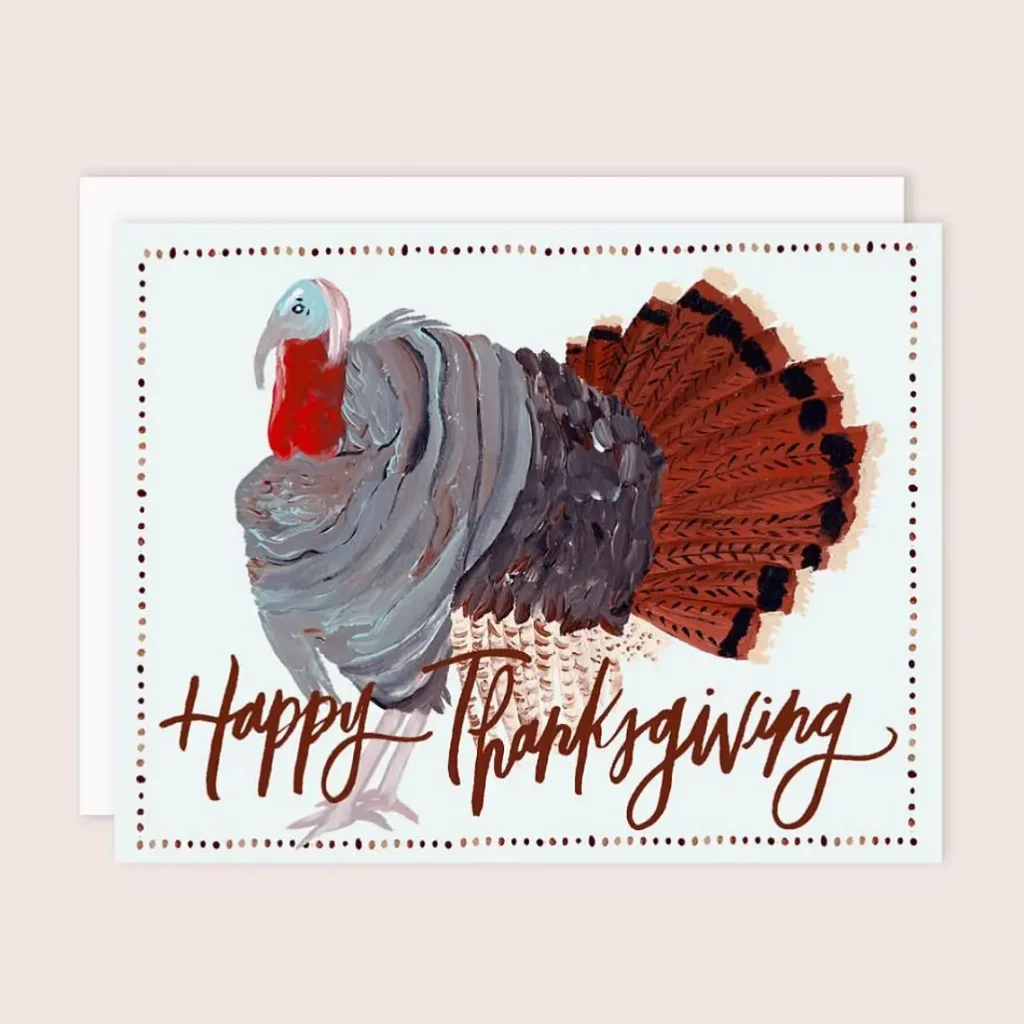
Not every Thanksgiving card needs to be cute, some can be striking instead.
This one paints a realistic turkey in gouache, feathers built up in loose gray and rust brushstrokes against a pale blue background, framed by a hand dotted border.
A brush script “Happy Thanksgiving” runs along the bottom in matching brown.
- ▸Use gouache or heavy watercolor for texture that reads as real feathers.
- ▸Keep the background pale so the painted subject stays the focus.
- ▸Add a simple dotted border by hand for a printed, gallery feel.
9. Build a Full Harvest Bouquet Around One Word
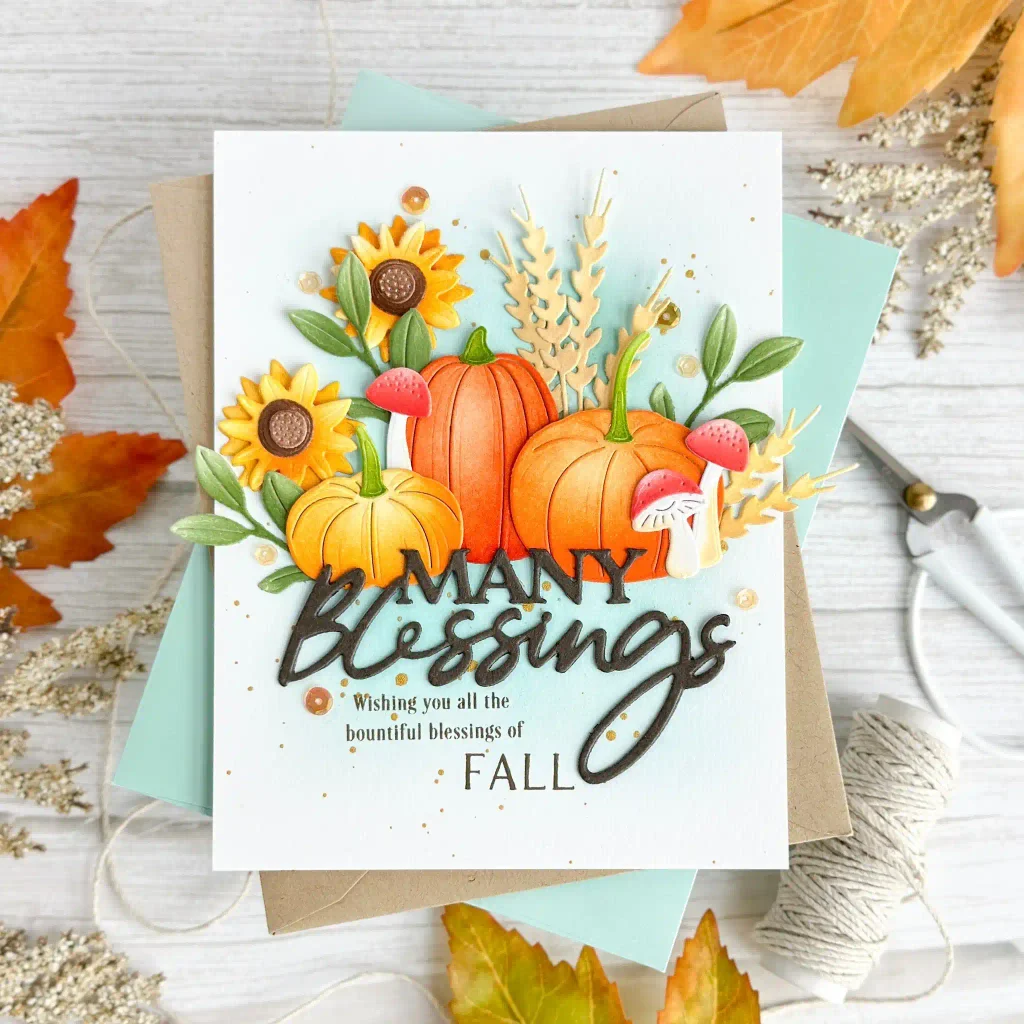
Bigger is the plan here, and it pays off.
Sunflowers, two pumpkins, dried wheat stalks, and little red mushrooms all cluster together at the top of the card, with a chunky script “Blessings” die cut running underneath in dark brown.
A soft mint background and gold ink splatter keep the busy arrangement from feeling heavy.
A single stamped pumpkin on plain cardstock, nice but simple.
Layered pumpkins, sunflowers, wheat, and mushrooms building a full harvest scene, like this one.
10. Combine Flat Ink Leaves With Dimensional Ones
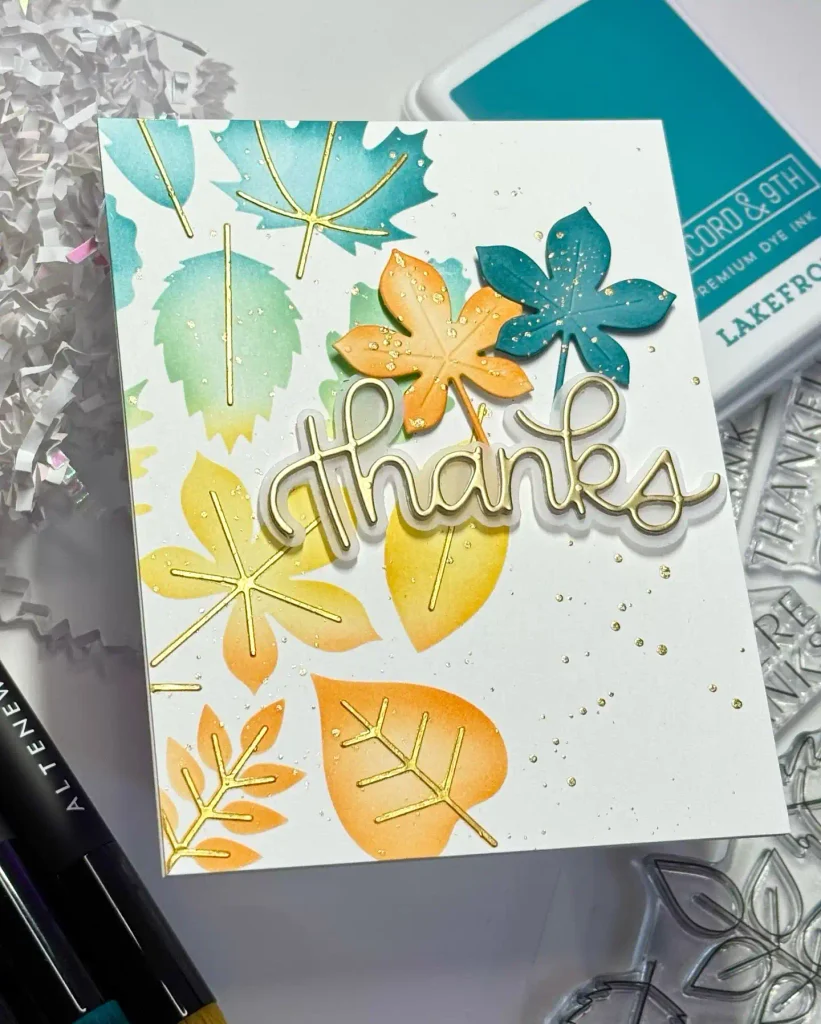
Depth is the trick behind this leaf-covered front.
Sponged blue, green, and gold leaf silhouettes sit flat across the background, some with gold heat embossed veins running through them, while three extra leaves are die cut, colored, and popped up in dimension near a gold script “thanks.”
Fine gold flecks scattered over the whole piece add a bit of shimmer.
| Flat Leaves | Dimensional Leaves |
|---|---|
| Sponged and heat embossed straight onto the card front. | Die cut separately, colored, and popped up with foam tape. |
| Builds the background pattern and depth of color. | Draws the eye forward and adds texture you can feel. |
11. Ground the Whole Card in Wood Texture
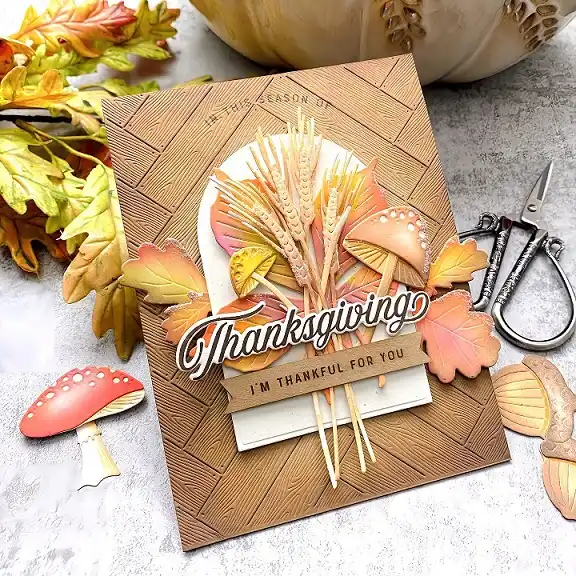
A woodgrain embossed background changes the whole feel of a harvest card.
Warm tan planks fill the entire front here, with a bundle of wheat stalks, layered leaves, and little mushrooms arranged in the center like a still life.
A script “Thanksgiving” die cut sits over the bundle, with “I’m thankful for you” tucked on a small tag below it.
12. Make a Printable Version for Sharing Online
Wait — this one is actually a different upload, let me correct the reference below.
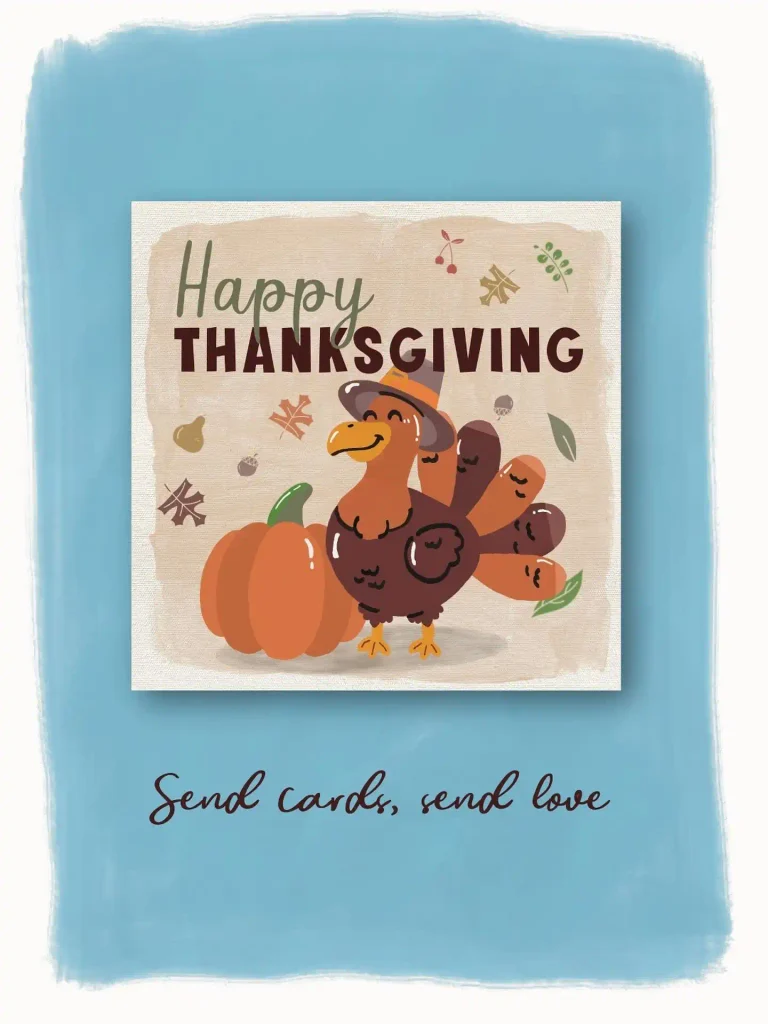
Not every card idea needs cardstock, this one works just as well as a digital send.
A friendly cartoon turkey in a pilgrim hat stands beside a plain orange pumpkin, small leaf and acorn doodles scattered around a “Happy Thanksgiving” headline.
A teal painted border and a “send cards, send love” tagline underneath suggest this design was built to be shared as a downloadable print.
📌 Good To Know
Simple flat illustrations like this one convert well into both printable PDFs and physical cardstock cards, so the same design can do double duty.
13. Pair a Cartoon Turkey With a Crackled Background
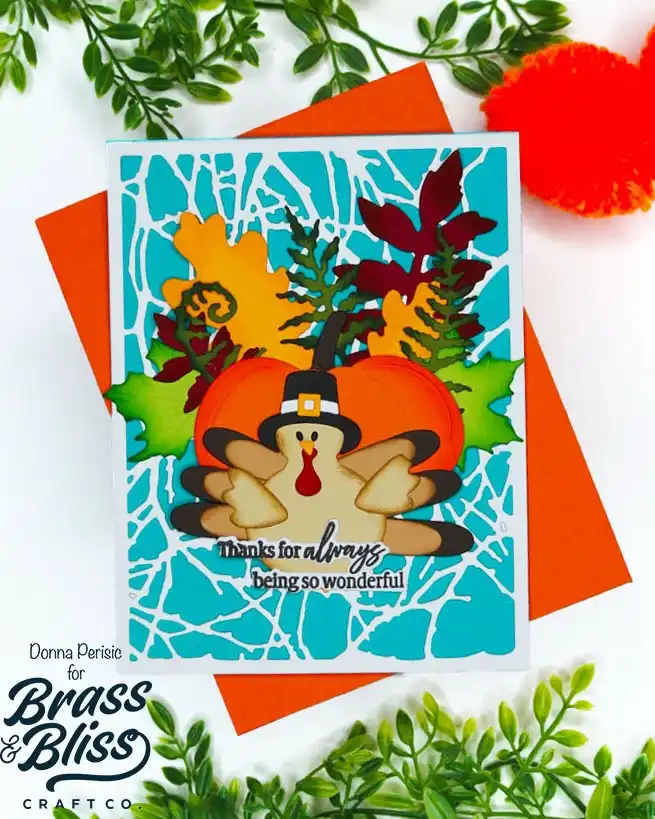
Texture and character together make this one stand out in a stack of florals.
A crackle-effect teal background sits behind a friendly turkey wearing a black pilgrim hat, its wings spread wide beneath a fan of yellow, green, and burgundy leaves.
The sentiment, “thanks for always being so wonderful,” runs in two small lines at the base.
14. Color Block the Card Front Before You Stamp
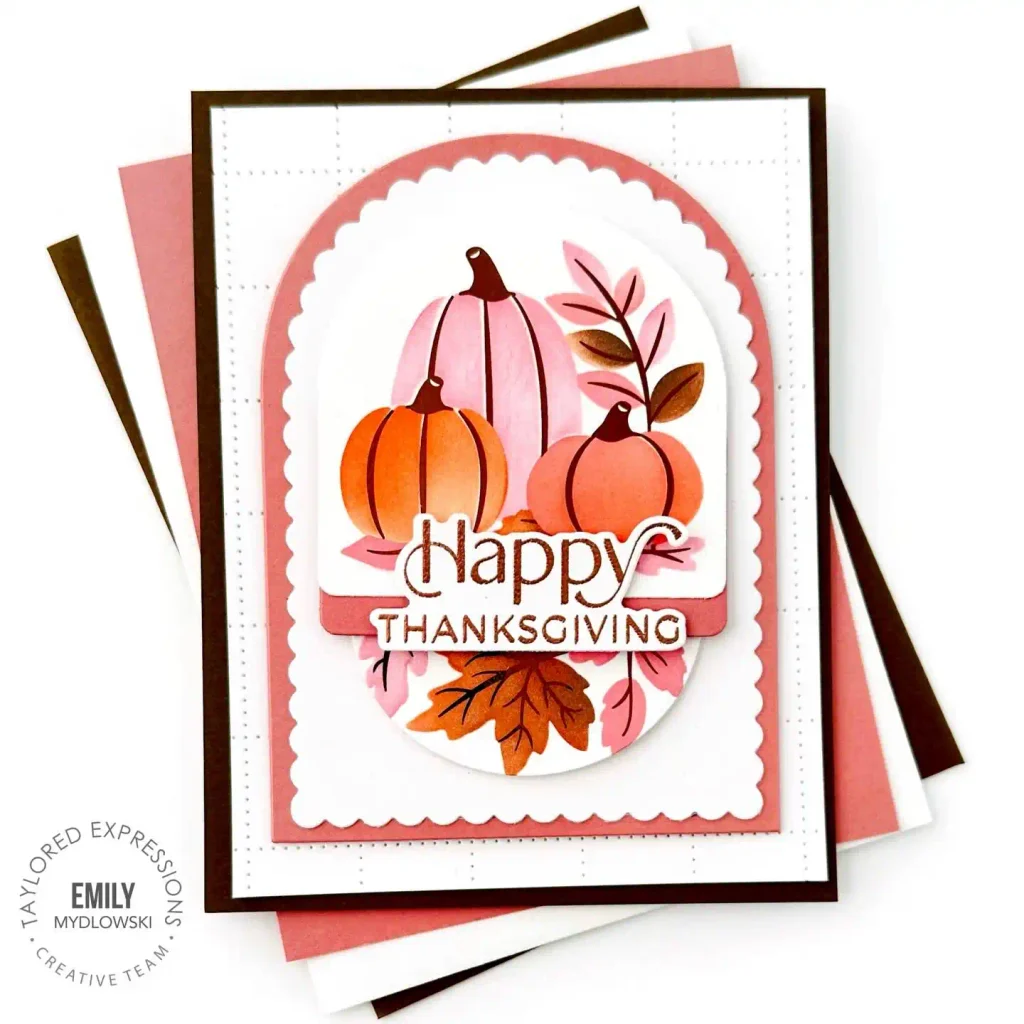
Blush, brown, and copper turn a simple pumpkin trio into something polished.
A pink, orange, and copper pumpkin cluster sits inside an arched scalloped window, layered over a deep pink mat, a white stitched panel, and a dark brown base card.
Copper foiled leaves and a copper embossed “Happy Thanksgiving” finish the look.
Here’s how to build the layers:
Start with a dark brown base card for contrast.
Stitch a white panel and layer a pink scalloped arch on top.
Add the pumpkin scene and finish with a foiled greeting.
15. Wash a Sunset Background Behind Metallic Leaves
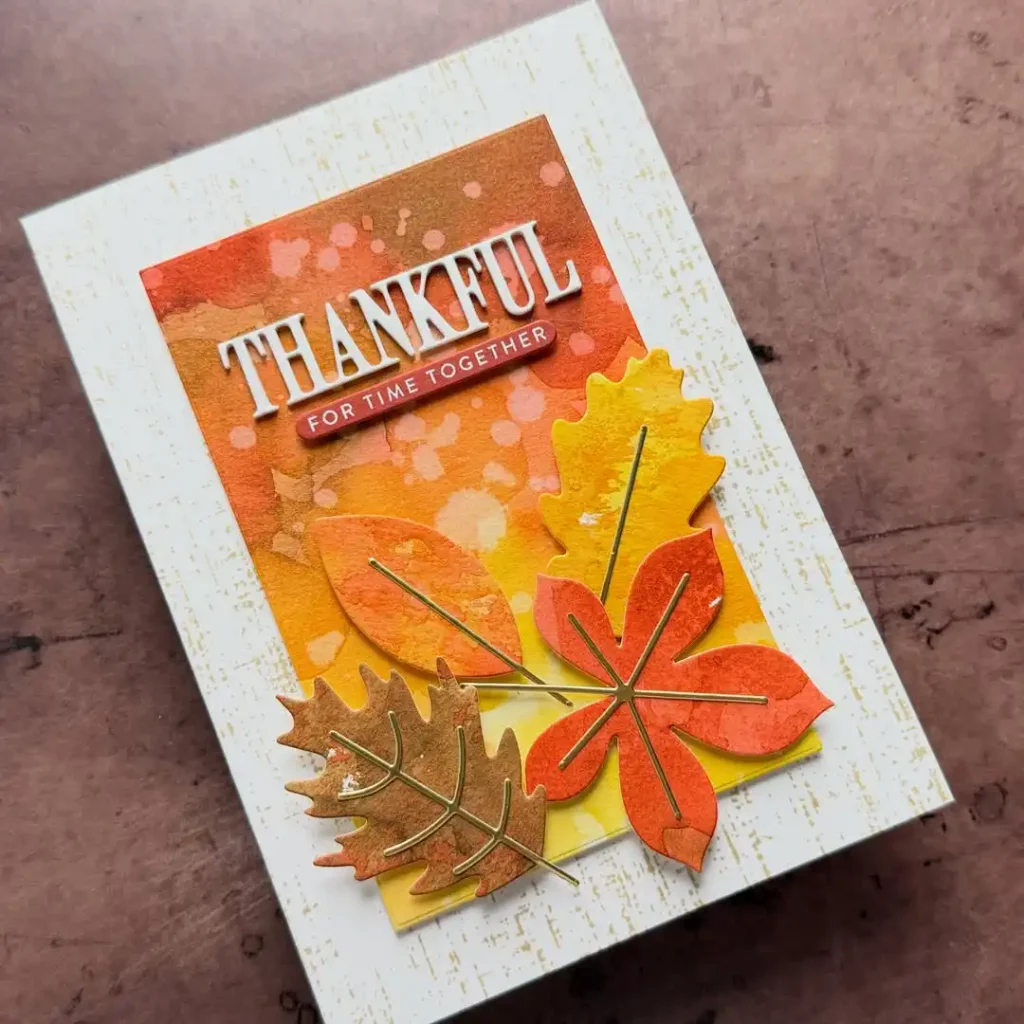
Saving the boldest color combo for near the end of the list.
A loose watercolor wash in orange, red, and gold fills most of this card front, with a crackle texture layered over the edges.
Gold veined leaf die cuts sit on top in matching sunset tones, and a bold “Thankful” title pairs with a smaller “for time together” tag.
A painted background does the heavy lifting on color, so the leaf die cuts only need to add shape and a bit of shine.
16. Cluster Every Color of Fall Into One Bouquet
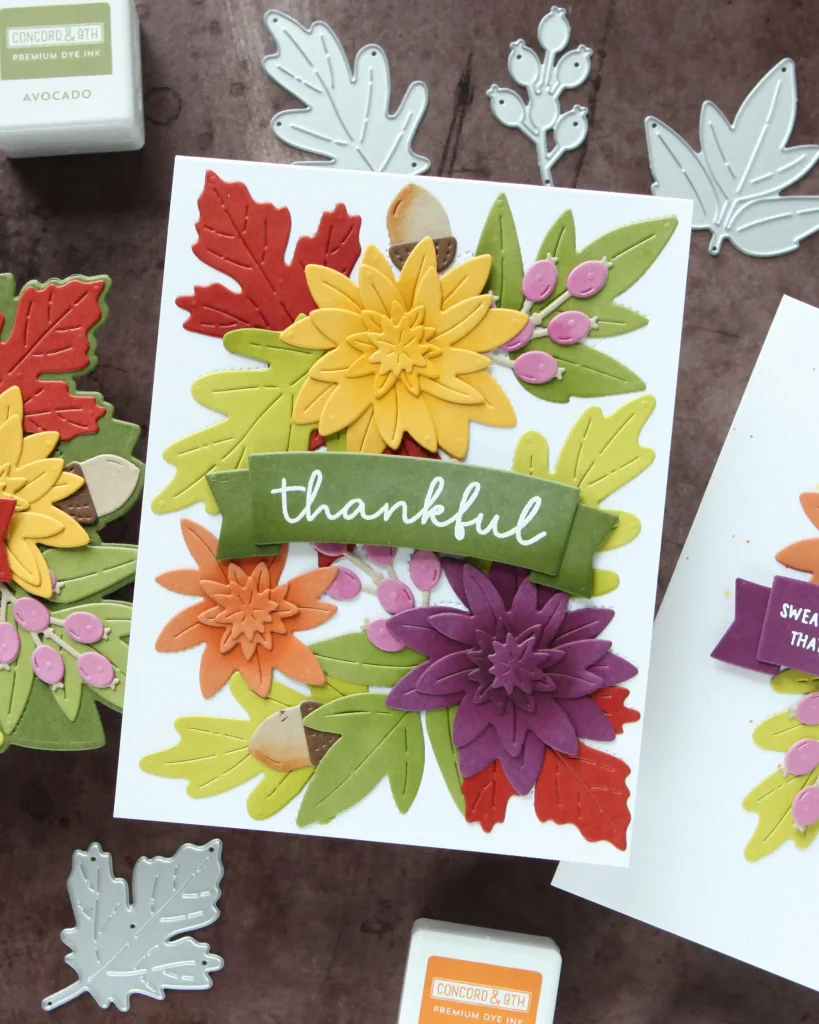
Nine dahlia-style blooms in yellow, orange, and deep purple crowd together here, tucked between layered green and gold leaf die cuts, red maple leaves, tiny pink berry sprays, and two small acorns.
A moss green banner reading “thankful” cuts straight across the middle, white embossed against the darker paper so it stays readable under all that color.
Three details separate this one from a plain floral card:
- Every bloom uses a different shade, so no two flowers compete for the same attention
- The banner sits low enough that the eye lands on the flowers first
- Acorns and berries fill the small gaps instead of leaving flat white space
One or two flowers on a plain leaf backdrop, tidy but a little flat.
A dense, multi color bouquet like this one, where every gap is filled with something small.
17. Shrink the Whole Card Down to a Square
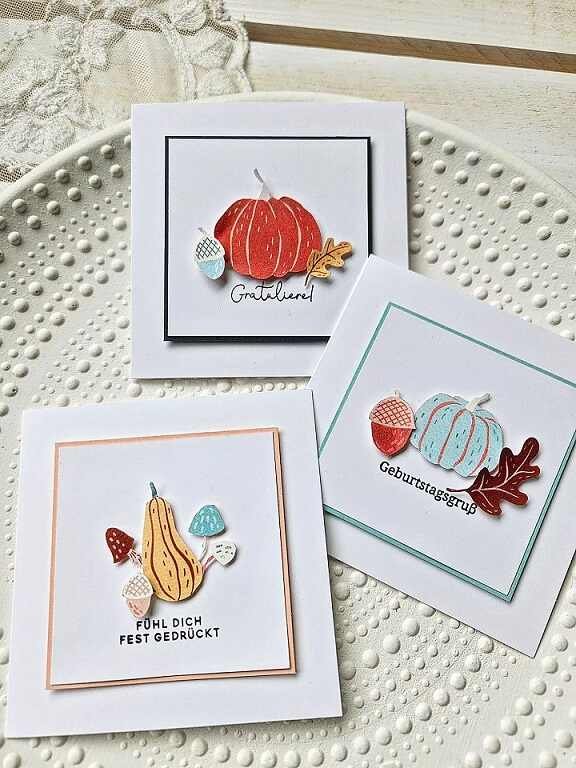
Big statement pieces are not the only option, small square cards have their own charm.
Three tiny cards here each carry one simple die cut, a red pumpkin with an acorn, a mushroom cluster with a squash, and a pale blue pumpkin with an oak leaf, matted on plain white squares with thin colored borders and a short printed greeting underneath.
| Standard Size | Mini Square |
|---|---|
| Room for a full scene and a longer message. | Forces a single focal image and a short line of text. |
| Works well as a standalone gift card holder. | Great for batch making a set of thin thin borders and quick notes. |
18. Set Bold Florals Against Neutral Kraft Leaves
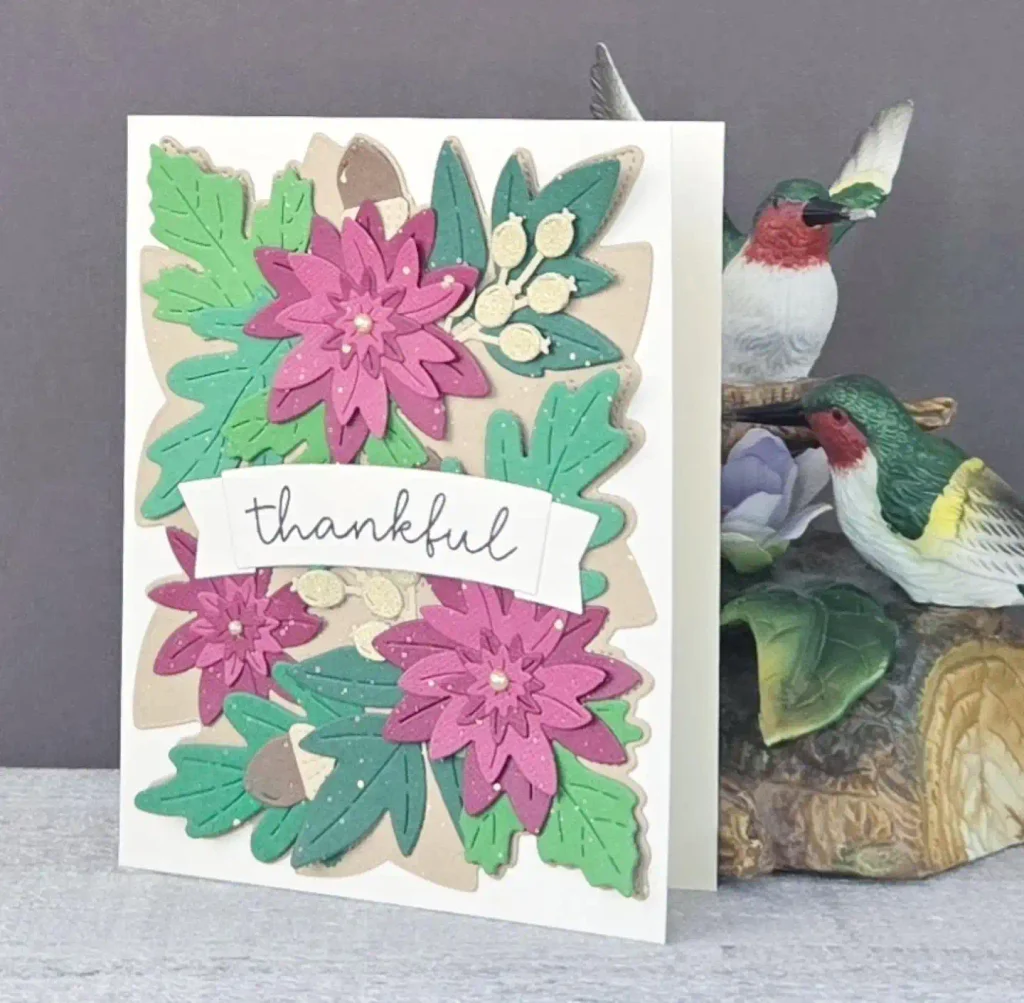
Restraint in the background makes the flowers pop harder.
Underneath the blooms here sits a soft tan die cut shape, almost like a mat, with sage and forest green leaves layered on top and deep magenta and berry pink flowers clustered in two groups.
A curved white banner reading “thankful” sits between them, and a light gold glitter spray finishes the whole piece.
19. Let Vellum Soften a Bold Gold Sentiment
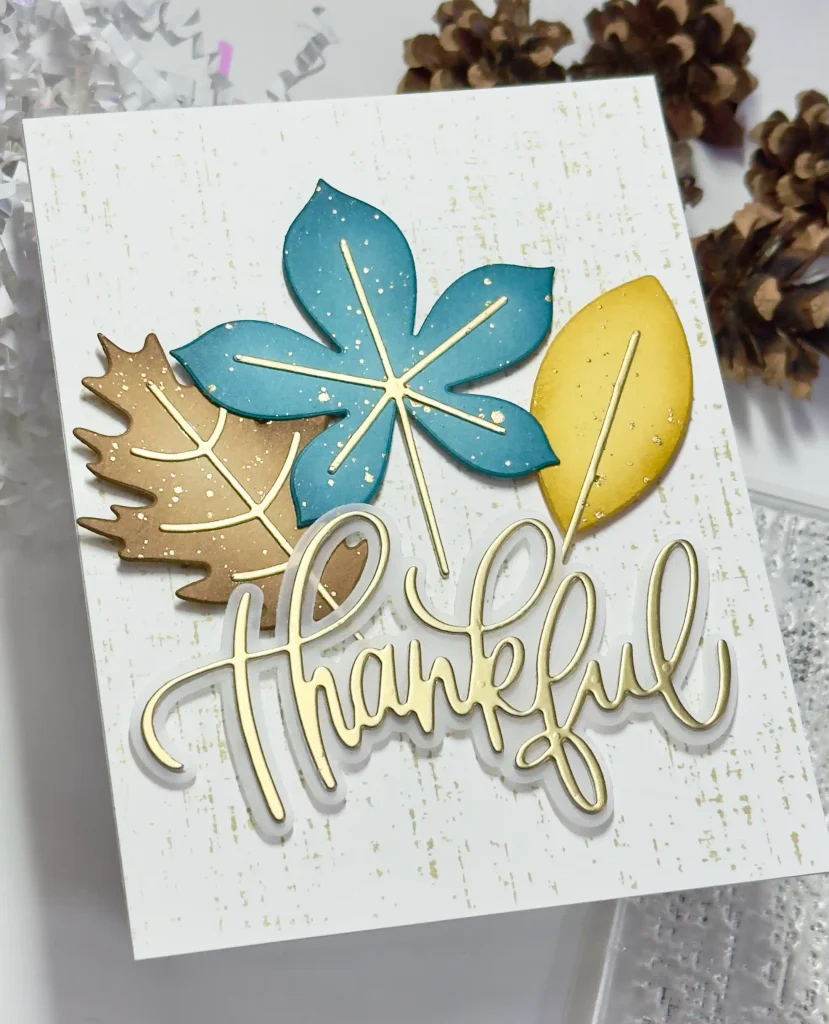
Vellum backing is a small trick that changes a whole card.
A large gold foiled “thankful” script sits mounted over a translucent vellum shadow layer here, floating in front of three oversized leaves in unexpected colors, teal, warm brown, and mustard, all foiled with matching gold veins.
A subtle crackle texture and scattered gold flecks cover the plain white background.
Recreate this look
20. Open the Card Like a Set of Double Doors
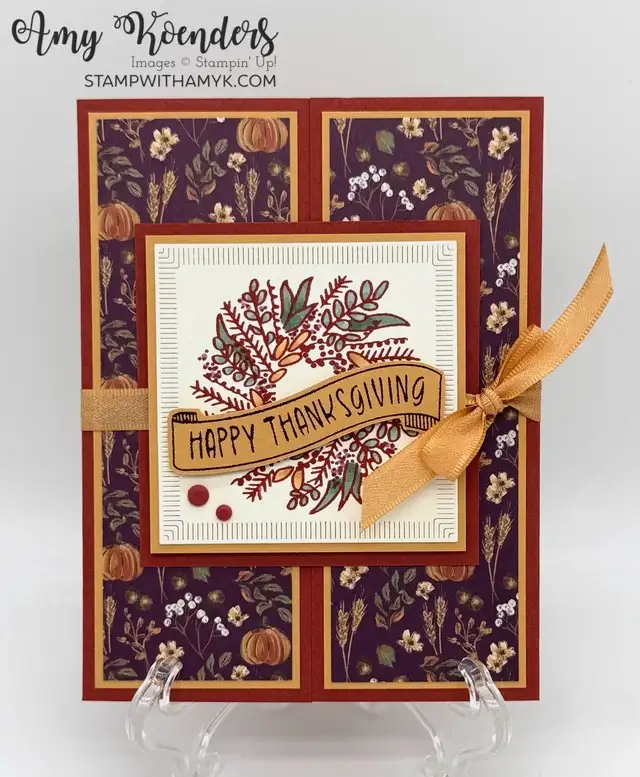
A gatefold base gives this card a reveal that flat cards cannot match.
Deep purple floral patterned paper covers both folding panels, bordered in rich red and gold, while a stamped harvest bouquet in burgundy and sage sits centered on a cream square with a gold “Happy Thanksgiving” banner.
A wide gold ribbon ties across the front like a gift.
21. Repeat One Stamped Leaf Across the Whole Front
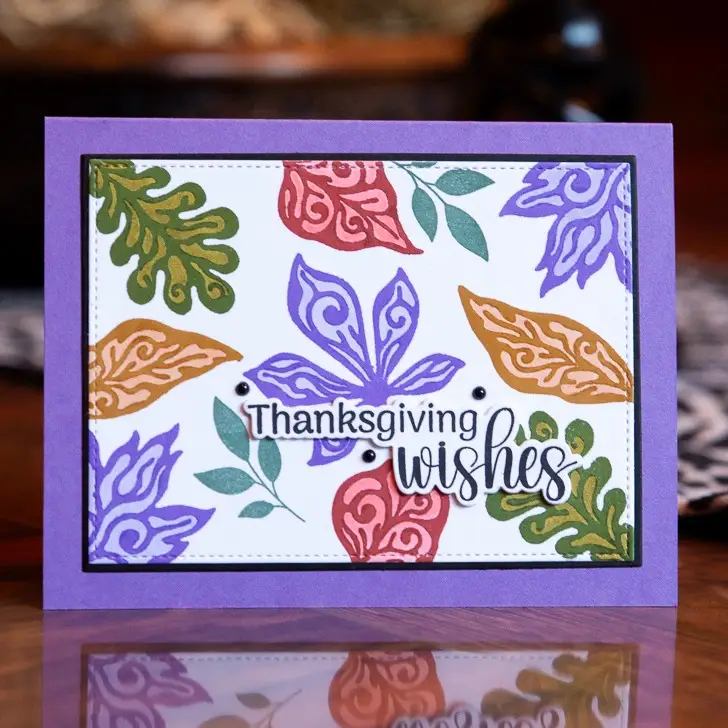
A single ornate leaf stamp, used again and again in five different ink colors, fills this entire card front edge to edge, no gaps of plain white left anywhere.
Purple, rust, gold, and sage leaves overlap slightly against a black matted panel, with “Thanksgiving wishes” sitting front and center in two different lettering styles.
One stamp, five ink pads, and a little overlap is all it takes to build a background pattern that looks custom designed.