16 DIY Clay Stamps Ideas for Handmade Tags, Ornaments, and Gifts

A single stamp can turn a plain scrap of clay into a tiny piece of art, and once you start carving your own, it’s hard to stop at just one.
That’s the pull behind DIY clay stamps: a small tool, a few minutes of pressing, and suddenly a blank round of clay has a squirrel mid-run, a fern sprig, or a hand-lettered “Noel” sitting right on the surface.
Some of these ideas lean into carved detail, like the wreath of tiny five-petal flowers or the deep grooves on a leaping fox.
Others keep things simple and let paint or clay color do the heavy lifting, the way a single wildflower sprig turns into nine completely different looks depending on the palette behind it.
Whether you’re making ornaments, gift tags, or a whole matching set, these ideas show just how far one well carved stamp can go. Grab your clay, pick a shape, and see which one you want to try first.
1. Fall Silhouette DIY Clay Stamps for a Full Woodland Set
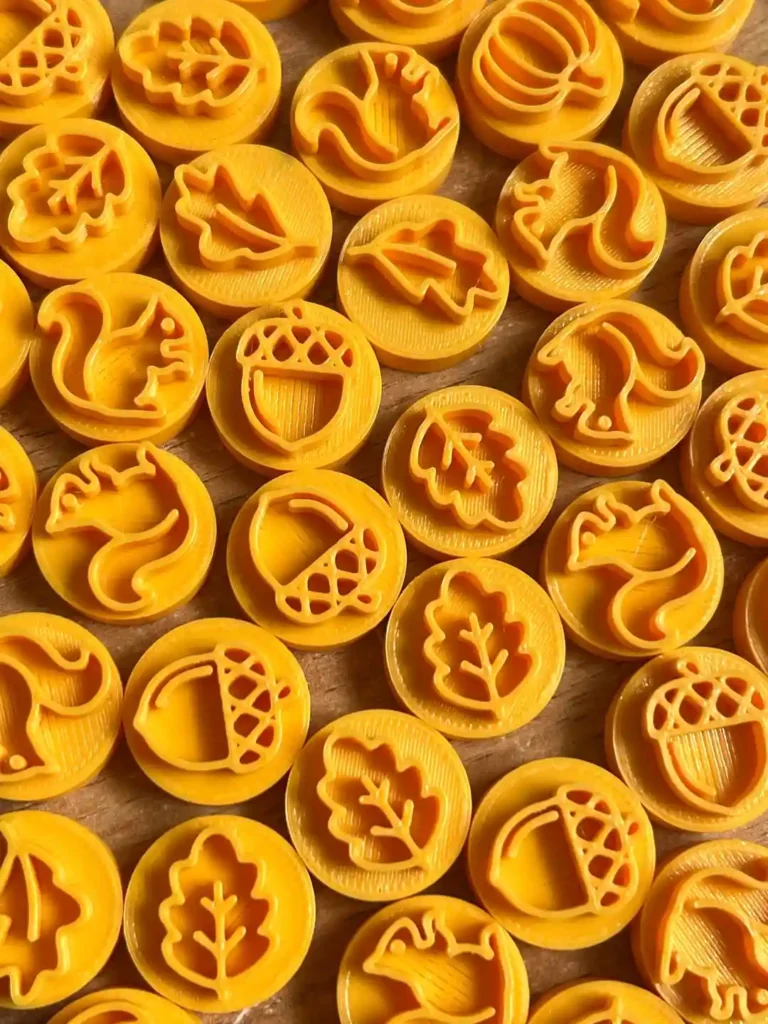
Squirrels, oak leaves, and acorns turn a single afternoon of carving into a matching collection you can press into ornaments, tags, or coasters.
What makes this set work is the outline style: every stamp uses clean, single-line silhouettes instead of heavy detail, so the imprint stays crisp even in soft polymer or air dry clay.
Carve three or four shapes from the same “family” (leaf, nut, animal) and the set instantly reads as intentional rather than random. Keep the lines shallow and even so pressing doesn’t drag the clay.
Good shapes to start with:
- A simple oak or maple leaf outline
- An acorn with a textured cap
- A running or sitting animal silhouette
- One “filler” shape like a small leaf sprig
Once you have three shapes carved, the set basically designs itself.
2. Carved Wooden Stamps for Botanical Christmas Ornaments
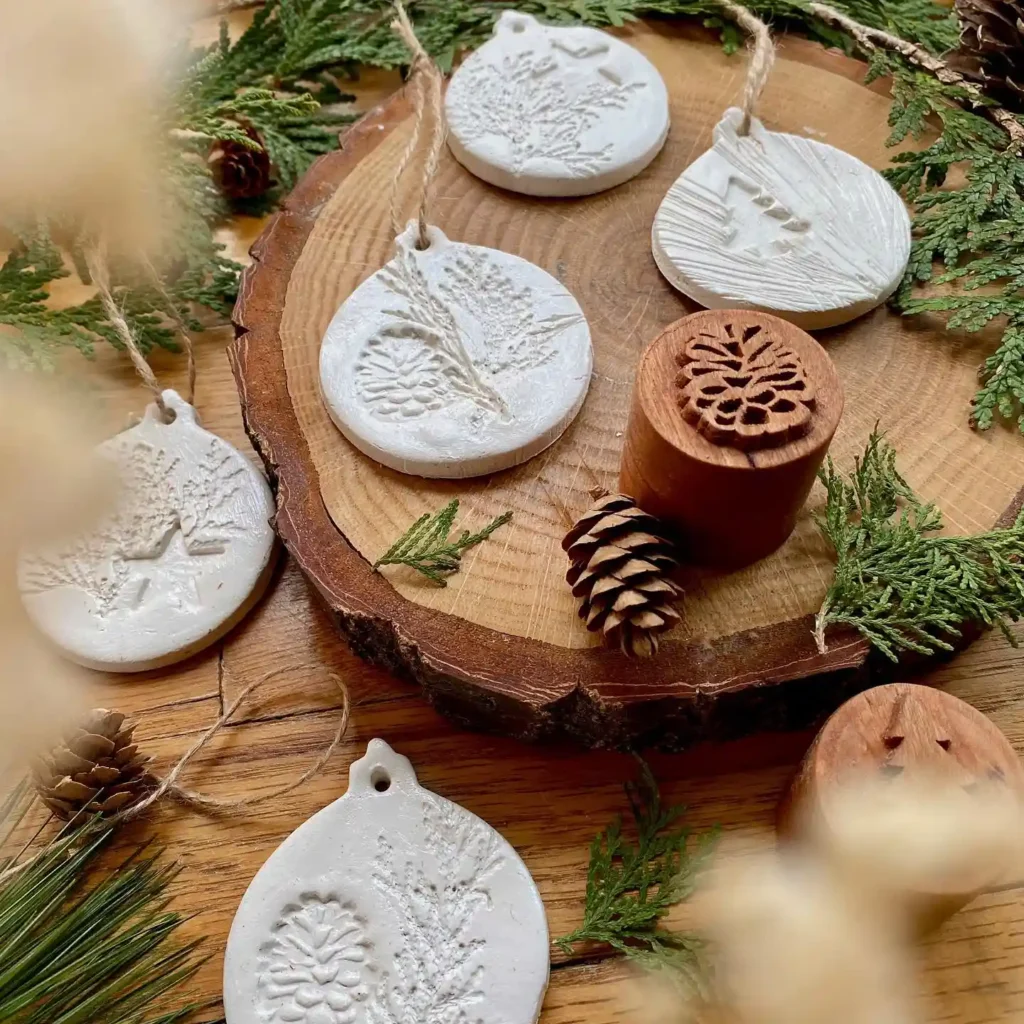
Real pine, tiny pinecones, and a hand-carved wooden pinecone stamp come together here to make ornaments that look foraged rather than store bought.
The stamp itself is carved into a small wood dowel, which gives a much deeper, more textured impression than a flat plastic stamp would.
Here’s how to get this same layered look at home.
Cut your clay into a round or drop shape and poke a hanging hole before stamping.
Press your main botanical stamp firmly, then lift straight up without twisting.
Layer in one smaller accent stamp before the clay firms up.
Let the pieces dry flat so the ornament doesn’t curl at the edges.
3. DIY Clay Stamps in Miniature: Wax Testers vs. the Full Slab
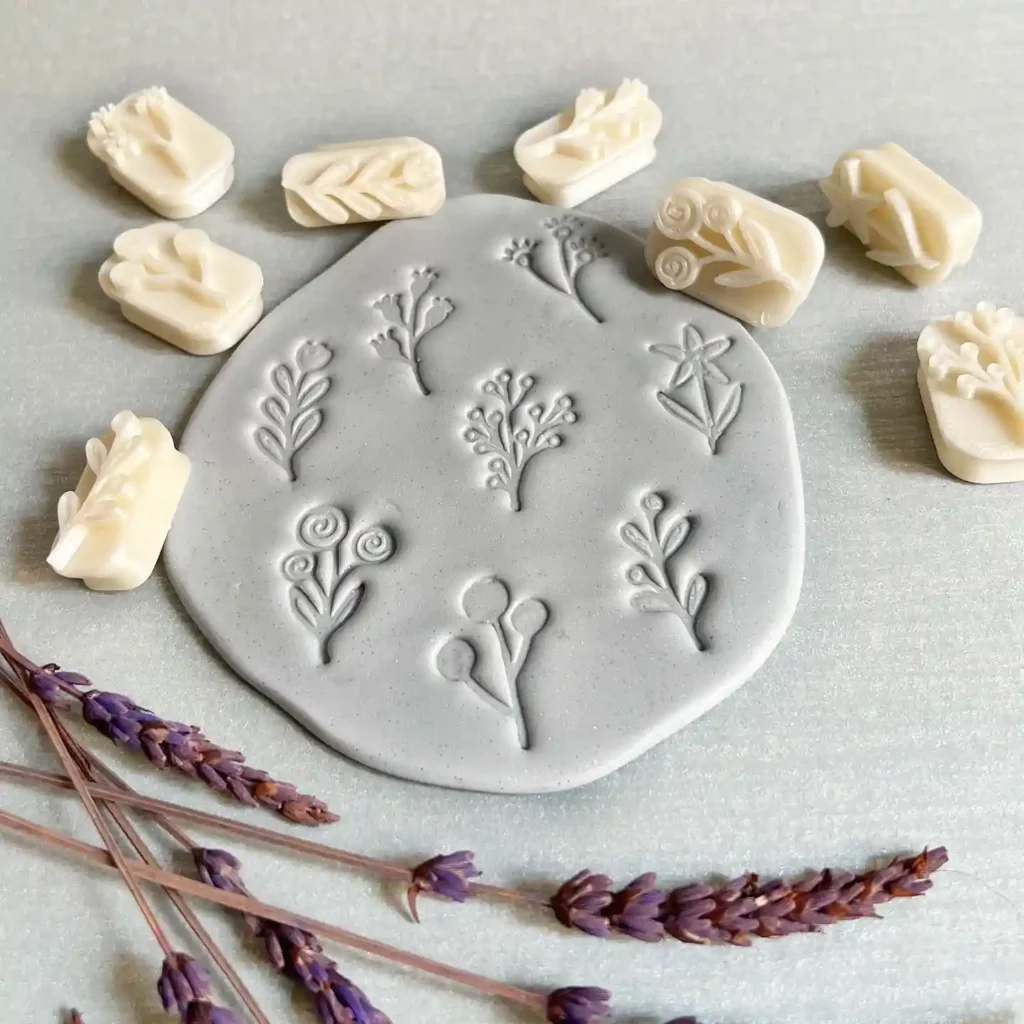
Small stamp heads and the impressions they leave don’t always look the same side by side, and this pairing shows exactly why testing matters.
Each mini stamp was pressed first into wax to check the design, then arranged together on one clay slab to see how the motifs read as a set.
| Testing in Wax | Stamping in Clay |
|---|---|
| Shows fine detail like veins and petal edges clearly. | Softer edges, more forgiving of a slightly off angle. |
| Quick way to check a new stamp before committing. | Final result, ready to trim, dry, and finish. |
If you carve your own stamps, press a test into a soft wax bar first. It saves you from finding out a design is too shallow only after it’s already baked.
4. Raw Clay Stamps for Teacups, Fans, and Flower Wreaths
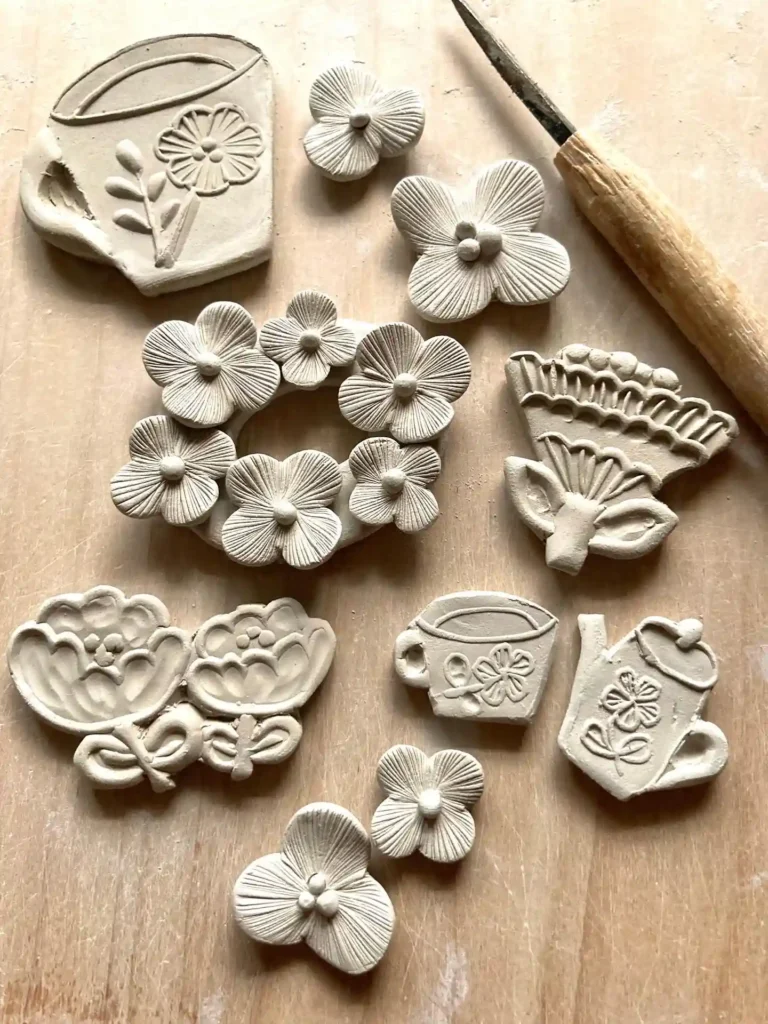
Watching a stamp mid-carve tells you more than the finished piece ever could. Here, a ribbed loop tool is still resting next to a half-finished flower wreath, a floral teacup, and a folding fan shape, all in unfired gray clay.
The wreath alone is built from eight tiny five-petal flowers pressed edge to edge, which is a slower but sturdier way to build a ring shape than carving it as one solid piece.
💡 Quick Tip
Build a wreath stamp from several small flower pieces instead of one large carved ring. It holds detail better and is far less likely to crack while drying.
The teacup and watering can shapes work the same way: carve the vessel outline first, then add a tiny floral stamp on the body afterward so the two textures don’t fight each other.
5. A Look Inside a Carved DIY Clay Stamps Collection
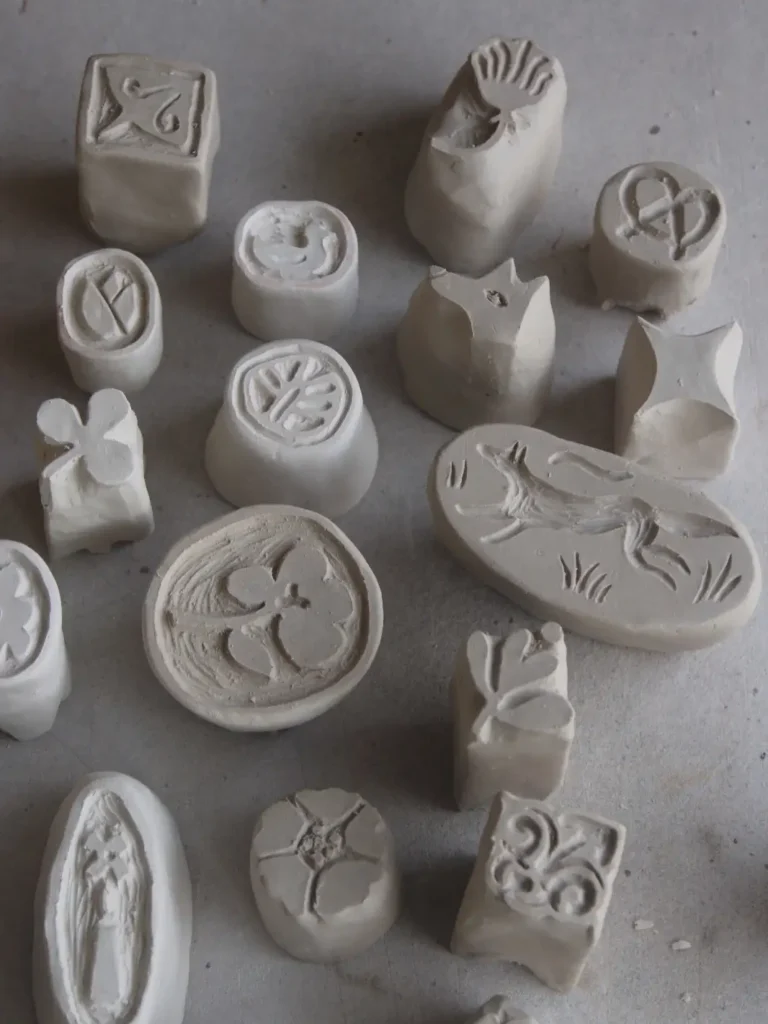
Spread out and unfired, this batch shows just how different one carver’s stamp heads can be from each other.
A leaping fox stretches across an oval base, a cluster of clover sits on a short block, and a robed figure runs the length of a narrow oval, all cut from the same gray clay.
Notice the base shapes are kept plain, round, oval, or a simple block. That’s intentional. A wild base shape distracts from the carved design once you’re holding it to stamp.
6. Everyday Icon Stamps: Bikes, Hedgehogs, and Fish in Odd Shapes
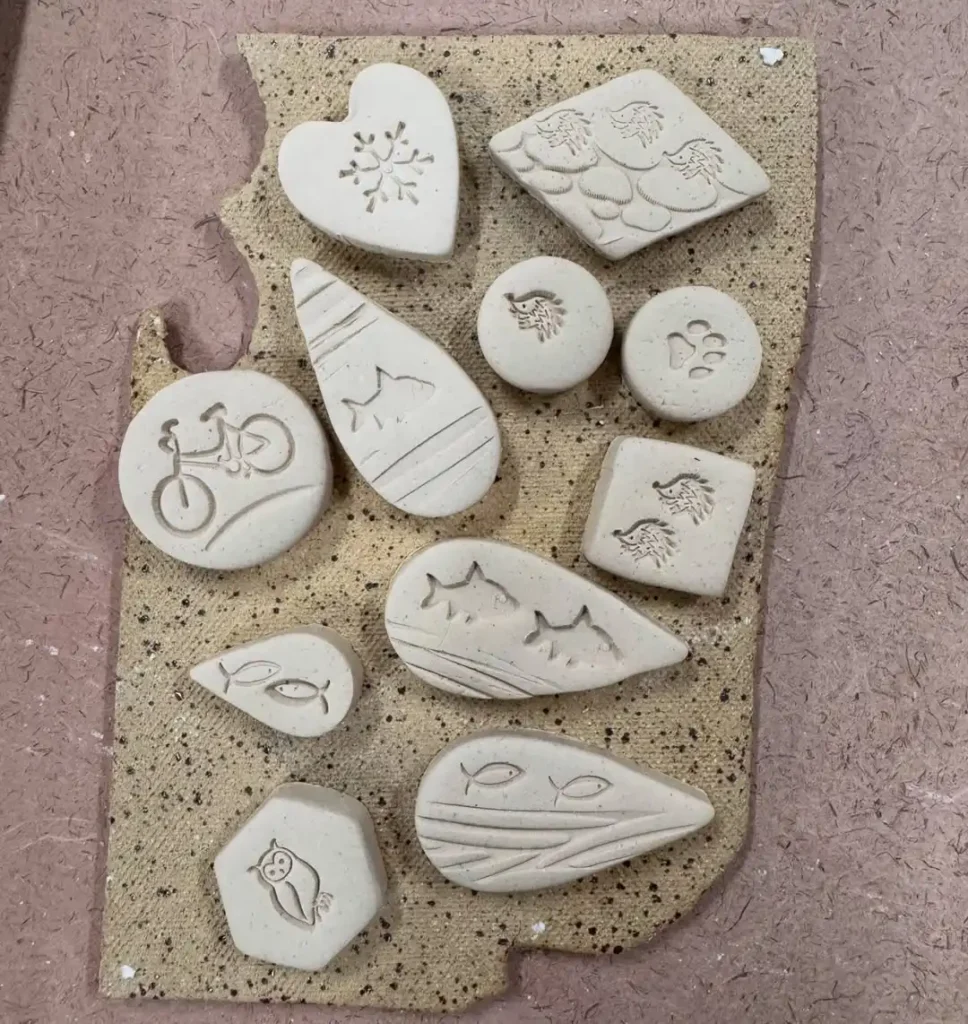
A bicycle, a paw print, an owl, and a school of tiny fish, each one cut into its own quirky shape instead of a plain circle. That’s the real trick in this batch.
A heart holds a snowflake, a hexagon holds an owl, and a long teardrop holds two swimming fish. Matching the shape to the icon makes each piece feel designed on purpose.
Recreate this look
A paw print or a bike works well because the lines stay simple even at a small size.
7. Painted DIY Clay Stamps: Fern and Lavender Tags Two Ways
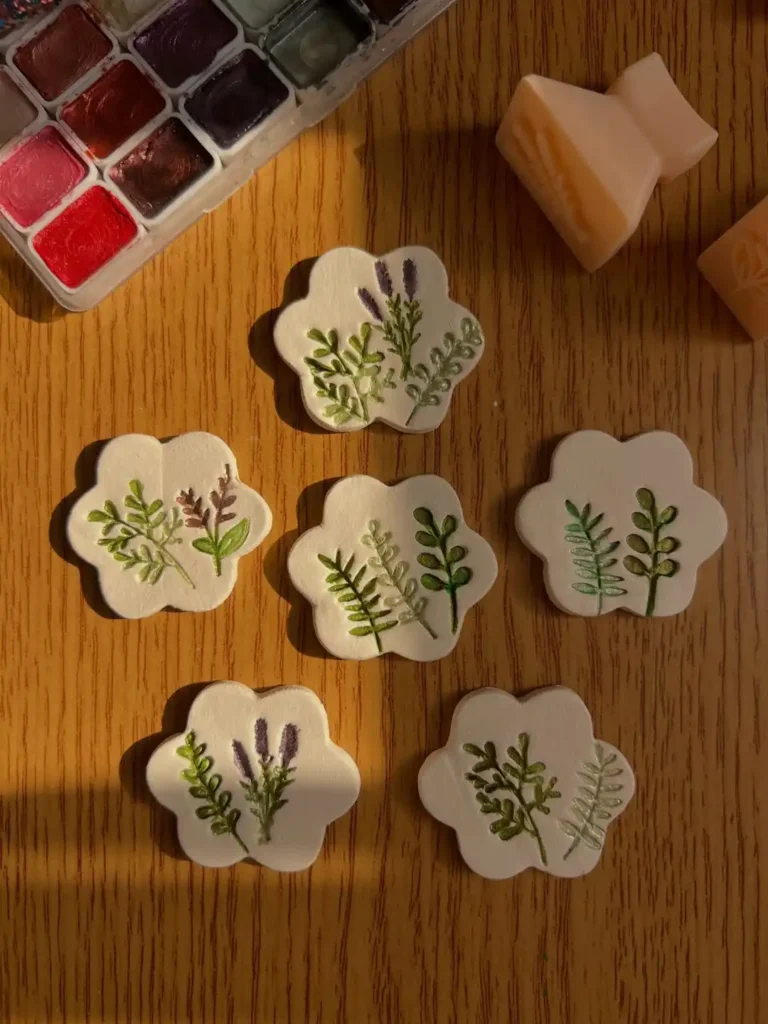
Watercolor changes everything about a stamped design, and this flower-shaped tag set proves it.
The same fern and lavender stamp was used on every piece, but hand painting each sprig in different greens and purples makes no two tags look identical.
Plain cream clay with the fern and lavender impression left raw.
Watercolor greens and purples fill the grooves, giving each tag its own character.
Wait until the clay is fully dry before painting, then use a thin brush and let the stamped lines guide your strokes instead of trying to paint freehand over them.
8. Stamped Word Tags and Tiny House Shapes for Gift Giving
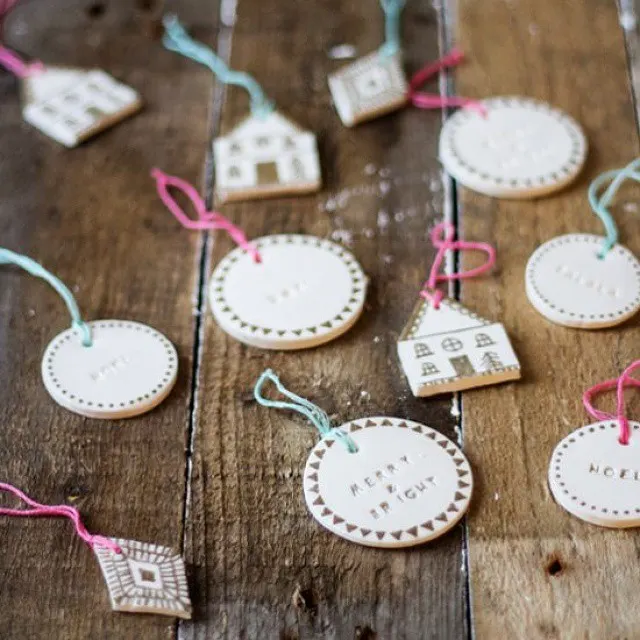
Words turn a plain clay tag into a keepsake, and this batch leans into that with names, “Noel,” and “Merry & Bright” stamped straight into rounds and tiny house cutouts.
A dotted triangle border does a lot of the visual work here, framing the text without competing with it.
Use individual letter stamps and press slowly, one letter at a time.
Add a simple border stamp to frame short words.
Pressing all the letters as one solid stamp block.
Using long words that won’t fit a small tag.
House shapes work well as a small side project once the round tags are drying, since they use the same stamping tools in miniature.
9. Bright Wildflower DIY Clay Stamps in a Coaster Grid
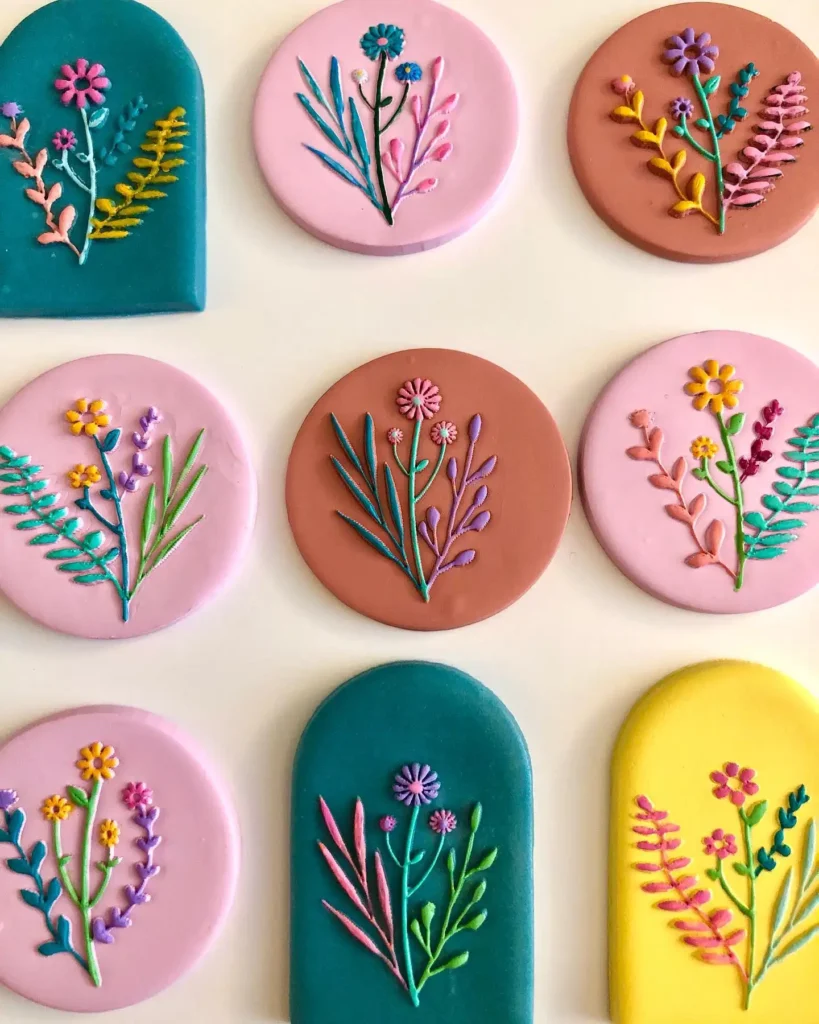
Nine little arches and circles, each in a different jewel tone and every one stamped with the same wildflower sprig, then hand painted in a completely different palette.
Laid out together, they read almost like a color chart for one single stamp design.
One good stamp design can carry a whole set. The variety comes from the clay color and the paint, not from carving nine different stamps.
If you only have time to carve one detailed floral stamp, this is the move. Mix a handful of clay colors, stamp them all the same way, then let paint and background color do the rest of the work.
10. Nature-Inspired Leaf and Botanical Clay Stamps
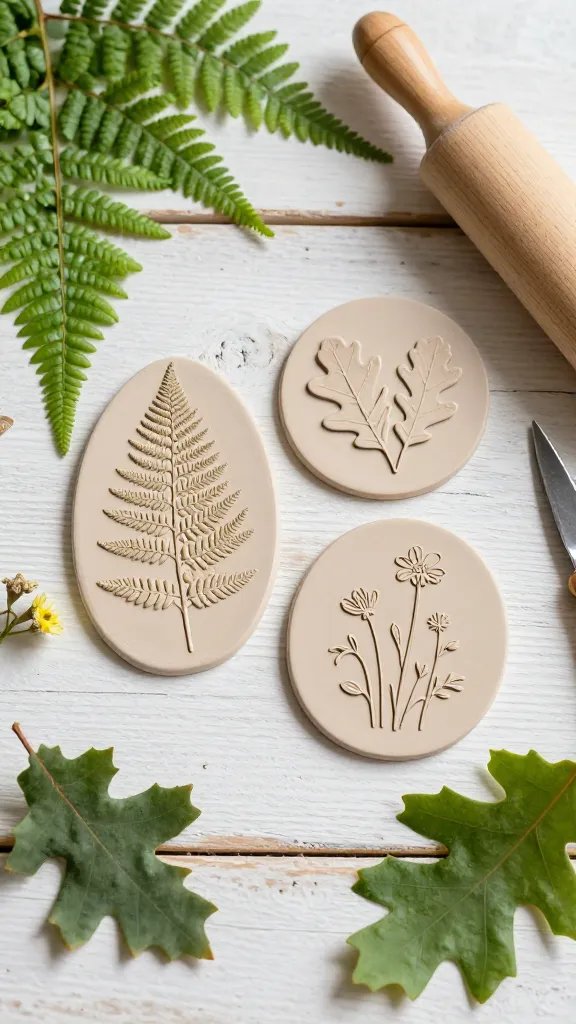
These nature-inspired stamps bring the organic beauty of the outdoors right to your craft table, and they’re absolutely perfect for creating that modern farmhouse aesthetic everyone loves.
Materials Needed
- Air-dry or polymer clay
- Fresh leaves, flowers, or ferns with interesting textures
- Rolling pin or clay roller
- Craft knife
- Small wooden blocks or cork pieces for handles
How to Make It
Roll your clay out to about half an inch thick, then press your chosen botanical element firmly into the surface.
Carefully remove the leaf to reveal its beautiful imprint, then cut around the design leaving a border.
Attach your stamped clay piece to a wooden block handle, let it cure completely, and you’ve got yourself a gorgeous botanical stamp.
These work beautifully on fabric napkins, handmade paper, and even on wet pottery before firing. Trust me, your Instagram feed will thank you for the gorgeous content these create.
11. Geometric Pattern Stamps With Everyday Objects
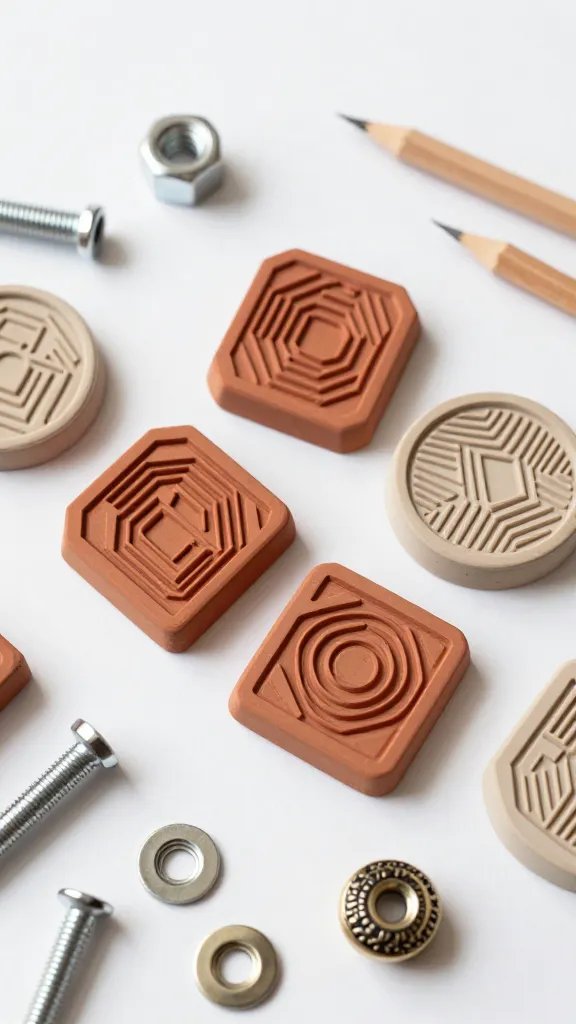
Who knew that random household items could become the coolest geometric stamp makers?
By pressing things like screws, bolts, textured buttons, and even the ends of paintbrushes into clay, you can create modern, architectural patterns that look seriously professional.
What You’ll Need
- Polymer clay in your choice of color
- Hardware items like bolt heads, nuts, and washers
- Textured buttons or jewelry findings
- Pencils with geometric erasers
- Super glue
- Bottle caps or film canisters for handles
Simply press your chosen object into a thick piece of clay to create the pattern, trim it into a neat square or circle, and attach it to your handle.
The repetitive geometric designs these create are perfect for modern gift wrap, minimalist greeting cards, or adding borders to art journal pages.
You can even mix and match different geometric stamps to create complex patterns that look like expensive wallpaper designs.
12. Personalized Initial and Monogram Stamps
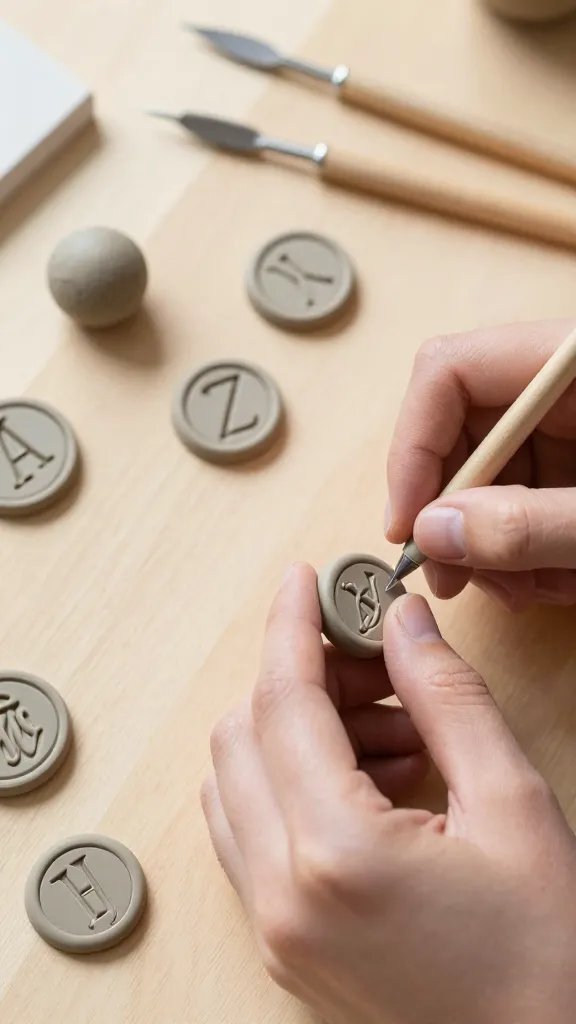
There’s something incredibly satisfying about stamping your personal mark onto your creations.
Custom initial stamps add that handmade-with-love touch to everything from pottery pieces to leather journals, and they make amazing gifts for friends who love personalized items.
Creating Your Monogram Stamp
You have two options here: carve your initial backward into the clay surface using clay carving tools, or use letter stamps to press into the clay creating a raised monogram.
The carved version gives you an embossed look when stamped, while the pressed version creates a debossed effect.
Roll out your clay, create your backward letter or monogram design, add a comfortable handle, and cure according to your clay type’s instructions.
These stamps are perfect for marking handmade pottery, customizing leather goods, or adding a professional signature to your handmade paper crafts. FYI, these make ridiculously thoughtful housewarming or wedding gifts.
13. Whimsical Doodle and Illustration Stamps
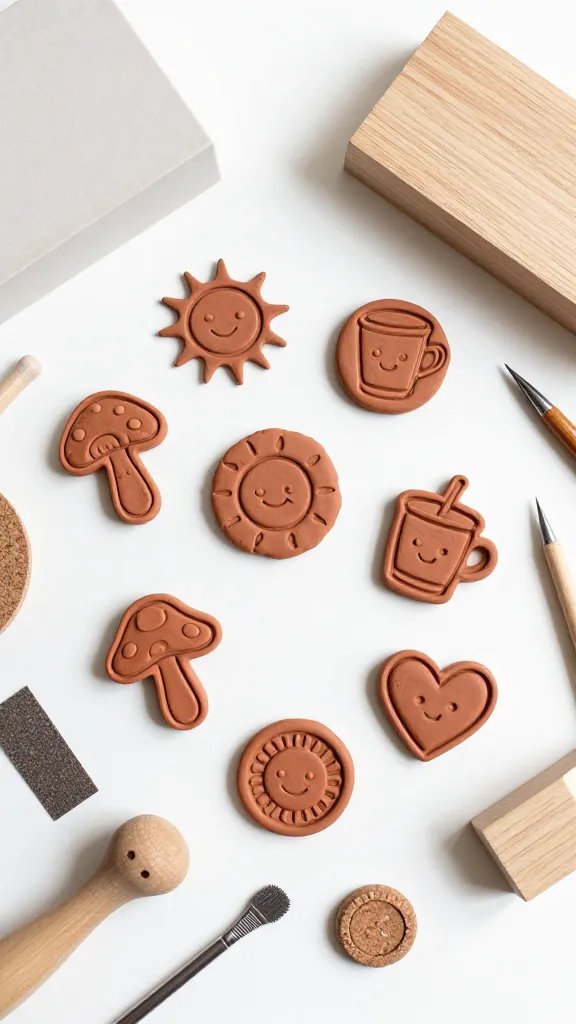
If you love quirky illustrations and hand-drawn vibes, you’ll absolutely adore making stamps from your own doodles.
Think tiny mushrooms, smiling suns, coffee cups, hearts with faces, or whatever brings you joy when you’re mindlessly sketching during meetings.
Materials You’ll Need
- Soft polymer or air-dry clay
- Clay sculpting tools or toothpicks
- Pencil and paper for planning
- Wooden blocks or wine corks for handles
- Sandpaper for smoothing edges
The Process
Sketch your doodle on paper first to get the proportions right, remembering it needs to be reversed.
Press or carve your design into the clay, going deep enough that the stamp will leave a clear impression.
Once cured, these adorable stamps add personality to everything from planner pages to fabric tote bags.
The beauty here is that imperfections actually add to the charm. Your hand-drawn aesthetic will shine through, making each stamped impression feel authentically handmade rather than mass-produced.
14. Vintage Lace Texture Clay Stamps
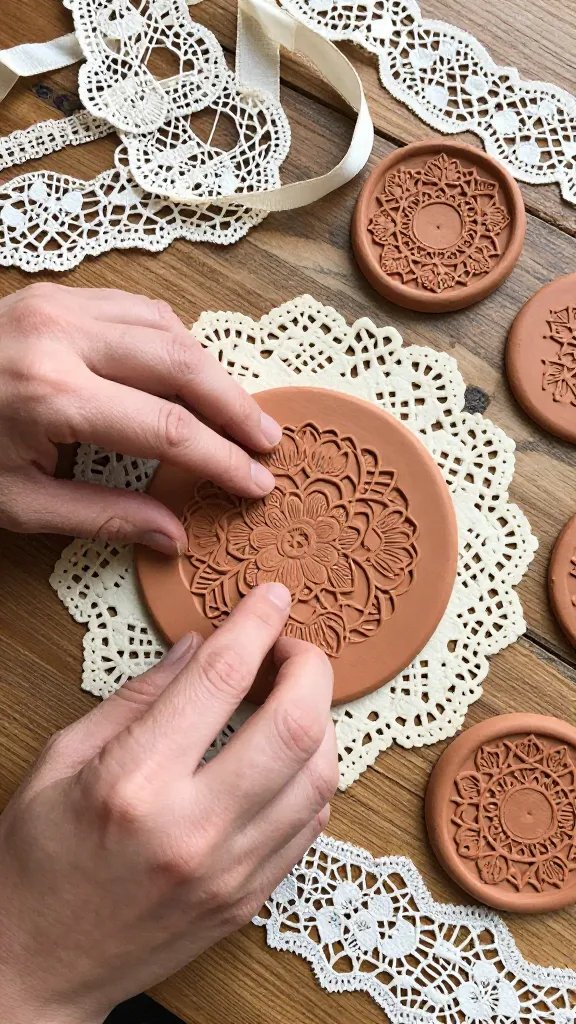
Want to capture that romantic, vintage cottage aesthetic in your crafts? Lace-textured stamps are your new best friend.
By pressing actual lace, doilies, or crocheted pieces into clay, you create stamps that reproduce those intricate, delicate patterns perfectly every single time.
Hunt through thrift stores for vintage lace trims, old doilies, or textured ribbon. Press these beauties firmly into thick clay, carefully peel away the fabric, and you’ve preserved that gorgeous pattern forever.
Mount your textured clay onto sturdy handles and let them cure completely.
Where to Use Them
- Wedding invitation envelopes
- Shabby chic furniture makeovers
- Handmade soap packaging
- Mixed media art projects
- Scrapbook borders and accents
These stamps bring instant elegance and a touch of grandma’s attic charm to any project. Seriously, they’re perfect for anyone who loves that romantic, vintage-inspired aesthetic.
15. Food and Kitchen-Themed Clay Stamps
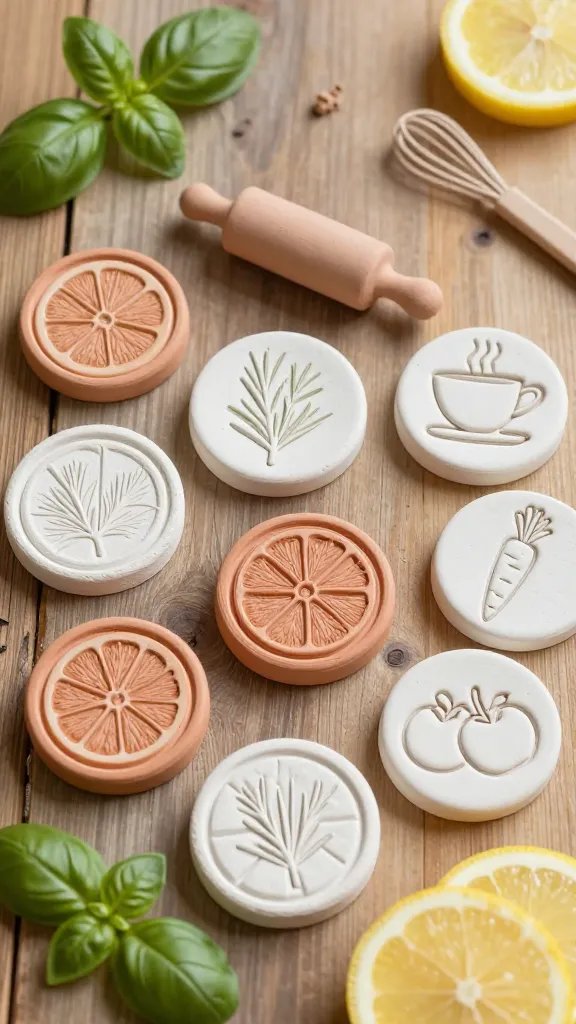
Calling all foodies and kitchen craft enthusiasts! Creating stamps shaped like vegetables, fruits, coffee beans, or kitchen utensils adds such a playful touch to culinary-themed projects.
These are especially fun for customizing tea towels, recipe cards, or packaging for homemade food gifts.
Fun Design Ideas
- Cross-sections of citrus fruits
- Tiny rolling pins or whisks
- Coffee cups or tea pots
- Herb leaves like rosemary or basil
- Simple vegetable silhouettes
You can either carve these designs freehand into your clay or use actual small items as inspiration. A real coffee bean pressed into clay creates an amazingly realistic stamp.
Same goes for pressing citrus slice-shaped cookie cutters into clay and adding segment details with a toothpick.
These stamps transform plain kitchen textiles into personalized pieces that make cooking feel more special.
They’re also fantastic for farmers market vendors or anyone selling homemade jams, honey, or baked goods who wants custom packaging.
16. Celestial and Mystical Symbol Stamps
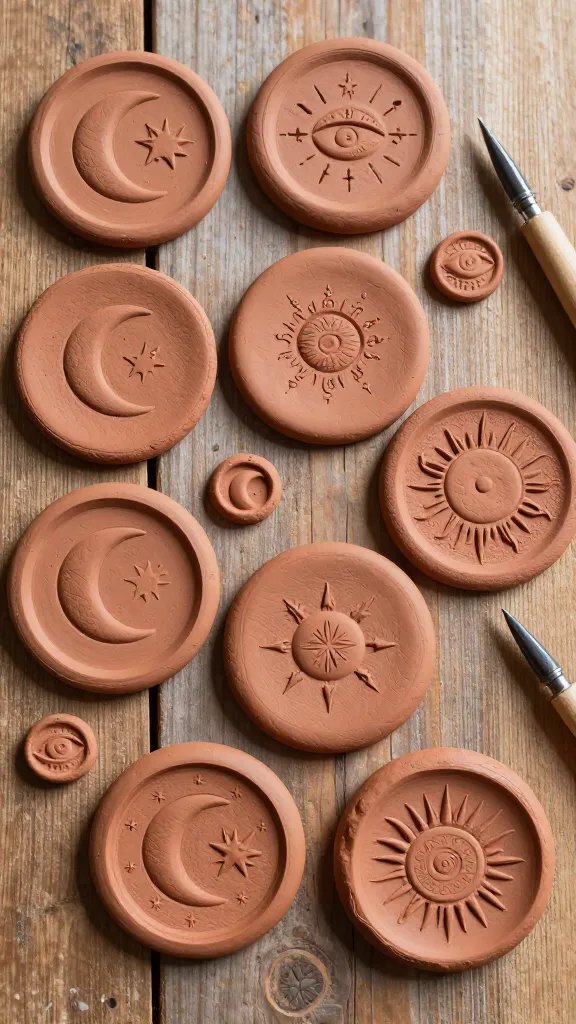
Moon phases, stars, suns, and mystical symbols are having such a moment right now, and creating your own celestial stamp collection lets you ride that cosmic wave.
These stamps add magical vibes to journals, tarot card storage boxes, candle labels, or any project that needs a touch of witchy wonder.
Symbol Ideas to Stamp
- Crescent moons and full moons
- Simple star bursts
- Celestial eyes
- Zodiac constellation patterns
- Crystal shapes
- Simple sun rays
Carve or mold these symbols into individual stamps, or create one larger stamp featuring multiple celestial elements arranged together.
The combination approach works beautifully for creating repeating patterns on fabric or larger paper projects.
These stamps are perfect for the spiritually-inclined crafter, bullet journal enthusiasts, or anyone decorating their meditation space.
You’ll love how they add instant mystique and personality to whatever you’re creating.
Ready to Start Stamping?
The beauty of DIY clay stamps is that once you make them, you’ve got reusable tools that’ll last for years of crafting adventures.
Whether you’re drawn to botanical prints, geometric patterns, or celestial symbols, there’s a stamp style here calling your name.
Grab some clay, raid your junk drawer for interesting textures, and start creating your custom stamp collection today—your future crafting self will be so grateful you did!