12 DIY Clay Fridge Magnets for a Fun Kitchen Touch

Want to make your fridge more fun on a budget? These DIY Clay Fridge Magnets are an easy, creative way to add instant charm to your kitchen.
I still remember making my first DIY Clay Fridge Magnets on a slow afternoon, using leftover clay to create something simple.
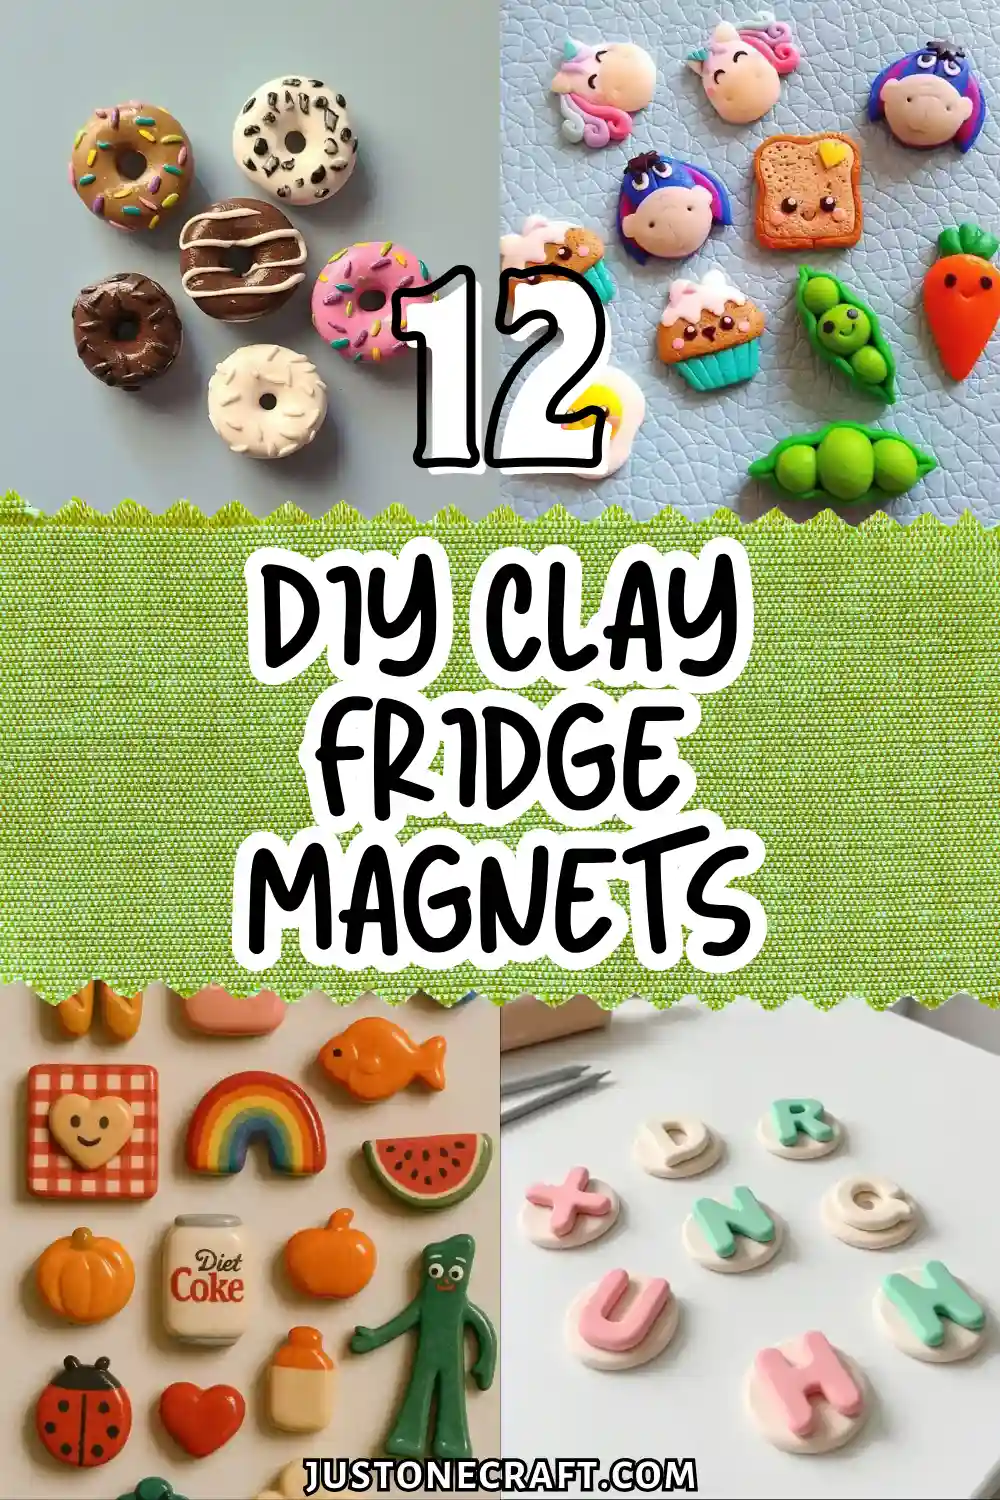
What surprised me was how addictive it became. Each piece felt like a tiny canvas, quick, fun, and rewarding.
If crafting feels overwhelming, this is the perfect start. DIY Clay Fridge Magnets are easy, budget-friendly, and a simple way to add charm to your space.
Build a Whole Flat Lay of Tiny Clay Characters and Everyday Objects
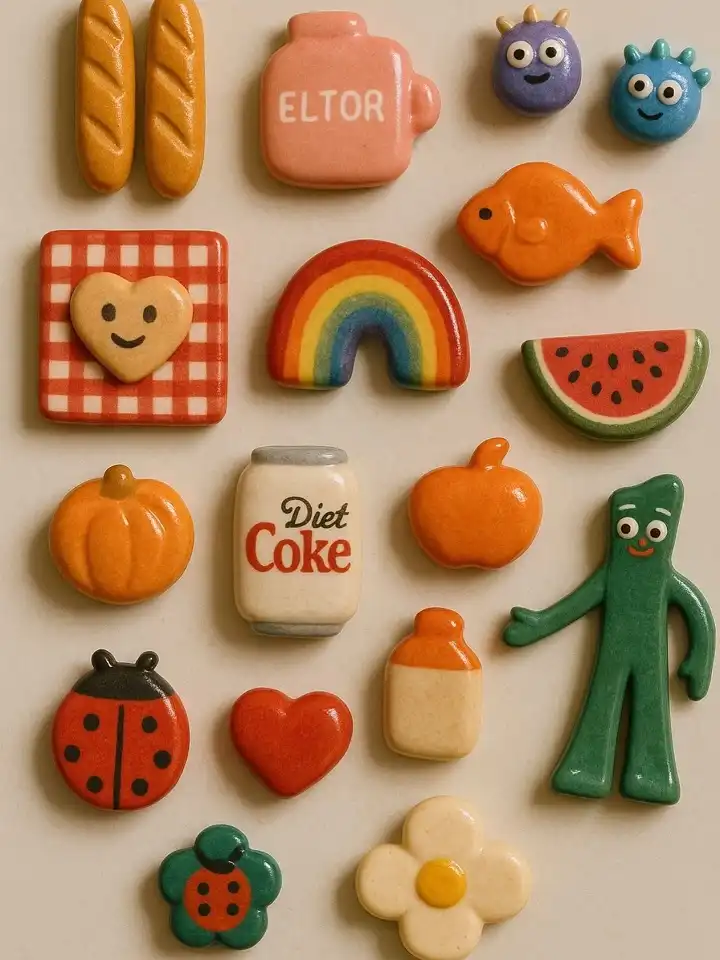
This board is a good reminder that a magnet collection does not need one theme to feel cohesive.
Look closely and you will spot a nostalgic soda can, a pair of baguettes, googly-eyed monster buddies, a smiling heart on gingham, a rainbow, and a little green figure with jointed limbs, all sitting together on the same cream backdrop.
What ties it all together is not the subject, it is the glossy glaze and the slightly rounded, hand-formed edges on every piece.
If you are just starting out, this layout works as a shopping list for your first batch. Pick a mix of categories so your fridge does not end up one-note:
- One food shape, like a fruit slice or bread loaf
- One character face with simple dot eyes
- One symbol, like a heart or flower
- One object from your own kitchen or pantry
Glaze everything the same way and the whole set will read as a matched collection, even though nothing repeats.
Layer Clay Balls to Sculpt a Standout 3D Animal Figure
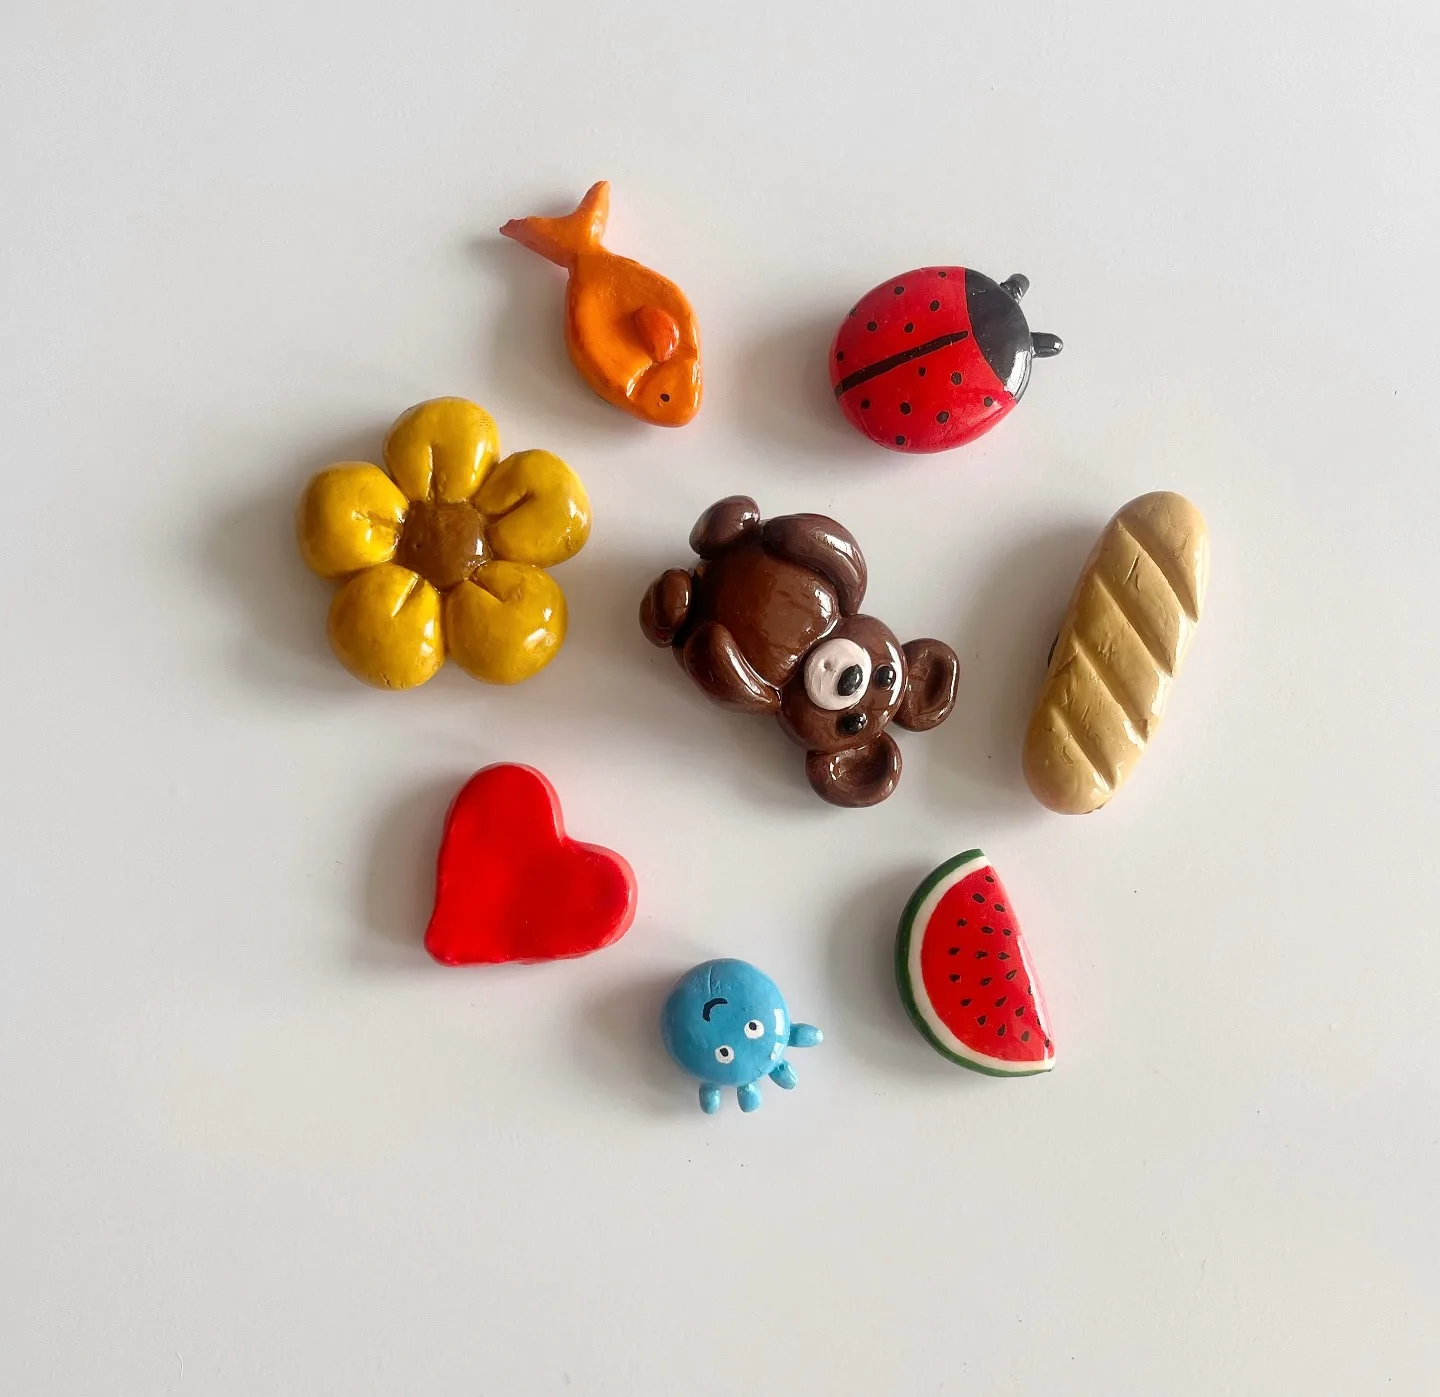
A slightly uneven paw is what makes the little bear here look hand-built instead of stamped from a mold.
Its ears, snout, and paws are each separate rolled balls pressed onto the body, then blended just enough at the seams to hold together but still keep their rounded shape.
That layering trick is the real skill to borrow from this photo, since it turns a flat blob of clay into something with real dimension.
Try it with any small critter:
- Roll one bigger ball for the body and flatten the base slightly so it sits flat.
- Roll four small balls for legs or paws and press them on at even angles.
- Add a nose, ears, or antennae as tiny separate pieces, using a toothpick to blend the edges.
The tiny blue octopus nearby uses the same idea in miniature, just with thinner rolled arms instead of paws.
Give Faces Personality with Raised Cheeks and Layered Hair Pieces
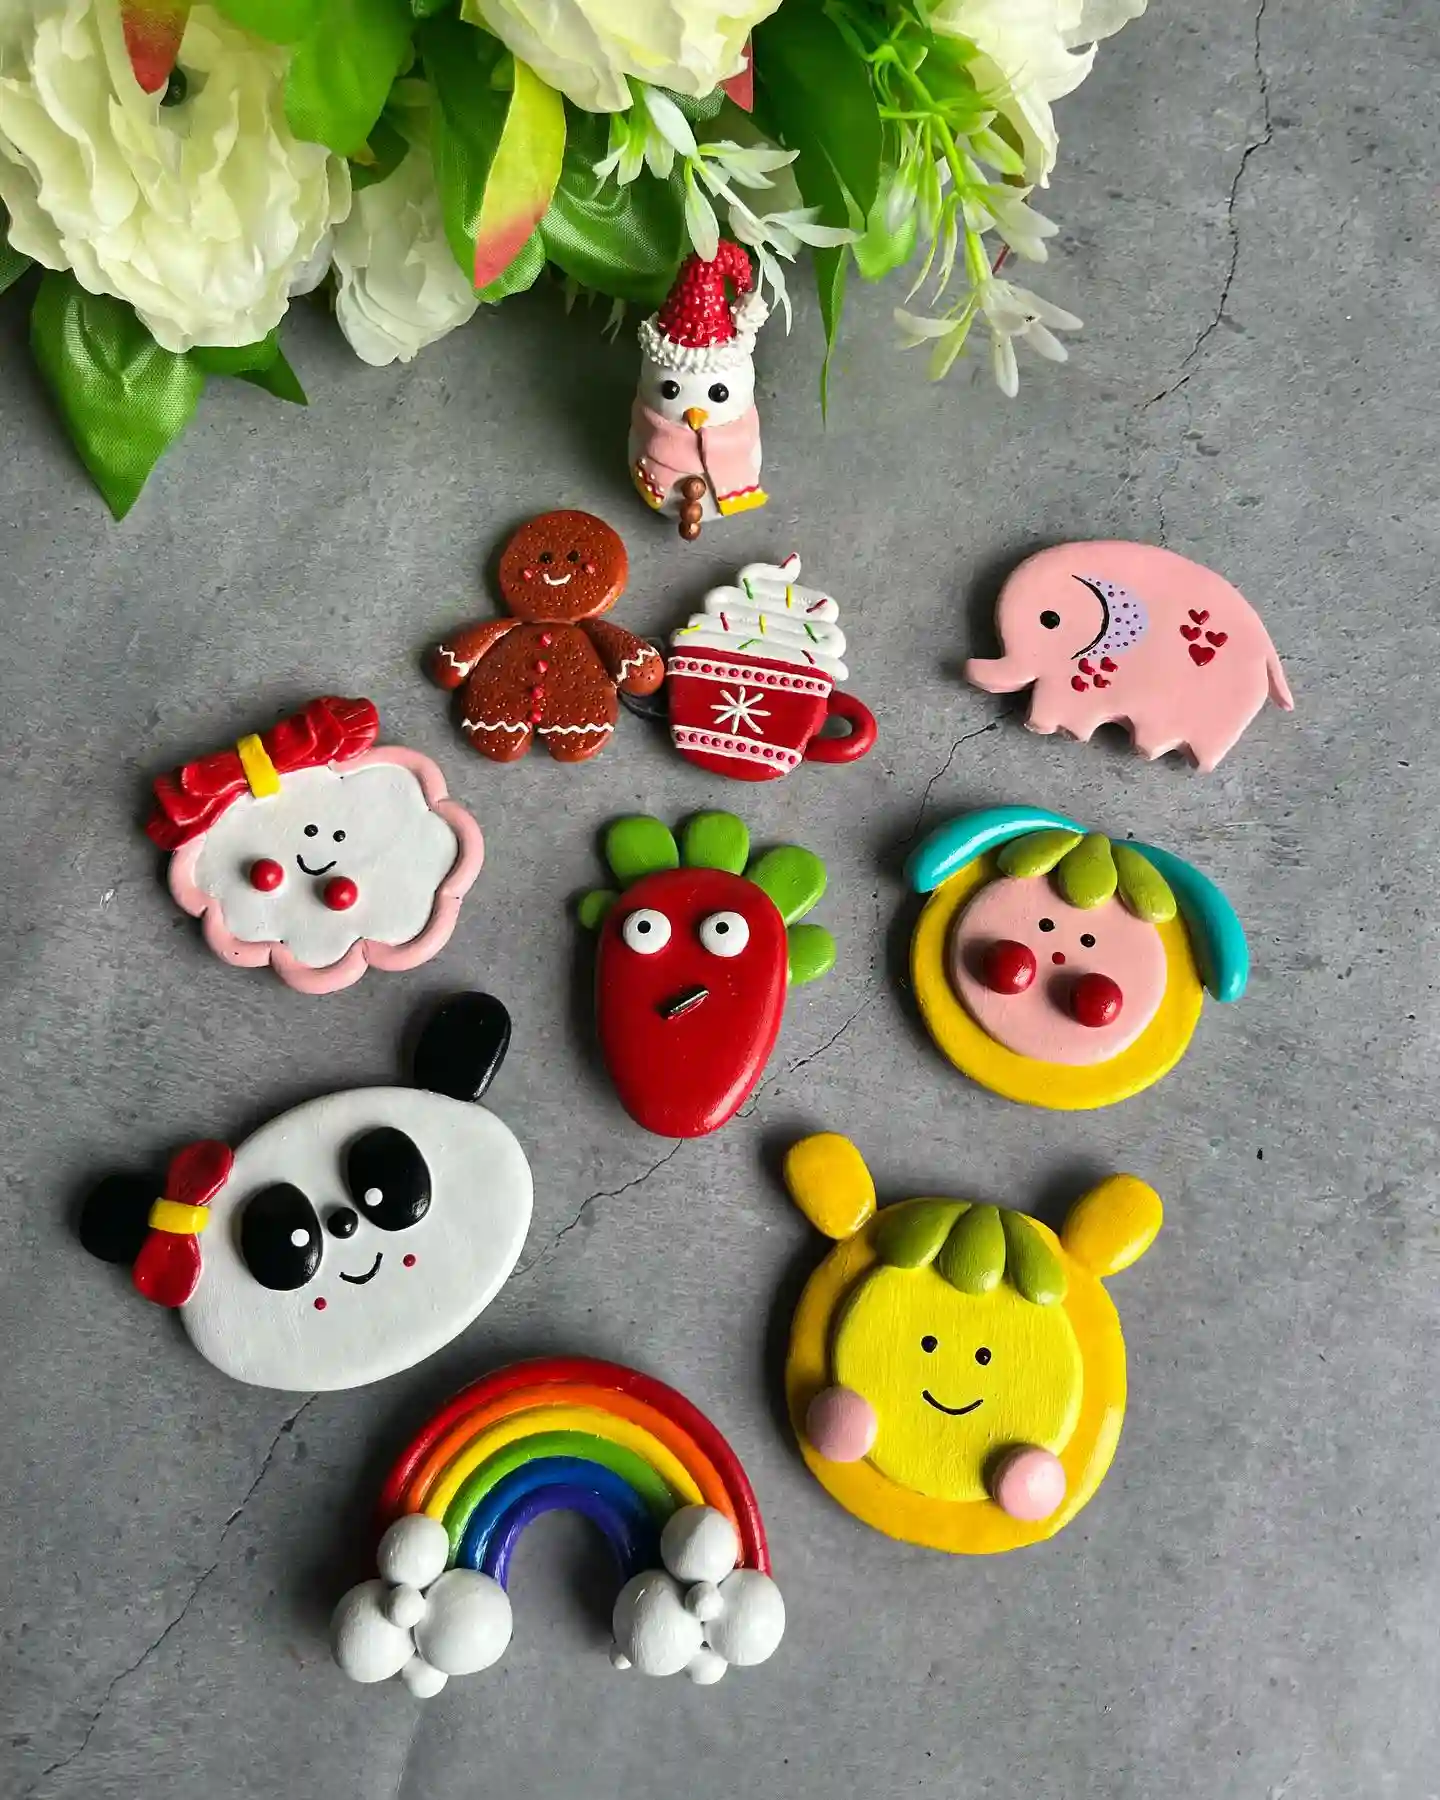
Small round cheeks pressed onto a painted face and thin leaf-shaped strips built up for hair are what make these little character magnets feel alive instead of static.
Look at the pink cloud face or the yellow bunny-eared friend, and you can see two tiny raised dots for blush sitting slightly higher than the flat base, catching the light differently.
That contrast between flat paint and raised clay is an easy trick once you know to look for it.
Here is what is doing the work in this batch:
- Two small clay dots pressed on for cheeks, always a bit uneven for a hand-touched look
- Thin rolled strips layered at the top for hair or petals, angled outward instead of straight up
- Dot eyes painted last, once the raised pieces are already dry
Try it on a plain circle base first before moving to a full character shape.
What to press on for raised features
Add Kawaii Faces with Blush Dots and a Coiled Swirl Technique
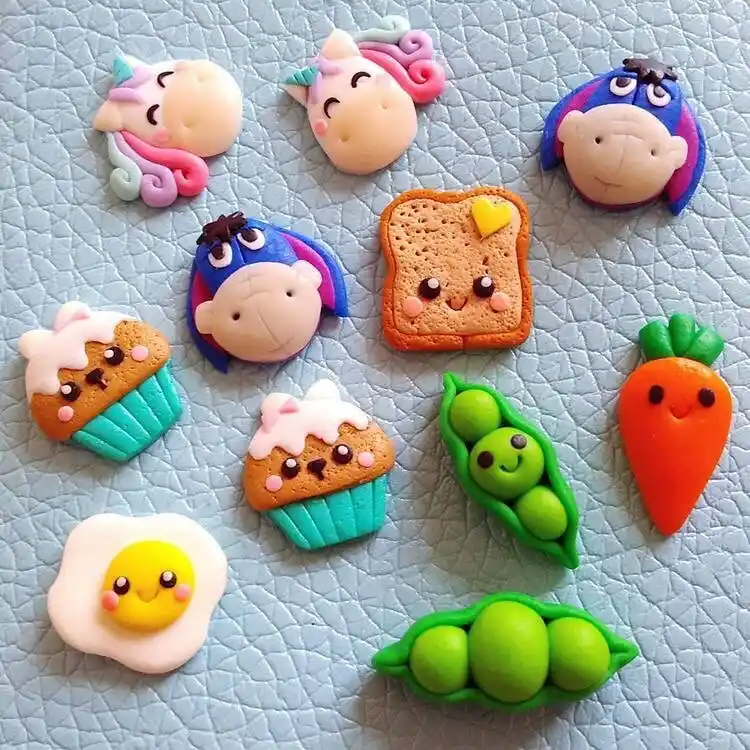
Blush dots and closed happy eyes turn almost any shape into something a kid would beg to keep on the fridge.
What sets this batch apart is the coiled unicorn mane, thin ropes of pastel clay rolled out and curled into loose spirals before they were pressed onto the head. It takes patience but it is not hard clay work, just slow, repetitive rolling.
Notice two different building techniques happening side by side here. The peapod stacks three round balls inside a curved shell for texture through repetition.
The unicorn mane uses long thin coils layered and looped for movement. Both start from the same basic skill, rolling clay into consistent shapes, they just finish differently.
Small pink dots for cheeks and a simple closed-eye smile tie every single piece in this photo together, even the toast and the carrot.
| Coiled Swirl | Stacked Balls |
|---|---|
| Roll a thin rope, curl loosely, press in place. | Roll small even balls, nestle them together. |
| Best for hair, manes, or flowing details. | Best for pods, berries, or clusters. |
Punch a Clean Center Hole for a Realistic Mini Donut Shape
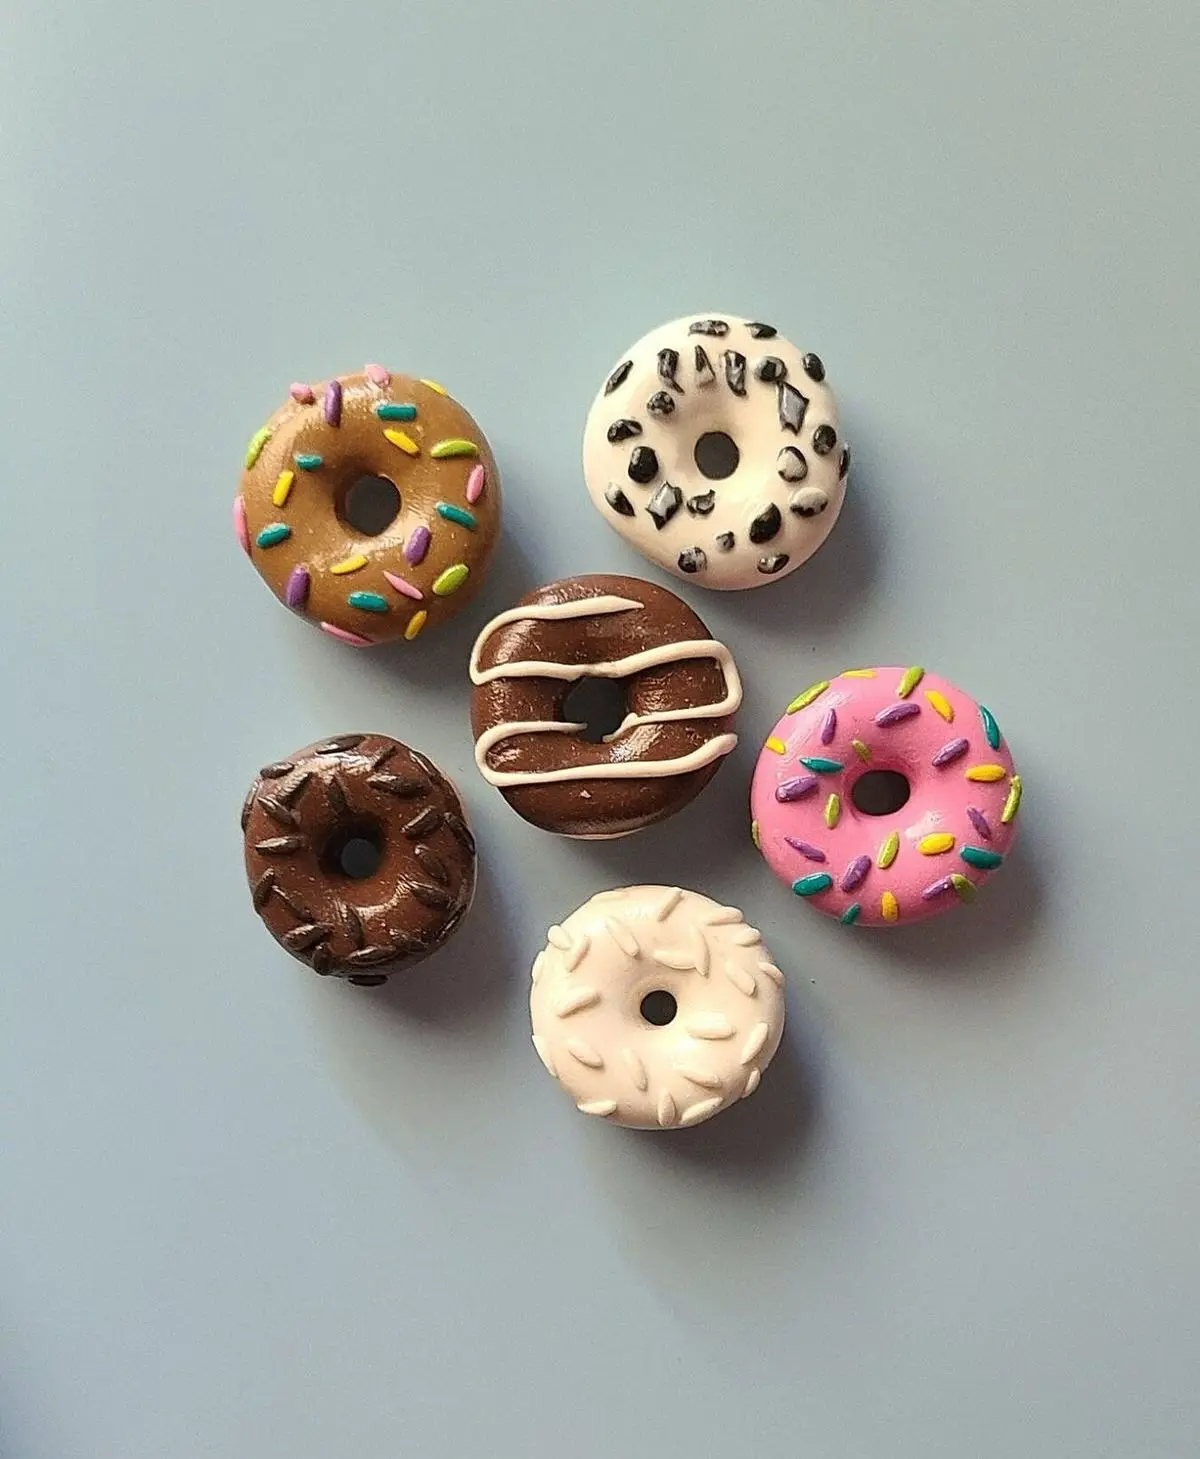
Six donuts, six different toppings, and not one of them looks like it came from the same mold.
That is the trick with this classic dessert shape, the base build is nearly identical every time and all the personality comes from what gets pressed on top, whether that is rolled sprinkle bits, a piped glaze drizzle, or chopped clay “chocolate chunks.”
Here is how to build the base before you get to decorate:
Roll a smooth ball, then flatten it slightly into a puck shape.
Use a round tool handle to press a clean hole through the center.
Add a thin layer of a second clay color on top for the glaze, then press on tiny sprinkle pieces before it sets.
Miniature Succulent Garden Magnets
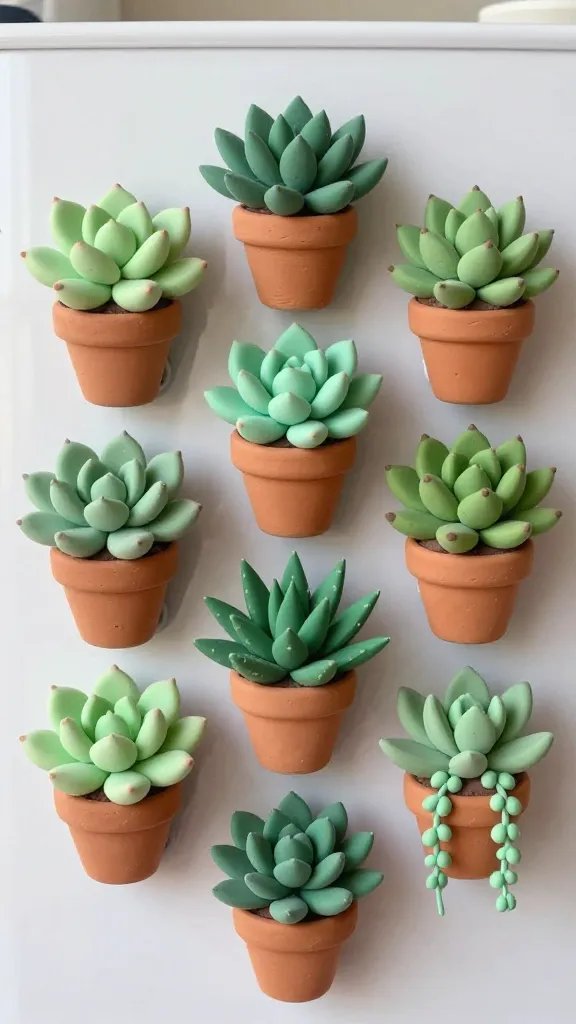
Imagine a collection of tiny succulents clinging to your fridge, bringing that trendy plant-parent vibe without the watering commitment.
These little clay cuties look incredibly realistic with just a few shades of green and some simple shaping techniques.
You can create different varieties—think echeveria rosettes, spiky aloe shapes, and trailing string-of-pearls designs.
Materials Needed
- Polymer clay in various shades of green, plus terracotta or gray for “pots”
- Small round magnets
- Strong craft glue
- Toothpicks or clay tools
- Clear glaze or varnish
How to Make It
Roll tiny teardrop shapes for succulent leaves and arrange them in spiraling rosette patterns.
For potted versions, create miniature terracotta pots from orange-brown clay and nestle your succulents inside.
Add texture to the pots with a toothpick for that authentic ceramic look, then bake according to your clay package instructions.
Once cooled, seal with a light coat of glaze to give them that fresh, dewy appearance real succulents have.
Attach magnets to the back with strong glue, and you’ve got an instant botanical collection that requires zero sunlight.
Colorful Rainbow Cloud Magnets
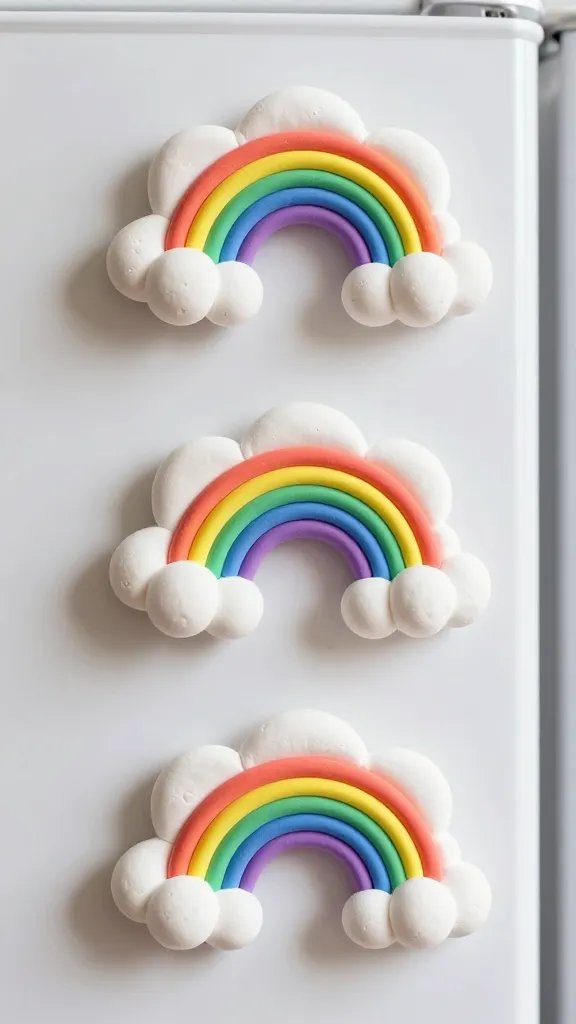
These whimsical little weather systems bring instant happiness every time you grab the milk. Picture puffy white clouds with bright, cheerful rainbows arching beneath them—it’s basically joy in magnet form.
They’re perfect for brightening up a kid’s artwork display or adding playful charm to any kitchen.
Start with white clay shaped into fluffy cloud formations with gentle curves and bumps. Roll thin snakes of clay in rainbow order—red, orange, yellow, green, blue, and purple—and gently press them together before curving into an arch.
Attach the rainbow to your cloud, creating a slight dimensional effect by leaving a tiny gap between them.
Pro Tips
- Add tiny raindrops beneath the cloud using translucent blue clay
- Create sleeping clouds by adding closed eyelashes with black clay
- Make a whole weather family with sun, storm clouds, and lightning bolts
These are absolutely adorable in a nursery or playroom, and honestly, they make adults smile just as much as kids.
Minimalist Geometric Shape Collection
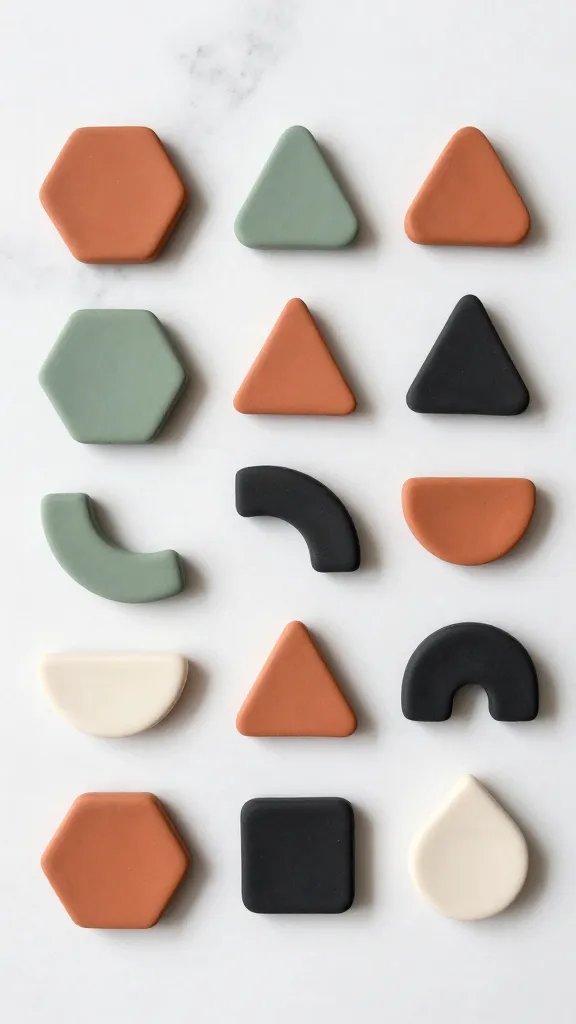
For those who love clean lines and modern aesthetics, these simple geometric magnets are seriously stylish.
Think hexagons, triangles, half-moons, and abstract arches in a curated color palette like terracotta, sage green, cream, and matte black. They look like something straight out of a trendy home decor magazine.
The beauty here is in the simplicity and the color combinations. Roll your clay to an even thickness—about a quarter inch works perfectly—and use cookie cutters or freehand cut your shapes with a craft knife.
You can keep them solid colors or get creative with color blocking by pressing different clay colors together before cutting.
Texture adds major visual interest without complicating the design. Try pressing fabric, lace, or even a kitchen sponge into the clay surface before baking for subtle patterns.
Arrange them on your fridge in clustered groups rather than scattered randomly for that curated, intentional look interior designers love.
Adorable Food and Drink Miniatures
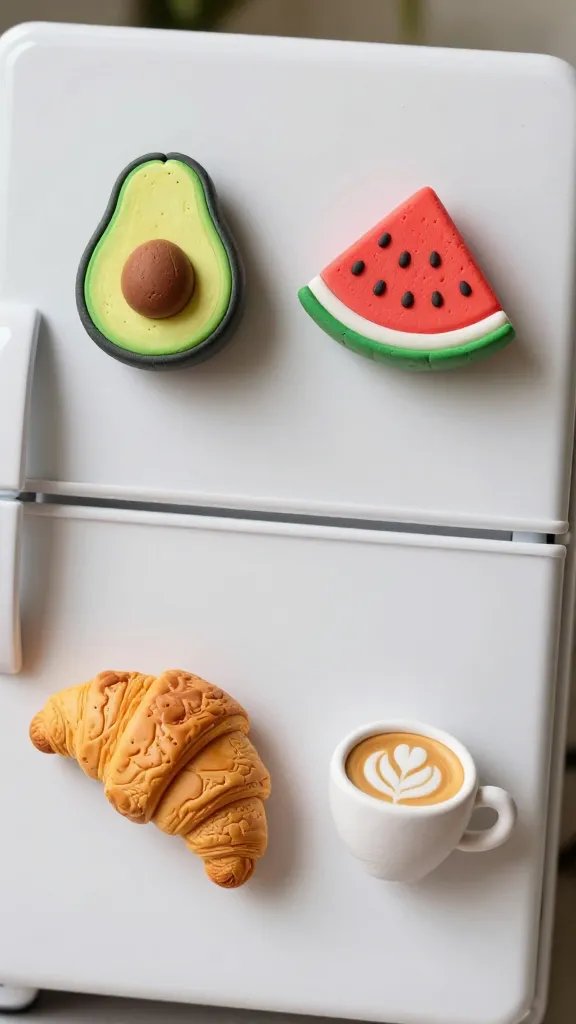
Who wouldn’t want a tiny avocado, a slice of watermelon, or a perfect little latte clinging to their fridge? These food-themed magnets are insanely cute and let you showcase your favorite snacks in permanent, calorie-free form.
The detail work is where these really shine—think sesame seeds on a bagel or foam art on that miniature coffee.
Popular Food Ideas
- Avocado halves with a clay “pit” in the center
- Watermelon slices with tiny black seeds
- Croissants with layered, flaky texture
- Sushi rolls with visible fillings
- Ice cream cones in various flavors
- Coffee cups with latte art on top
Use reference photos to get the colors just right—mixing clays creates more realistic shades than using them straight from the package.
Add dimension with lighter highlights and darker shadows. A toothpick becomes your best friend for adding tiny details like coffee foam swirls or avocado texture.
These make fantastic gifts for foodies, baristas, or anyone who appreciates the adorable miniature aesthetic that’s so popular right now.
Personalized Initial and Name Magnets
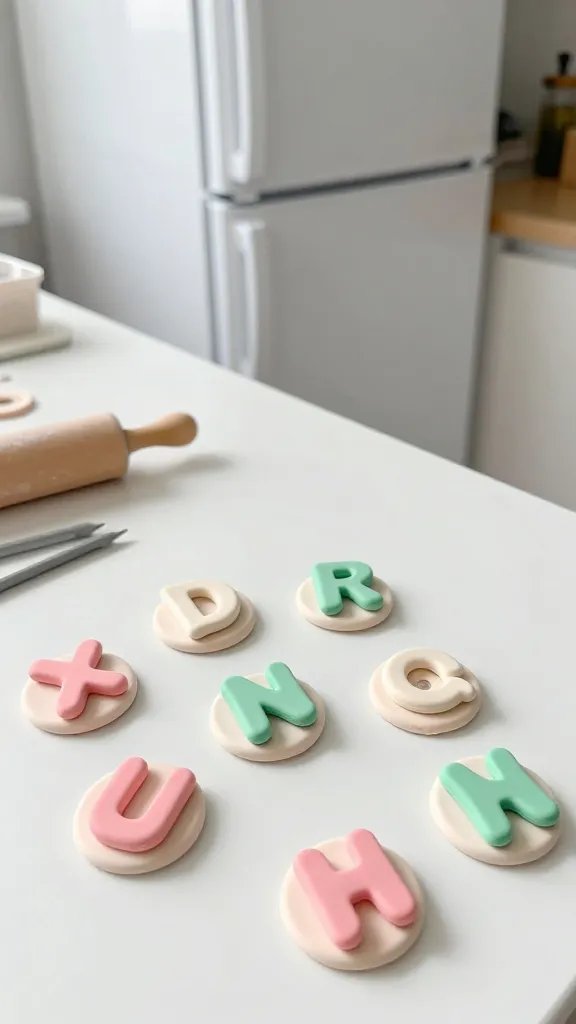
Custom monogram magnets bring a personal touch that generic decor just can’t match.
These are perfect for families who want to label whose artwork is whose, or simply for adding a customized element to your space. You can go elegant with script-style letters or fun and chunky with bold block fonts.
Roll out clay in your chosen color and cut out letters freehand or use alphabet cookie cutters if you have them.
The surrounding shape matters too—circle backgrounds create a classic look, while organic blob shapes feel more contemporary and relaxed. Try marbling two clay colors together for a sophisticated swirled effect behind your letters.
Embellishments take these from basic to special. Press tiny clay flowers around the letter, add gold leaf accents after baking, or create a subtle border with contrasting clay.
FYI, metallic acrylic paint applied after baking gives amazing results if you want that glamorous touch without buying metallic clay.
Seasonal and Holiday Theme Sets
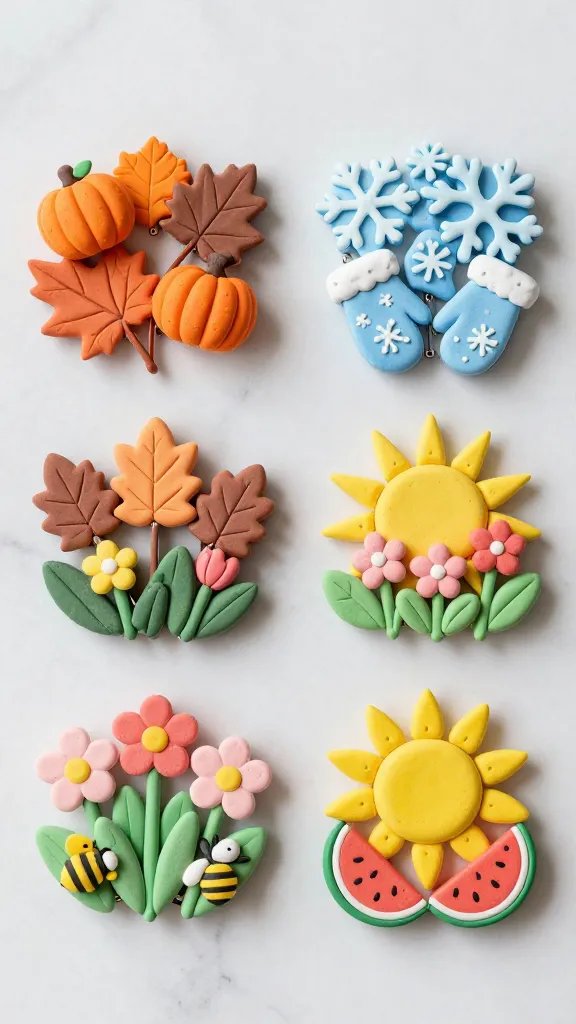
Creating magnets for different seasons means your fridge decor can rotate throughout the year, keeping things fresh and festive.
Think tiny pumpkins and leaves for fall, snowflakes and mittens for winter, flowers and bees for spring, and sunshine and watermelon for summer. You’ll actually look forward to switching them out.
The key is making cohesive sets with complementary color palettes. Autumn magnets work beautifully in oranges, deep reds, golden yellows, and browns. Winter sets shine in icy blues, silvers, whites, and evergreen.
Don’t feel pressured to make dozens—even four or five seasonal magnets make an impact when clustered together.
Quick Seasonal Ideas
- Spring: Cherry blossoms, baby chicks, rain boots, tulips
- Summer: Sunglasses, flip-flops, beach balls, popsicles
- Fall: Acorns, mushrooms, cozy sweaters, apple slices
- Winter: Hot cocoa mugs, snowmen, candy canes, pine trees
Store your off-season magnets in small boxes so they stay protected and ready to swap out when the weather changes.
Faux Marble and Agate Slice Magnets
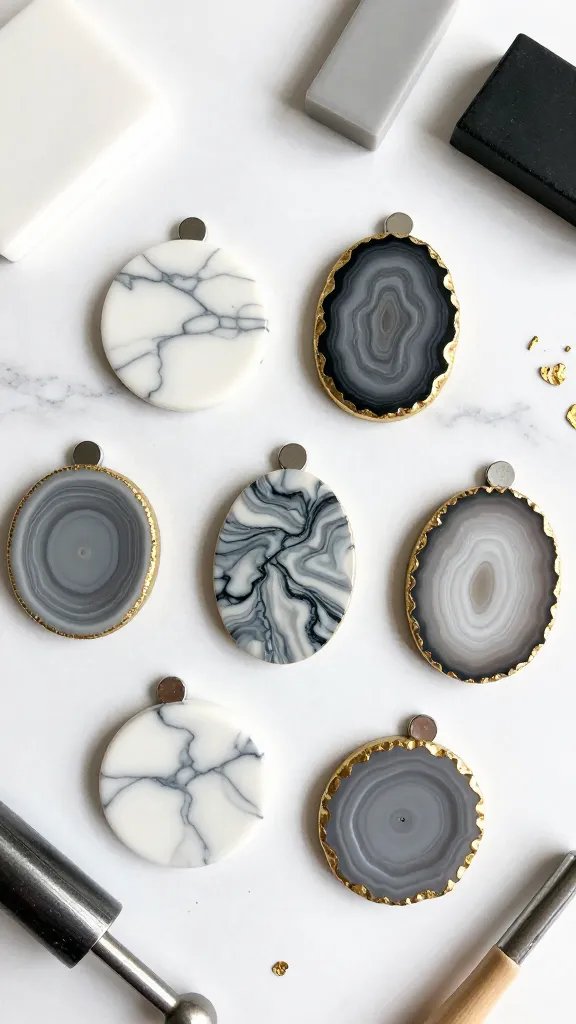
These sophisticated magnets look like expensive home decor pieces but cost almost nothing to make.
The marbled effect and metallic accents create that high-end geological vibe that’s everywhere in modern interiors right now. Seriously, people will think you bought these from a boutique.
Creating the marble effect is easier than it looks. Blend white clay with tiny amounts of gray and black, but don’t fully mix them—you want distinct veins and swirls running through.
Roll and fold the clay several times to create natural-looking patterns, then slice or shape into rounds or organic shapes. For agate slices, use translucent clay mixed with purples, blues, or teals, and add thin white clay veins.
The magic happens with the finishing touches. After baking, edge your “slices” with gold, copper, or silver metallic paint or leafing to mimic those trendy gilded agate coasters.
A coat of glossy varnish gives them that polished stone appearance that really sells the effect.
Display these beauties in a grouped arrangement on your fridge or even on a magnetic board in your office—they’re way too pretty to hide in a drawer.
Conclusion
The best part about clay magnets is that there’s literally no wrong way to make them—each one becomes a unique little masterpiece.
Whether you’re drawn to the minimalist geometric vibes or can’t resist making an entire farm stand of tiny vegetables, you’ll end up with functional art that makes you smile every single day.
Grab some clay, put on your favorite playlist, and trust me, you’ll be hooked after making your first batch!