17 DIY Clay Ashtray Ideas That Look Way Too Good to Hide in a Drawer

Most ashtrays get shoved out of sight. These ones earn a spot on the coffee table.
A clay ashtray is one of the easiest ways to bring some personality into a room, and it barely takes any pottery experience to start.
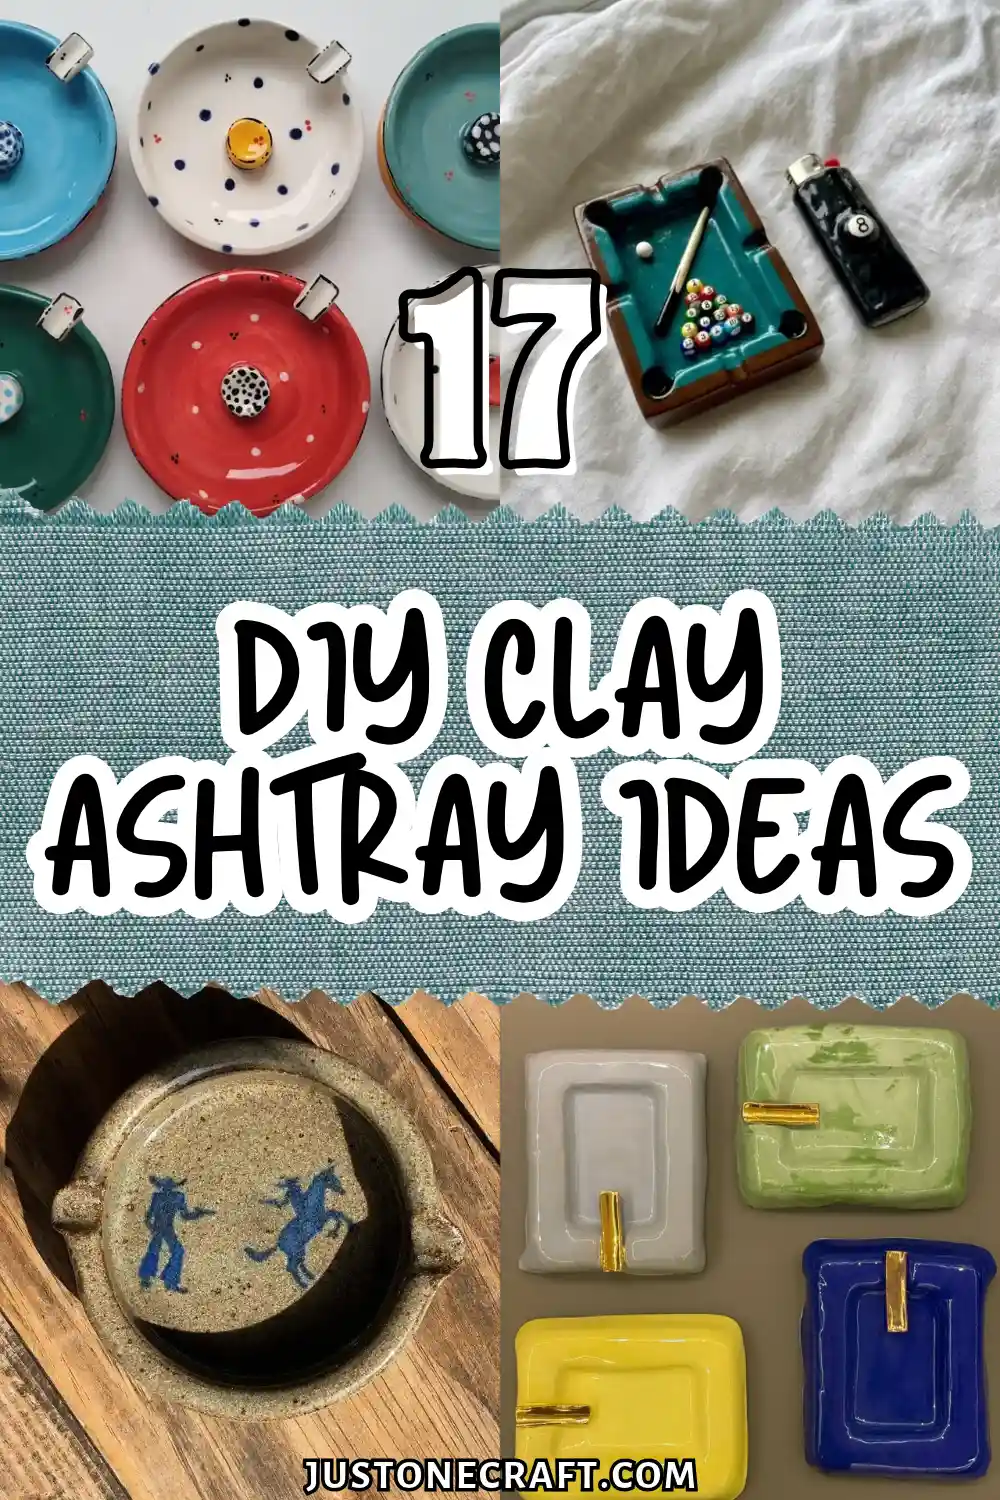
This roundup gathers ten real DIY ideas, from rainbow polka dot trays and a raw stoneware piece with a painted western scene to a matte black bowl with a coiled snake and a tiny pool table with a matching lighter.
Some lean playful, some lean minimal, and a few sneak in tiny sculpted details you would not expect on something this small. Save your favorites and pick one to try this weekend.
1. Polka Dot Rainbow Ashtrays That Turn One Batch Into a Collection

Six trays, six moods, one glaze afternoon. Sky blue, cream, teal, forest green, red, and a soft dotted cream all sit in a grid, each one topped with a raised center knob painted in a contrasting speckle or dot pattern.
A single rectangular tab on the rim holds the cigarette in place.
What makes this batch work:
- Every tray uses the same round shape, so the color and dot pattern do the talking
- The raised center knob doubles as a lighter or cigarette rest, not just decoration
- Dots are painted in a different scale on each piece, some tight and small, some loose and scattered
- One rim tab keeps the whole design clean instead of cluttered
Paint the dots freehand with a small brush and underglaze once the base color has dried. Uneven spacing looks better than a perfect grid here.
2. Soft Square Trays With a Gold Bridge Rest
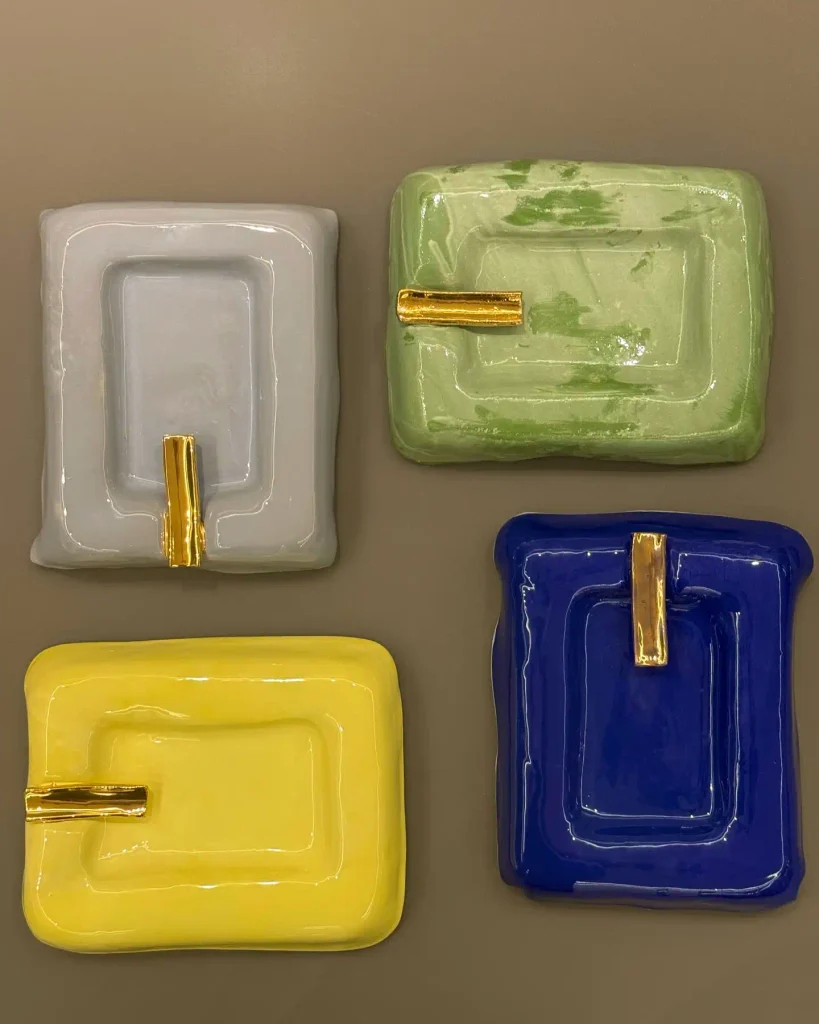
Soft edges and a gold bar running through the middle give these square trays a dressed up feel without much extra work.
Grey, sage green, yellow, and cobalt blue each get the same nested square shape, but the gold rest is what pulls the whole set together and makes plain glaze colors look intentional.
Recreate this look:
- Pinch a rounded square base instead of using sharp corners
- Carve a shallow inner square so the walls hold ash
- Roll a small clay bar, bisque fire it separately if needed, then glaze it gold
- Set the gold piece across the middle before the final glaze firing
- Stick to one solid color per tray so the metallic rest stands out
Gold luster reads as expensive even on a simple shape, which is the whole trick.
3. Nine Glaze Finishes You Can Steal From One Photo
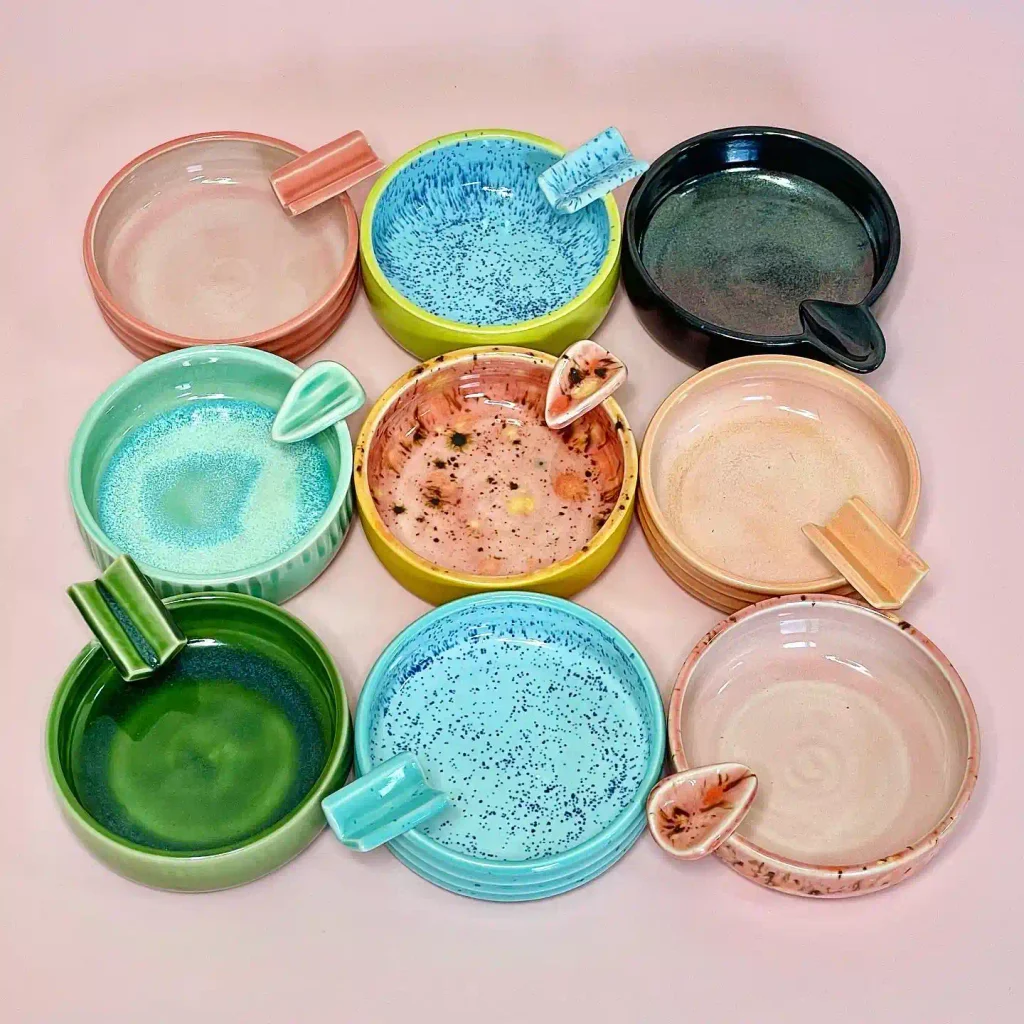
Nine bowls, nine glaze results, and not one of them repeats. Coral, speckled lime and blue, matte black, mint, terracotta with dark spots, blush, forest green, blue speckle, and soft pink all sit side by side, each with its own rim shape, from small rectangular tabs to rounded wing handles.
This is really a glaze reference chart disguised as a photo. Speckled glazes give texture without extra carving, solid colors like the black and mint lean modern, and the terracotta piece with dark speckling looks closest to raw fired clay.
Handle shape changes the whole personality too, a wing shape feels softer than a straight tab.
Pick two or three finishes from here rather than trying all nine at once, and let the handle shape match the mood you are going for.
4. Raw Stoneware Rim With an Ocean Glaze Center
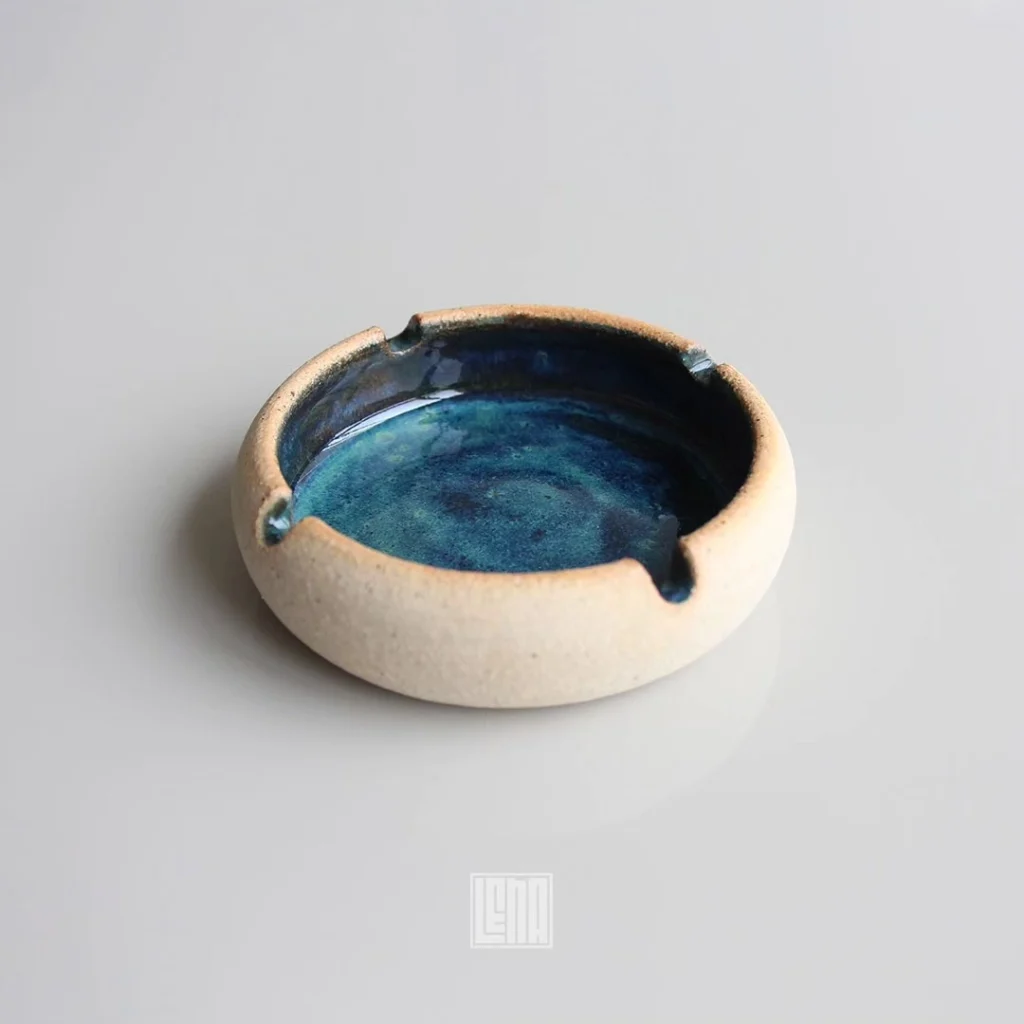
Raw clay left bare along the rim tells you right away this piece was thrown by hand. The exterior stays sandy and unglazed while the interior gets a deep blue and teal glaze that pools and shifts like water. Two simple notches on opposite sides hold the cigarette, nothing fussy.
The contrast between rough exterior and glossy interior is the whole point of this piece.
Leaving the outside bare saves glaze and gives your hand something to grip, while the glaze pooling inside happens almost on its own if you apply it a little thick near the center.
💡 Quick Tip
Wax the rim before glazing so the raw clay stays clean while the glaze pools in the bowl.
Skip glazing the whole thing, the bare clay is doing half the work here.
5. A Hand Painted Western Scene on Unglazed Clay
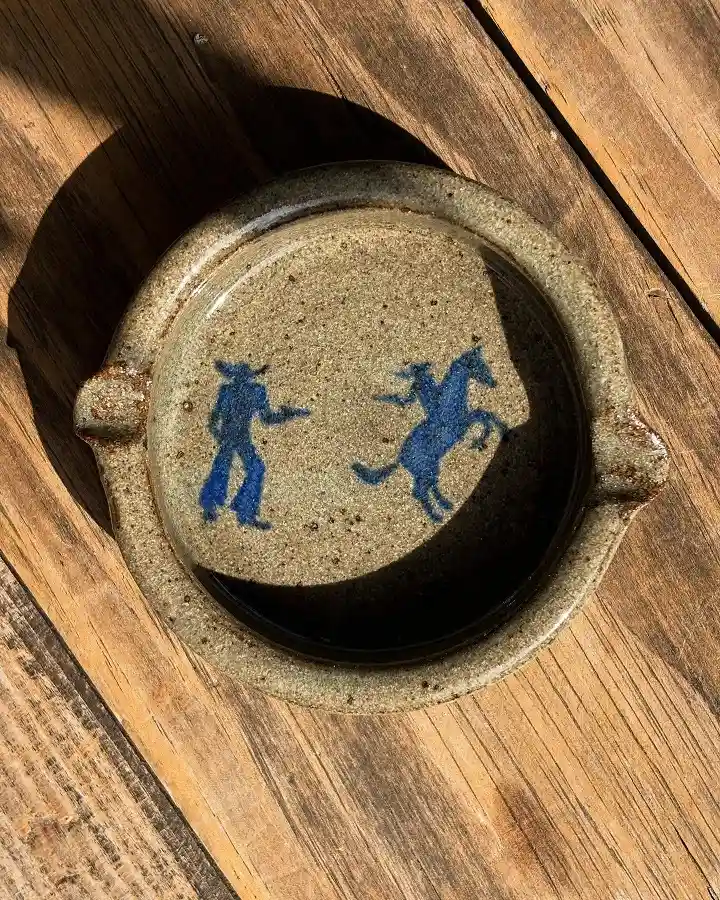
A cowboy squares off with a rearing horse painted in cobalt blue across the floor of this ashtray, set on speckled stoneware left mostly unglazed.
A single pulled handle on one side makes it easy to pick up, and the whole piece keeps its clay colored, matte finish outside the glossy painted scene.
Do this and skip this:
Getting a scene like this to read clearly on a small surface comes down to keeping the illustration simple and leaving space around it.
Keep the figures small and simple, two colors max
Leave open clay space around the scene
Crowding the bowl with too many small details
Glazing over the painted line work
6. Four Petal Rests With a Painted Trout Center
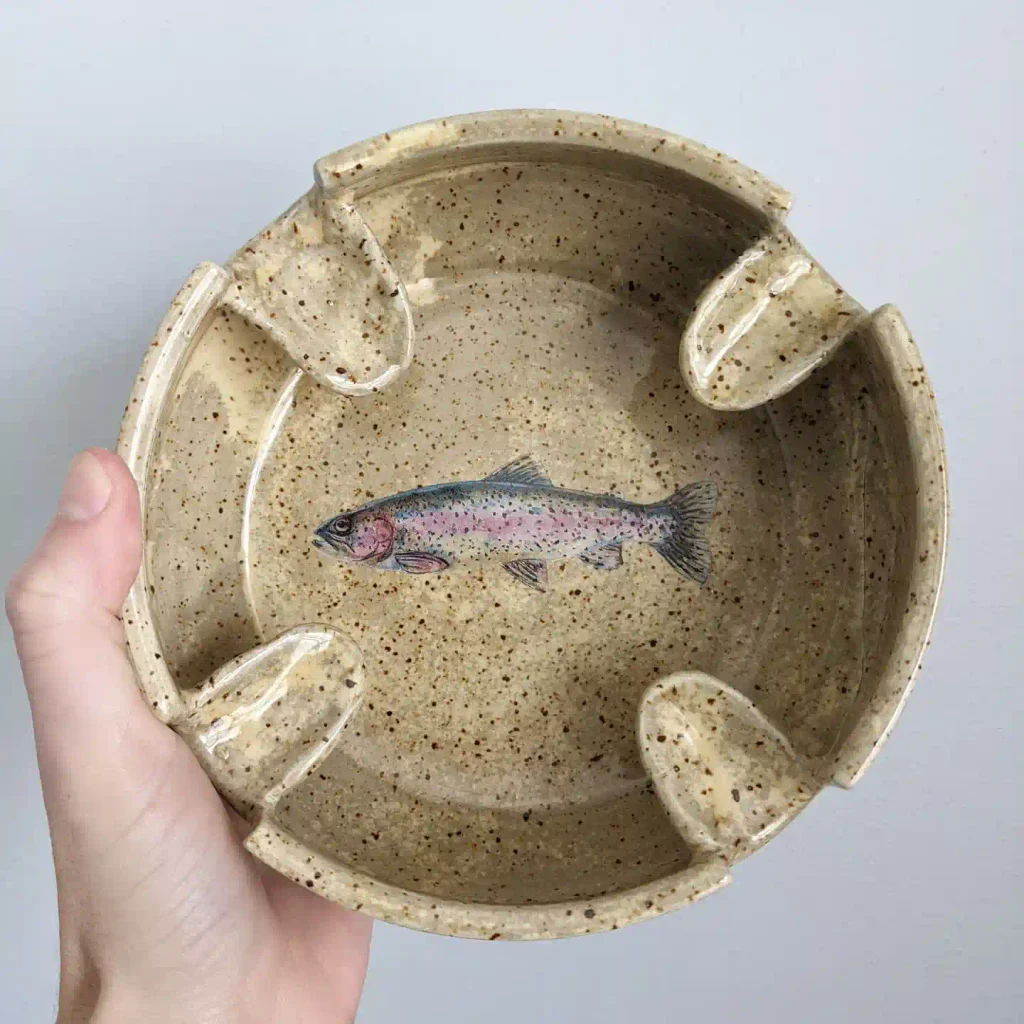
Four wide, petal shaped rests replace the usual single notch on this speckled stoneware tray, giving it a completely different silhouette from a standard round bowl.
A rainbow trout decal sits centered in the base, calm against the oatmeal colored, flecked glaze that covers the rest of the piece.
Petal rests versus a single tab changes more than the look.
| Petal Rests | Single Tab Rest |
|---|---|
| Room for several cigarettes at once | Simpler to shape and trim |
| Reads as a more finished, gift ready piece | Leaves more open glaze space to decorate |
A speckled stoneware glaze like this one hides ash stains well, which matters more than people expect.
7. Matte Black Clay With a Coiled Snake Accent
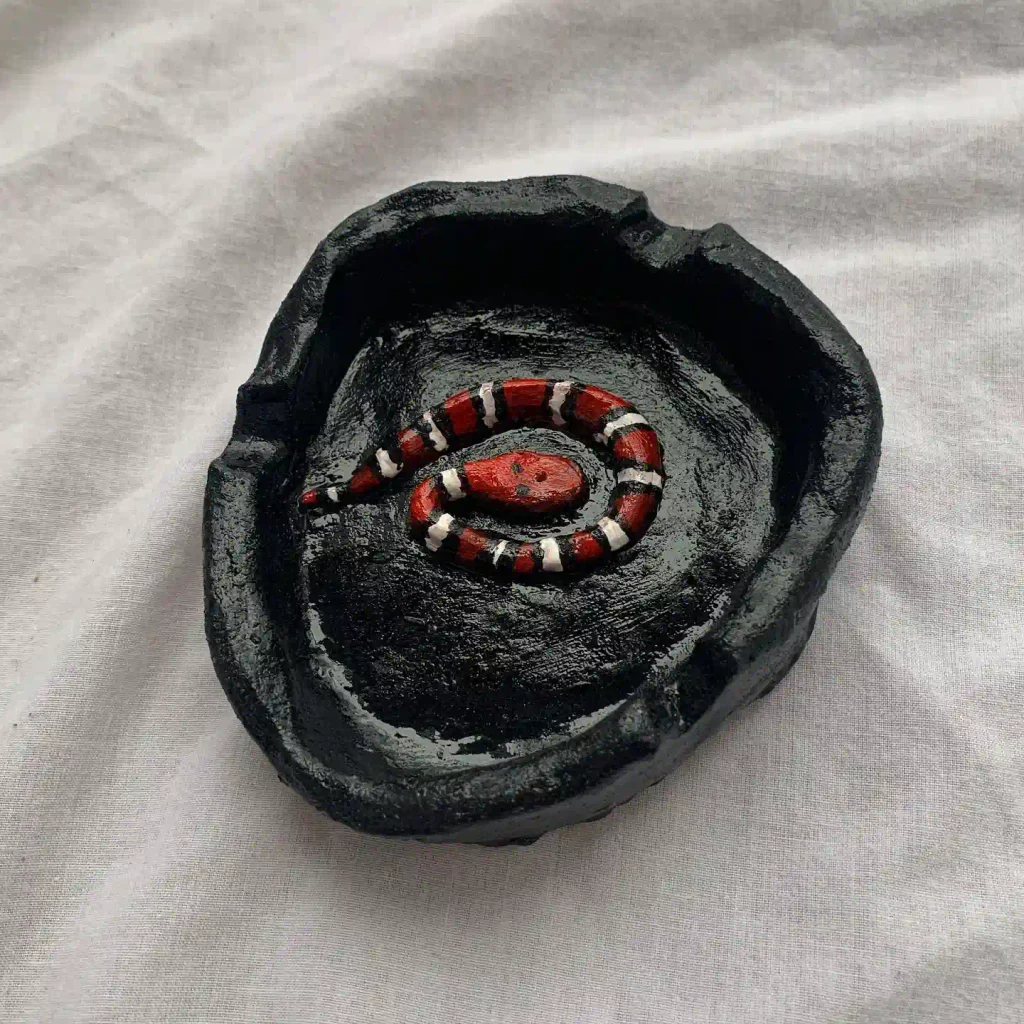
Matte black clay swallows the light on this piece, its edges left rough and organic instead of trimmed clean.
A banded red, black, and white snake curls in the center, sculpted with just enough dimension to catch a shadow. The whole tray reads more like a small sculpture than a household object.
Black glaze or paint does something useful here, it makes ash disappear visually instead of standing out against a light background.
The raised, hand built snake is the real centerpiece, and it works because nothing else on the tray competes with it for attention.
A dark base and one raised sculpted detail beat busy paint every time.
8. A Tiny Koi Pond Built Right Into the Rim
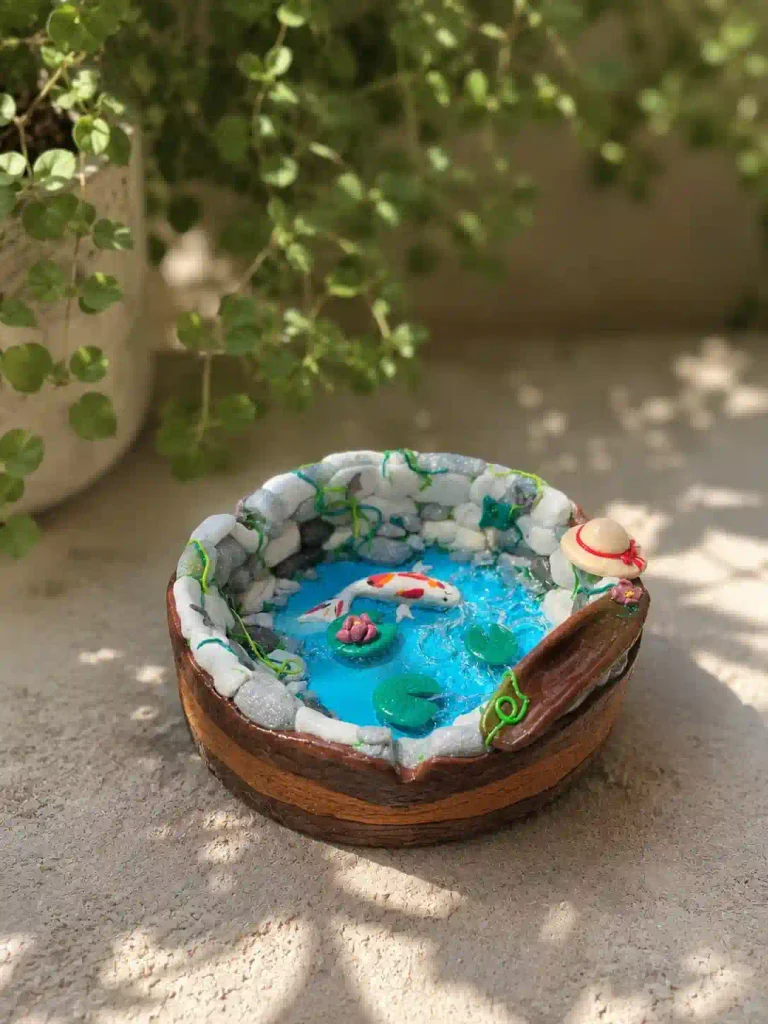
Stack pebbles around the rim and suddenly a tray stops looking like a tray. This piece builds a full miniature pond scene into its wall, with small clay stones, a wire vine, a blue resin pool, a tiny koi fish, floating lily pads, and even a woven hat charm resting on the wood colored base.
How to build a rim like this:
Shape the base bowl and let it firm up before adding detail.
Press small clay stones around the rim, leaving gaps for a wire vine.
Add a resin pour for water, then set tiny sculpted charms before it fully cures.
This one takes patience over skill, most of the work is just adding small pieces one at a time.
9. Cartoon Characters Painted Straight Onto the Glaze
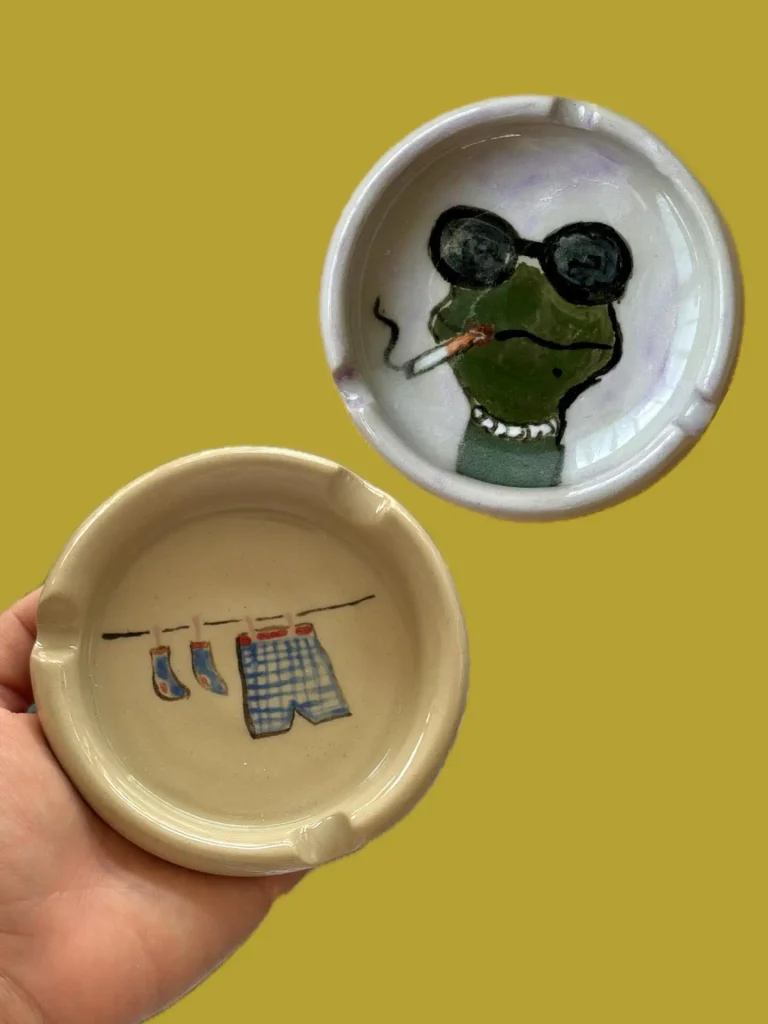
Sunglasses, a cigarette, and a gold tooth turn a tiny painted frog into a personality instead of a decoration.
A second tray nearby keeps things lighter, showing a simple clothesline with socks and a pair of plaid shorts hanging against a plain cream glaze. Both prove that a good illustration matters more than a complicated base.
Character ideas worth trying:
- A cool animal in sunglasses, smoking or otherwise mid personality
- A clothesline or laundry scene for something quieter and funnier
- A single object floating alone on plain glaze for a minimalist joke
- Bold black outlines so the art reads clearly even on a small round surface
10. A Mini Pool Table Ashtray With a Matching Lighter
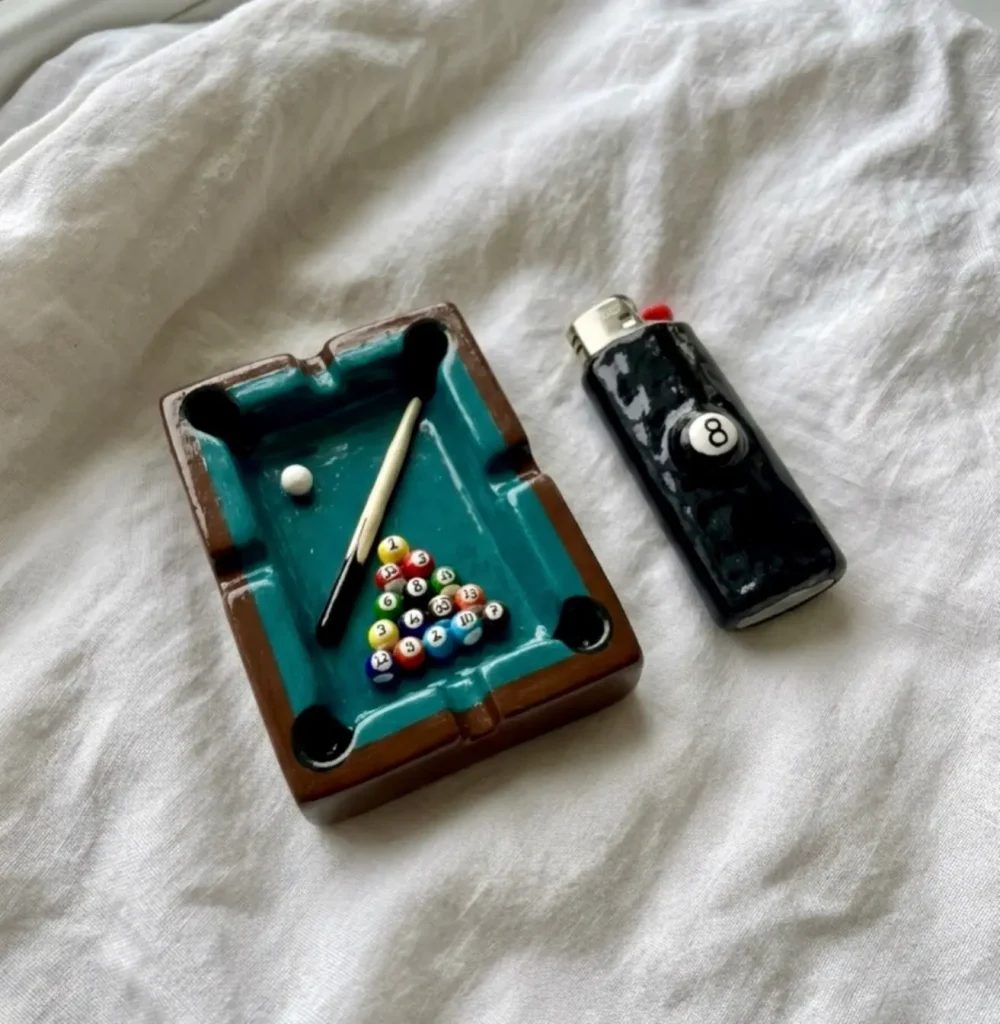
A felt green tray shrinks an entire pool table down to ashtray size, complete with a tiny sculpted cue stick, a rack of numbered balls, corner pockets, and a brown wood look border.
Next to it sits a matching lighter cover painted glossy black with a small 8 ball detail, turning two separate objects into a set.
Making a matching lighter cover is what pushes this idea from cute to genuinely gift worthy.
Rectangular tray, felt green base, tiny sculpted balls and cue in the corner.
Glossy black clay shell with a painted 8 ball, made to slide over a standard lighter.
11. Marbled Moon Phase Clay Ashtray
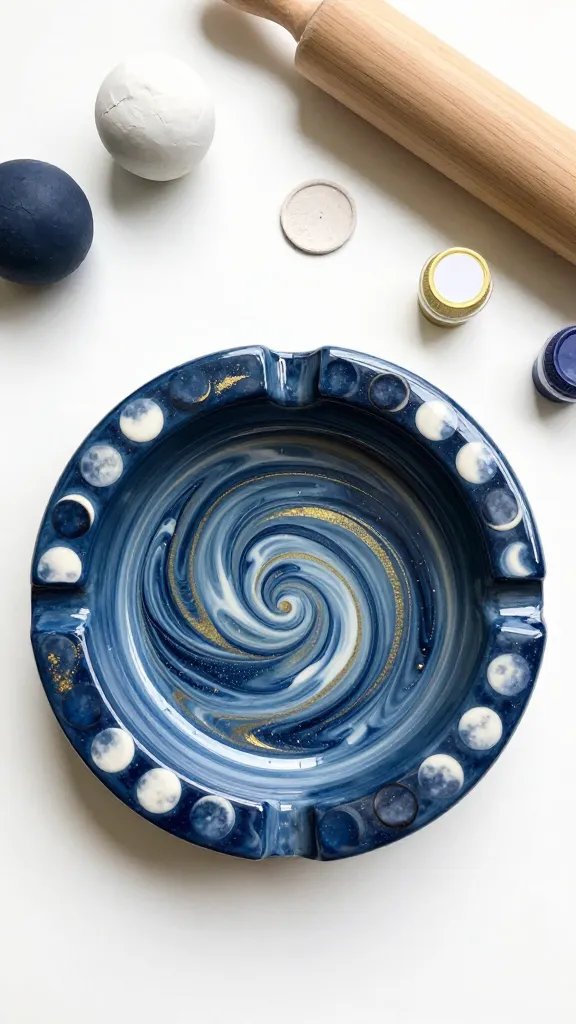
Picture a sleek round ashtray with gorgeous marbled swirls in midnight blue, white, and metallic gold, complete with embossed moon phases around the rim.
This cosmic-inspired piece looks like something straight from an artisan boutique, but it’s surprisingly simple to create at home.
Materials Needed
- Air-dry clay or polymer clay
- Acrylic paints in navy, white, and gold
- Small circular cookie cutter or cup
- Moon phase stamps or small circular objects
- Clear sealant spray
- Rolling pin
How to Make It
Roll out your clay to about half an inch thick, then create the marbled effect by kneading together different colored clay pieces without fully blending them.
Use your circular cutter to shape the base, then press gentle indentations around the edges using round objects to mimic moon phases.
Create a small bowl shape in the center for ashes, and add cigarette rests by carving small grooves along the rim.
Once dried or baked (depending on your clay type), seal it with a protective coating. This ashtray is perfect for anyone who loves celestial aesthetics and wants their smoking accessories to double as altar decor.
12. Terrazzo-Style Speckled Clay Ashtray
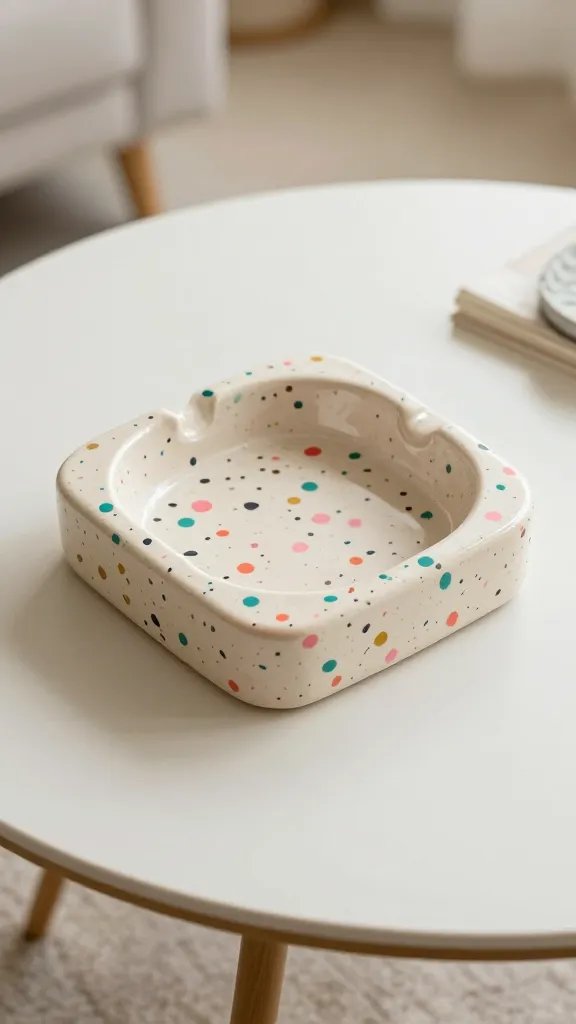
Terrazzo is having a major moment right now, and this colorful speckled ashtray brings those trendy vibes to your coffee table.
The confetti-like specks of color against a neutral base create an eye-catching pattern that’s totally Instagram-worthy.
Materials Needed
- White or cream polymer clay
- Tiny clay pieces in various colors (pink, teal, coral, mustard)
- Square or rectangular mold
- Sandpaper for smoothing edges
- Glossy varnish
Mix tiny colored clay bits into your base color without fully incorporating them—you want distinct specks throughout.
Shape your ashtray into a modern rectangular or square form with slightly raised edges. After baking, sand the surface smooth and apply glossy varnish to make those colors really pop.
This design works beautifully on modern coffee tables and makes an unexpectedly chic housewarming gift. Trust me, people will ask where you bought it.
13. Minimalist Black Ring Dish Ashtray
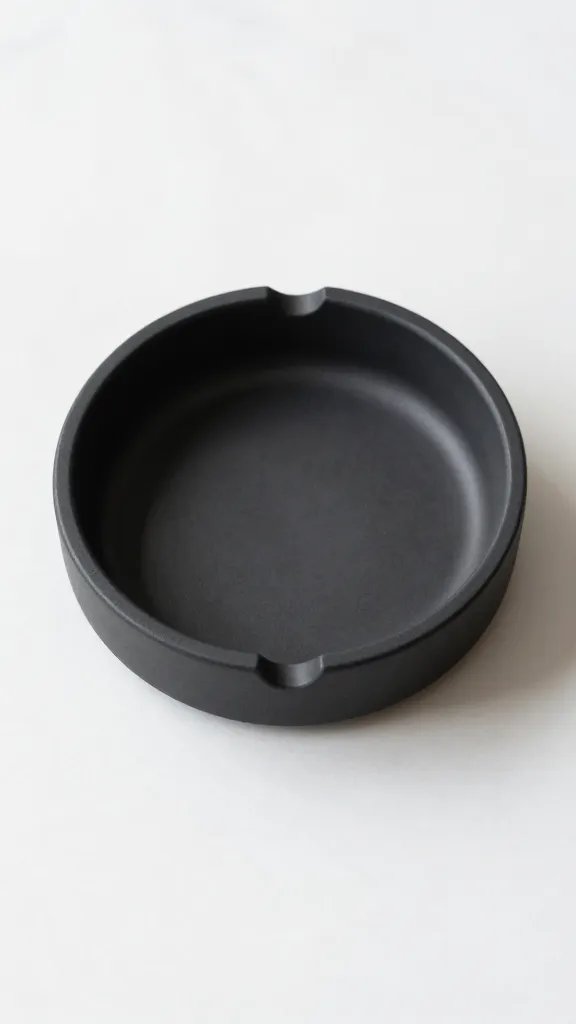
Sometimes simple is absolutely stunning, and this sleek black clay ashtray proves it. With clean lines, a matte finish, and subtle geometric indentations, this piece channels serious minimalist luxury.
Materials Needed
- Black air-dry clay or white clay with black paint
- Circular template (about 4-5 inches diameter)
- Toothpick or clay tool
- Matte sealant
Roll your clay into a flat circle and gently press the center down to create a shallow bowl.
Use a toothpick to etch minimalist line patterns around the outer edge—think simple geometric shapes or parallel lines. Keep everything understated and intentional.
The matte black finish gives this ashtray a museum-quality look that fits perfectly in modern, Scandinavian, or industrial-style spaces. It’s so elegant that it doubles beautifully as a catch-all for jewelry when not in use.
14. Sculpted Hand Holder Clay Ashtray
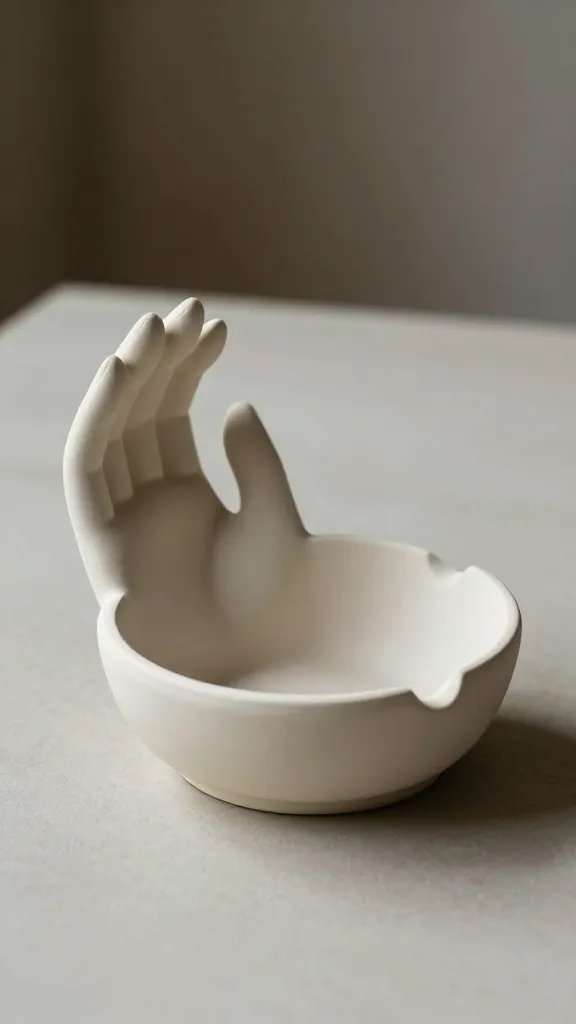
Nothing says statement piece like a realistic sculpted hand cradling your cigarette. This artistic ashtray is equal parts edgy and elegant, perfect for adding drama to your decor.
Materials Needed
- Sculpting clay (air-dry or polymer)
- Clay sculpting tools
- Reference photos of hands
- Metallic paint (optional)
- Strong sealant
Sculpt an open palm with fingers slightly curved upward to hold cigarettes between them. The palm itself becomes the bowl for ashes. This requires a bit more skill than other projects, but the result is absolutely worth it.
You can paint it in realistic skin tones, go full metallic gold for a luxury vibe, or keep it matte white like a classical sculpture.
This conversation-starter piece appeals to art lovers and anyone who appreciates bold, unconventional decor. FYI, it also looks incredible holding incense sticks.
15. Nature-Inspired Leaf Imprint Clay Ashtray
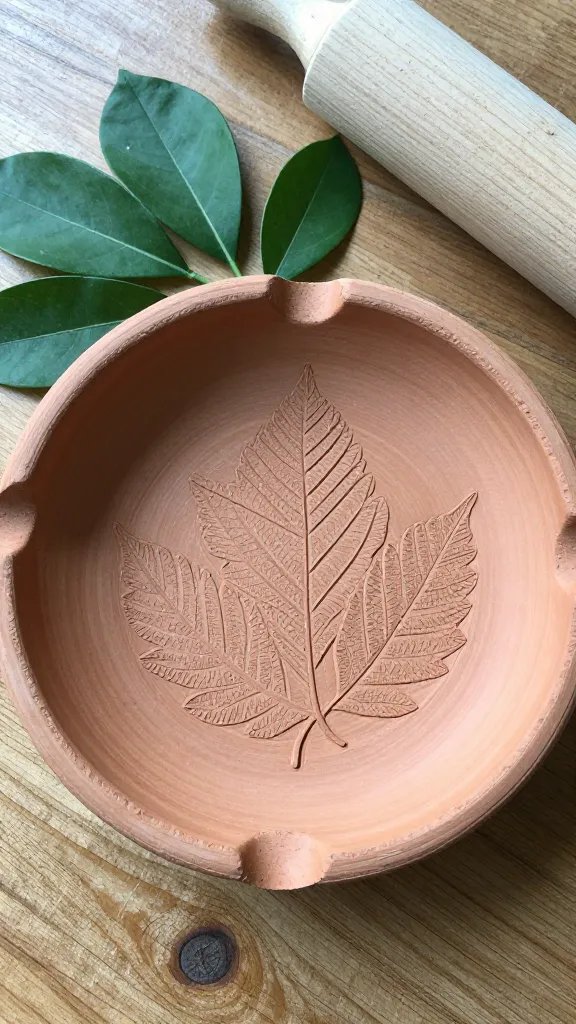
Bring the outdoors in with this organic ashtray featuring delicate leaf impressions pressed into the clay. The natural textures create a beautiful botanical vibe that feels grounding and earthy.
Materials Needed
- Terracotta or natural-colored clay
- Fresh leaves with prominent veins
- Rolling pin
- Circular or oval cutter
- Green or earth-tone glazes (optional)
How to Make It
Roll out your clay and press fresh leaves firmly into the surface before removing them to reveal detailed vein patterns.
Shape your ashtray into an organic oval or irregular circle to enhance the natural aesthetic. Create grooves along the edges for cigarette rests.
Leave it natural terracotta for an earthy look, or glaze it in mossy greens and browns. This ashtray works beautifully in bohemian spaces, plant-filled rooms, or anywhere you want to add organic texture.
16. Sunset Gradient Ombre Clay Ashtray
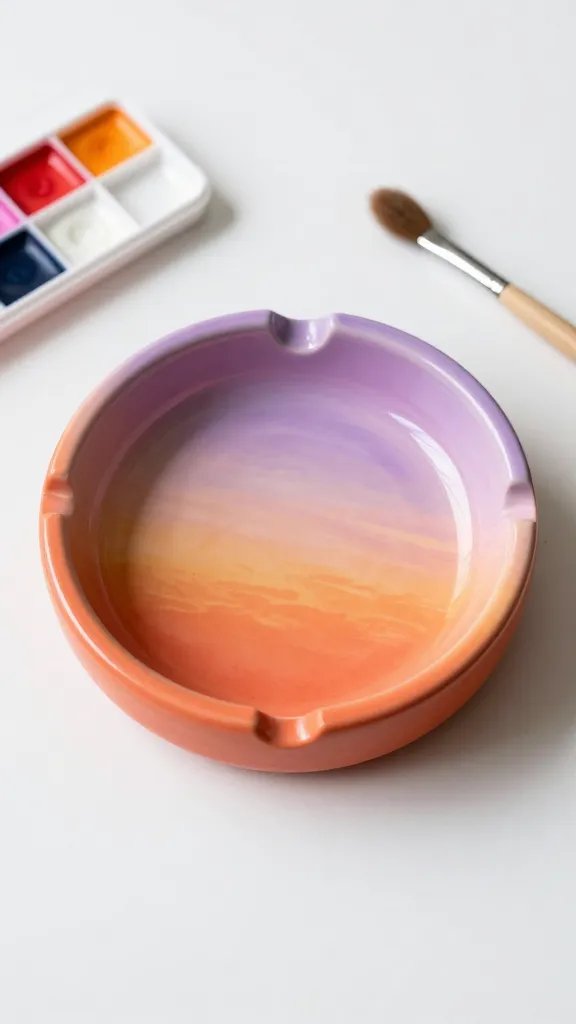
Capture golden hour in clay form with this stunning gradient ashtray that transitions from deep orange through pink to soft lavender. It’s like having a permanent sunset on your side table.
Materials Needed
- White polymer clay
- Acrylic paints in sunset colors (orange, coral, pink, purple)
- Round or square mold
- Sponge or soft brush
- Glossy sealant
Shape your ashtray first, then paint the gradient by blending colors from one edge to the other while the clay is still workable or after baking.
Use a damp sponge to blend where colors meet for that dreamy ombre effect. The key is patience—build up thin layers for the smoothest transition.
This piece brings calming, aesthetic vibes to any space and photographs beautifully for your crafting portfolio. It’s perfect for anyone who loves sunset watching or pastel color schemes.
17. Geometric Hexagon Tile Clay Ashtray
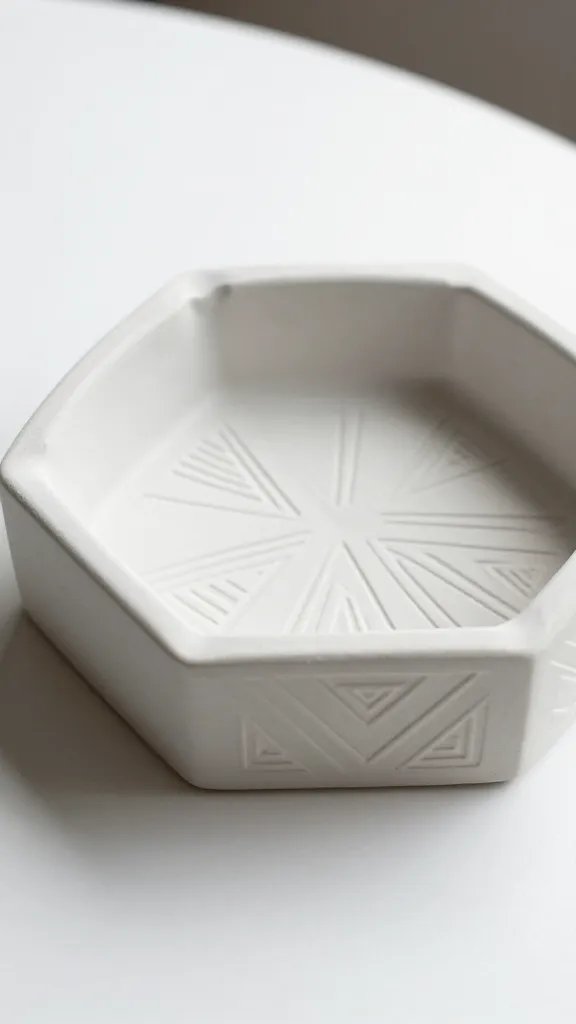
Channel your inner architect with this modern hexagonal ashtray featuring raised geometric patterns on the surface.
The structured design feels contemporary and sophisticated while still being totally DIY-friendly.
Materials Needed
- Gray or white polymer clay
- Hexagon template or cookie cutter
- Ruler and craft knife
- Clay stamps or textured materials
- Matte or semi-gloss sealant
How to Make It
Cut your clay into a perfect hexagon shape and press geometric patterns into the surface—think triangles, lines, or honeycomb textures.
Keep the center relatively smooth to function as the ash bowl, with patterns concentrated around the edges. Carve small triangular notches along alternating sides for cigarette rests.
The architectural quality of this design appeals to fans of modern, mid-century, or industrial aesthetics.
It looks amazing grouped with other hexagonal decor items for a cohesive geometric theme.
Conclusion
Whether you’re drawn to celestial vibes, retro mushrooms, or sleek minimalism, these clay ashtray projects prove that functional items can absolutely be beautiful.
The best part? You’ll have a completely unique piece that reflects your personal style. Grab some clay this weekend and get creative—you might just discover your new favorite DIY hobby.