18 DIY Clay Crafts Ideas: Easy Rings, Dishes, Keychains, and More

Every one of these started as a plain lump of clay and a bored afternoon, and not one of them looks like it.
Clay is one of those crafts that hooks you fast. You start with something soft and shapeless, and an hour later you have a ring, a tiny dish, or a keychain shaped like a strawberry with a face.
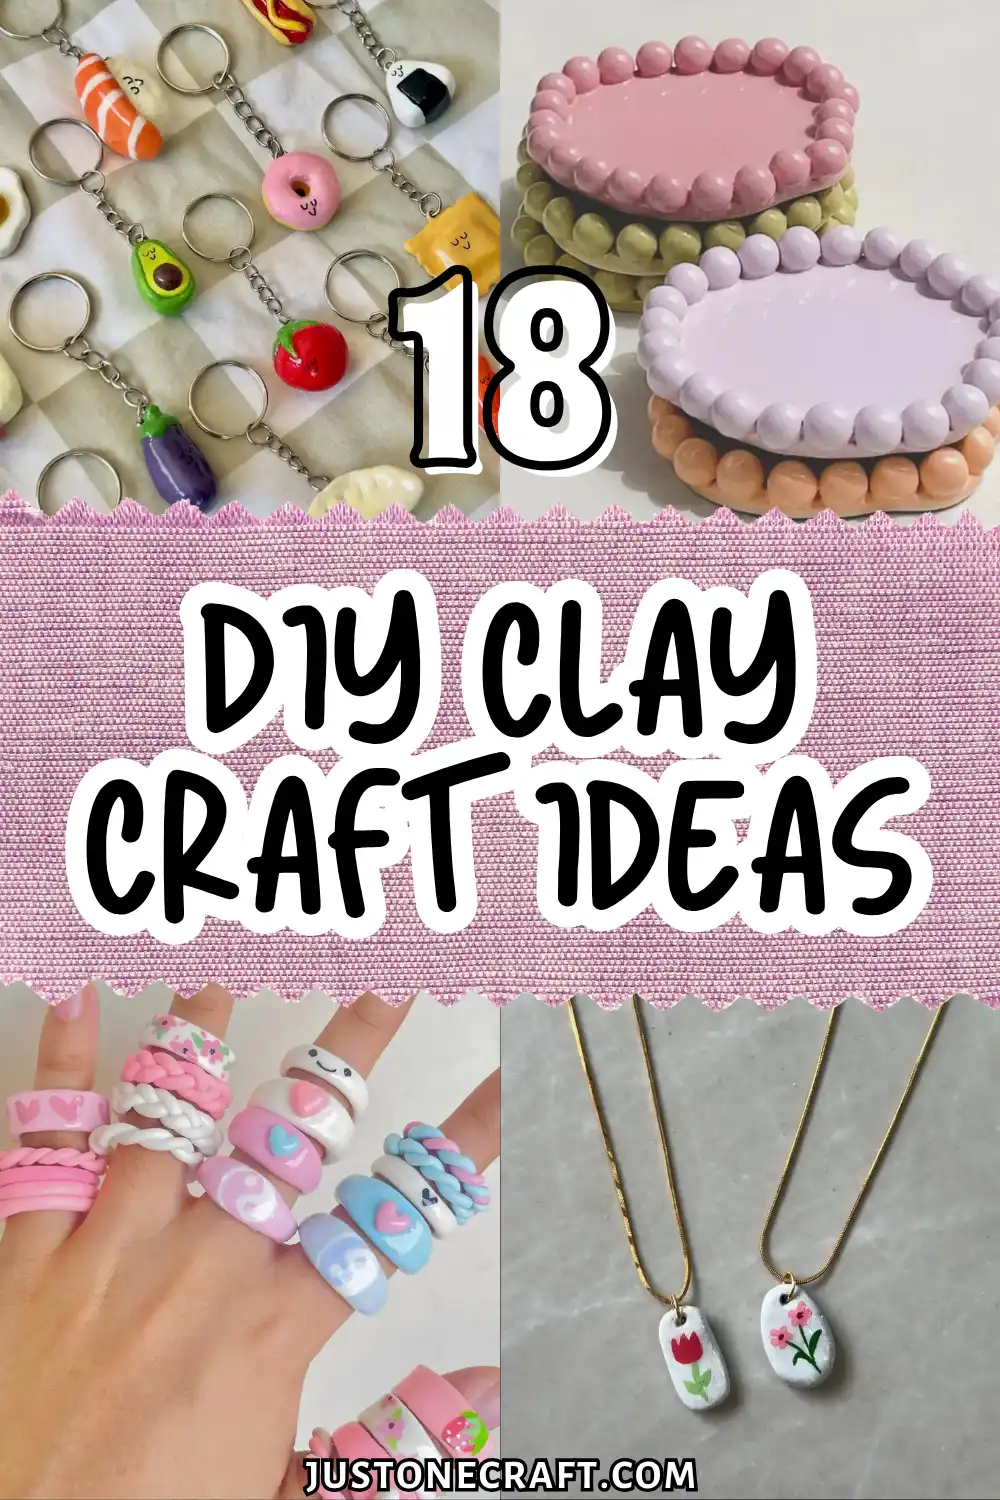
That’s the pull behind this roundup of DIY clay crafts, real projects made by real hands, no fancy studio required.
Some lean simple, like painted pendants on a gold chain. Others get more ambitious, like a layered 3D scene with a cat peeking over a rose covered wall.
Whether you want jewelry, home decor, or a handmade gift, there’s a project here that fits your afternoon.
1. Stack Your Rings Like a Candy Dish
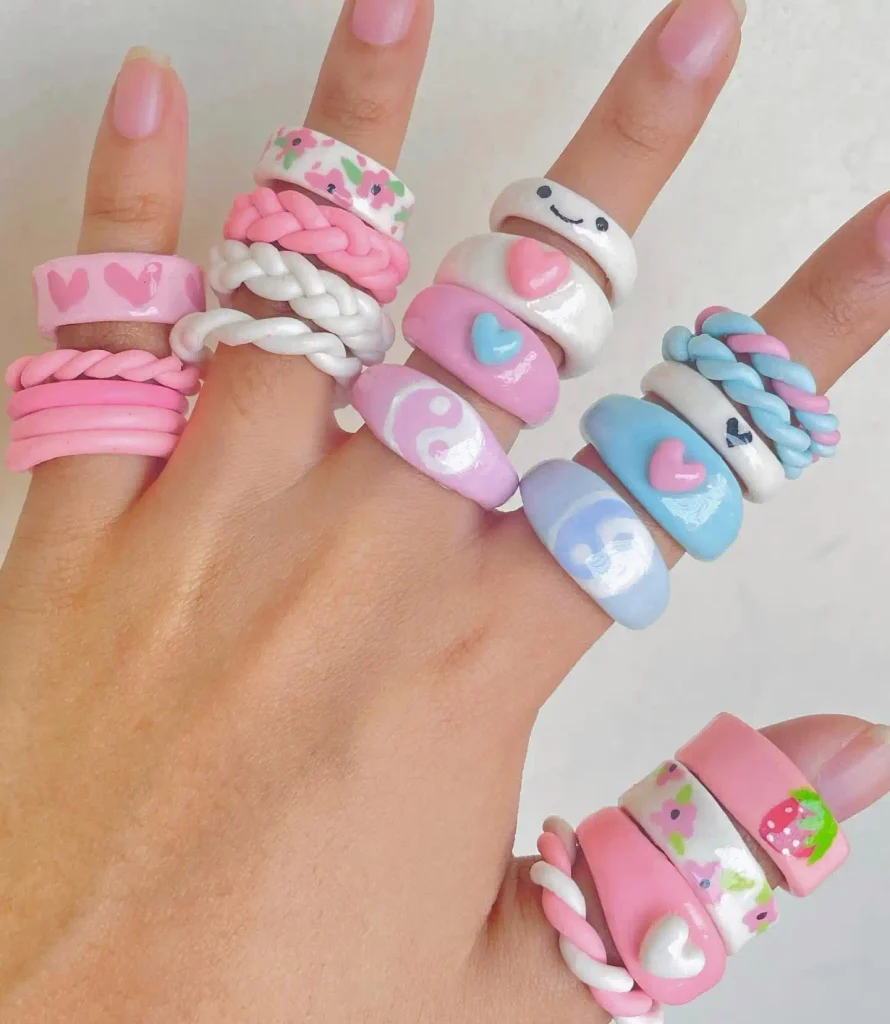
Ten rings across one hand and not one of them matches, and that’s the whole point.
This look mixes glossy heart bands, a hand painted floral ring, a smooth yin yang cabochon, twisted rope bands in white and pink, and a plain smiley face ring for balance.
The trick to pulling this off without looking messy is keeping every ring the same glossy finish so the mismatched shapes still read as one set.
What makes it work for a first stacking project:
- Twisted rope bands are the easiest shape to roll and hide small imperfections
- Flat bands are your canvas for hearts, faces, or tiny painted flowers
- Keep two or three rings solid color so the patterned ones stand out
- Glaze everything the same way so the finish stays consistent hand to hand
2. Turn Fallen Leaves Into Tiny Trinket Dishes
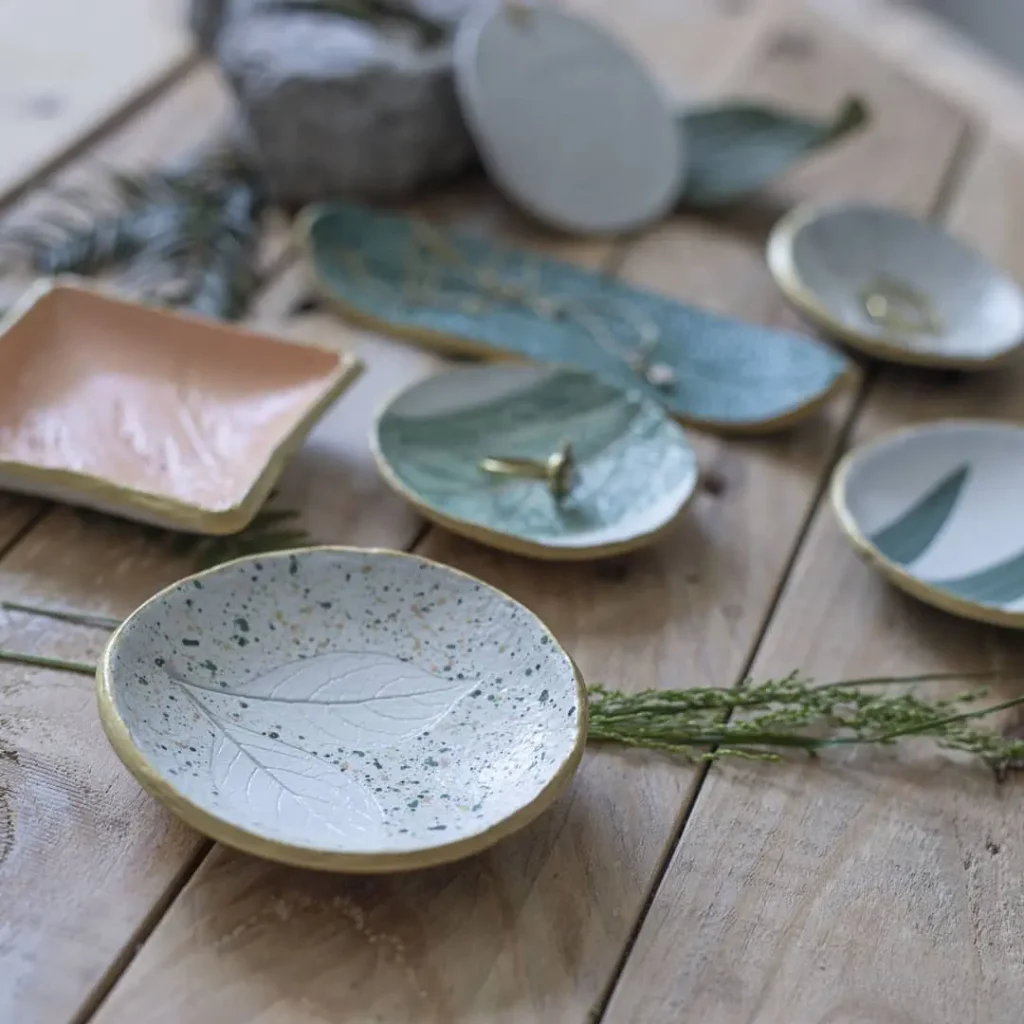
Real leaves pressed into slabs of clay leave behind veining you could never draw by hand, and that’s exactly what’s happening on the speckled dish in this set.
Some of the pieces here go further with confetti style speckles mixed right into the clay before pressing, while others get a simple sage or terracotta glaze with a gold painted rim for a finished, gift shop look.
This is one of those projects where the clay does most of the work for you.
How to get this look at home:
Roll clay into a slab about a quarter inch thick and press a real leaf firmly into the surface, then peel it away.
Cut around the slab freehand for a natural, slightly irregular dish edge instead of a perfect circle.
Once fired or cured, paint a thin gold line around the rim to give it that finished boutique feel.
3. Make Kawaii Food Charms People Actually Want as Keychains
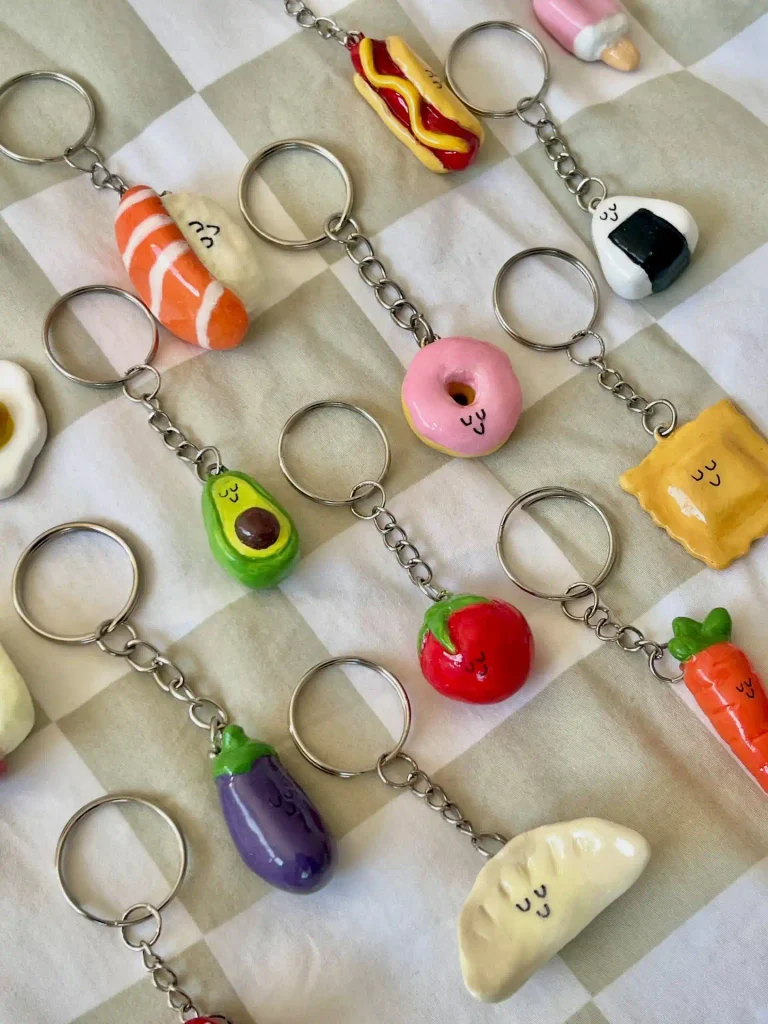
Every single piece in this lineup has the same tiny closed eyes and a small curved smile, and that one detail is what ties a sushi roll, a hot dog, an avocado half, and a slice of watermelon into one cohesive collection.
The food shapes themselves are sculpted with real texture too, like the ridges on the eggplant and the seeds dotting the strawberry, so they read as the actual food and not just a blob with a face.
📌 Good To Know
Pick foods with simple, chunky silhouettes first. An avocado or a donut is far easier to shape than something with thin parts like carrot tops, which tend to snap off keychains.
4. Sculpt Feathers With Real Depth, Not Just Paint
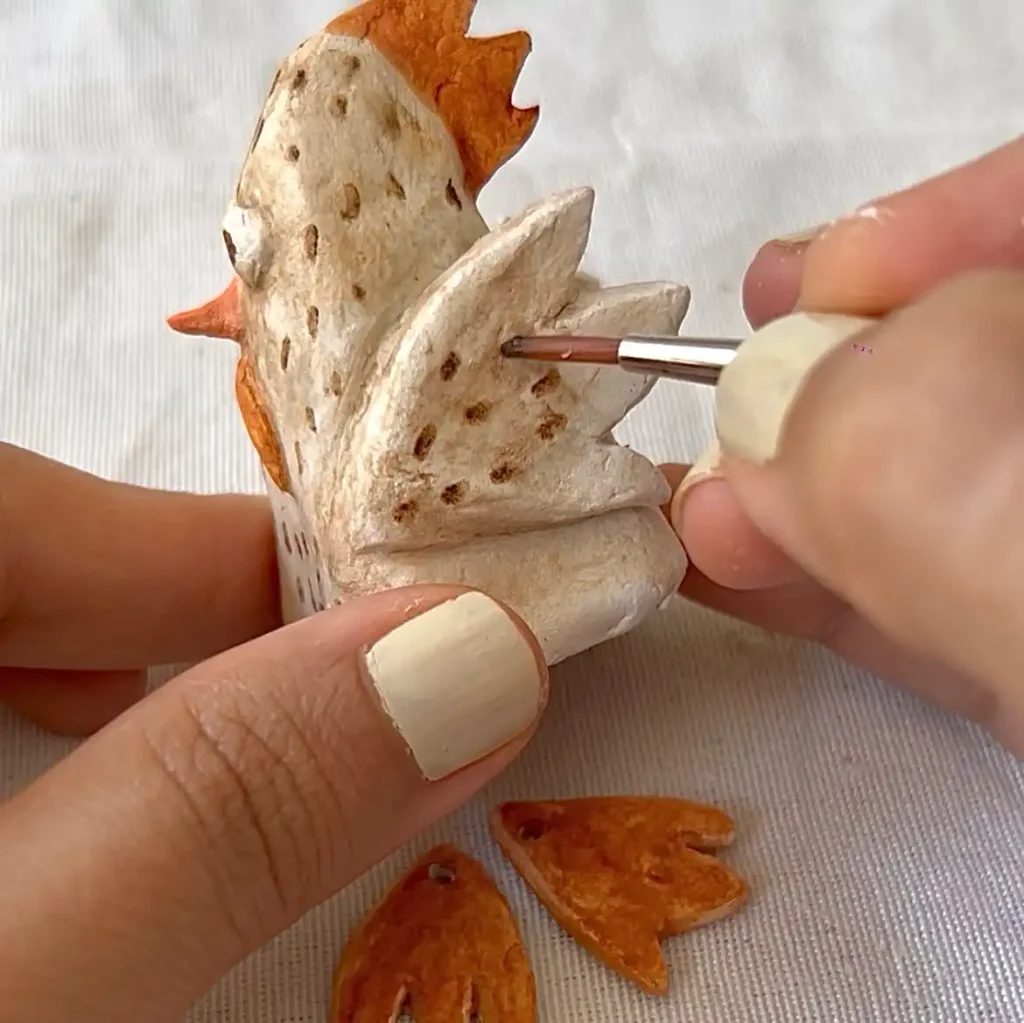
This one is a mid process shot, and it shows exactly why it earns a spot on the list.
Instead of painting feather lines onto a flat surface, this rooster figure has actual layered clay feathers built up and tucked under each other, with a fine tool poking texture dots into the surface before the paint even goes on.
The rust orange comb and wattle are shaped separately and pressed into place, which is what gives the whole piece its dimension.
What works here:
- Feathers are built as individual layered pieces, not one smooth painted shape
- A fine detail tool presses in tiny dimples for a realistic feather texture
- Warm rust tones are used only on the comb and wattle to keep the eye moving
- Extra loose feather pieces are shaped ahead of time so they’re ready to add on
5. One Pendant, Two Totally Different Moods
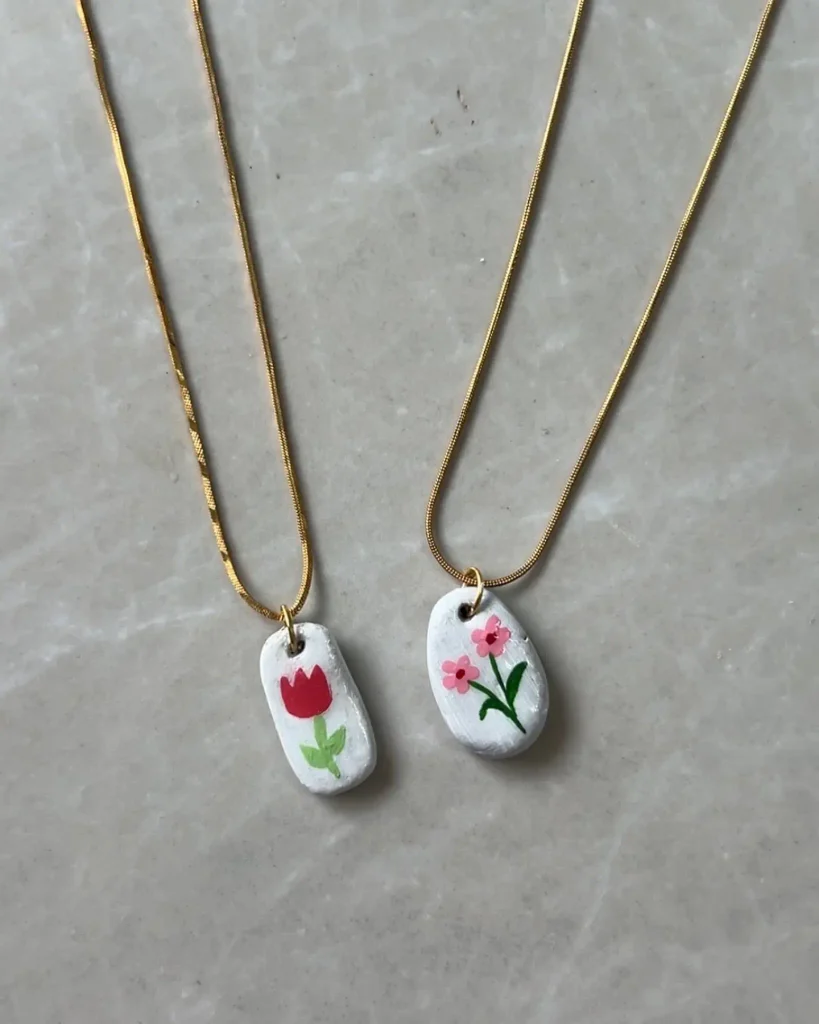
Same blank shape, same gold snake chain, completely different feeling once the paint goes on.
The tulip pendant leans bold with a single graphic red flower and simple green leaves, while the wildflower version feels softer with two small blooms branching off one thin stem.
Side by side they show how much a painted charm depends on the brushwork, not the clay shape underneath.
| Bold Tulip | Soft Wildflower |
|---|---|
| One large flower, high contrast red on white | Two small blooms, softer pink tones |
| Best for a statement, everyday piece | Best for layering with other necklaces |
6. Bubble Edge Trays That Look Like Candy Buttons
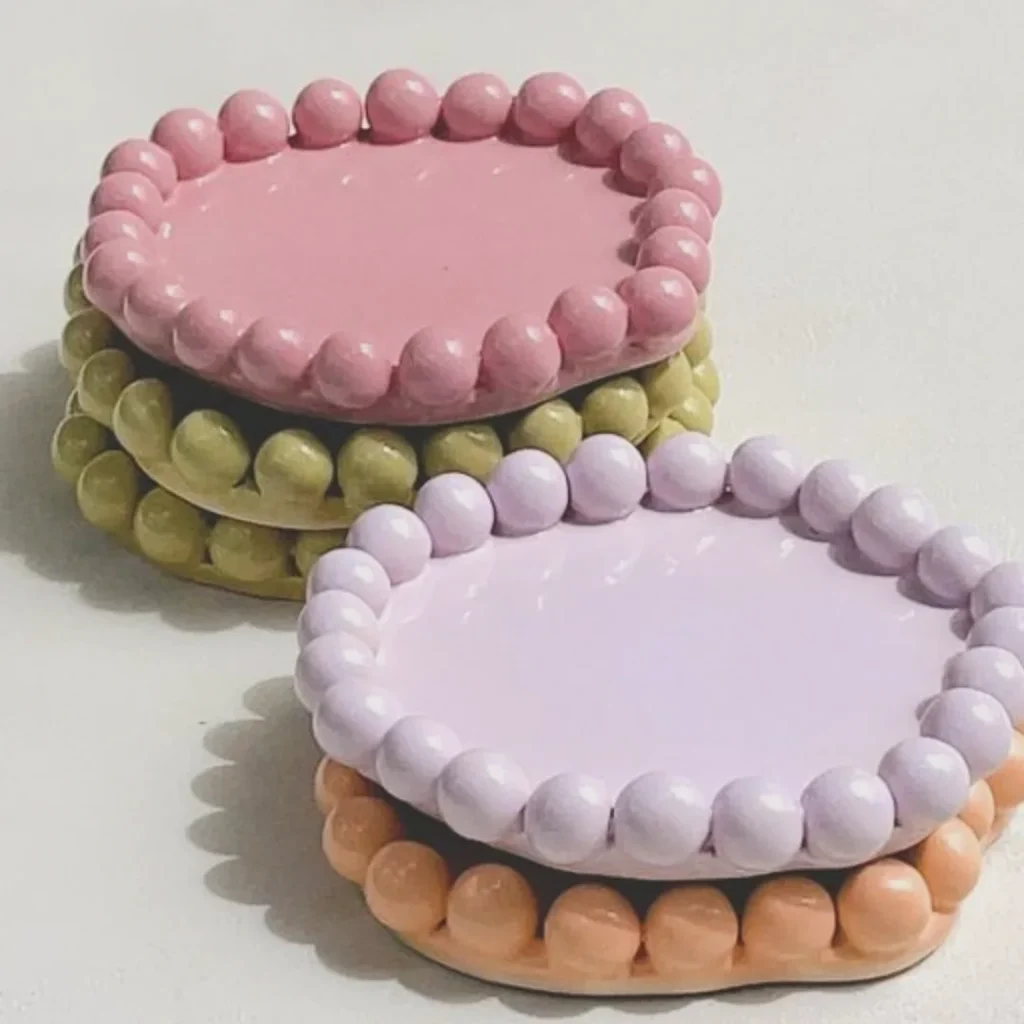
Every tray in this stack has the exact same detail circling the rim, rows of small glossy clay spheres that look almost edible against the flat pastel base.
Pink, olive green, lavender, and peach each get their own tray, and none of the colors are mixed, which keeps the whole stack looking clean and organized instead of busy.
Recreate this look
7. Hand Paint Hibiscus Blooms So Real They Fool the Plants Next to Them
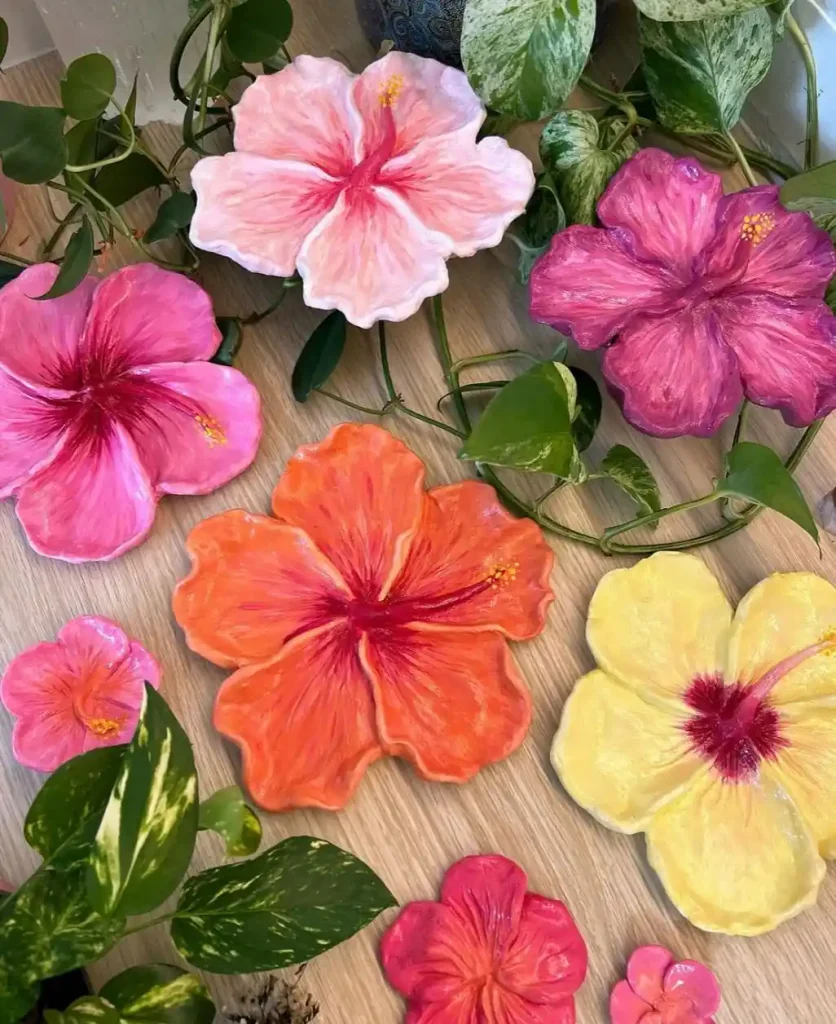
Set these next to actual houseplants and it takes a second look to tell which flowers are alive.
Each hibiscus petal is shaped with a natural ruffled edge, and the shading is where the magic happens, deep red centers fading out into pink, orange, or yellow tips with visible brush strokes that mimic real petal veining. No two blooms in the group are colored the same way.
The shading does more than the shape. A ruffled petal painted flat still looks fake, but a dark center fading into a lighter tip is what sells the illusion of a real flower.
8. Flat Character Magnets With Faces That Do All the Talking
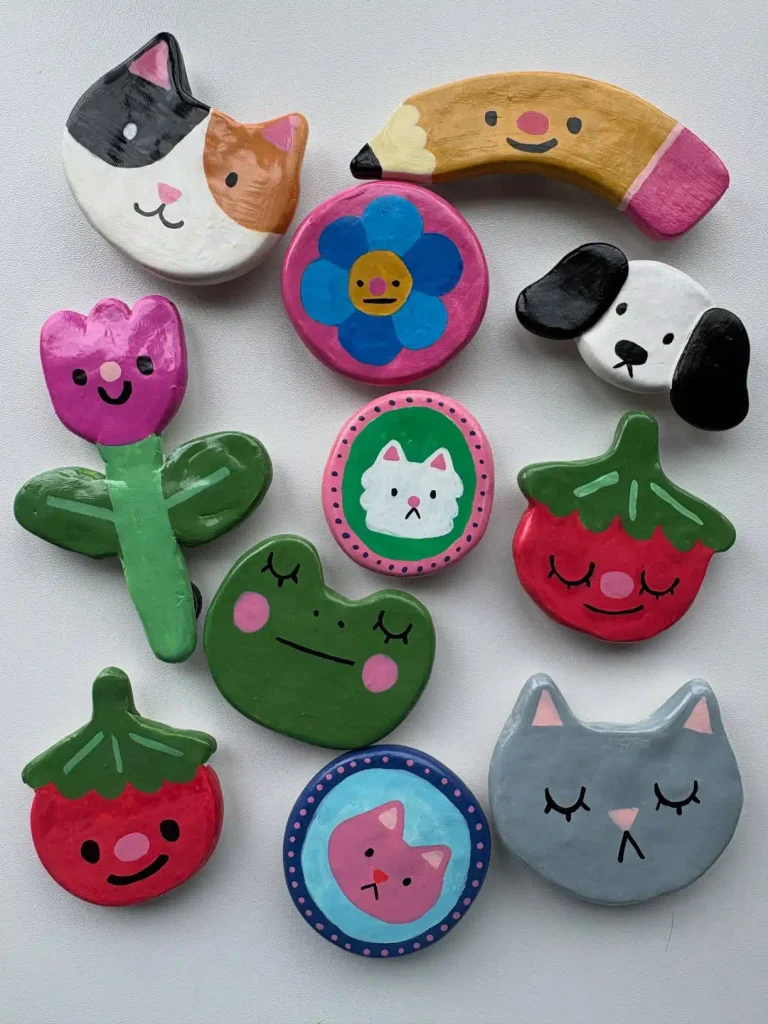
Eleven little faces, and every single one gets its personality from the eyes alone.
Some are wide open circles like the calico cat and the pencil, some are sleepy curved lines like the gray cat and the strawberry, and that one choice changes the whole mood of an otherwise simple flat shape.
The shapes themselves stay basic too, mostly rounded blobs, which makes this one of the more forgiving projects on the list for anyone still building up their sculpting confidence.
A few pairings worth noticing:
- The calico cat and the black and white dog use the same split color technique, just flipped in placement
- Both tomato characters share a shape but change expression, one smiling, one sleepy
- The pink and blue circle badges use a simple ring border to frame a smaller animal face inside
- The purple tulip gets stem and leaf details added separately, which lifts it off the flat pile of faces
| Open Eyes | Sleepy Eyes |
|---|---|
| Feels alert and playful, good for pets and food | Feels calm and content, good for produce and plants |
| Two dots plus a small highlight | Two short curved lines, no dot needed |
9. Build a Tiny 3D Scene on a Flat Clay Disc
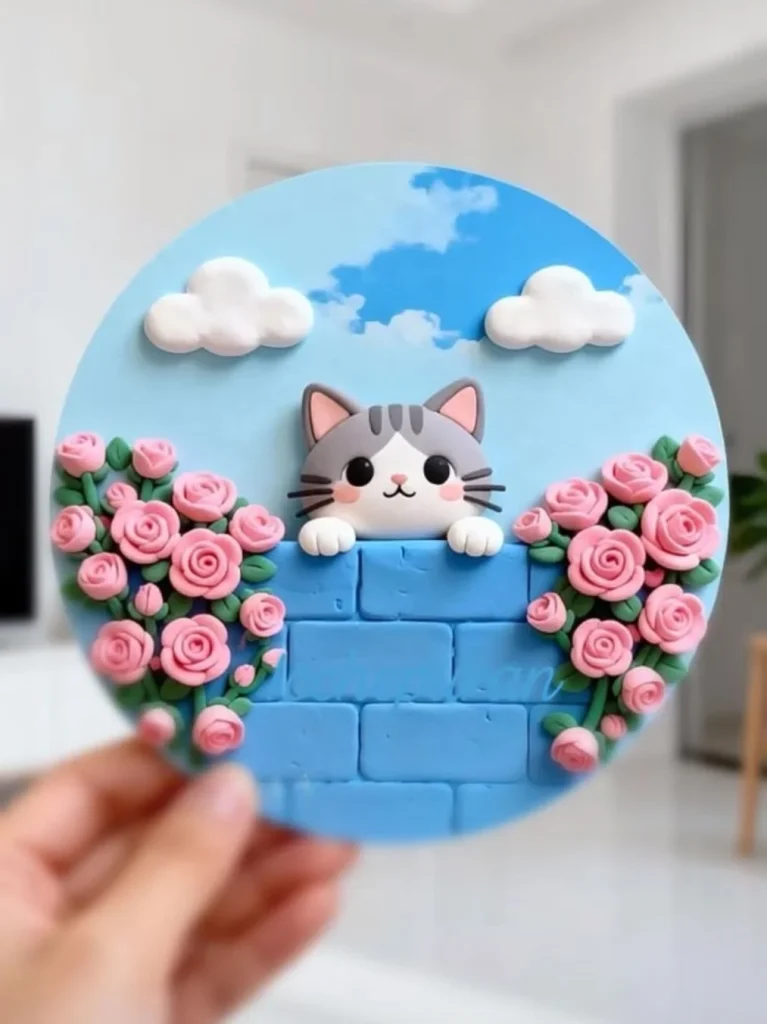
This one is not flat, and that’s what makes it stand out from a plain painted circle.
A soft gray tabby cat pokes up over a hand textured brick wall, paws resting on top, while two full rose vines climb up either side and puffy clouds sit high in a painted sky background.
Every element is sculpted separately, the cat, the bricks, the roses, the clouds, then layered and pressed onto the base disc so the whole piece has real height instead of sitting flat.
Breaking down the layers:
Sculpt each element separately and let pieces firm up before layering.
Build the wall texture before adding the cat so the bricks stay crisp.
Rushing the rose vines, since thin unsupported stems break easily.
Painting the sky after the clouds are attached, it gets messy fast.
10. Handmade Clay Napkin Rings For Special Occasions
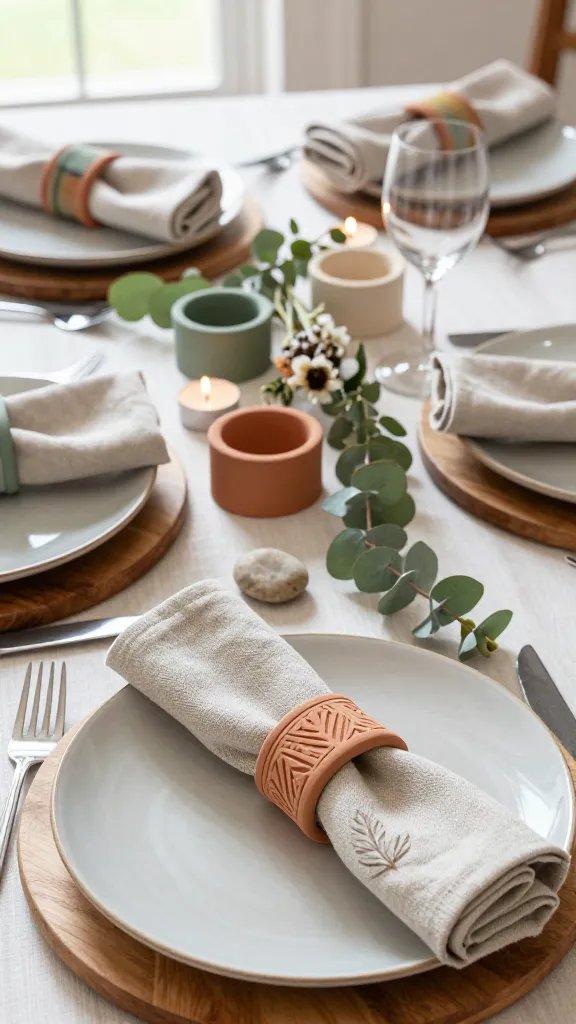
Want to make your dinner table look like you hired a professional stylist? Clay napkin rings add that handmade, thoughtful touch that turns regular meals into occasions worth remembering.
Roll clay into logs, then form them into rings that fit around rolled napkins—test the size before they dry!
Add details like tiny leaves, geometric cutouts, stamped patterns, or simple painted bands.
You can theme them seasonally with fall leaves, winter snowflakes, spring flowers, or summer seashells.
Pro Tips
- Make extras because they’re fragile and backups are smart
- Sand the edges smooth after drying for a polished look
- Mix metallic paint with matte finishes for dimension
- Store them carefully wrapped in tissue between uses
Use these for holiday dinners, birthday celebrations, or even casual Sunday brunches that you want to feel a little more special. Your guests will definitely notice the extra effort.
11. Minimalist Clay Ring Dish With Gold Accents
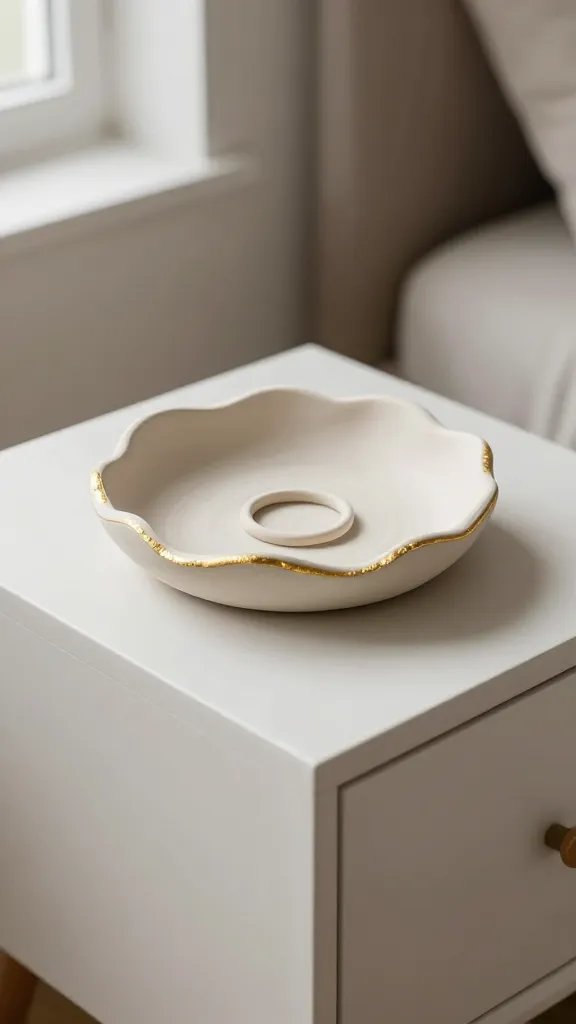
This little beauty combines the natural texture of air-dry clay with luxe metallic touches that elevate the whole vibe.
Materials Needed
- Air-dry clay (white or terracotta)
- Rolling pin or smooth bottle
- Small bowl for shaping
- Gold leaf or metallic acrylic paint
- Mod Podge or clear sealer
Roll out your clay to about a quarter-inch thickness, then drape it over an upside-down bowl to create that perfectly imperfect curved shape.
Once it’s dry, add delicate touches of gold leaf along the edges or paint abstract brushstrokes across the surface.
These make incredible gifts for literally anyone who wears jewelry, and you can customize the size based on whether they’re a dainty-ring person or a statement-piece collector.
12. Boho Rainbow Wall Hanging With Clay Beads
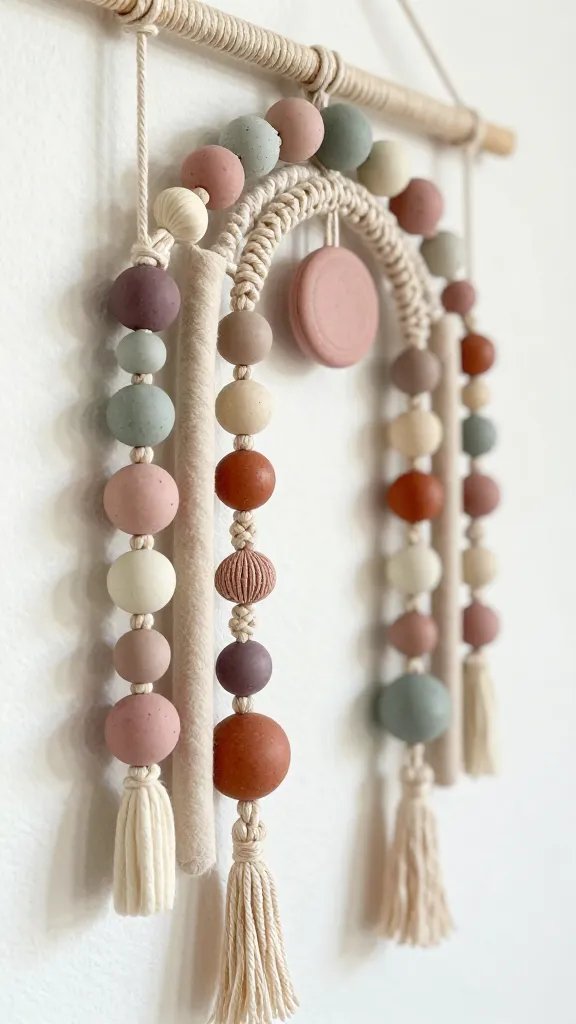
If you’ve been eyeing those gorgeous clay bead wall hangings all over Pinterest, it’s time to make your own.
This craft combines polymer clay beads in dreamy pastel or earthy tones with macramé cord to create a statement piece that screams boho chic.
Shape different-sized beads from polymer clay, making sure to poke holes through them before baking according to package directions.
Mix round beads with tubes, discs, and even tiny mushroom shapes for added visual interest.
Once cooled, thread them onto cotton cord in a rainbow pattern or ombré gradient, then attach everything to a wooden dowel or driftwood piece.
Hang this beauty above your bed, in a reading nook, or anywhere that needs a pop of handmade charm. Trust me, people will ask where you bought it.
13. Personalized Clay Plant Markers For Your Herb Garden
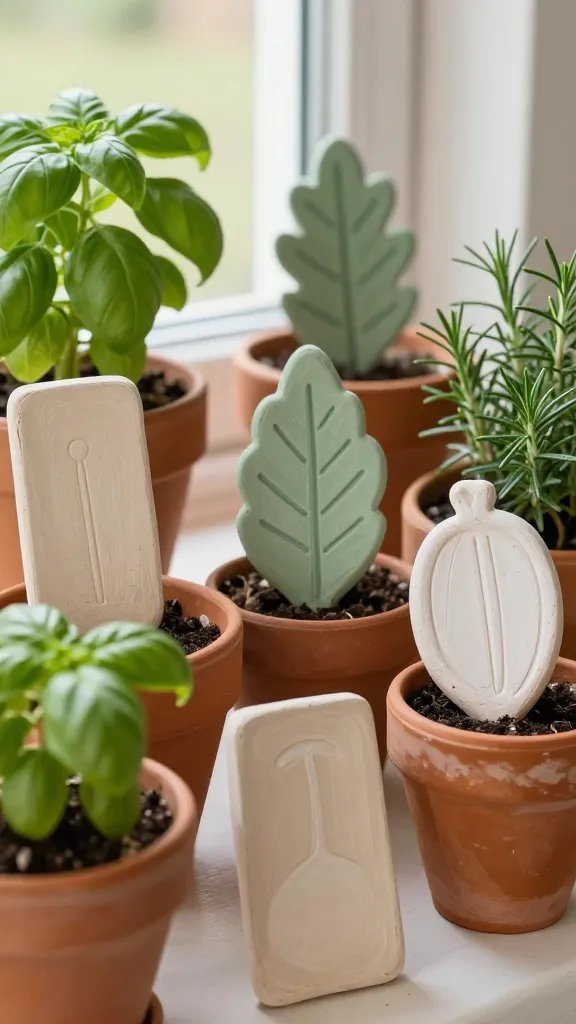
Your basil deserves better than a popsicle stick with sharpie scribbles, right? These adorable clay plant markers add cottage-core vibes to any windowsill garden while actually being functional.
How to Make It
Cut air-dry clay into small rectangles or fun shapes like leaves or vegetables. Use letter stamps, a toothpick, or even your own handwriting to mark each herb name before the clay dries.
You can keep them natural terracotta-style or paint them in soft greens, creams, and whites for that French countryside aesthetic.
Attach them to wooden skewers or popsicle sticks, and suddenly your kitchen garden looks intentional and Instagram-worthy.
These also make thoughtful gifts for the plant-obsessed friend in your life (you know the one).
14. Textured Clay Coasters With Lace Imprints
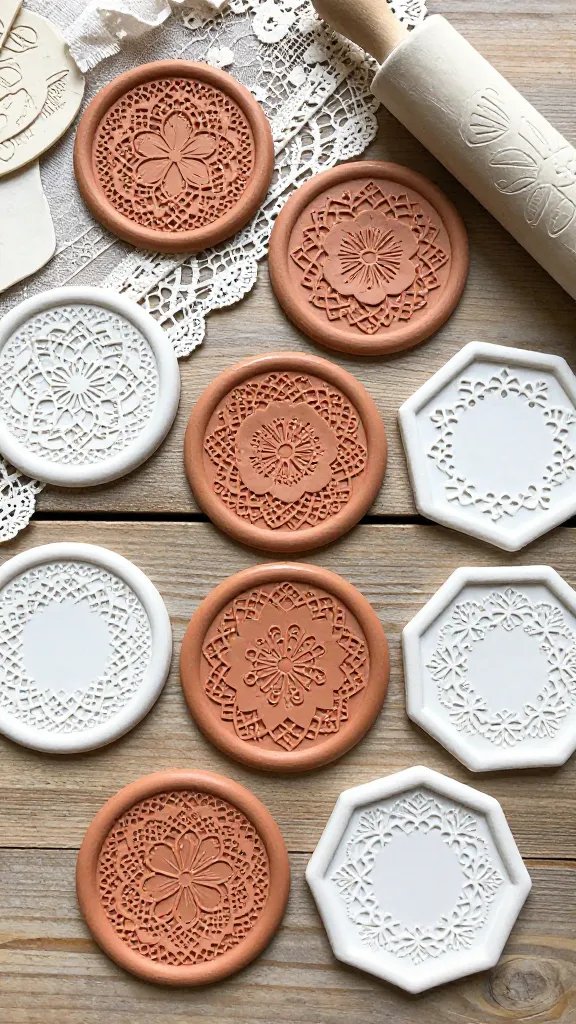
Here’s where clay gets seriously cool—you can transfer any texture onto it, and lace creates the most stunning delicate patterns. These coasters look like expensive artisan pieces but cost almost nothing to make.
Roll out your clay, press a piece of lace firmly into the surface, then carefully peel it away to reveal the gorgeous imprint.
Cut into circles or hexagons using cookie cutters or a knife, then let them dry completely.
Seal with a waterproof varnish because, you know, they’re coasters and will definitely meet condensation.
Styling Ideas
- Keep them natural white for a Scandinavian look
- Add watercolor washes in soft blues or pinks
- Paint the edges in contrasting colors
- Stack them with a leather cord for gift-giving
Set these out during your next dinner party and watch everyone ask about them.
15. Miniature Clay Succulent Garden That Never Needs Watering
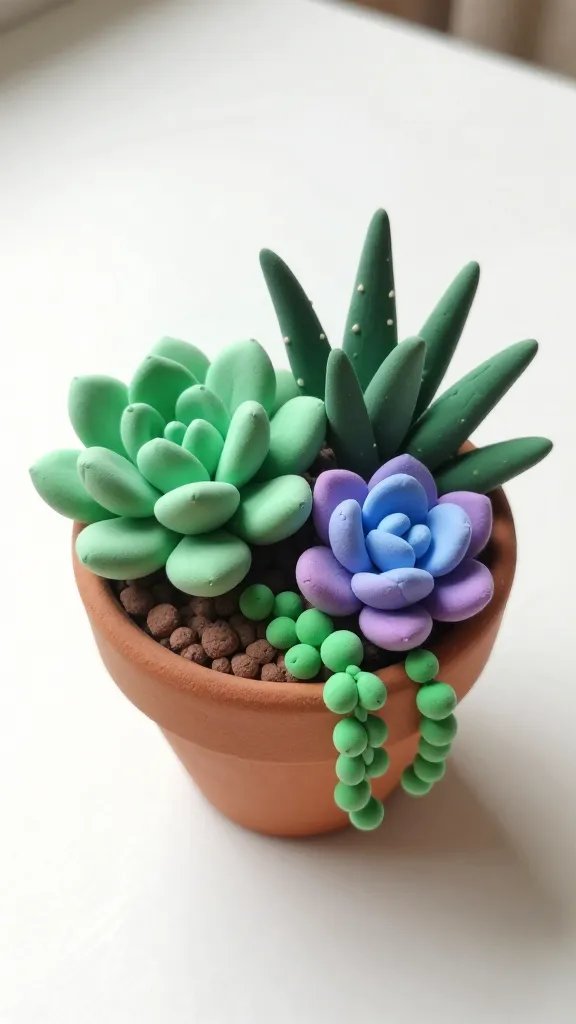
If you love the look of succulents but have the opposite of a green thumb, this craft is your solution.
Create an entire tiny succulent arrangement from polymer clay that looks surprisingly realistic and requires zero maintenance.
Use different shades of green, blue-green, and even purple polymer clay to sculpt various succulent types—echeveria rosettes, trailing string-of-pearls, and spiky aloe varieties.
Layer thin petals for the rosettes, roll tiny balls for the pearls, and add texture with toothpicks for realistic details.
Arrange them in a small terracotta pot with real soil or sand on top, and suddenly you have greenery.
This is seriously therapeutic to make and looks adorable on desks, shelves, or gifted to someone who kills every real plant they touch.
16. Geometric Clay Incense Holders With Modern Vibes
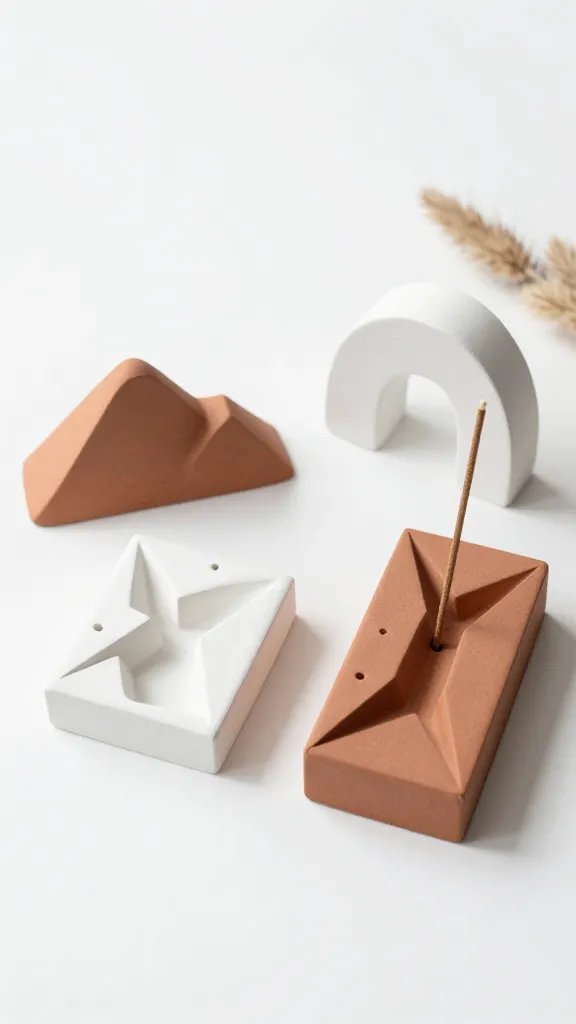
Incense holders can be boring and basic, or they can be these sculptural little works of art that double as decor even when you’re not burning anything. Think clean lines, interesting shapes, and that minimalist-meets-artsy aesthetic.
Shape air-dry clay into geometric forms—triangular mountains, abstract arches, or simple rectangular blocks with interesting angles.
Before the clay dries, poke a small hole at an upward angle to hold your incense stick, and add a shallow groove along the front to catch the ash. Paint them in trendy colors like sage green, terracotta, or matte black.
These look expensive, elevate your self-care routine, and make your space smell amazing. What’s not to love?
17. Custom Clay Keychains With Stamped Initials
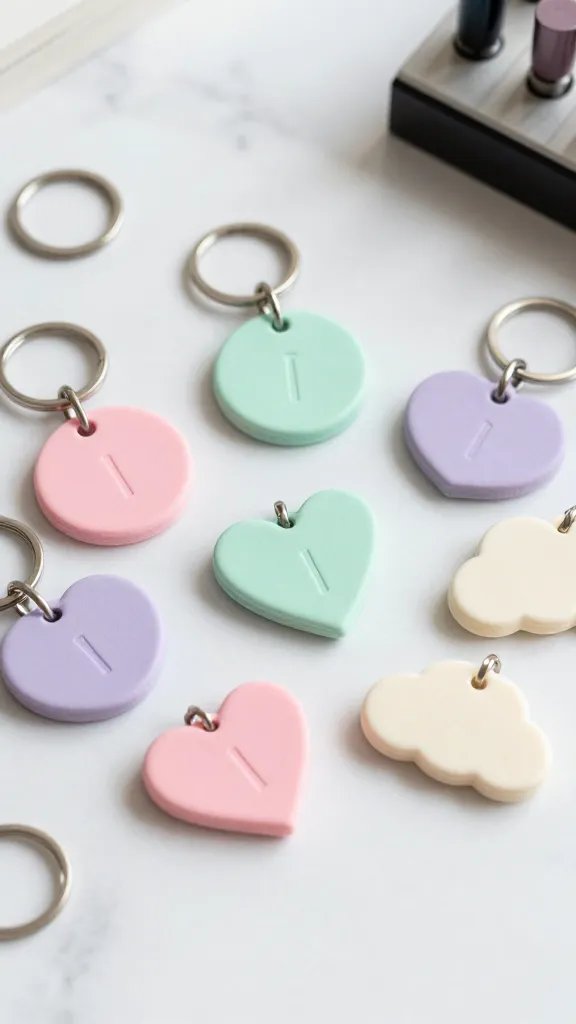
Sometimes the best crafts are the small, everyday items that add personality to your routine.
These polymer clay keychains are completely customizable and actually durable enough for daily use.
Materials Needed
- Polymer clay in your favorite colors
- Letter stamps or alphabet cookie cutters
- Keychain rings and jump rings
- Drill or large needle for making holes
- Clear glaze for finishing
Cut your clay into circles, rectangles, or fun shapes like clouds or hearts. Stamp initials or short words into the surface, add patterns with texture tools, or mix colors for a marbled effect. Don’t forget to make a hole for the keychain ring before baking!
Make matching sets for your whole friend group, create personalized gifts, or just make yourself a collection because clay keychains in every color is totally reasonable.
18. Decorative Clay Wall Planters With Drainage Holes
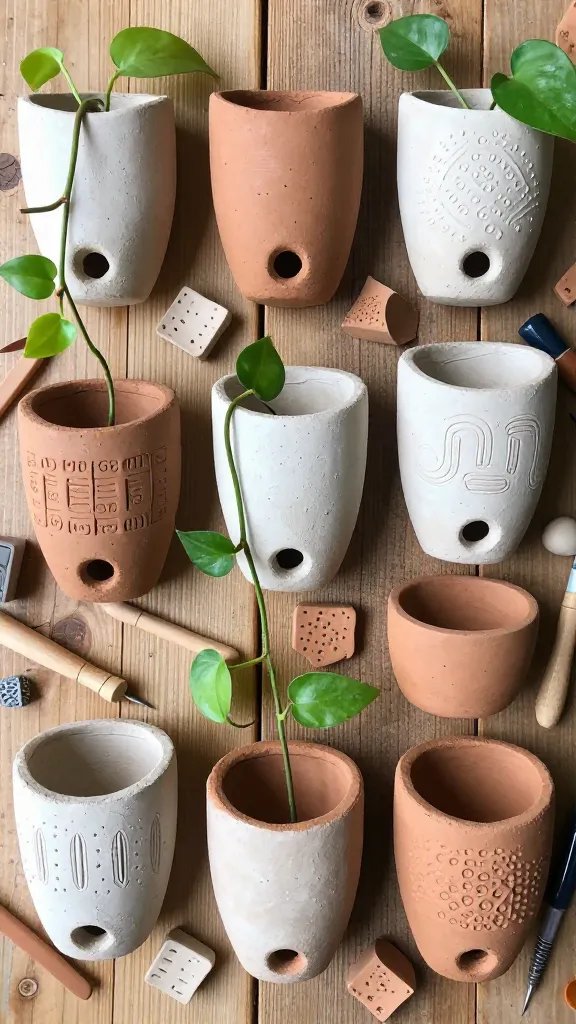
Wall planters are having a major moment, and making your own from clay means you can create exactly the size, shape, and style you want. These work beautifully for small pothos, philodendrons, or air plants.
Form air-dry clay into pocket-shaped vessels with flat backs that sit flush against the wall.
Create a small drainage hole at the bottom (seriously important for plant health), and add texture to the front with stamps, carving tools, or even fork tines for a rustic look. Once dry and sealed, attach a small wire or leather loop to the back for hanging.
Cluster several at different heights for a living wall effect, or use just one as a statement piece. FYI, these look incredible in entryways or above kitchen sinks.
Conclusion
There you have it—nine completely different ways to turn simple clay into something beautiful, functional, and totally you.
The best part about clay crafts is that there’s no wrong way to do them, and even the “imperfect” pieces have character.
Pick one project that speaks to you, grab some clay, and let your hands do the creating. You might just discover your new favorite creative outlet!