
Scented Candle Making: 9 Easy DIY Ideas

Are you searching for a creative hobby that’s both relaxing and useful? Scented candle making is a great way to express your style while filling your home with lovely scents. Explore these ideas to craft candles that are perfect for yourself or as gifts.
I still remember my first attempt at scented candle making. I thought it would be simple—melt wax, add fragrance, and pour. But the result? A weak scent and an uneven burn. It was frustrating after putting in the effort.
That’s when I realized the magic is in the details. The right wax, proper temperature, and correct fragrance ratio make all the difference. Once I learned these basics, everything changed.
Now, candle making is one of my favorite DIY projects. It’s creative, personal, and incredibly rewarding. And if you’ve ever struggled with weak scents or poor burns, don’t worry—simple techniques can turn your candles into something beautiful and long-lasting.
Understanding the Basics of Scented Candle Making Before You Begin
Before diving into scented candle making ideas, it is essential to understand the core elements that influence fragrance quality and burn performance.
Choosing the right wax type, selecting appropriate fragrance oils, and maintaining correct pouring temperatures all play a crucial role in achieving the perfect candle.
A strong foundation ensures that your DIY scented candles not only look appealing but also deliver a consistent and long-lasting aroma.
9 Scented Candle Making Ideas
Layered Rainbow Candles in Glass Jars
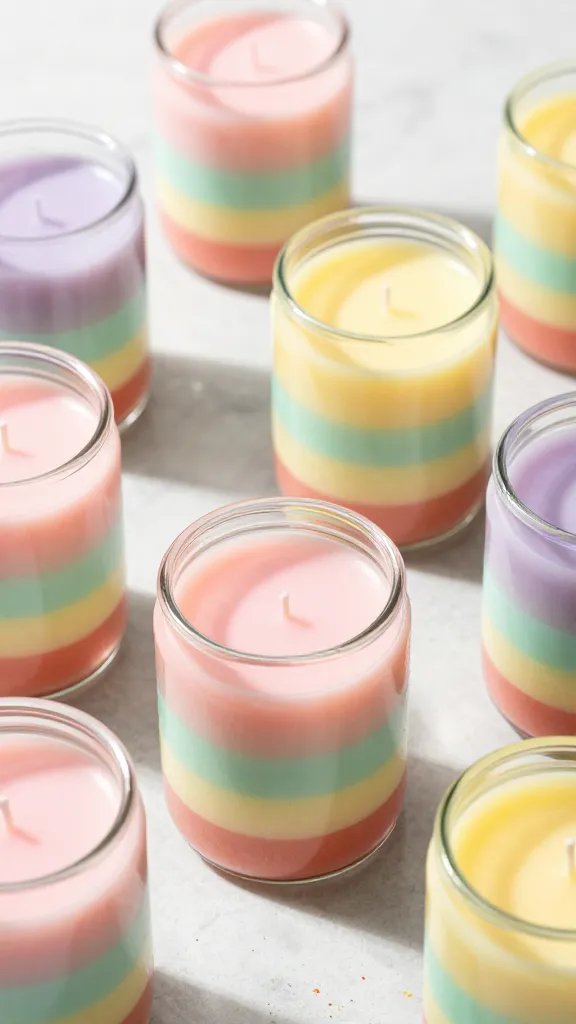
Picture this: gorgeous stripes of color stacked perfectly in a clear glass jar, each layer releasing its own unique scent as it melts.
These layered rainbow candles are total showstoppers that look way more complicated than they actually are.
The trick is letting each colored wax layer cool completely before pouring the next one, creating those clean, Instagram-worthy lines.
Materials Needed
- Soy or paraffin wax flakes
- Candle dye in multiple colors (think pastels or bold brights)
- Different fragrance oils for each layer
- Cotton wicks with tabs
- Clear glass jars or tumblers
- Double boiler or melting pot
How to Make It
Start by securing your wick to the bottom center of your jar using a dab of melted wax or a wick sticker. Melt your first batch of wax, add your chosen color and scent, then pour a thin layer into the jar.
Wait about 30-45 minutes until it’s completely solid before melting and pouring the next color. Repeat this process for each layer, mixing up scents like lavender, vanilla, citrus, and eucalyptus.
The beauty of this project is that you can match your layers to any color scheme—pastels for spring, earth tones for fall, or even your favorite sports team colors. These make incredible gifts because they’re so personalized and eye-catching on any shelf or coffee table.
Coffee Bean Embedded Candles for Kitchen Counters
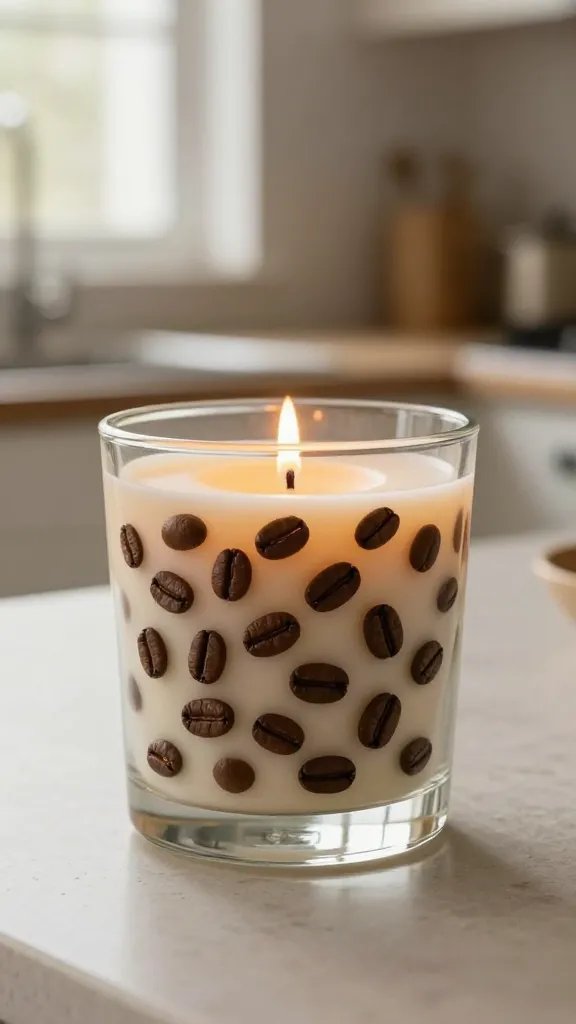
If you’re obsessed with the smell of fresh coffee (who isn’t?), you’ll love these rustic candles that feature actual coffee beans pressed into the wax.
They’re perfect for kitchen windowsills or dining room tables, and the beans create this gorgeous textured look that feels both cozy and sophisticated. Plus, as the candle burns, it releases a warm coffee-vanilla aroma that’s absolutely divine.
Simply pour a layer of vanilla or caramel-scented wax into a container, let it cool slightly until it’s tacky, then gently press whole coffee beans into the surface in whatever pattern you like. You can create swirls, straight lines, or cover the entire surface for maximum impact.
Pour a final thin layer of wax over the beans to seal them in place, making sure to leave some beans visible at the top for that artisan look.
These candles pair beautifully with burlap ribbon tied around the jar or a rustic wooden wick for extra crackling ambiance. Trust me, your morning coffee routine just got a major upgrade.
Pressed Flower Candles in Pillar Form
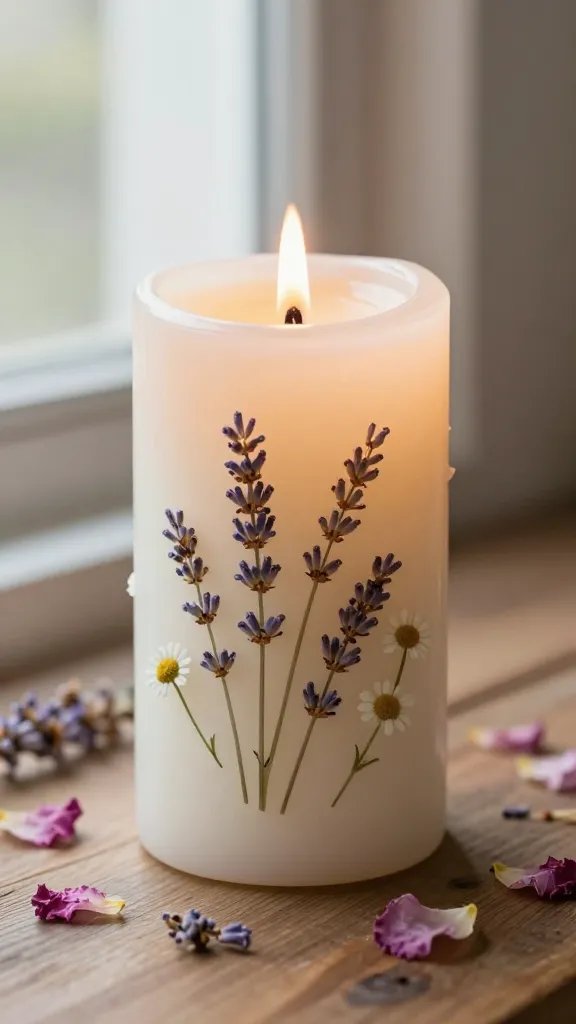
Bring the garden indoors with these absolutely stunning pressed flower candles that look like they belong in a fancy boutique.
The secret is using real dried flowers—think lavender sprigs, rose petals, or daisies—and carefully adhering them to the outside of pillar candles. The flowers become beautifully translucent when the candle glows, creating this enchanting botanical effect.
Materials Needed
- White or ivory pillar candles (unscented or lightly scented)
- Pressed and dried flowers
- Wax paper
- Spoon for smoothing
- Heat gun or hairdryer
Arrange your pressed flowers on the outside of the candle exactly how you want them. Gently heat the candle surface with a hairdryer or heat gun until the wax becomes slightly tacky, then press the flowers into place.
Use a piece of wax paper and the back of a warm spoon to smooth everything down, sealing the flowers completely into the wax.
The heat melts just enough wax to create a protective layer over the botanicals. These romantic candles are perfect for weddings, bridal showers, or just adding a touch of nature-inspired elegance to your space. They’re surprisingly easy but look incredibly professional.
Teacup Candles With Vintage Charm
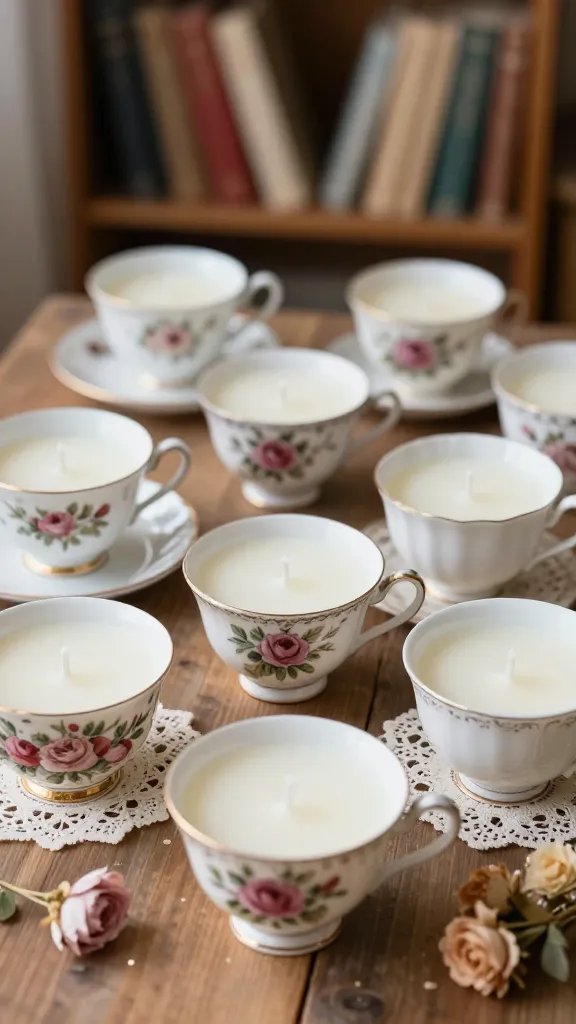
Got some mismatched teacups gathering dust in your cabinet? Turn them into the cutest little candles that are perfect for gifting or styling on bookshelves.
Vintage teacup candles have this shabby-chic appeal that works with literally any decor style, and you can match the scent to the teacup’s vibe—floral scents for rose-patterned china, Earl Grey tea fragrance for classic white cups.
The process is super simple: just secure a wick in the center of your teacup, melt your wax with your chosen fragrance oil, and pour. The teacup acts as both the mold and the permanent container, so there’s no unmolding required. You can even leave the matching saucer attached as a built-in coaster.
Pro Tips
Check thrift stores and estate sales for affordable vintage teacups with unique patterns. Mix and match different florals and china styles for an eclectic collection, or stick to one color family for a more cohesive look. These also make thoughtful Mother’s Day or hostess gifts that feel extra special and handmade.
Citrus Rind Container Candles
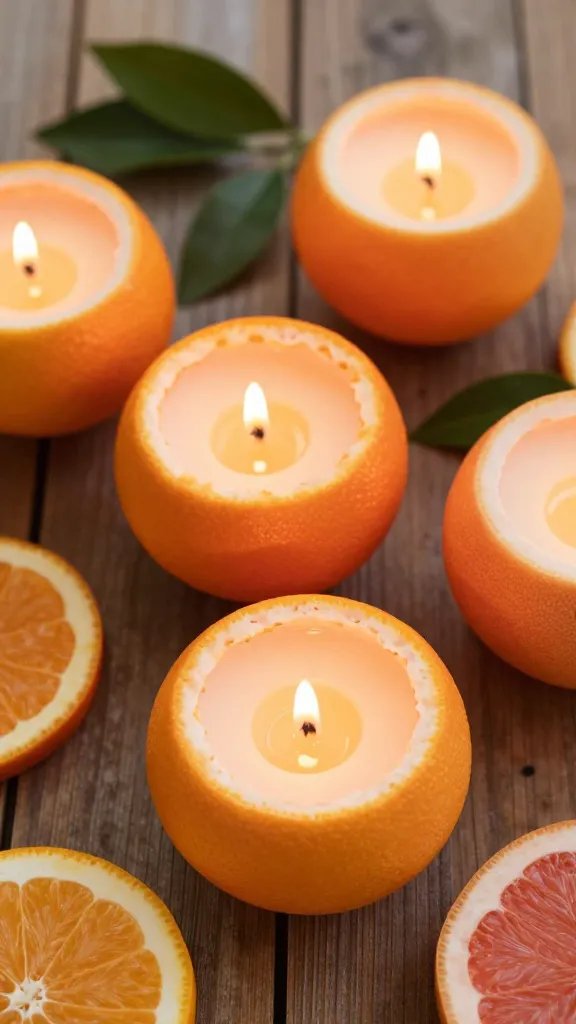
Here’s a fun twist that’s equal parts creative and eco-friendly: candles poured directly into hollowed-out citrus peels.
Orange halves, grapefruit shells, or even lemon rinds become biodegradable candle containers that naturally complement citrus-scented wax. As they burn, the heat releases essential oils from the rind itself, amplifying that fresh, zesty aroma.
Cut your citrus fruit in half and carefully scoop out all the flesh (save it for smoothies or snacking). Make sure the rind is completely dry before pouring your melted wax. Use fresh citrus scents like orange zest, lemon verbena, or grapefruit mint for a cohesive experience.
These candles are gorgeous for outdoor dinner parties or summer gatherings, and they’re completely compostable once they’ve burned down.
The rustic, natural look is seriously charming, and guests always ask how you made them. Just be aware these are best for one-time use occasions since the rinds will eventually dry out and deteriorate.
Geometric Concrete Candle Holders With Wax Inserts
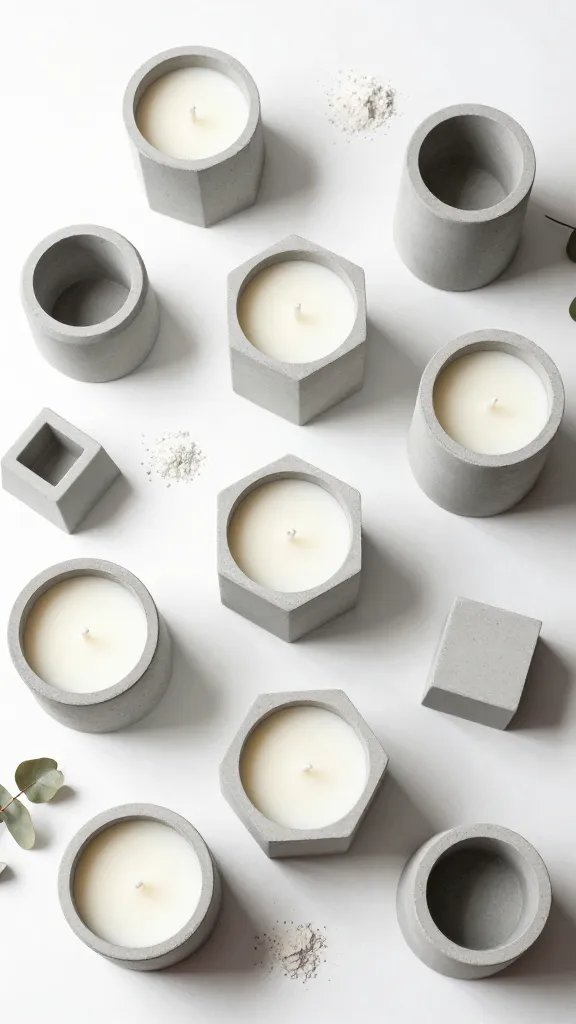
If you’re into that modern minimalist aesthetic, these geometric concrete candles are about to become your new obsession.
You’ll create concrete vessels using silicone molds in cool shapes like hexagons, cylinders, or cubes, then pour scented wax directly into the cavity. The industrial-meets-cozy vibe is absolutely on trend right now.
Materials Needed
- Quick-setting concrete mix
- Geometric silicone molds
- Small plastic cups or tubes (for creating the wax cavity)
- Soy wax and wicks
- Masculine scents like cedarwood, tobacco, or sandalwood
Mix your concrete according to package directions and pour it into your mold. Before it sets, press a smaller container into the center to create a hollow space for the wax.
Once the concrete is fully cured (usually 24-48 hours), remove it from the mold, take out the placeholder, and pour your scented wax into the cavity with a wick.
These make fantastic gifts for guys or anyone who appreciates clean, contemporary design. The concrete stays cool to the touch even when the candle is burning, and you can customize the look with metallic paint accents or leave it raw for that industrial edge.
Ombré Dipped Taper Candles
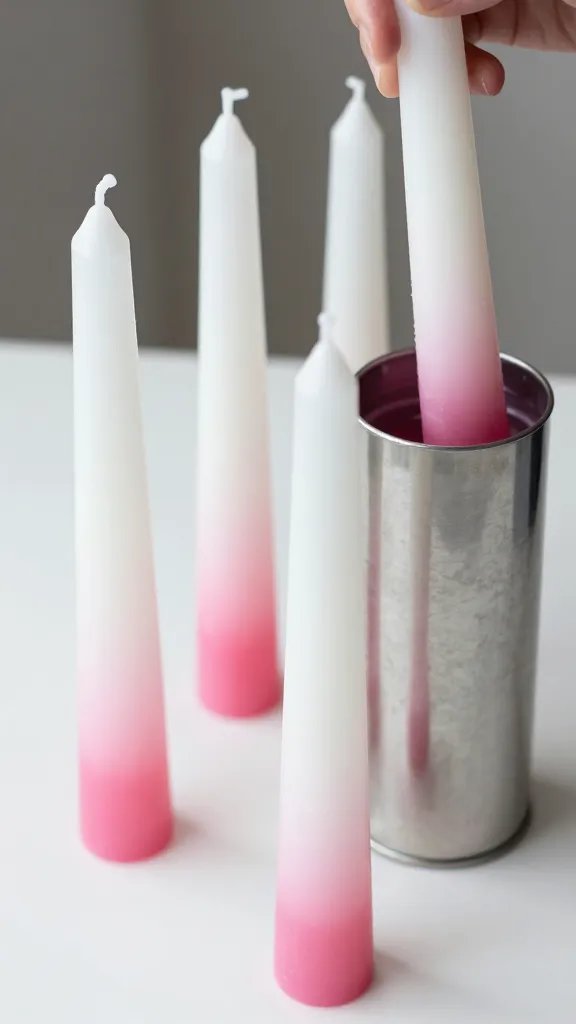
Elevate plain white taper candles into works of art with this simple dipping technique that creates a gorgeous gradient effect.
You’ll repeatedly dip the bottom portion of white tapers into colored wax, building up layers that fade from deep color at the base to pure white at the top. The ombré effect is stunning when you display several candles together in varying heights.
Melt colored wax in a tall, narrow container (a cleaned soup can works great). Dip the bottom third of your white taper into the colored wax, hold for a second, then pull it out slowly.
Let it cool for about 30 seconds, then dip again, going slightly less deep each time to create that gradient fade. Repeat 5-10 times until you achieve your desired color intensity.
This technique works beautifully with jewel tones like emerald, sapphire, or amethyst for dramatic dinner party centerpieces. You can also do subtle pastels for baby showers or weddings. FYI, these look absolutely magical in gold or brass candlestick holders.
Terrazzo-Style Speckled Candles
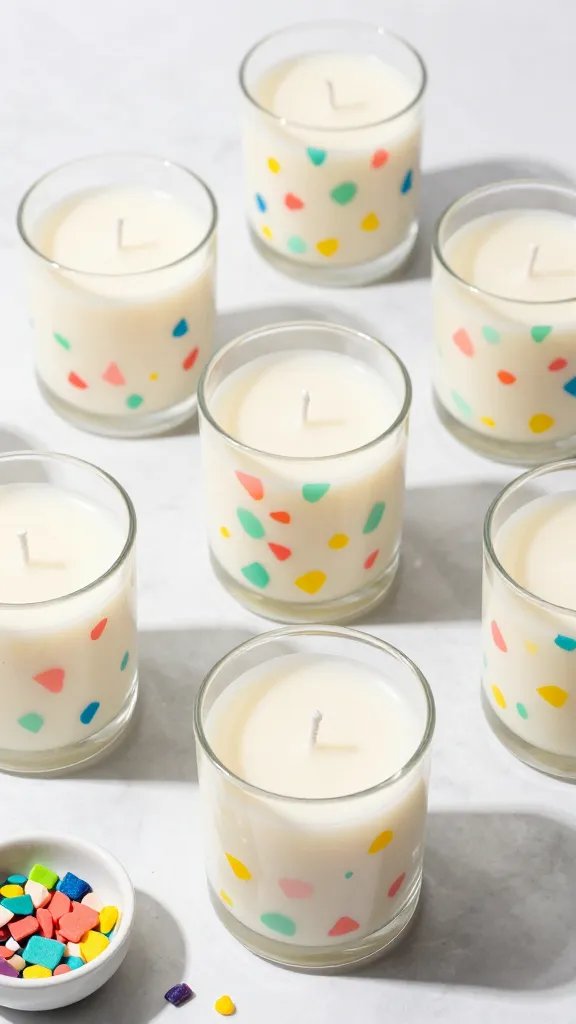
Terrazzo is having a major moment in home decor, and now you can bring that trendy speckled pattern to your candles.
This technique involves adding small chunks of colored wax to white or neutral wax, creating a fun confetti-like effect that’s totally unique every time. The finished candles look playful and contemporary, perfect for modern spaces or colorful craft rooms.
How to Make It
First, create your “terrazzo chips” by melting small batches of wax in various bright colors, pouring them thin on wax paper, and breaking them into small irregular pieces once cooled.
Melt your base wax (white or cream works best), let it cool slightly, then stir in your colorful wax chunks. Pour everything into your container before the base wax fully hardens, so the chips stay suspended throughout.
The beauty of this style is that no two candles ever look exactly alike. You can go bold with neon colors or keep it sophisticated with muted pastels and gold flakes mixed in. These seriously look like expensive designer candles but cost just dollars to make.
Wooden Wick Candles in Ceramic Bowls
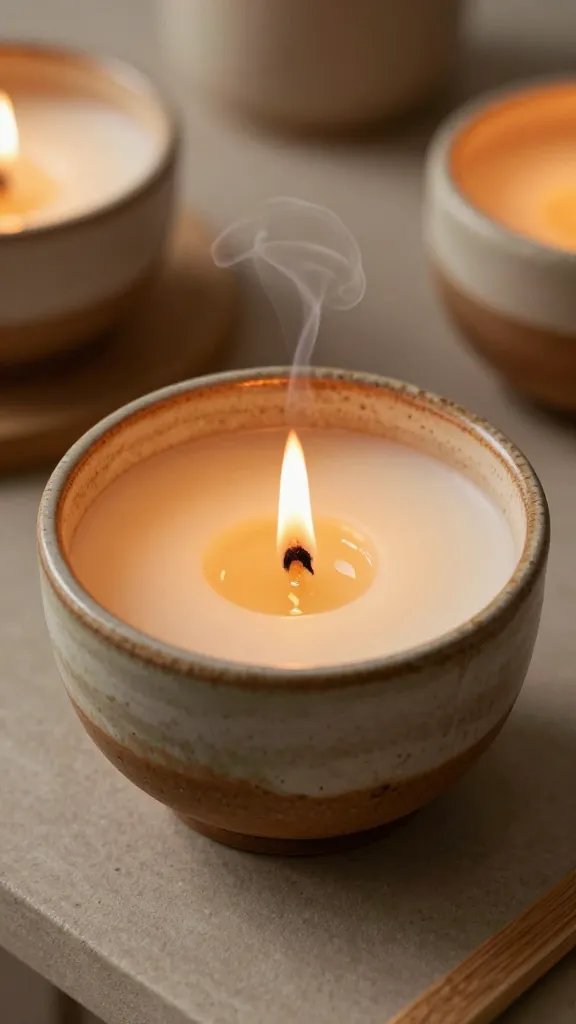
There’s something incredibly soothing about the soft crackling sound of a wooden wick candle—it’s like having a tiny fireplace right on your nightstand.
Pair wooden wicks with beautiful ceramic bowls or pottery vessels, and you’ve got a candle that appeals to multiple senses at once. The gentle crackling combined with cozy scents like firewood, vanilla bourbon, or cinnamon creates the ultimate relaxation experience.
Choose shallow ceramic bowls or handmade pottery pieces with interesting glazes and textures. Wooden wicks require slightly different setup than cotton wicks—you’ll need to secure them with special wick clips or glue dots to keep them centered and upright.
Use wax blends specifically designed for wooden wicks (usually soy-paraffin blends) for the best burn and crackling effect.
Scent-wise, go for warm, comforting fragrances that complement the natural wood element: think amber and sandalwood, campfire marshmallow, or spiced apple cider.
These candles are perfect for creating that hygge atmosphere everyone’s always talking about, and the ceramic vessels can be washed and reused once the candle burns down.
Ready to Get Crafty?
Whether you’re drawn to the modern geometric concrete look or the romantic charm of pressed flowers, there’s a candle project here calling your name.
The best part about DIY candles is that once you master the basics, you can experiment endlessly with colors, scents, and containers to create something totally unique.
So grab some wax, pick your favorite idea, and get ready to fill your home with beautiful handmade candles that smell absolutely amazing!






