
8 DIY Paper Vines Ideas for a Fresh Aesthetic

Want to add a touch of nature to your room without the mess of real plants? DIY paper vines are a fun and stylish way to do it. These ideas will help you create eye-catching wall decor that feels fresh, cozy, and totally unique.
When I first tried decorating a blank wall, I realized how expensive beautiful decor could be. I wanted something natural and cozy without spending much, so I turned to DIY Paper Vines.
With just paper, glue, and a little creativity, I experimented with shapes, layers, and colors until simple leaves became beautiful hanging vines.
Now, my plain wall feels fresh, personal, and full of charm—all from an easy craft project.
Cascading Eucalyptus Garland With Watercolor Leaves
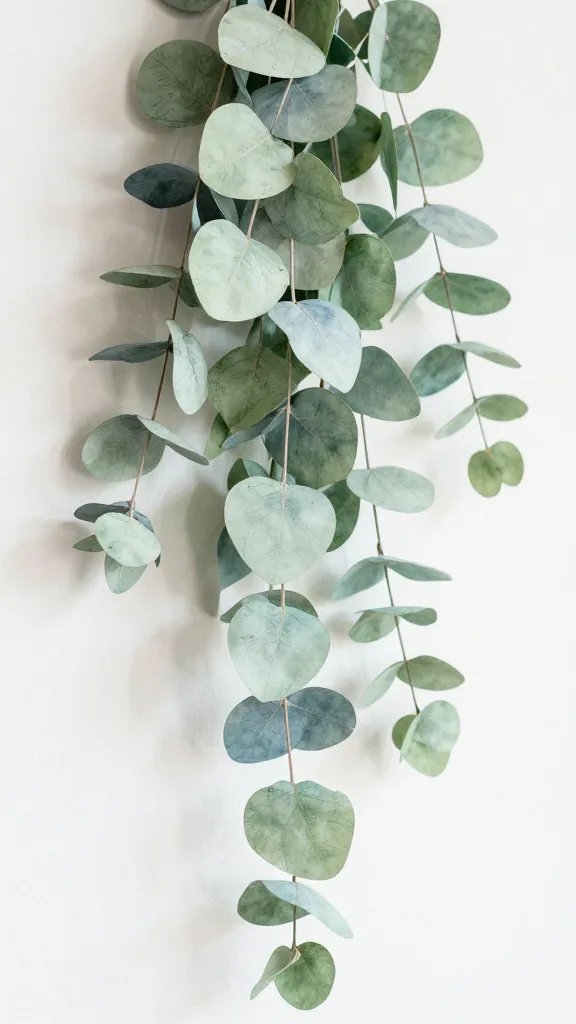
Picture this: delicate eucalyptus leaves in soft watercolor greens and blues, cascading down your wall like they’re straight from a botanical garden.
This garland brings that trendy farmhouse-chic aesthetic without spending a fortune at the florist.
Materials Needed
- Watercolor paper or cardstock
- Watercolor paints in sage green, dusty blue, and mint
- Floral wire or thin twine
- Eucalyptus leaf template (easily found online)
- Hot glue gun
How to Make It
Start by painting your watercolor paper in varying shades of green and blue, letting the colors blend naturally for that organic look.
Once dry, trace and cut out eucalyptus leaf shapes in different sizes. Attach the leaves to your wire or twine using hot glue, alternating sides as you work your way down to create that authentic cascading effect.
Drape these beauties across a mantel, behind your bed’s headboard, or along a dining table for your next dinner party.
The watercolor effect makes each garland completely unique, so no two will ever look exactly the same.
Tropical Monstera Leaf Wall Installation
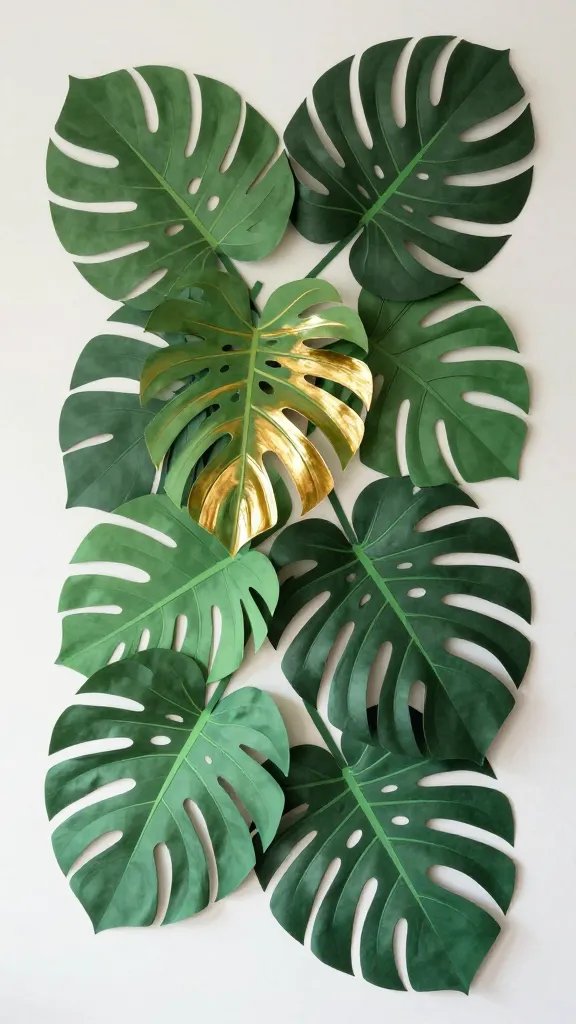
Nothing screams “tropical paradise” quite like those iconic split-leaf monstera plants. This dramatic wall installation creates a stunning focal point that’ll have your guests asking where you bought it—and they’ll never guess you made it yourself.
Materials Needed
- Large sheets of dark green cardstock or poster board
- Monstera leaf templates in various sizes
- Scissors or craft knife
- Command strips or mounting putty
- Optional: metallic gold paint for leaf edges
Cut out monstera leaves ranging from small to extra-large, making sure to create those characteristic splits and holes.
For extra dimension, gently curl the edges backward using a pencil. Arrange them climbing up a corner wall or spreading across an empty space above your couch.
The key here is layering—overlap some leaves and let others stand alone to create depth. This works beautifully in living rooms, bedrooms, or even as a photo booth backdrop for parties.
Delicate Ivy Vine Curtain for Doorways
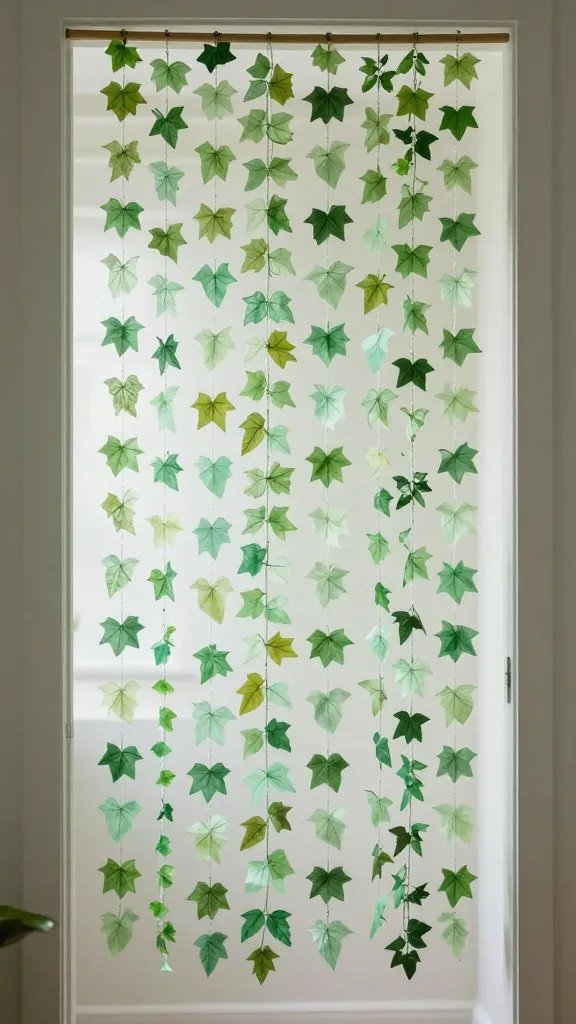
Transform any boring doorway into a magical entrance with flowing ivy vine curtains. This project gives major fairy garden vibes and works perfectly for creating dreamy room dividers or party decorations.
Materials Needed
- Green tissue paper or crepe paper in multiple shades
- Fishing line or clear thread
- Ivy leaf template
- Tension rod or wooden dowel
- Scissors
Pro Tips
Cut your ivy leaves from different shades of green tissue paper to add natural variation. Attach them to long strands of fishing line, spacing them organically rather than evenly—real ivy doesn’t grow in perfect patterns, right?
Hang multiple strands from your tension rod at different lengths for that cascading curtain effect.
This works wonderfully for spring or summer parties, fairy-tale themed events, or just adding a whimsical touch to a child’s bedroom. The tissue paper catches light beautifully and creates gorgeous shadows.
Ombre Paper Wisteria Chandelier
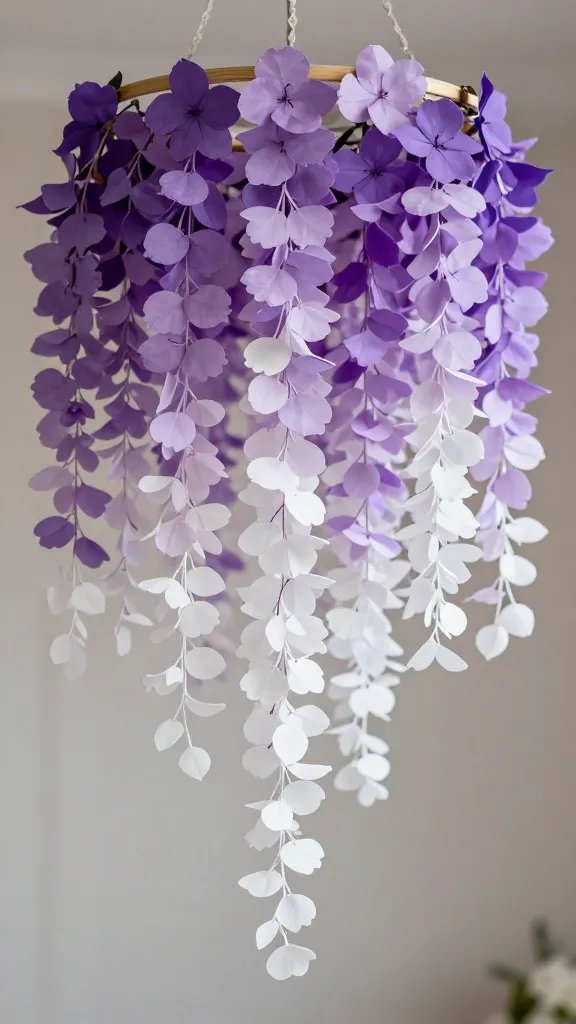
Seriously, if you want to create something that looks ridiculously expensive but costs almost nothing, this wisteria chandelier is it.
The cascading ombre effect in purples and whites creates an elegant, romantic atmosphere that’s perfect for weddings or special occasions.
Materials Needed
- Cardstock in gradient purples (deep purple to lavender to white)
- Embroidery hoop or wire wreath frame
- Thread or fishing line
- Small oval template for petals
- Hot glue gun
Cut hundreds of small oval petals from your purple cardstock, organizing them by shade. String them onto thread, starting with white at the bottom and gradually transitioning to deep purple at the top. Attach multiple strands to your embroidery hoop, letting them hang at varying lengths.
Hang this beauty from the ceiling above a table, in a corner reading nook, or anywhere you want to add serious wow-factor. The movement when air flows through it is absolutely mesmerizing.
Rustic Grapevine Wreath With Paper Leaves and Berries
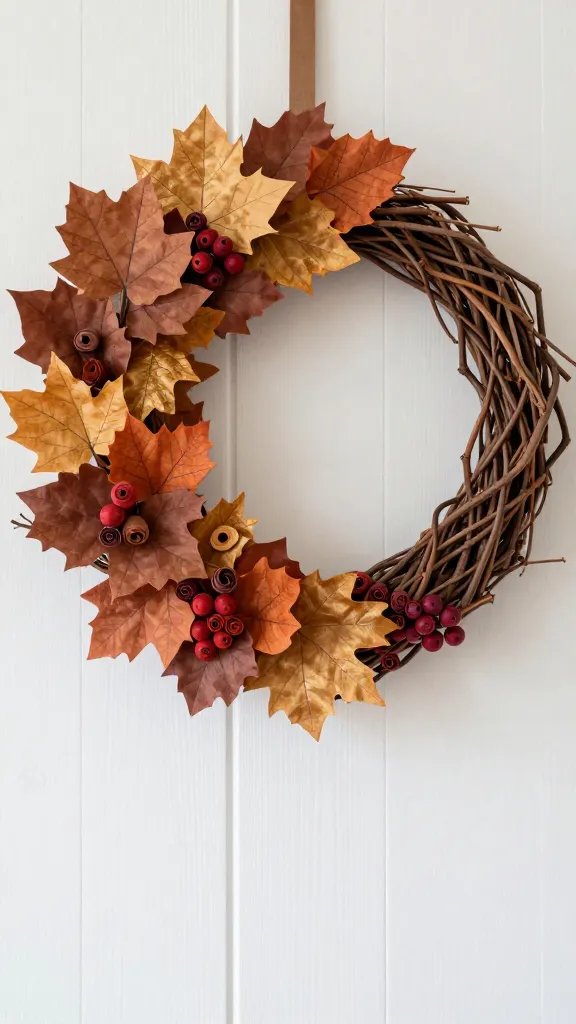
This charming wreath combines actual grapevine with paper elements for a mixed-media masterpiece. It’s perfect for fall decorating and looks expensive enough to be from a fancy boutique.
Materials Needed
- Grapevine wreath base (from any craft store)
- Brown and rust-colored cardstock
- Red and burgundy paper for berries
- Leaf templates (oak, maple, or mixed)
- Twine
Styling Ideas
Cut autumn-colored leaves and roll small balls from red paper to create berry clusters. Tuck the leaves into the grapevine wreath, securing with hot glue, and add berry clusters throughout. Wrap sections with twine for added texture.
This works beautifully as front door decor, above a fireplace, or as a centerpiece laid flat on a dining table with candles in the middle.
FYI, you can easily swap the colors for any season—pastels for spring, greens for summer, or metallics for winter.
Climbing Rose Vine for Mirrors and Frames
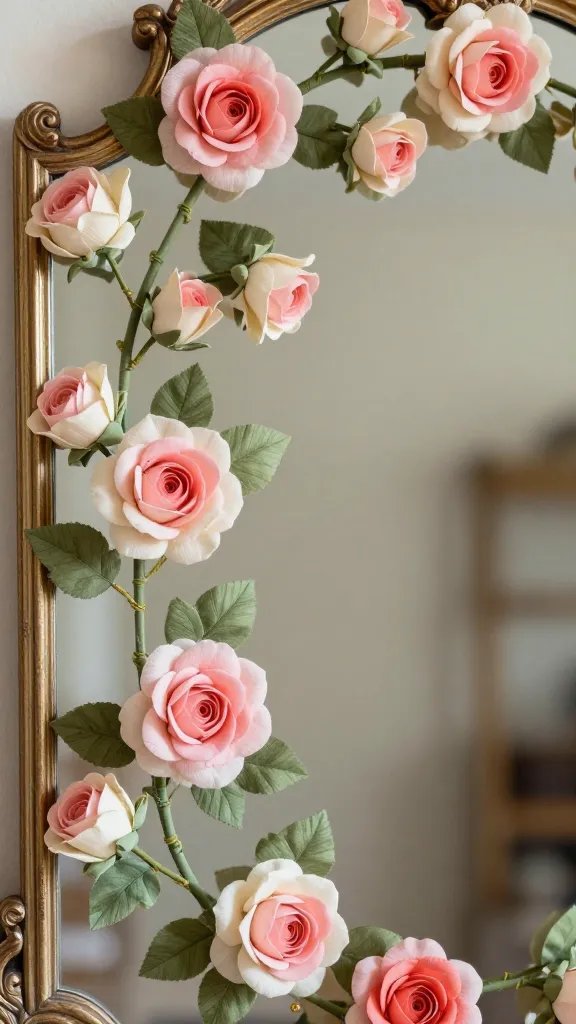
Add romance to any mirror or picture frame with delicate climbing rose vines. This feminine, elegant touch transforms ordinary items into statement pieces worthy of a vintage boutique.
Materials Needed
- Pink, cream, and coral tissue paper or crepe paper
- Green floral tape
- Floral wire
- Small rose tutorials (plenty on YouTube)
- Green cardstock for leaves
Create small roses using tissue paper and the classic twist method, then attach them to floral wire wrapped in green tape.
Add paper leaves along the wire to create authentic-looking rose vines. Position them climbing up one side of your mirror or frame for an asymmetrical, organic look.
These work especially well in bedrooms, bathrooms, or vanity areas where you want that soft, romantic aesthetic. You’ll love how they catch the light and add dimension to flat surfaces.
Geometric Succulent Vine for Modern Spaces
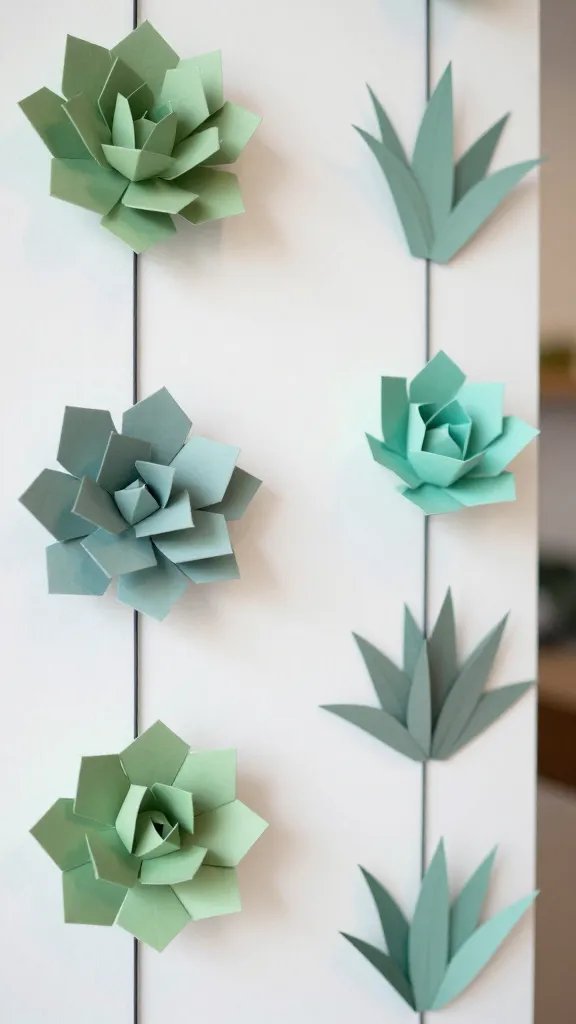
Not everything has to be flowery and traditional—this geometric take on paper vines brings modern, minimalist vibes to your space.
The angular succulent shapes create striking visual interest while keeping things clean and contemporary.
Materials Needed
- Cardstock in sage green, seafoam, and gray-green
- Geometric succulent templates
- Thin black wire or cord
- Scissors
- Glue dots
How to Make It
Cut out geometric succulent shapes—think angular echeveria and structured aloe forms. Layer different sizes and shades to create dimensional succulent rosettes. Attach them to black wire in a more structured, intentional pattern rather than wild and organic.
This style works perfectly in modern offices, minimalist bedrooms, or anywhere you want greenery without the cottage-core aesthetic. The geometric approach feels fresh and contemporary while still bringing nature indoors.
Whimsical Fairy Light Vine Combo
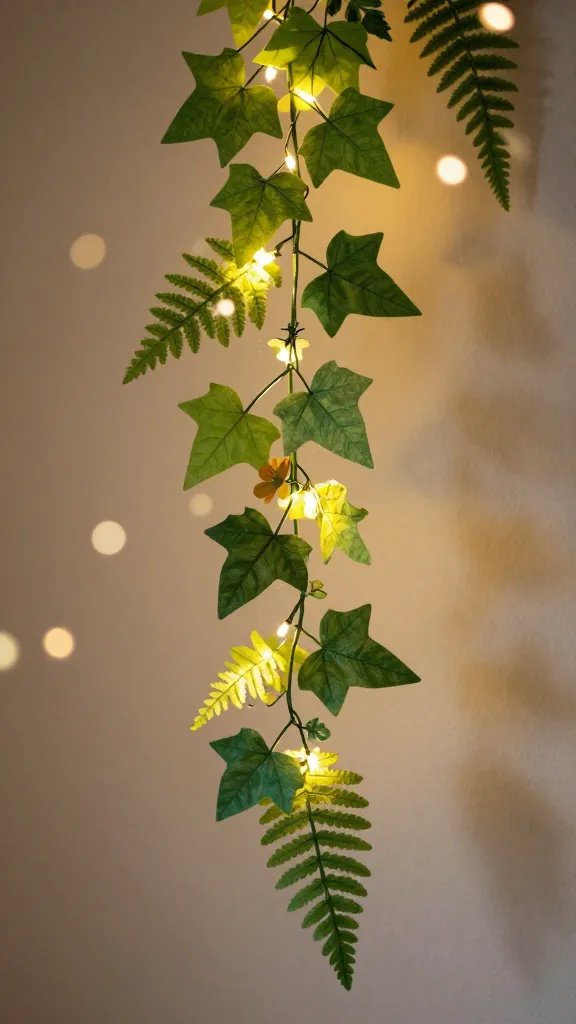
Why choose between paper vines and fairy lights when you can have both? This magical combination creates an enchanted garden effect that’s perfect for adding warmth and ambiance to any room.
Materials Needed
- Battery-operated fairy lights
- Green crepe paper
- Mixed leaf templates (ivy, ferns, small florals)
- Thin floral wire
- Hot glue gun
Create your paper vine with mixed greenery and small flowers, but leave it loose and flexible.
Carefully weave your fairy light strand through the paper vine, securing occasional points with small dabs of hot glue. The lights will illuminate the paper from within, creating a gorgeous glowing effect.
Drape this across your headboard, around a window frame, or along bookshelves for instant coziness.
The combination of paper texture and soft lighting creates the most dreamy, magical atmosphere—especially perfect for bedrooms or reading nooks.
Conclusion
There you have it—eight completely different ways to bring paper vines into your space, each with its own personality and style.
Whether you’re going for tropical drama, romantic florals, or modern minimalism, there’s a paper vine project here calling your name.
The best part? These crafts are forgiving, customizable, and way more budget-friendly than buying expensive faux plants or fresh florals that’ll die in a week.
So grab some paper, put on your favorite playlist, and get ready to transform your space into the botanical paradise you’ve been dreaming about!






