
DIY Clay Jewelry Dish: 13 Ideas That Look So Chic

Never let your jewelry get lost again! With these DIY clay jewelry dish ideas, you can create simple yet stunning pieces that keep your rings, earrings, and trinkets neatly organized while adding a personal touch to your decor.
I still remember the first time I made a DIY Clay Jewelry Dish. My dresser was always cluttered with rings and earrings, and store-bought organizers felt boring and expensive. So, I decided to create something simple, pretty, and useful myself.
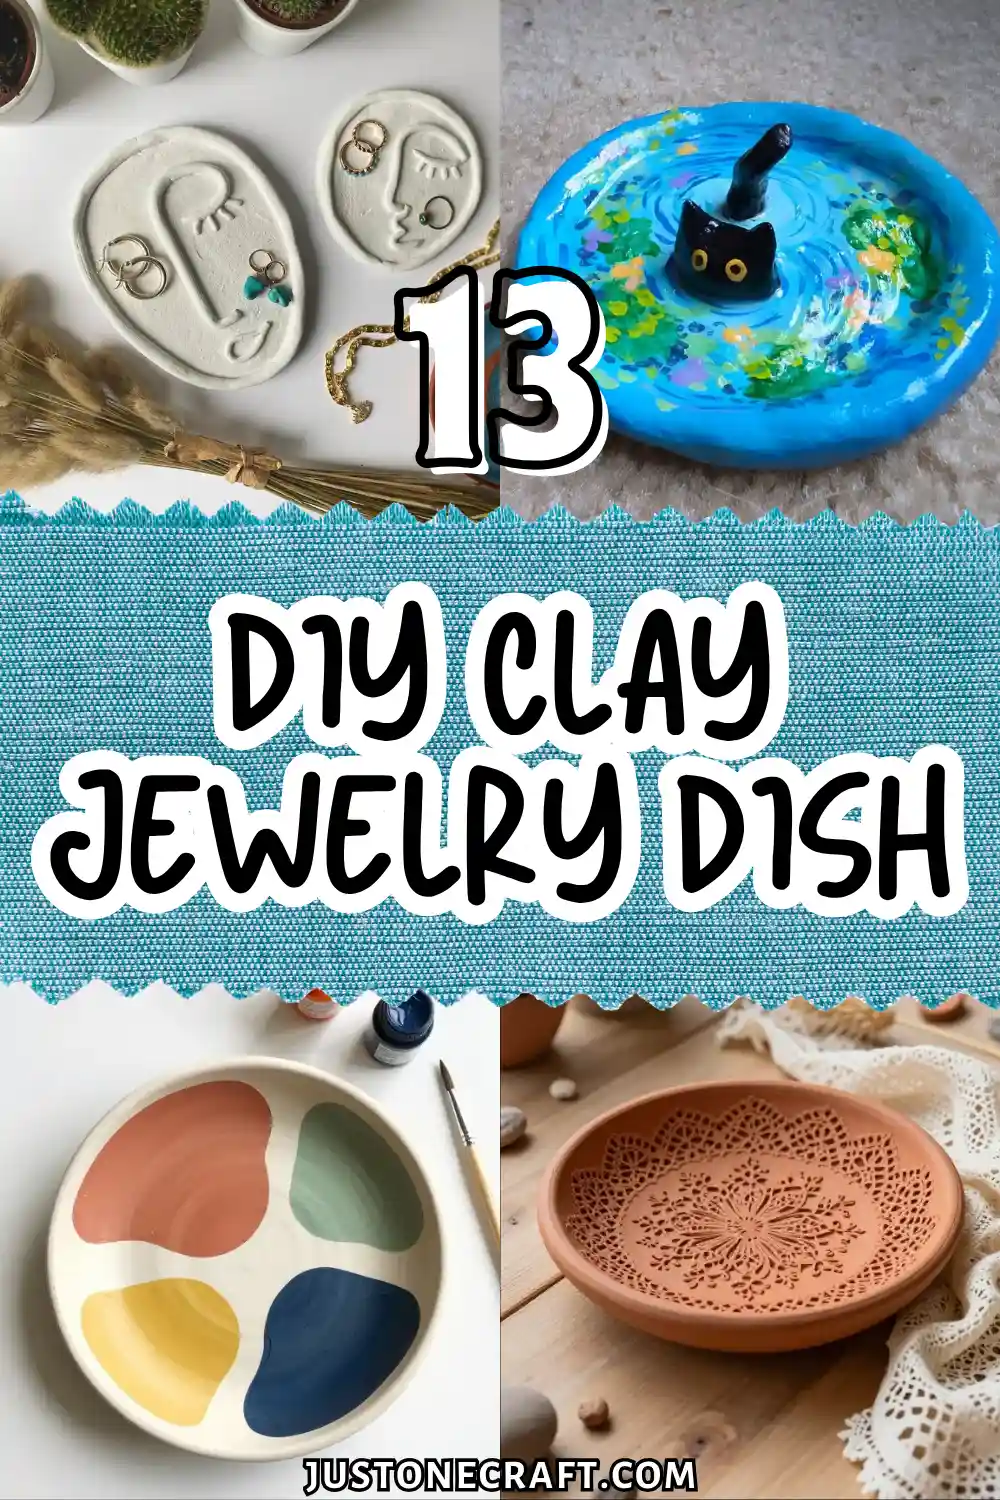
It wasn’t just about storage, it was about adding a personal touch. With a bit of clay and creativity, I turned a basic idea into something stylish and functional. Small details like soft colors or gold edges made each piece feel unique.
What started as a quick craft became a relaxing and rewarding project. If you’re tired of messy jewelry or want something handmade, these DIY Clay Jewelry Dish ideas are a perfect place to begin.
Hand-Painted Blue Gingham Dish with Cherry Details
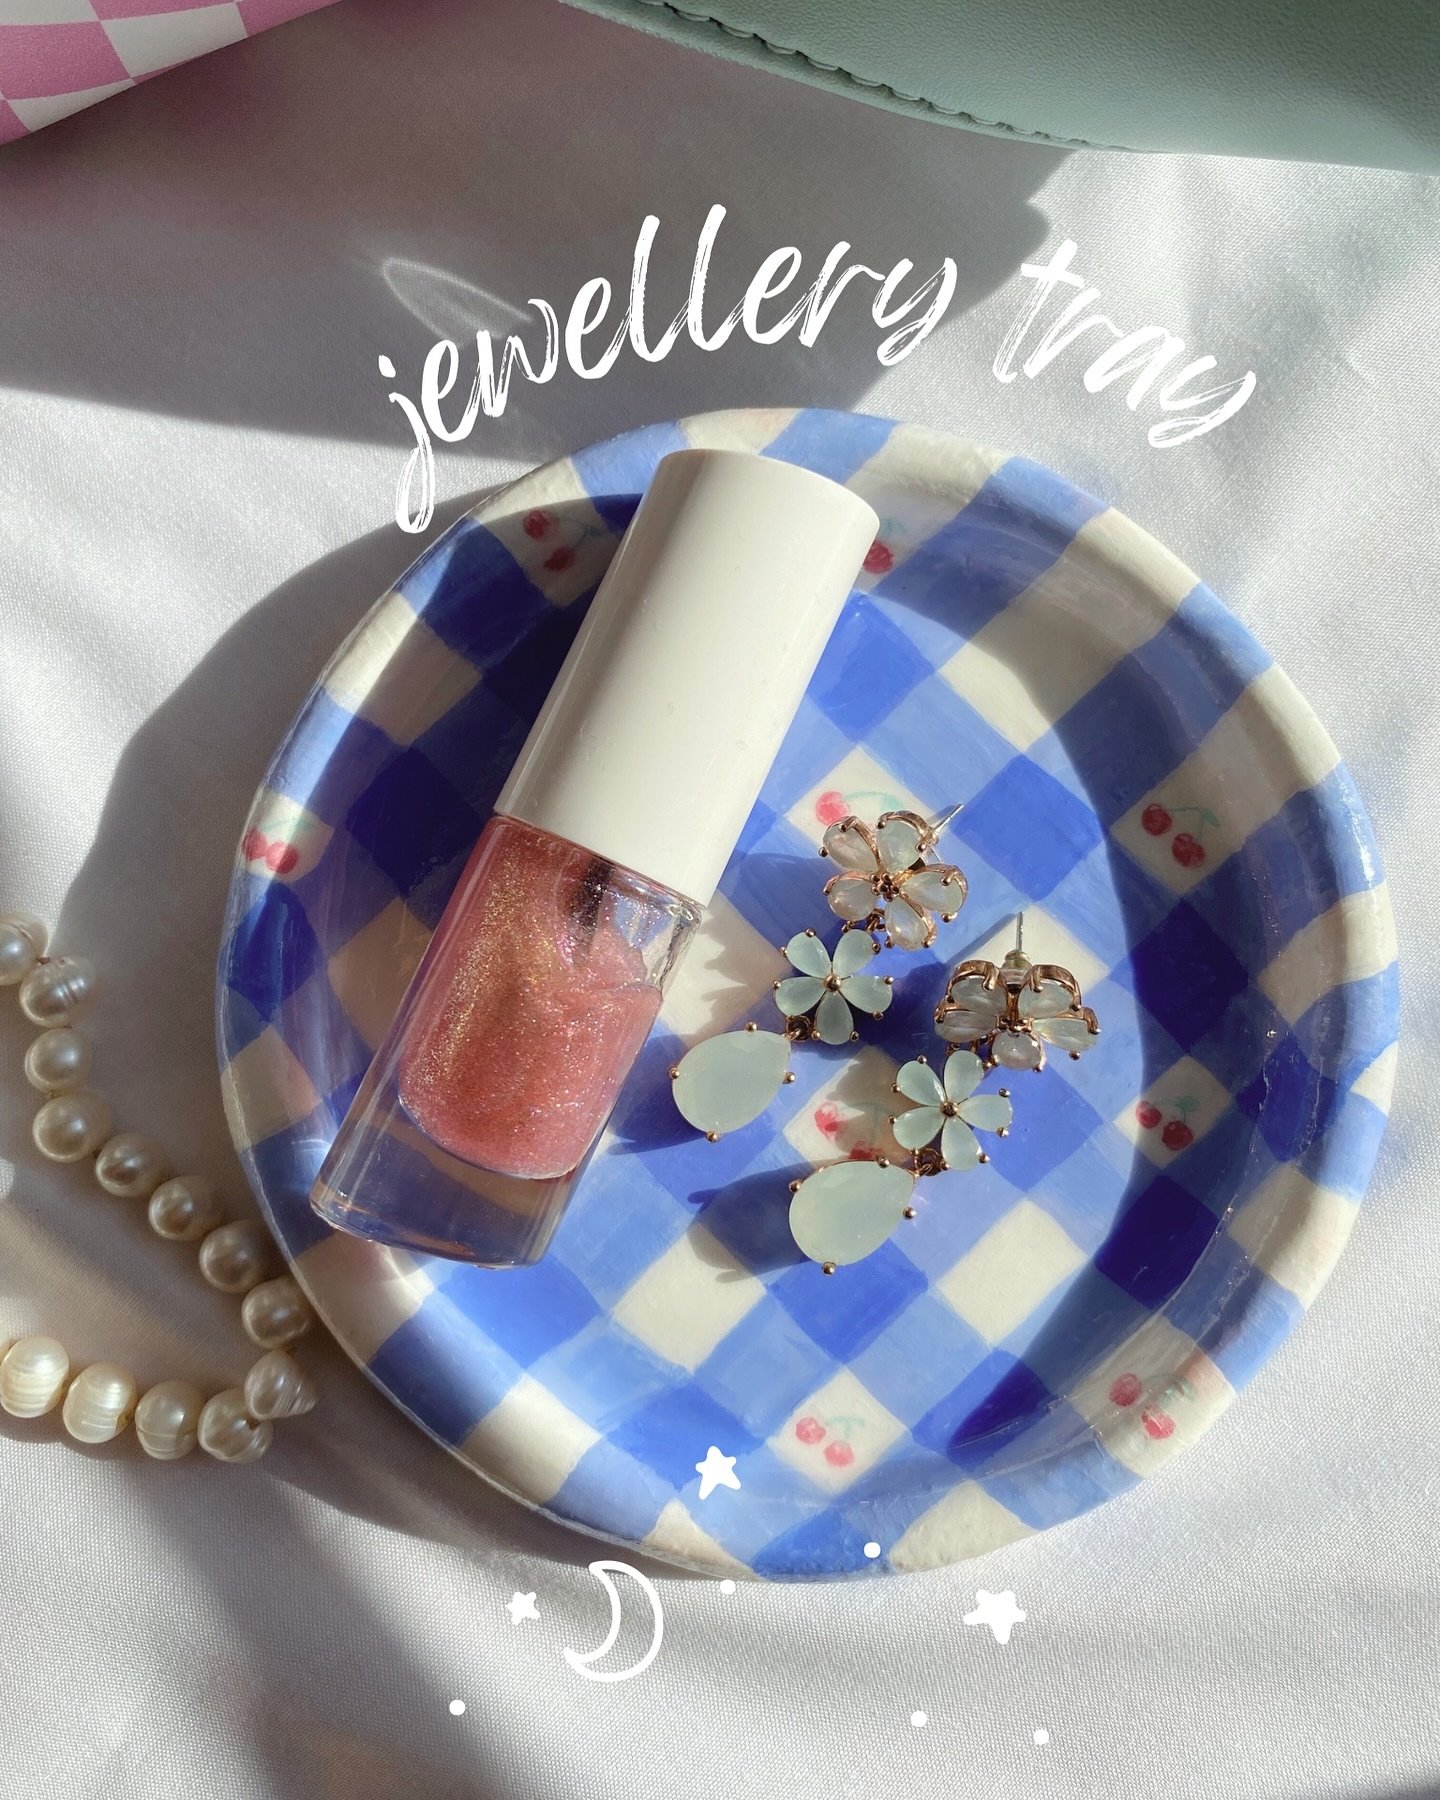
Gingham patterns bring a sweet, retro feel to simple clay shapes. This round dish combines soft periwinkle blue checks with tiny, hand-painted cherries scattered across the white squares.
A smooth glossy coat seals the acrylic paint, giving the piece a polished ceramic finish that holds lip gloss and flower earrings safely on a vanity.
- Roll a flat clay circle and gently curl the rim upward to create a low saucer shape.
- Paint horizontal and vertical blue stripes to create a checkerboard pattern, then let it dry completely.
- Use a fine detail brush to add small pair-cherries with green stems inside the lighter squares.
💡 Quick Tip
To get clean grid lines on your clay dish without painter’s tape peeling off wet clay, sketch the square grid lightly using a soft graphite pencil before applying acrylic paint.
Carve a Sleeping Face Profile for an Instant Boho Statement Piece
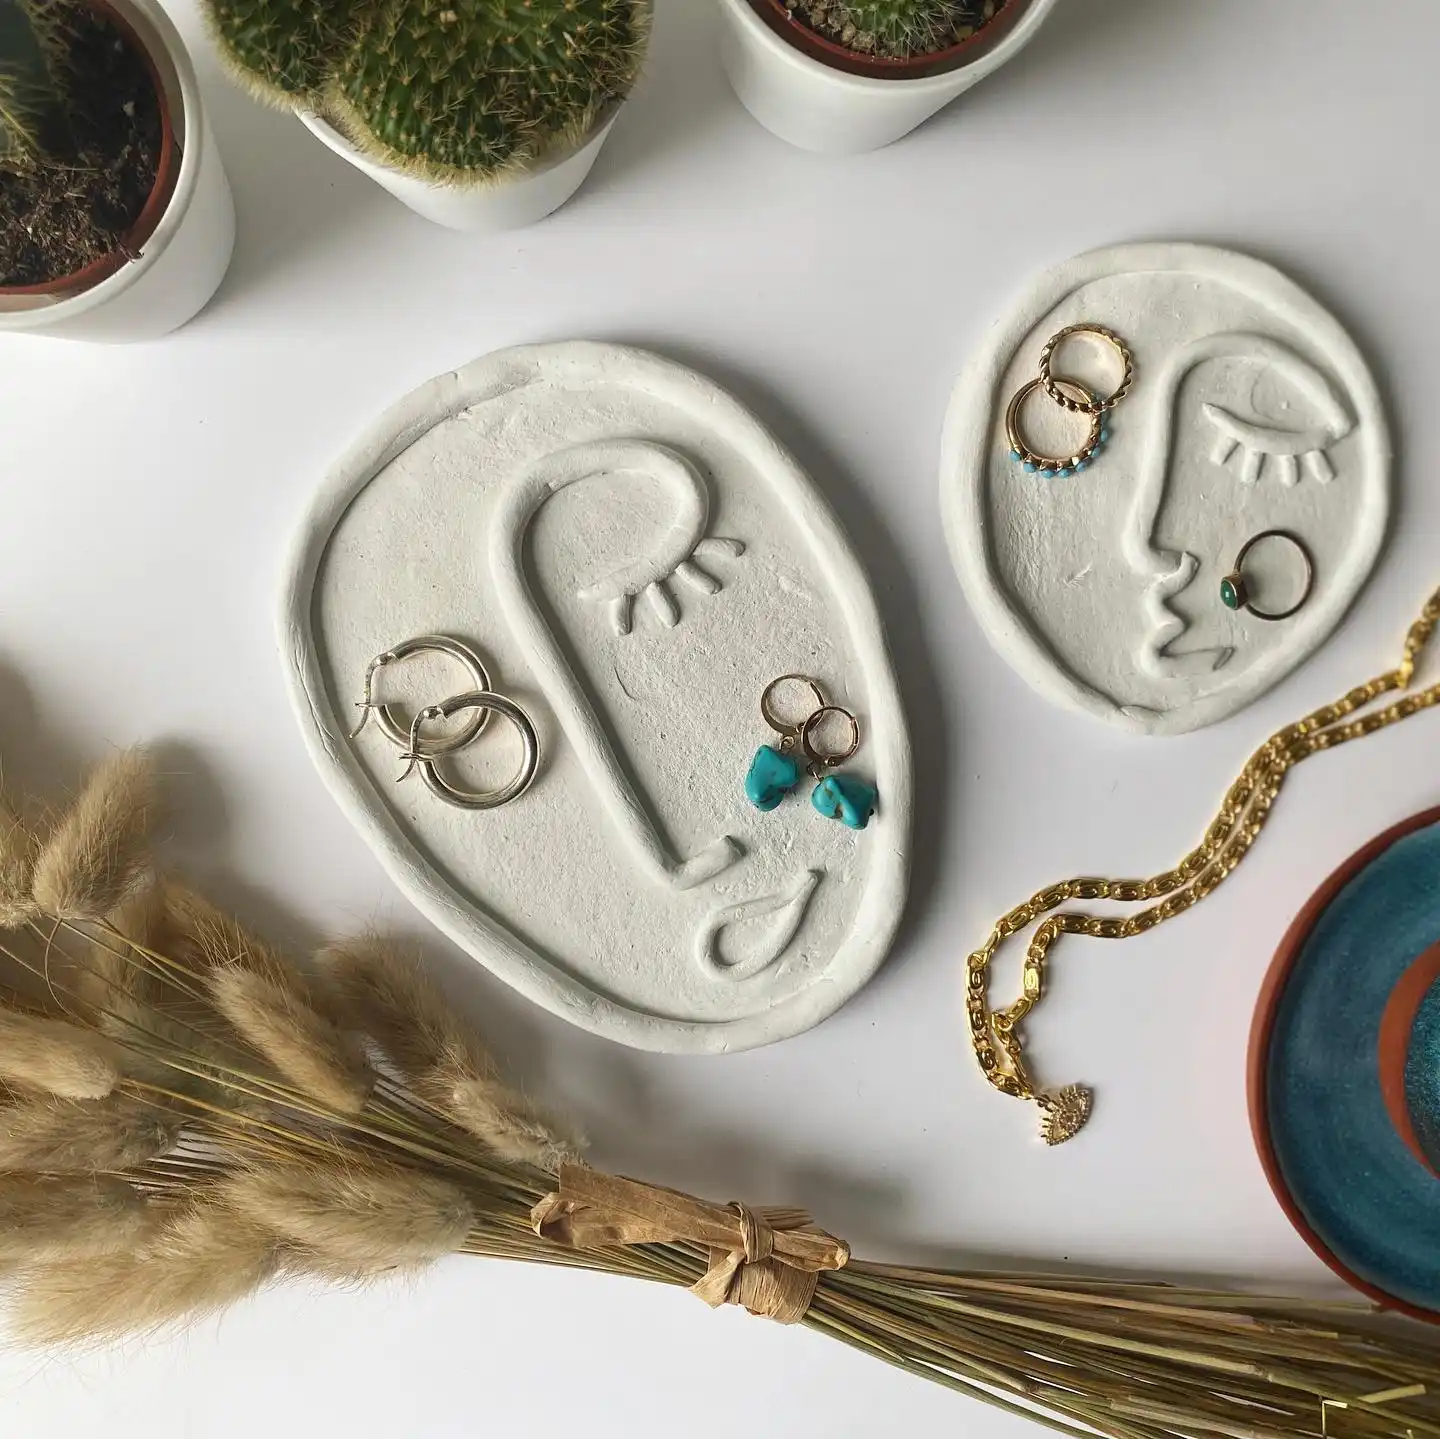
Two faces, two totally different moods, and that’s the whole trick. One dish shows a closed eye with soft lash lines curling down into a long nose and lips.
The other tilts the face at an angle so only half shows, with one eye open and one closed.
Neither face is symmetrical or perfect, and that’s exactly why they look handmade instead of stamped.
What makes this idea work for a first clay dish project:
- You only need to carve three features: one eye, a nose line, a mouth
- Keeping the clay in its natural raw white color lets the carved lines do all the work
- An oval base with slightly uneven edges reads as intentional, not sloppy
- The dip and curve of the nose gives you a built in spot to rest rings
The raw, unglazed finish here is doing a lot of the styling. No paint, no glaze, just air dry clay left pale and matte so it looks like a little sculpture instead of a craft project.
Press a Real Leaf Into Clay for Botanical Texture You Can’t Fake
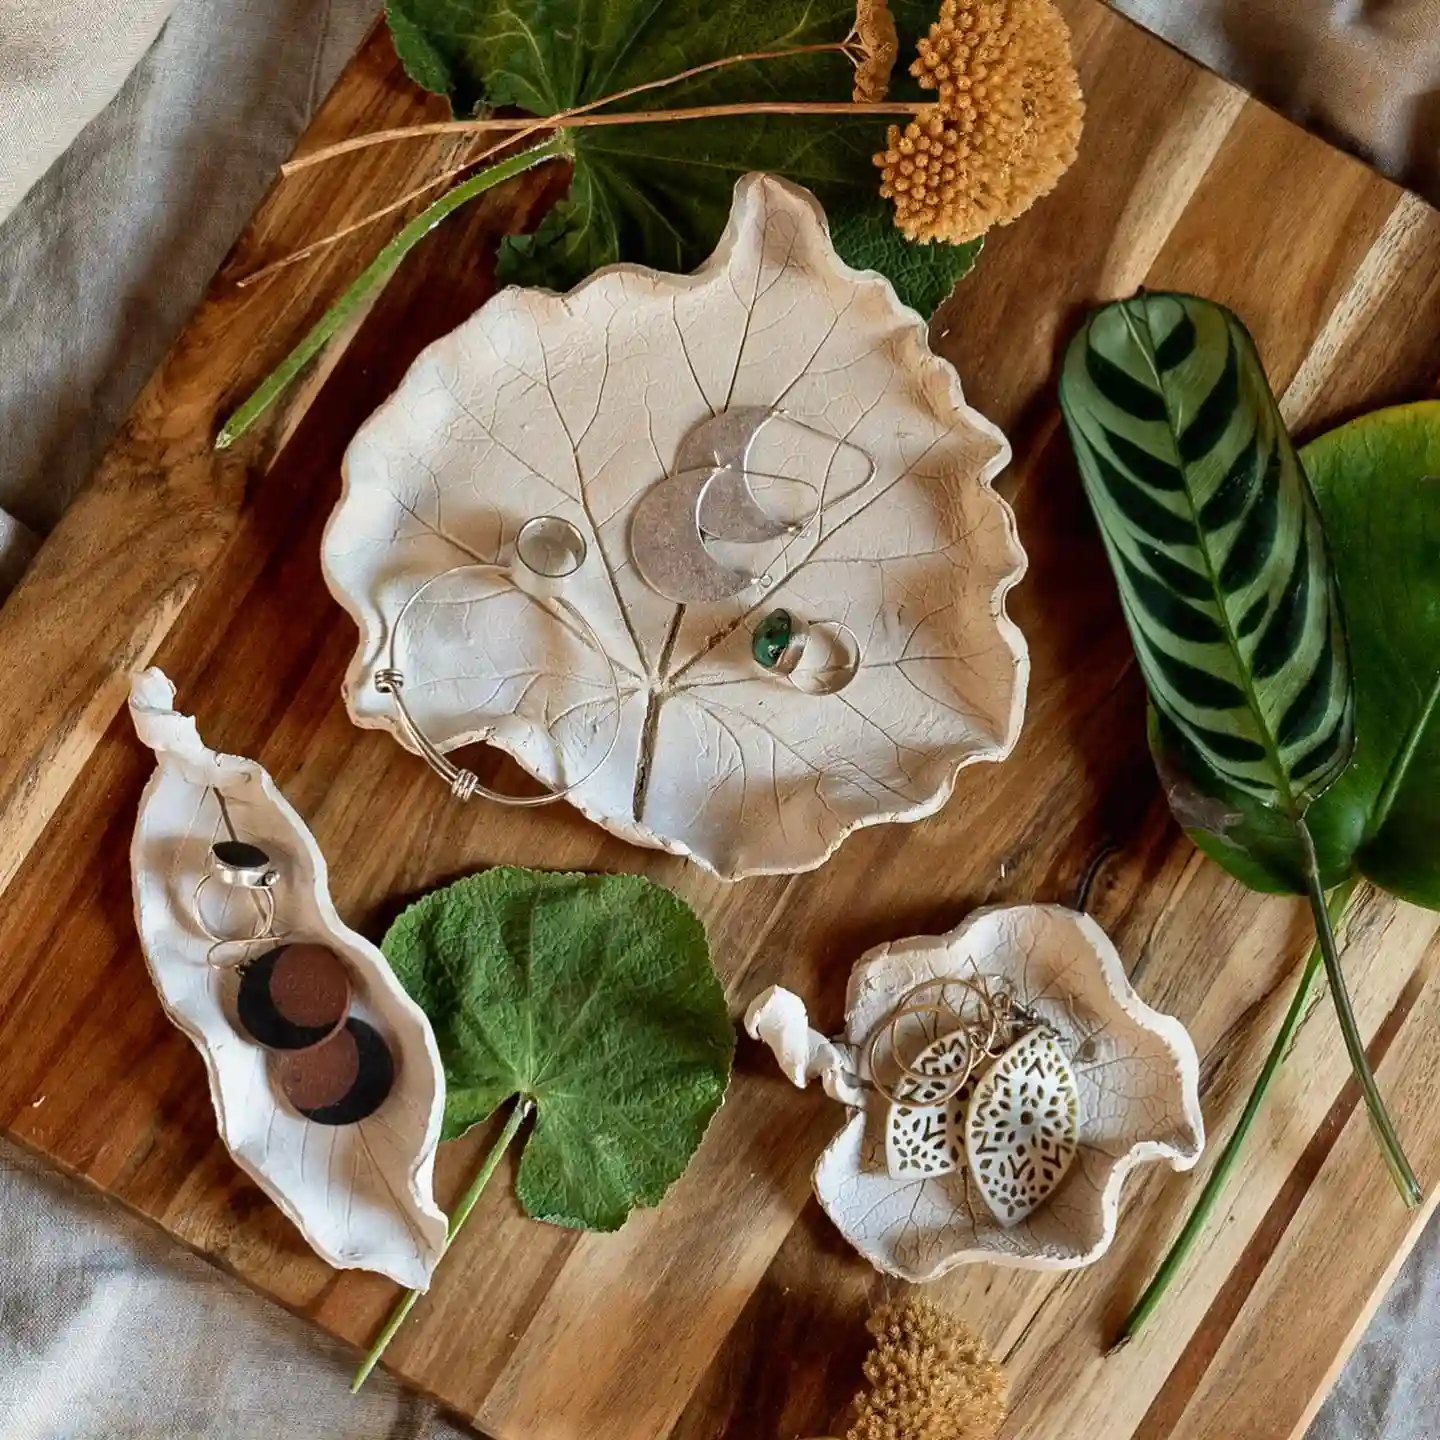
Skip carving altogether here. The three dishes in this shot were shaped by pressing an actual leaf into rolled out clay, then peeling the leaf away before firing or air drying.
Every vein, every ripple along the edge, and even the slightly torn look at the tip came straight from the leaf itself, not a tool.
How to get this exact effect at home:
- Pick a leaf with strong, raised veins. Something like a grape, maple, or hollyhock leaf works better than a smooth one
- Roll your clay to about a quarter inch thick and lay the leaf face down, vein side against the clay
- Press firmly and evenly with a rolling pin, then peel the leaf back slowly starting from the stem end
- Trim around the natural leaf outline instead of cutting a perfect oval, so the scalloped edge stays
The smaller crescent shaped dish in the bottom left corner shows how well this trick scales down too. Even a small leaf gives you enough vein detail to hold a ring or a pair of stud earrings without looking plain.
Sculpt a Whole Scene Into the Dish for a Dish That Makes People Laugh
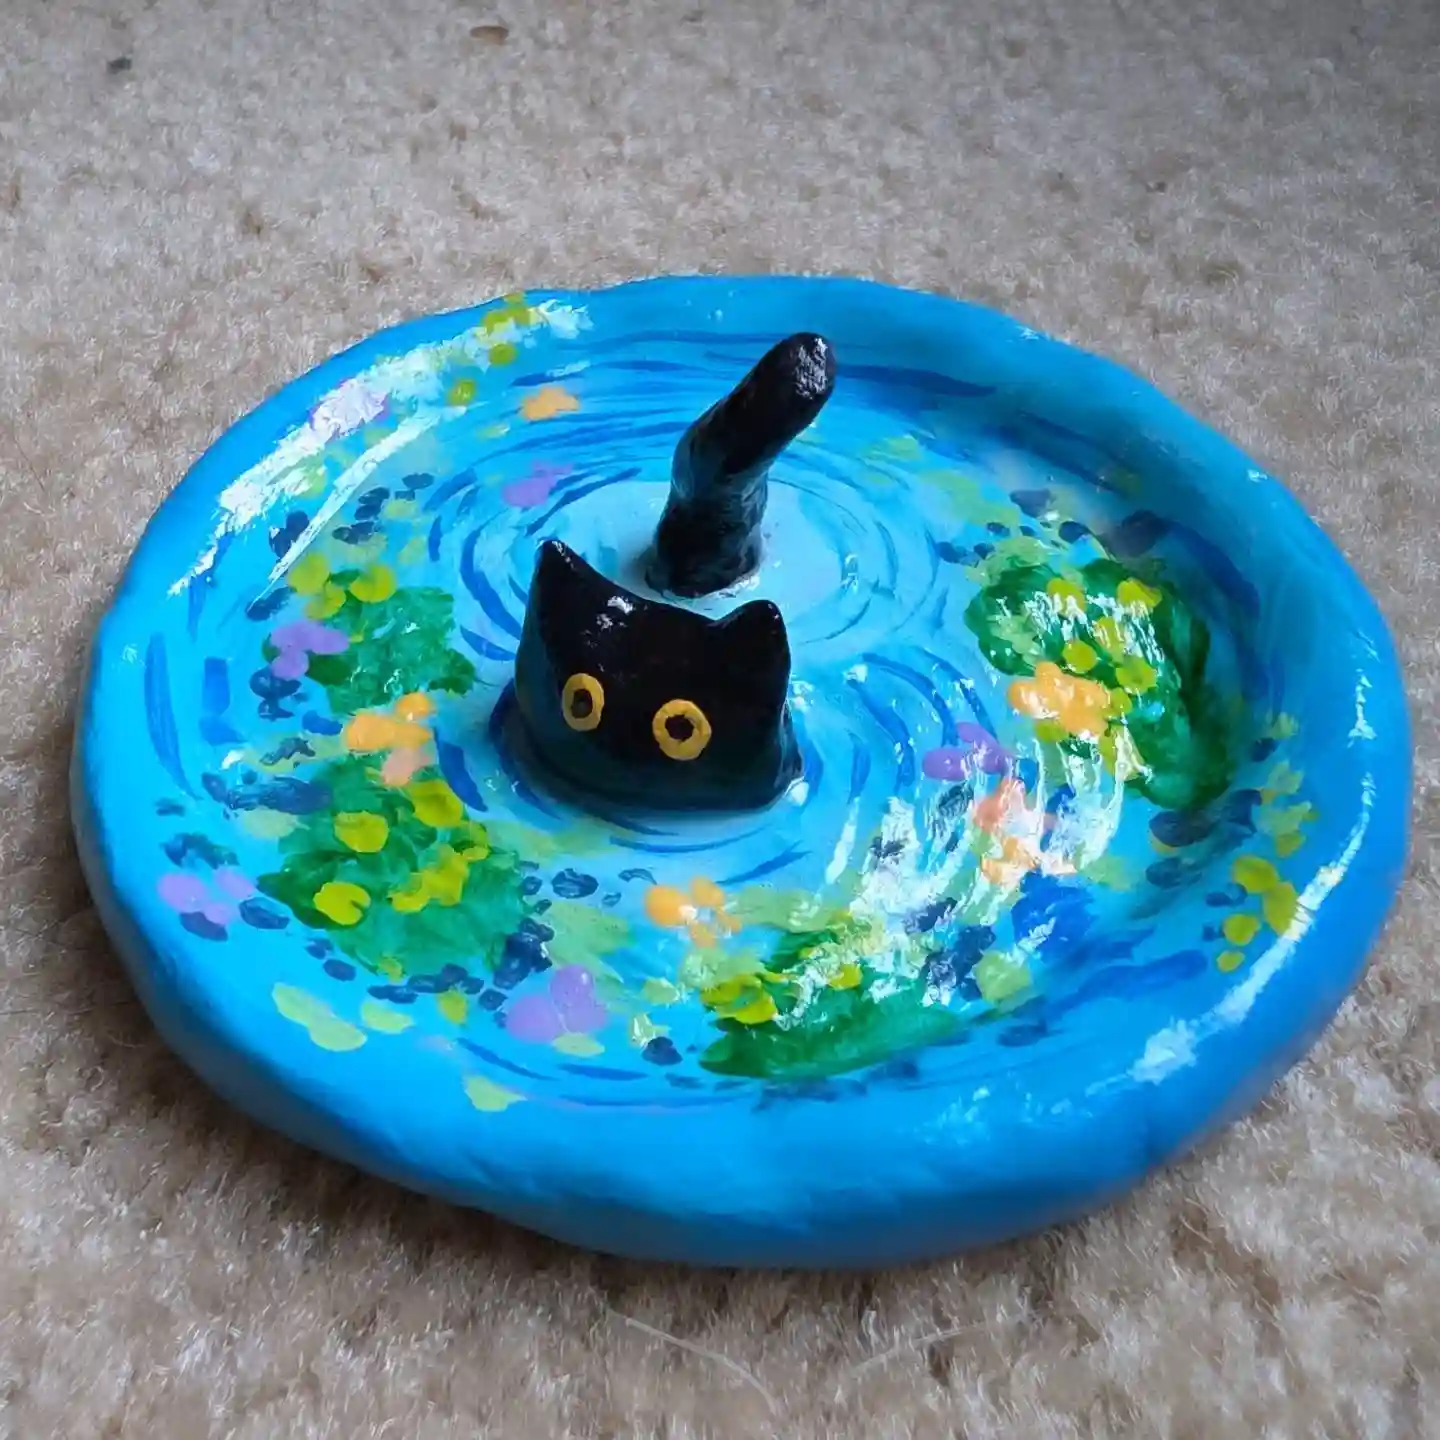
This one throws out subtlety completely. A black cat sinks into a glossy blue dish painted to look like a lily pond, tail straight up, head barely above the surface with two round yellow eyes peeking out.
The whole rim is hand painted with loose green lily pads and dabs of purple and yellow to mimic a Monet style pond, then sealed with a shiny glaze.
What separates a piece like this from something that reads as amateur:
Do this
- Build the animal shape first, let it dry hard, then attach it to the base before painting
- Use a glossy top coat only on the “water” area so it actually looks wet next to the matte dry parts
Skip this
- Painting fine details before the clay is fully dry, colors will smear and muddy together
- Making the sculpted piece too tall, it needs to sit flat and steady once earrings and rings start weighing down the dish
The humor is doing the heavy lifting here. A dish like this works best as a gift or a conversation piece rather than something that blends into a bathroom counter, so lean into a subject the recipient will actually laugh at.
Splatter Black Glaze Over White for a Speckled Dish That Never Looks the Same Twice
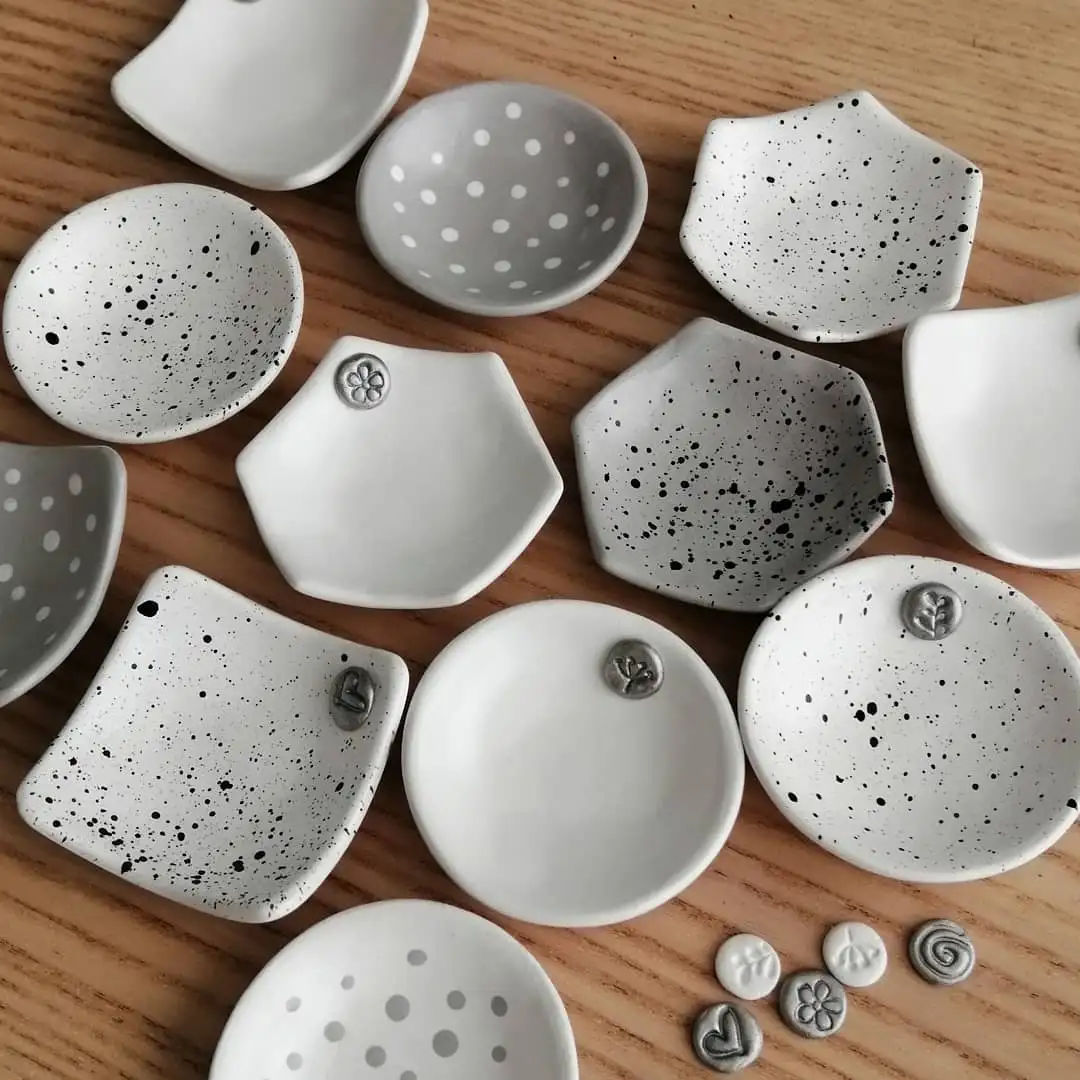
Look closely at this whole batch and two different surface treatments show up again and again: fine black speckles flicked across white or gray glaze, and clean white polka dots stamped onto gray. Both are simple to pull off, and neither one requires painting a single line by hand.
Speckled vs Dotted
| Speckled Glaze | Polka Dot |
|---|---|
| Flick a loaded brush over the dry dish for random black flecks. | Dip a small round tool in white glaze and stamp evenly spaced circles. |
| Every piece comes out different, no two dishes match. | Easy to keep symmetrical if you like a tidier look. |
| Works best on white or pale gray base glaze. | Works best on a darker base so the dots stand out. |
A few of these dishes also carry a tiny stamped medallion pressed into one corner, a heart, a flower, a leaf, a little spiral.
Those come from small clay stamps, visible in the bottom right of the photo, pressed into a pinch of extra clay and glued on after firing. It’s a small touch, but it turns a plain corner into a spot worth noticing.
Marbled Polymer Clay Ring Dish With Gold Leaf Accents
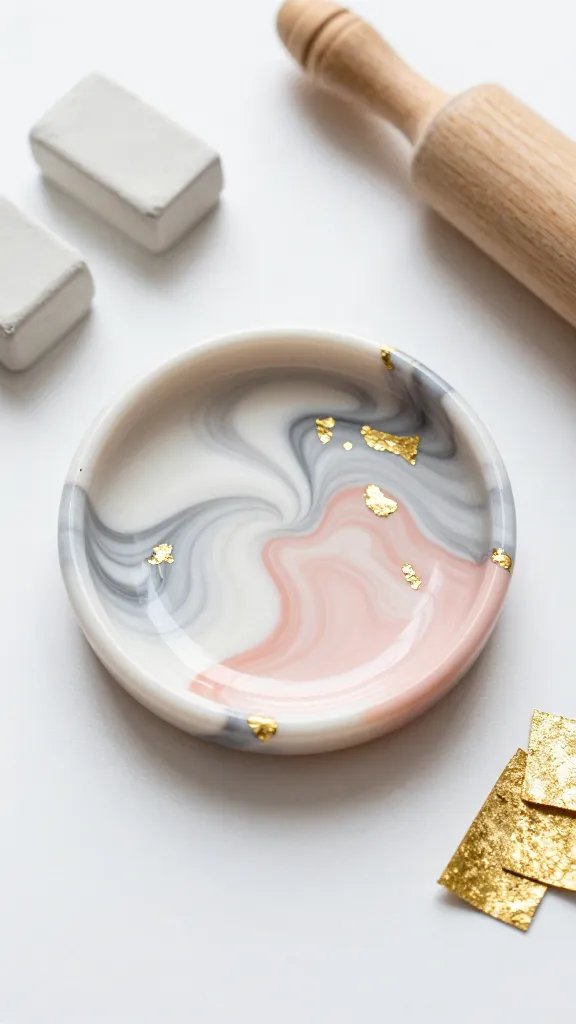
This stunning little dish looks like a miniature work of art, with swirls of color that would make any marble countertop jealous.
The secret is blending two or three colors of polymer clay without fully mixing them, creating those dreamy marble patterns that are completely unique every single time.
Materials Needed
- Polymer clay in 2-3 coordinating colors (white, gray, and blush pink work beautifully)
- Gold leaf flakes or sheets
- Rolling pin or clay roller
- Small bowl to use as a mold
- Mod Podge or clear sealer
How to Make It
Twist your clay colors together like a rope, then roll flat without completely blending the colors.
Drape the clay over your upside-down bowl to create the dish shape, then carefully press tiny pieces of gold leaf onto the edges or in random spots for that luxe touch.
Bake according to your clay package instructions, and finish with a clear sealer to make those colors pop.
This one’s perfect for your bedside table or vanity, and it makes an incredible handmade gift for your friend who has expensive taste but you’re on a budget. Trust me, no one will believe you made it yourself!
Textured Terracotta Dish With Lace Imprint
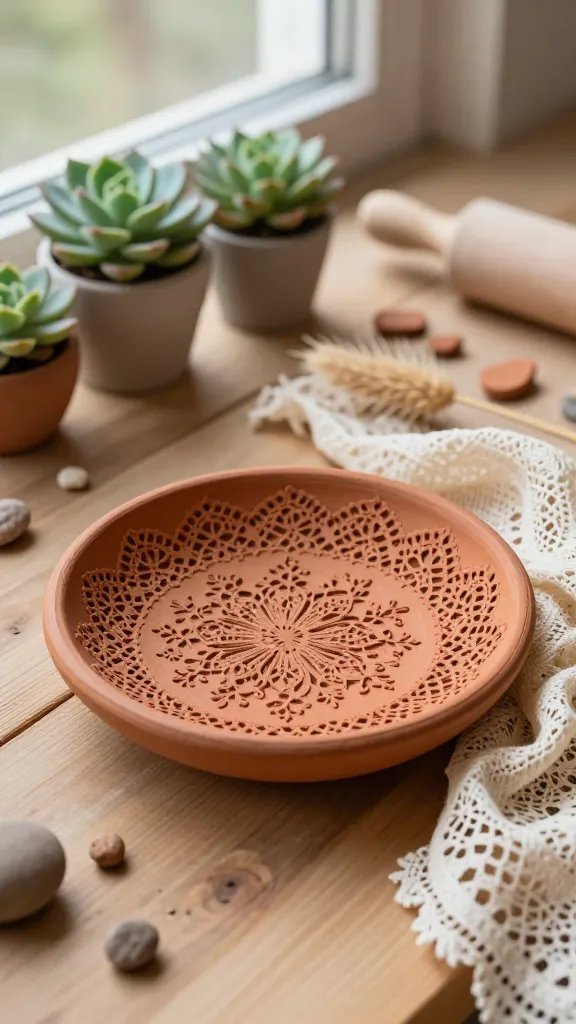
There’s something so charming and rustic about terracotta clay, and when you add a delicate lace pattern, you get the perfect balance of earthy and elegant.
This dish has serious boho-chic energy and looks amazing styled with plants and natural decor.
Materials Needed
- Air-dry terracotta clay
- Piece of lace fabric with an interesting pattern
- Rolling pin
- Circular cookie cutter or small plate
- Acrylic paint in white or cream (optional)
How to Make It
Roll out your clay to about a quarter-inch thick, then press your lace firmly into the surface. Carefully peel away the lace to reveal the gorgeous texture underneath.
Cut your circle, gently curve the edges upward to create a shallow dish, and let it air dry completely over 24-48 hours.
You can leave it in its natural terracotta state, or lightly dry-brush white paint over the texture to make the lace pattern really stand out.
This one’s a stunner on a bathroom counter or dresser, and it looks especially gorgeous holding vintage brooches or delicate chains.
Abstract Painted Clay Catchall With Modern Shapes
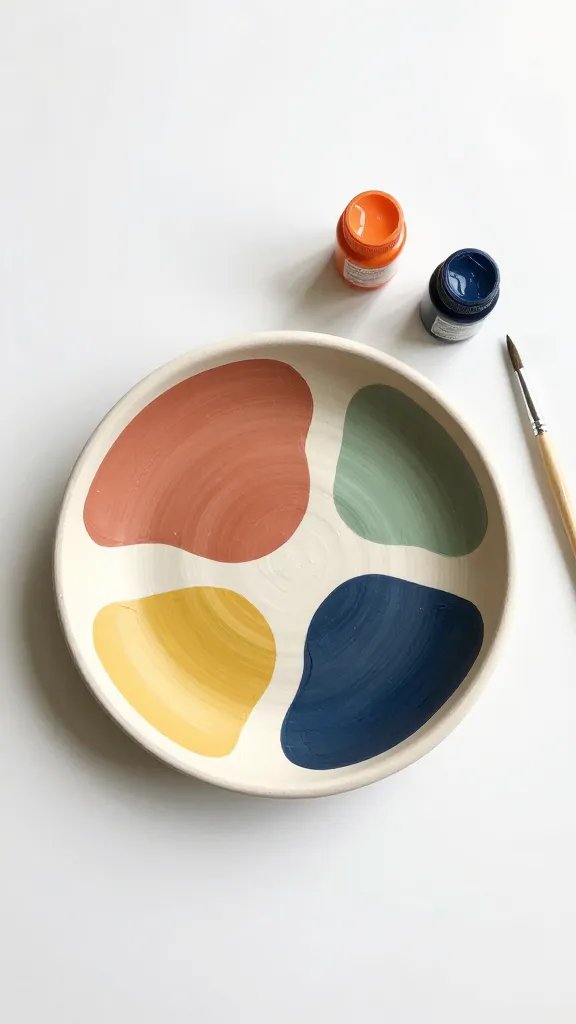
If you love that trendy abstract art vibe, this is your moment. This dish features bold, organic shapes painted in whatever color palette makes your heart happy—think terracotta and sage, or navy and mustard, or go wild with rainbow brights.
Materials Needed
- White air-dry clay or polymer clay
- Acrylic paints in your chosen colors
- Small paintbrushes
- Clear acrylic sealer
- Bowl or plate for molding
Pro Tips
Create your basic dish shape and let it dry or bake completely before painting. Then go to town with abstract blobs, squiggles, dots, or geometric shapes—there’s literally no wrong way to do this.
Layer different shapes on top of each other for depth, and don’t stress about perfection because the imperfect, hand-painted look is exactly what makes it cool.
Seal everything with a clear coat when you’re done, and boom—you’ve got a statement piece that looks like it came from a trendy home goods store. This is perfect for anyone with a colorful, eclectic style!
Minimalist Black Clay Dish With Carved Constellation Design
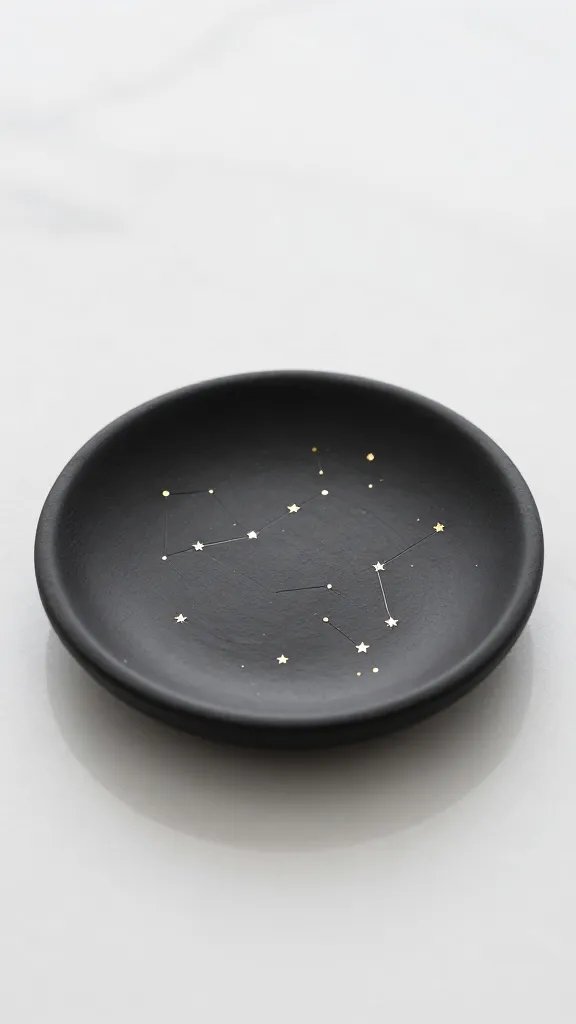
For all my minimalist and celestial-loving friends, this sleek black dish with tiny carved stars is absolutely everything.
It’s understated, sophisticated, and has just enough personality without being over-the-top.
Materials Needed
- Black polymer clay or air-dry clay
- Toothpick or clay carving tool
- Gold or silver paint pen
- Small shallow bowl for shaping
How to Make It
Shape your basic dish, then use a toothpick to carefully carve your favorite constellation pattern into the clay—Orion’s Belt, the Big Dipper, or even your zodiac constellation.
After baking or drying, trace inside the carved lines with a metallic paint pen to make the stars shine.
This dish is moody, elegant, and looks incredible in a modern bedroom or on a dark wood dresser.
It’s also a thoughtful personalized gift when you use someone’s zodiac constellation. Seriously, people will lose their minds over this one!
Rainbow Ombré Clay Dish With Scalloped Edges
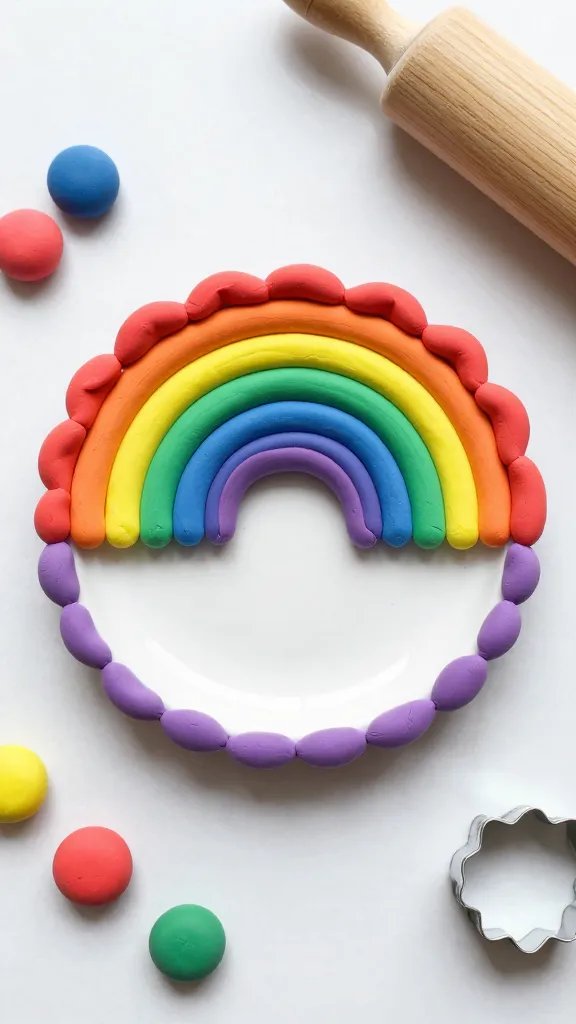
Why choose one color when you can have all of them? This cheerful dish transitions through rainbow colors in a smooth ombré effect, and the scalloped edges give it an extra-sweet, almost vintage feel.
Materials Needed
- Polymer clay in rainbow colors
- Clay blade or knife
- Rolling pin
- Circle cookie cutter with scalloped edges (or create scallops by hand)
- Small bowl for shaping
How to Make It
Create thin strips of each color clay and lay them next to each other in rainbow order. Gently blend where the colors meet to create that gradient effect, then roll smooth. Cut your scalloped circle, drape over your bowl mold, and bake according to directions.
This happy little dish brings instant joy to any space and is perfect for holding colorful statement earrings or mixing your rings.
It’s also a fantastic project to make with kids or teens who want something fun and bright for their room!
Faux Granite Speckled Dish With Organic Free-Form Shape
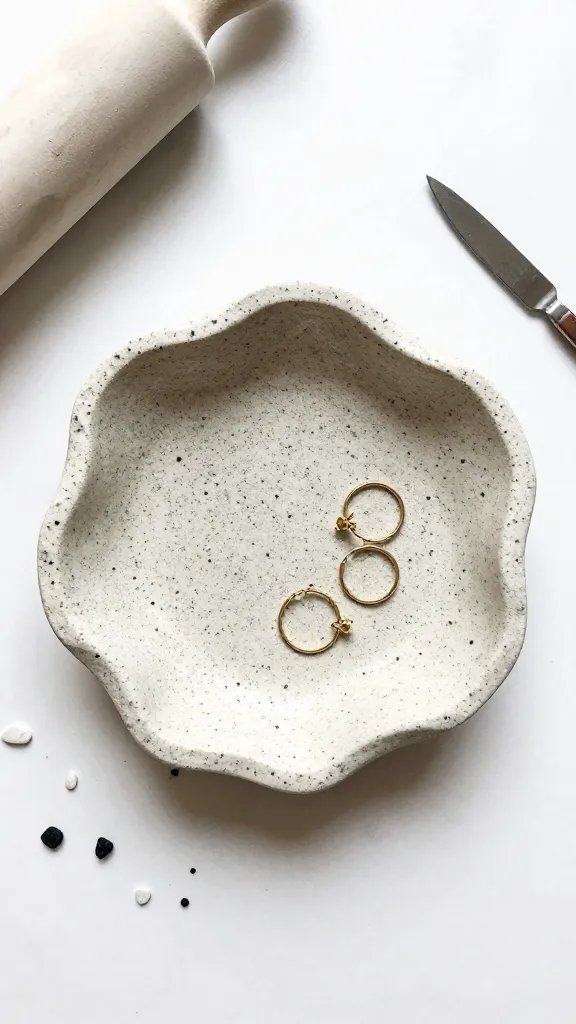
Forget perfect circles—this dish embraces beautifully imperfect, organic shapes that look like natural stone.
The speckled granite effect is surprisingly easy to achieve and looks incredibly high-end.
Materials Needed
- White or cream polymer clay
- Black polymer clay
- Gray polymer clay
- Clay blade
- Rolling pin
How to Make It
Roll out your base white or cream clay. Shave tiny bits of black and gray clay with your blade, then sprinkle them randomly over your base color. Roll gently to press the speckles in without fully blending them.
Shape into a free-form blob rather than a perfect circle, creating gentle curves and an irregular edge that looks totally intentional.
The result is this gorgeous, modern-organic piece that looks like carved stone. It pairs beautifully with greenery and natural textures, and it’s perfect for someone who loves that earthy, grounded aesthetic. FYI, these look amazing in sets of different sizes!
Pressed Flower Clay Dish With Resin Coating
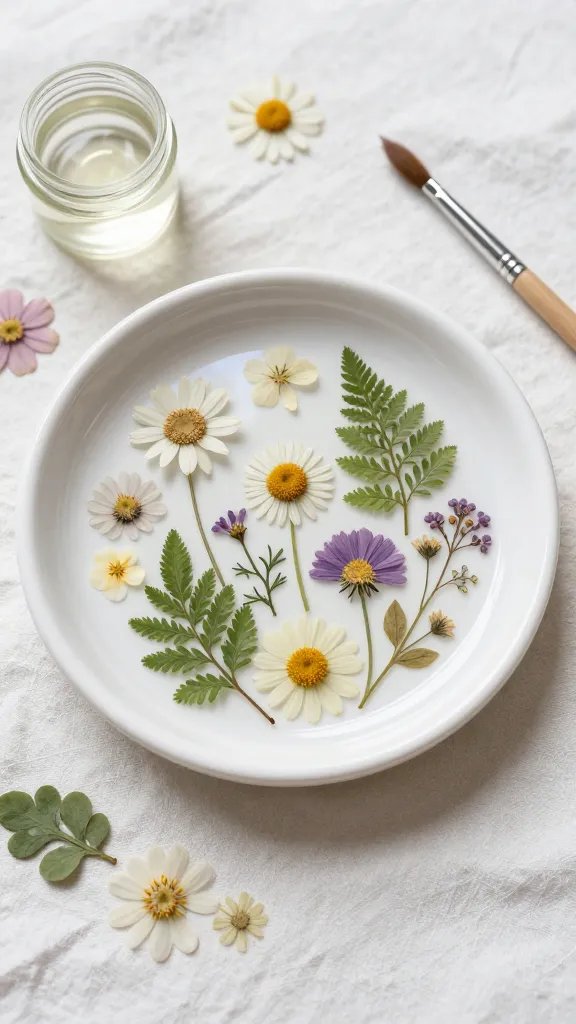
This is the ultimate romantic, cottage-core jewelry dish that preserves real flowers in a functional piece of art.
It takes a bit more time than the others, but the result is absolutely magical and completely one-of-a-kind.
Materials Needed
- White air-dry clay or polymer clay
- Pressed flowers and leaves (press them yourself or buy pre-pressed)
- Clear resin (two-part epoxy resin)
- Mod Podge
- Small paintbrush
How to Make It
Create your dish shape and let it dry or bake completely. Arrange your pressed flowers on the surface in whatever design speaks to you—scattered petals, a corner cluster, or a full floral arrangement.
Use a thin layer of Mod Podge to seal the flowers to the clay. Once completely dry, mix your resin according to package directions and pour a thin coating over the entire dish to seal and protect the flowers.
This dish is breathtakingly beautiful and captures flowers at their peak forever. It makes an incredibly sentimental gift and looks stunning on a vanity or dresser.
Just note that because of the resin coating, you’ll want to let it cure fully for several days before using it.
Conclusion
There you have it—seven completely different ways to create gorgeous clay jewelry dishes that solve your storage problems while adding serious style to your space.
Whether you’re drawn to minimalist vibes, colorful energy, or romantic florals, there’s a project here calling your name.
Pick your favorite, set aside an afternoon, and get ready to wonder why you ever bought home decor when making it yourself is this fun and rewarding!






