
DIY Clay House Ideas for a Cozy Mini Creation

Are you searching for a creative craft project that’s easy, relaxing, and fun to make? These DIY Clay House ideas will help you transform basic clay into beautiful little creations that can brighten up your home or make thoughtful handmade gifts.
When I first discovered clay crafts, I wanted to create something more personal than store-bought decorations. That’s when I started making a DIY Clay House.
At first, I thought it would require advanced skills and special tools, but I quickly learned that clay is all about creativity and patience. The small imperfections made my handmade piece feel unique and special.
With simple supplies, I transformed clay into a charming miniature house with tiny details, textures, and character. Whether you’re a beginner or a craft lover, a DIY Clay House is a fun way to bring your imagination to life.
Whimsical Fairy Garden Cottages With Toadstool Roofs
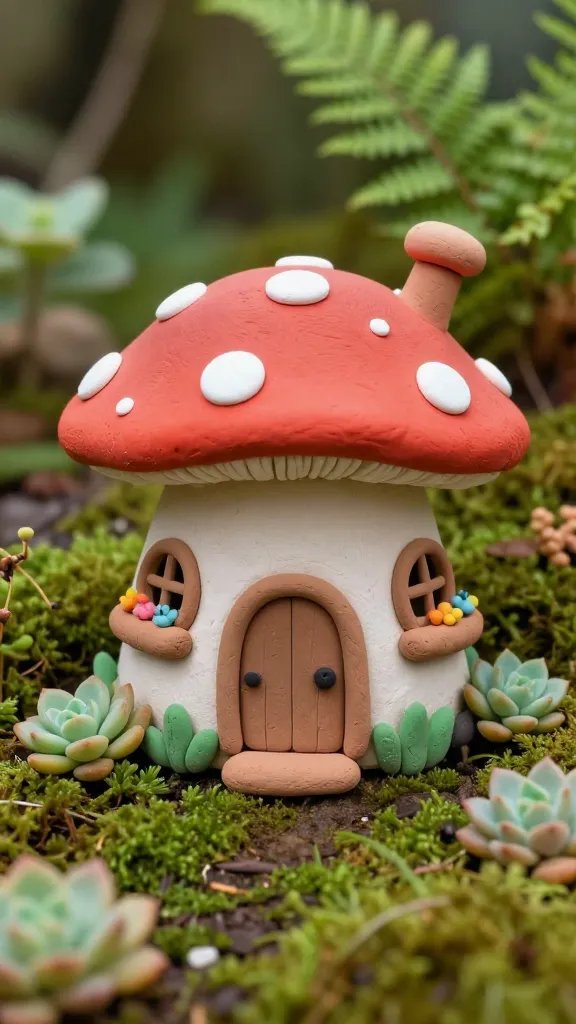
Imagine adorable little mushroom-topped houses nestled among your succulents and moss. These fairy cottages are perfect for adding a touch of enchantment to any outdoor or indoor garden space.
The curved toadstool roofs with white polka dots give major storybook vibes, and you can customize each one with tiny doors, round windows, and even miniature flower boxes.
Materials Needed
- Air-dry clay or polymer clay
- Acrylic paints in earthy tones, red, and white
- Sculpting tools or toothpicks
- Small paintbrushes
- Clear varnish or mod podge
How to Make It
Start by forming a round or cylindrical base for the house body, then create a separate mushroom cap shape for the roof.
Use a toothpick to carve out windows and door details before the clay dries. Once everything’s dry, paint your cottage in soft creams, browns, or even pastel colors, then add those classic white dots to the red mushroom roof.
These little guys are perfect for gifting to friends who love all things magical, or just keeping them for yourself to create the cutest terrarium setup ever. Trust me, once you make one, you’ll want an entire fairy village.
Miniature Mediterranean Villa With Terracotta Tile Roof
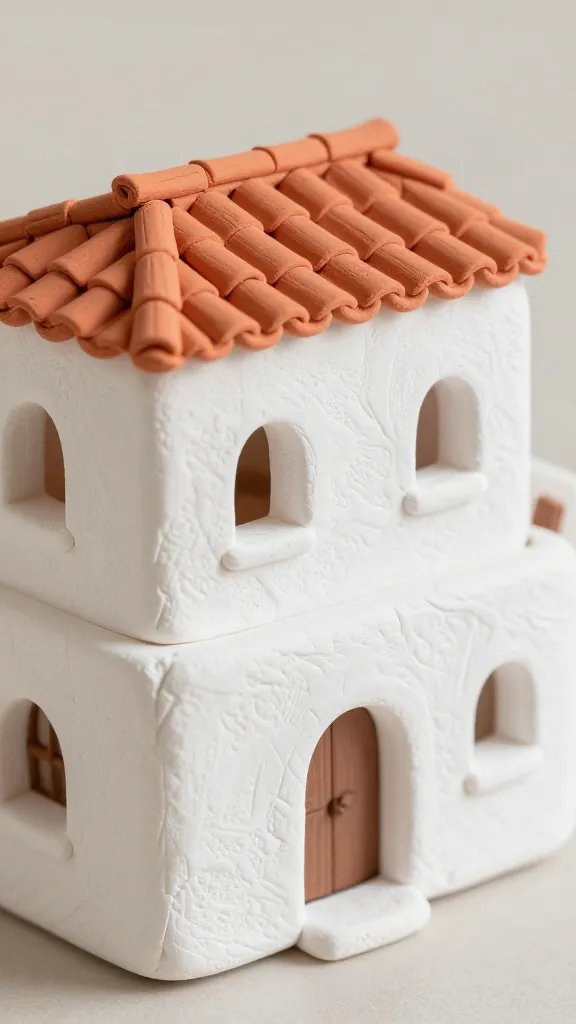
Channel your inner vacation mood with a tiny clay villa that screams coastal European getaway.
This project focuses on clean white walls, arched doorways, and that gorgeous terracotta roof that makes you dream of sipping wine on a Greek island.
The architectural details might sound fancy, but they’re actually super beginner-friendly.
Materials Needed
- White or beige polymer clay
- Terracotta-colored clay
- Clay blade or knife
- Texture tools or a toothbrush
- Small rolling pin
Roll out your terracotta clay thin and cut it into small rectangular tiles, then layer them across the roof in an overlapping pattern for that authentic Mediterranean look.
The walls should be smooth and clean, with an arched doorway that you can shape using a small round object.
Add some texture to suggest stucco walls by gently dabbing with a dry toothbrush before baking or drying.
Display this beauty on your desk or windowsill as a permanent reminder to book that European vacation you’ve been dreaming about. It also makes an amazing handmade gift for anyone who loves travel or architecture.
Cozy Log Cabin Incense Holder With Chimney
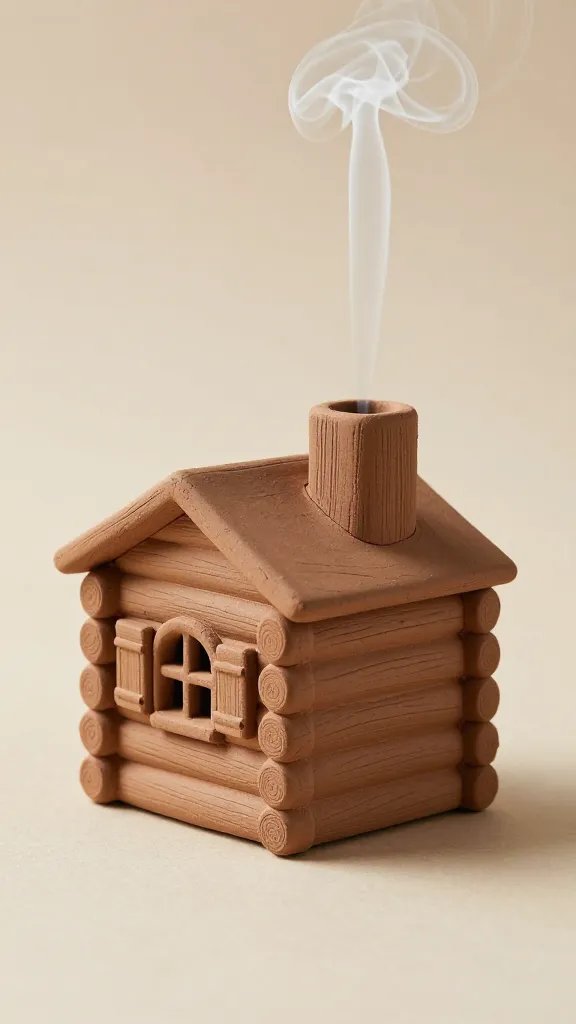
Why settle for a boring incense holder when you can have an adorable log cabin with smoke curling out of its chimney?
This functional clay house serves double duty as both decor and a practical way to burn your favorite incense. The rustic wood texture and tiny details like window shutters make it seriously charming.
How to Make It
Form a rectangular cabin shape and use a sculpting tool to carve horizontal lines that mimic log cabin construction.
Don’t forget to hollow out the chimney top so it can actually hold an incense stick—this is what makes the project both cute and useful.
Add windows, a little door, and maybe even a tiny porch if you’re feeling ambitious.
Paint it in natural wood tones with darker brown for the roof, and add tiny green accents around the base to suggest grass or pine trees.
When you light incense, the smoke billowing from the chimney creates the coziest vibe imaginable, especially during fall and winter months.
Modern Geometric House Planter for Succulents
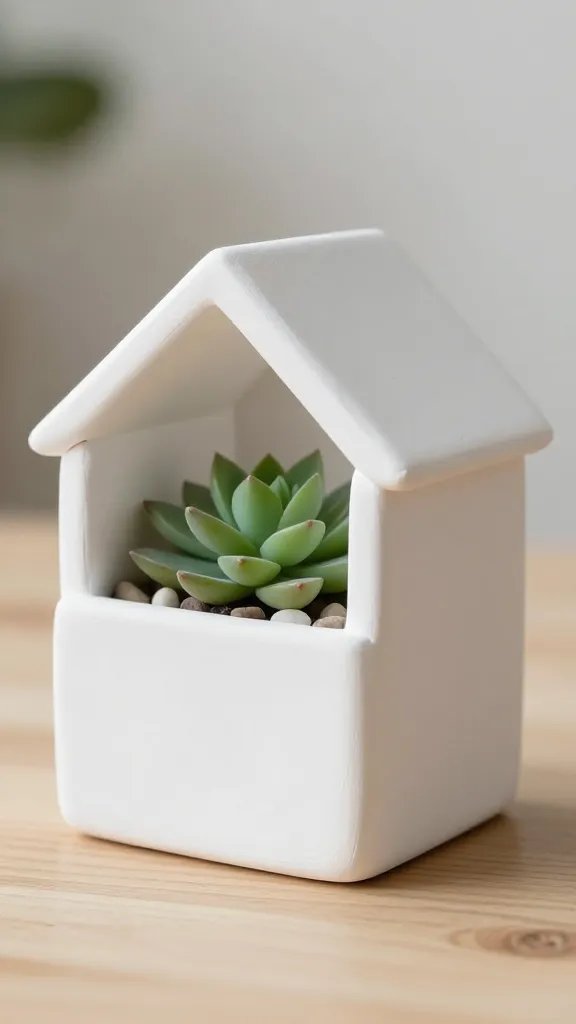
If your style leans more contemporary than cottage-core, this geometric clay house planter is calling your name.
Think clean lines, angular roofs, and a minimalist aesthetic that looks like it belongs in a design magazine. The hollow interior makes it perfect for housing a small succulent or cactus.
Materials Needed
- Air-dry clay or stoneware clay
- Ruler and cutting blade
- Sandpaper for smoothing edges
- Matte white, black, or concrete-colored paint
- Drainage materials (small pebbles)
Build your house using flat slabs of clay for ultra-clean geometric shapes—squares, triangles, and rectangles are your friends here.
Cut a square opening in the top or side for planting, and make sure your walls are thick enough to support soil and a small plant. Smooth everything with sandpaper after drying for that professional finish.
These modern little planters look incredible grouped together on a shelf or windowsill, each one housing a different succulent variety. FYI, they’re also ridiculously popular on Instagram if you’re into sharing your creations online.
Vintage English Cottage With Climbing Rose Details
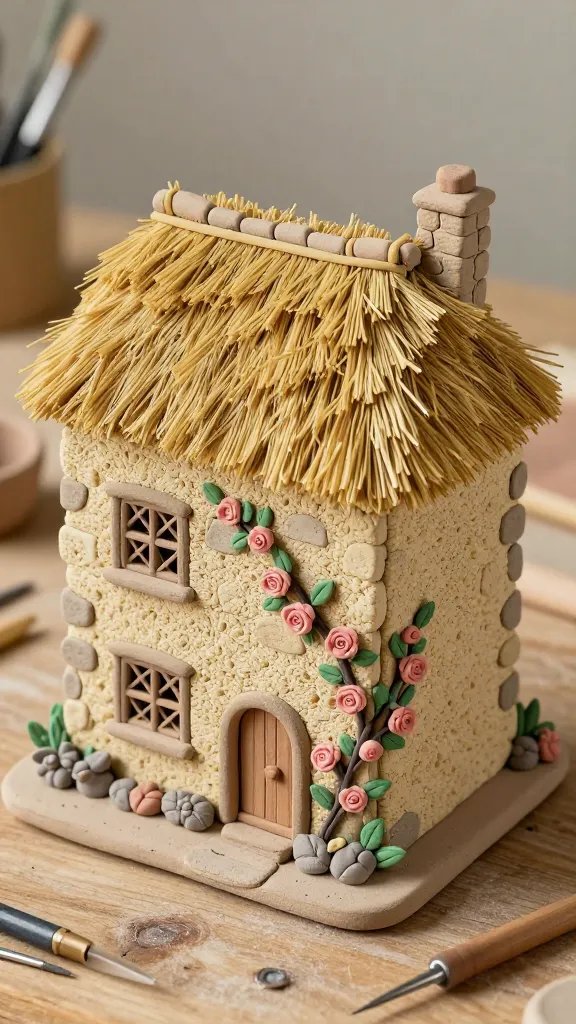
This project is for the romantics out there who swoon over ivy-covered walls and charming country gardens.
Create a clay cottage with textured stone walls, a thatched roof, and delicate rose vines climbing up one side. The level of detail you can achieve makes this feel like a true miniature work of art.
Pro Tips
Use a sponge or crumpled foil to create a stone texture on the walls before the clay dries. For the climbing roses, roll out tiny balls of pink or red clay and attach them to thin vine-like strands going up the wall. Add leaves using small teardrop shapes of green clay, and press them gently into place.
The thatched roof effect comes from scoring lots of thin horizontal lines close together, then adding a slight texture with a stiff brush.
Paint everything in soft, muted colors—think cream walls, golden thatch, and pops of pink from the roses. This one takes a bit more time but the end result is absolutely worth it.
Display it under a glass cloche for an extra-special vintage presentation that protects all those delicate details you worked so hard on.
Gingerbread House Clay Ornament for Year-Round Charm

Who says gingerbread houses are only for December? Create a permanent clay version that brings that sugary-sweet aesthetic to your home decor any time of year.
This project embraces all the fun details—candy cane stripes, gumdrops, icing swirls—without any of the worry about it getting stale or attracting ants.
How to Make It
Shape a classic house form with a steep triangular roof, then go wild with the decorative elements.
Roll out tiny clay “candies” in bright colors, create swirled lollipops, and add textured dots to mimic gumdrops along the roof edge. You can even add a small loop at the top if you want to hang it as an ornament.
Paint it in traditional gingerbread brown with white “icing” details, or flip the script and go with pastel colors for a kawaii aesthetic.
Seriously, the customization options are endless. Kids absolutely love helping with this project too, making it perfect for family craft time.
Japanese-Inspired Tea House With Pagoda Roof
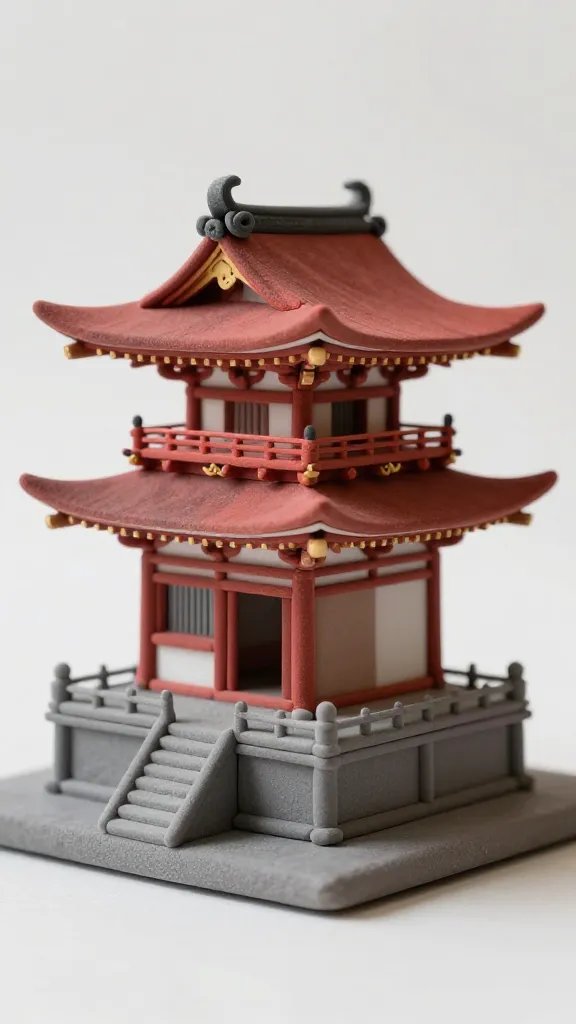
Bring a touch of Zen to your space with an elegant clay tea house featuring the distinctive curved eaves of traditional Japanese architecture.
This project focuses on symmetry, balance, and those beautiful upturned roof corners that make pagoda-style buildings so recognizable. Despite the sophisticated look, it’s surprisingly straightforward to create.
Materials Needed
- Gray or brown polymer clay
- Red clay for roof accents
- Sculpting tools with fine tips
- Black and gold acrylic paint
- Thin wire for support (optional)
The key to nailing the pagoda roof is creating multiple thin layers that gradually decrease in size as they stack upward, with each layer’s edges curving slightly upward.
Form the building base as a simple square or rectangular platform, then add sliding door details and maybe a tiny porch area.
You can even create a miniature stone pathway leading to the entrance using tiny flattened clay circles.
Paint in traditional colors—deep reds for the roof, natural wood tones or gray for the structure, and black for trim details.
A touch of gold paint on the roof tips adds authentic elegance. This makes an incredible centerpiece for a meditation corner or bookshelf display that celebrates minimalist beauty.
Conclusion
Whether you’re drawn to fairy tale cottages or sleek modern designs, there’s a clay house project here with your name on it.
The best part about working with clay is that mistakes are totally fixable and every house develops its own unique character.
So grab some clay, pick your favorite idea, and start building your own miniature world—you might just discover your new favorite creative outlet.






