
DIY Clay Figures: 6 Creative Ideas to Try

Are you searching for a creative way to spend your free time? These DIY Clay Figures ideas are the perfect mix of fun, creativity, and handmade charm. Discover simple techniques and inspiring designs that can help you create beautiful clay creations from scratch.
When I first started making DIY Clay Figures, I thought it would be as easy as shaping clay into cute little characters.
But my first attempts were far from perfect. The shapes were uneven, details disappeared after baking, and some pieces even cracked.
I soon learned that successful clay figures come from simple techniques like conditioning the clay, building a strong base, adding details, and baking correctly.
Once I slowed down and focused on the process, my creations became smoother and more polished.
The best part about DIY Clay Figures is that a small piece of clay can transform into adorable animals, characters, decorations, or handmade gifts. These ideas will help you create unique clay creations you’ll love displaying.
Tiny Succulent Planters With Happy Face Designs
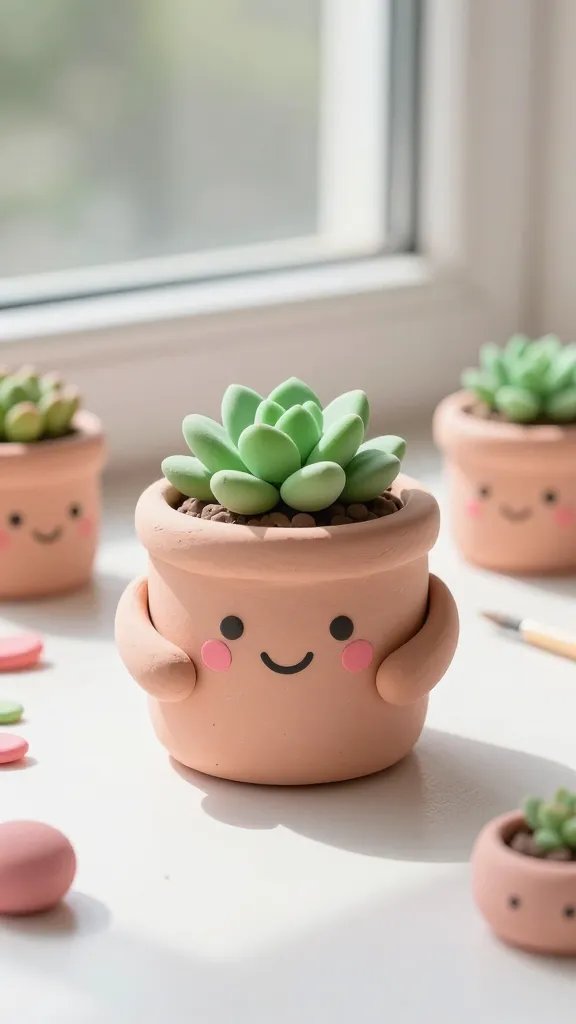
These cheerful planters are basically the cutest thing you’ll make all year, and they’re ridiculously simple to create.
They add instant personality to your desk, windowsill, or anywhere that needs a dose of wholesome vibes.
Materials Needed
- Air-dry clay or polymer clay
- Small circular cookie cutter or cup for shaping
- Acrylic paints in pastel colors
- Fine-tip paintbrush
- Clear sealant spray
- Tiny succulents or air plants
How to Make It
Roll out your clay to about half an inch thick, then use your cookie cutter to create circular bases.
Mold the sides upward to form a small pot shape, making sure the walls are thick enough to hold soil.
Once your pot is shaped, use your fingers or a small tool to create little indentations for arms on either side.
After your clay dries completely (usually 24 hours for air-dry clay), paint on the sweetest little face you can imagine.
Rosy cheeks, closed happy eyes, and a gentle smile work perfectly. You can even add little details like freckles or eyelashes if you’re feeling fancy.
Styling Ideas
Line these cuties up on your kitchen windowsill or give them as gifts to friends who need cheering up.
They’re also perfect for office desks because honestly, who wouldn’t smile at a tiny planter giving you a hug?
Miniature Food Charms For Keychains and Jewelry
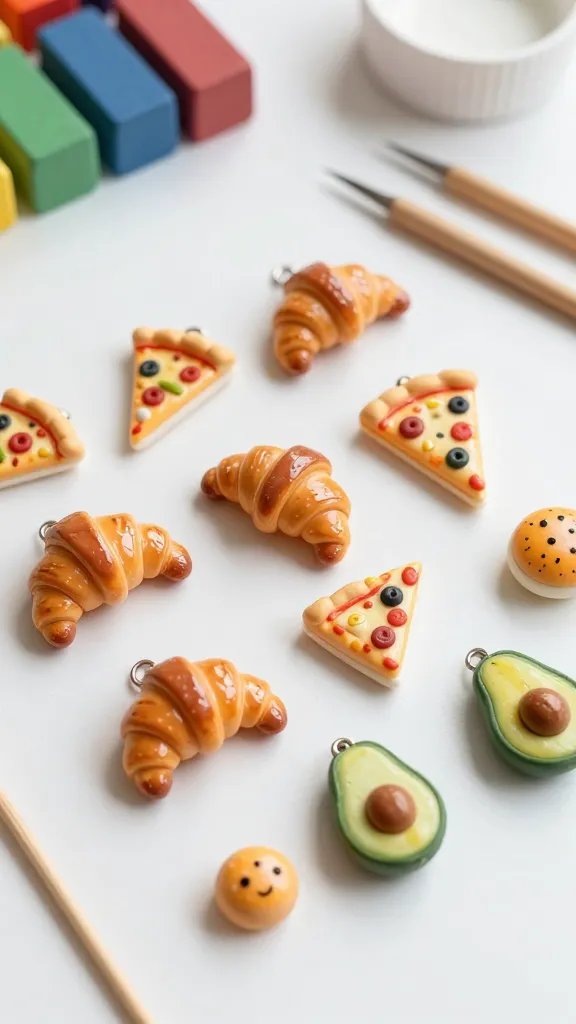
If you’ve ever wanted to wear a tiny croissant as an earring or have a little pizza slice dangling from your bag, this project is calling your name.
Miniature food figures are having a major moment, and they’re surprisingly easy to sculpt once you get the hang of it. Trust me, making teeny tiny avocado halves is oddly therapeutic.
Materials Needed
- Polymer clay in various colors
- Toothpicks or sculpting tools
- Eye pins or jump rings
- Oven for baking polymer clay
- Gloss varnish for realistic shine
- Keychain rings or earring hooks
How to Make It
Start with simple foods like donuts, watermelon slices, or sushi rolls. Mix your clay colors to get realistic shades, then shape them into bite-sized versions of your favorite treats.
Use toothpicks to add texture like sesame seeds on bread or grill marks on a burger.
Before baking, insert an eye pin into the top of each piece so you can attach them to jewelry findings later.
Follow the baking instructions on your clay package, then seal with varnish for that fresh-from-the-oven look.
Pro Tips
Make matching sets for yourself and your bestie, or create an entire charm bracelet with all your favorite foods. These also make incredibly unique birthday gifts that people will actually keep forever.
Whimsical Mushroom Village Scene
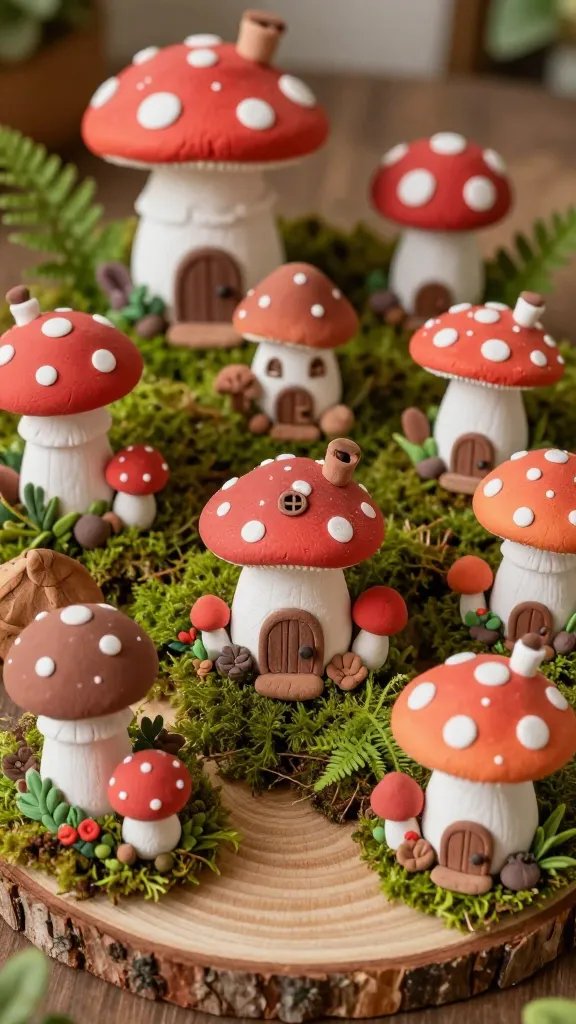
Cottagecore enthusiasts, this one’s for you. A collection of clay mushroom houses with tiny doors, windows, and chimney details creates the most enchanting little display piece.
Arrange them on a wooden slice with some moss, and suddenly you’ve got a fairy garden that belongs in a storybook.
Materials Needed
- Air-dry or polymer clay in reds, whites, browns, and earth tones
- Sculpting tools or a butter knife
- Acrylic paints for detailing
- Small wooden base or bark piece
- Preserved moss or fake greenery
- Hot glue gun
How to Make It
Form mushroom caps by rolling clay into balls and flattening them slightly, then create stems in neutral browns or creams.
Use your sculpting tool to carve in tiny doors and circular windows before the clay dries. You can even add a little chimney on top for extra cottage charm.
Once everything’s dry, paint white polka dots on red caps for that classic toadstool look, or go wild with pastel colors for a more magical vibe. Add tiny details like window shutters or door handles with a fine brush.
Styling Ideas
Display your mushroom village on a bookshelf, use it as a centerpiece for your dining table, or gift it to someone who loves all things cozy and magical. Seriously, this craft screams “peaceful forest energy.”
Abstract Human Form Sculptures
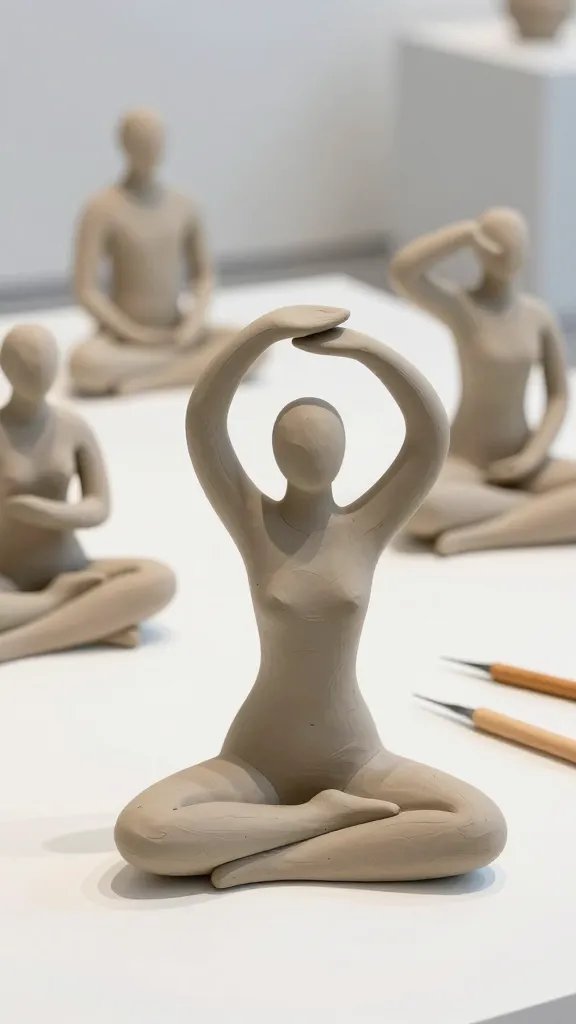
For those who want something a bit more sophisticated and modern, abstract human figures are absolutely stunning.
Think smooth, minimalist bodies in meditation poses or dancers mid-movement.
These sculptures look expensive and gallery-worthy, but they’re actually pretty forgiving to make since the whole point is being abstract.
Materials Needed
- Air-dry clay or stone clay
- Wire armature for support (optional)
- Sculpting tools
- Sandpaper for smoothing
- Matte sealant or leave natural
How to Make It
Start by creating a basic wire frame if you’re making a pose with extended limbs, then build up clay around it.
Focus on flowing lines and gentle curves rather than realistic details. The beauty is in the simplicity, so keep facial features minimal or skip them entirely.
Smooth everything with wet fingers or tools as you work, then let it dry completely. Sand any rough patches for that professional finish, and decide whether you want a natural clay look or a painted finish in matte black, white, or terracotta.
Pro Tips
These look incredible on minimalist shelves, coffee tables, or as part of a styled bookcase. They’re the kind of decor that makes guests ask “where did you get that?” and you get to casually say you made it yourself.
Kawaii Animal Friends With Big Eyes
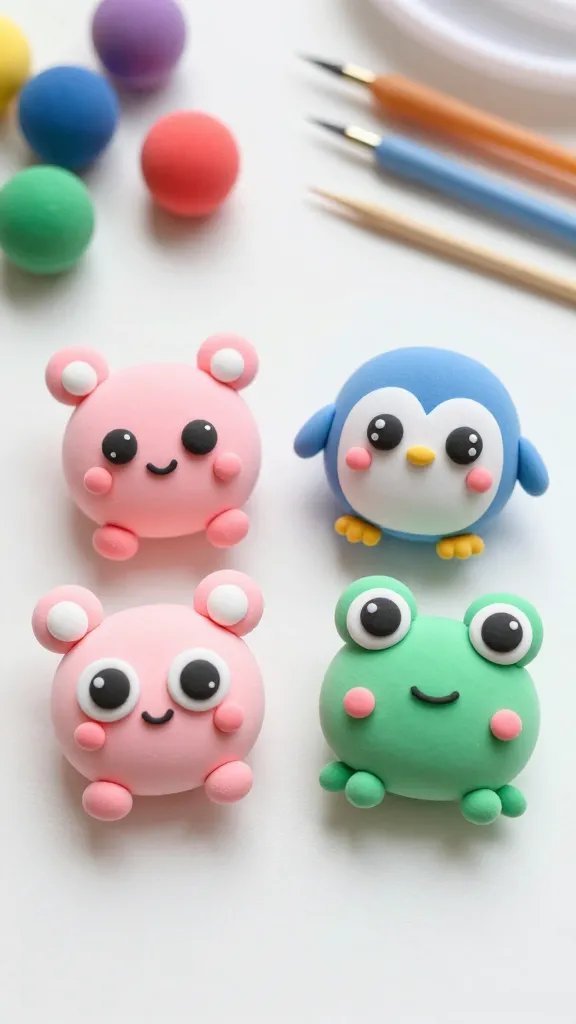
Everything’s cuter with oversized eyes and tiny bodies, right? These kawaii-style animal figures are basically portable happiness.
Whether you make a chubby little bear, a round penguin, or a smiling frog, these guys are guaranteed to make you smile every single time you look at them.
Materials Needed
- Polymer clay in bright, cheerful colors
- Black and white clay for eyes
- Pink clay for blush details
- Sculpting tools or toothpicks
- Oven for baking
How to Make It
Start with a ball or oval shape for the body, keeping proportions cute and chubby. Add tiny arms, legs, and ears depending on your chosen animal.
The secret to kawaii style is making the eyes huge compared to the body, so create big white circles with smaller black pupils.
Add a tiny smile and rosy cheeks with pink clay or paint. Keep all features simple and rounded—sharp angles aren’t part of the kawaii aesthetic.
Bake according to your clay instructions and you’ve got yourself an adorable new desk buddy.
Styling Ideas
Make an entire collection and display them together for maximum cuteness overload. They’re perfect for cheering up your workspace, decorating a kid’s room, or giving as thoughtful handmade gifts.
Decorative Hand Sculptures For Ring Storage
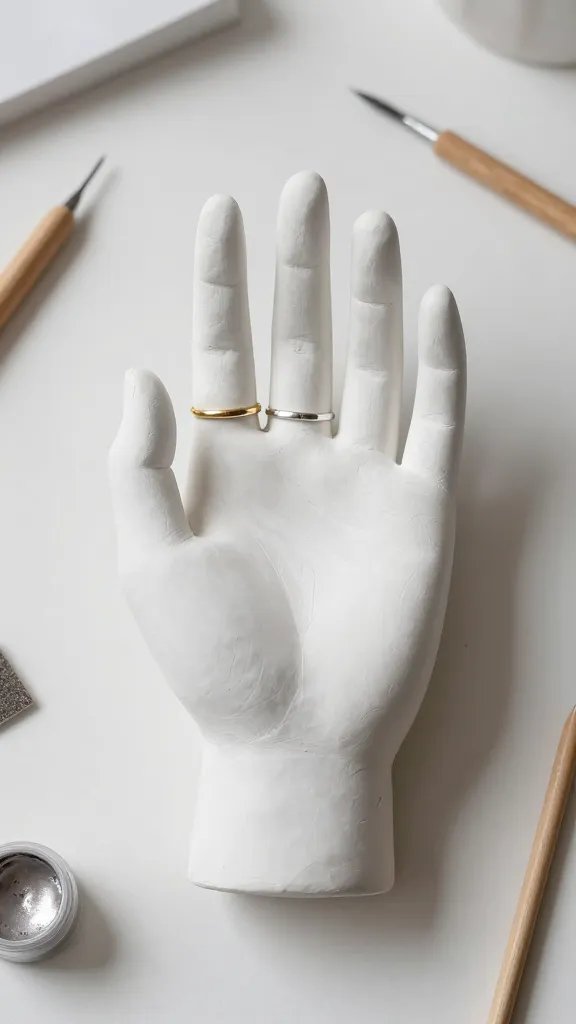
Elegant, practical, and seriously Instagram-worthy—clay hand sculptures that hold your rings are the ultimate blend of art and function.
Whether you create an open palm, a peace sign, or fingers in a delicate pose, these make your jewelry storage part of your decor.
Materials Needed
- Air-dry clay or porcelain clay
- Reference photos of hand poses
- Sculpting tools
- Sandpaper
- Metallic paint or natural finish
- Sealant
How to Make It
Trace your own hand on paper to get proportions right, then start sculpting the basic shape from a thick slab of clay.
Build up the fingers individually, making sure they’re sturdy enough to hold rings. You can create a flat base or have the wrist portion serve as the stand.
Take your time smoothing and refining details like knuckles and fingernails. Once dry, sand everything smooth and decide on your finish—matte white looks clean and modern, while gold or bronze paint adds glamorous vibes.
Pro Tips
Place this on your nightstand, dresser, or bathroom counter for a chic way to store rings overnight. FYI, these also make incredibly thoughtful gifts for anyone who loves unique home accessories.
Craft with Confidence
So there you have it—six totally different ways to get your hands dirty with clay and create something amazing.
Whether you’re drawn to cute and colorful or sleek and sophisticated, there’s definitely a project here calling your name.
Pick one, grab some clay, and let those creative juices flow—you’ll be so proud of what you make!






