
9 Beeswax Tea Candles That Glow Naturally

Ever wish you had a hobby that filled your home with warmth, a little honey-sweet scent, and something pretty to show for an hour of your time? Grab some beeswax, because these nine tea candle ideas will have you crafting cozy little glows in no time.
The first time I tried making beeswax tea candles, I microwaved a chunk of wax in a mug, dropped in a wick, and called it a day.
The wax seized up, the wick tipped sideways, and the whole thing smelled faintly like burnt honey instead of that warm, golden scent beeswax is famous for.
My “aha” moment came when I finally slowed down and used a proper double boiler instead of blasting the wax with direct heat.
Suddenly the wax melted smooth and glossy instead of clumpy, and the wick actually stood up straight because I’d centered it before pouring.
Once I got the basics down, this craft became genuinely relaxing — the kind of thing you do on a Sunday afternoon with music on. It’s forgiving once you know the few tricks that matter.
Trust me, if I can go from lopsided wick disasters to candles I’m proud to gift, you can absolutely make something beautiful too.
Understanding the Basics of Beeswax Candles Before You Begin
Three things make or break a beeswax tea candle: gentle, even melting (a double boiler beats a microwave every time), a properly centered and trimmed wick, and pour temperature — wax that’s too hot can crack your containers, while wax that’s too cool won’t self-level. Get those right and everything else is just fun decorating.
9 Beeswax Tea Candle Ideas
Classic Honey-Scented Tea Lights
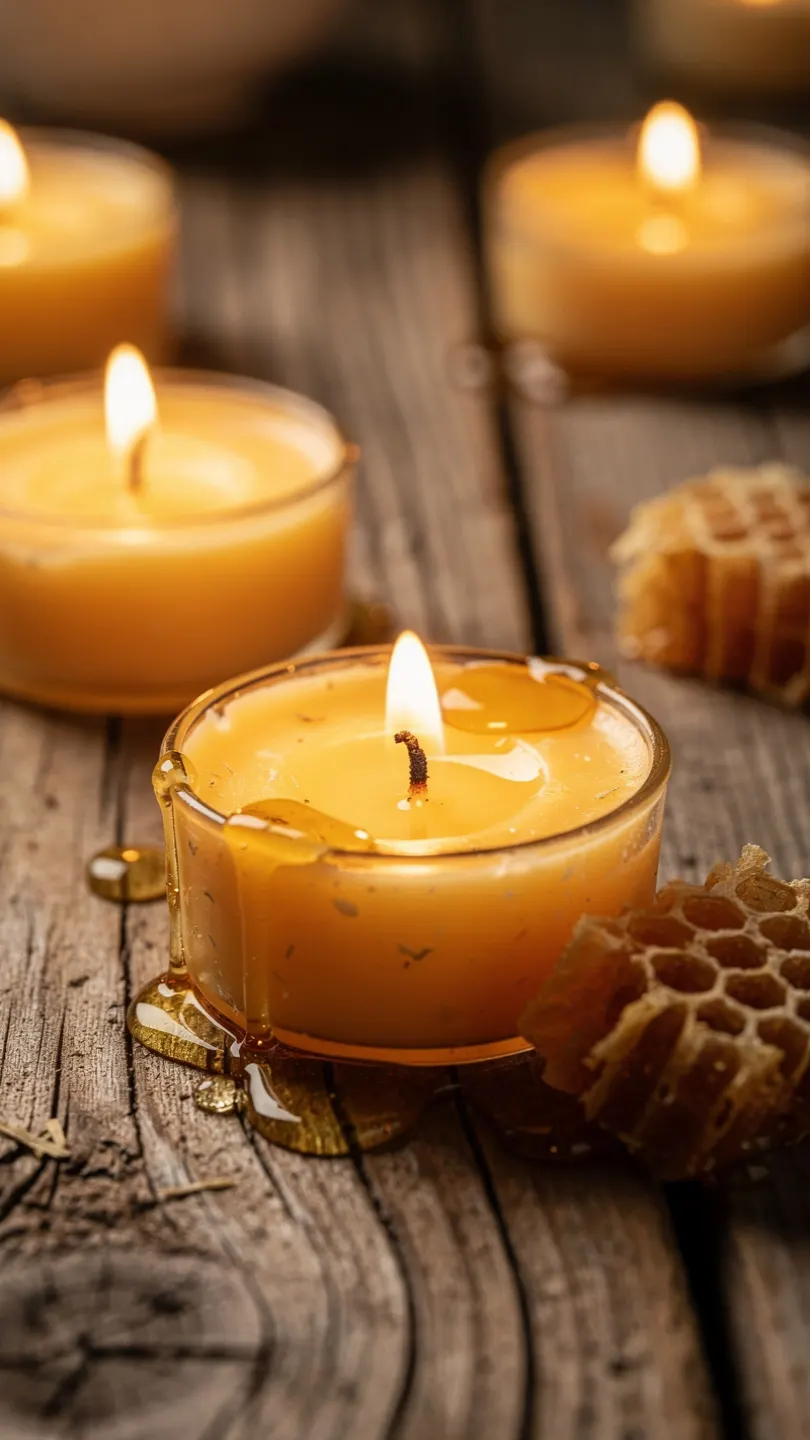
Picture this: a windowsill lined with warm, golden tea lights that smell faintly of honeycomb, no added fragrance needed.
This is the purest expression of beeswax candle-making, and it’s the perfect starting point.
Materials Needed
- Pure beeswax pellets or block wax
- Pre-tabbed cotton wicks (small tea light size)
- Small metal or heat-safe tea light cups
- Double boiler
- Wooden skewer or chopstick
Melt the beeswax slowly in your double boiler until it’s fully liquid and glossy — this usually takes about 10 minutes on medium-low heat.
While it melts, press the wick tabs into the center of each tea light cup so they stay put.
Pour the melted wax into each cup, then use a skewer to hold the wick upright and centered while it starts to set.
Let the candles cure undisturbed for a few hours before trimming the wick to about a quarter inch.
These are wonderful as everyday candles or bulk party favors — make a big batch and tie a few together with twine for an easy hostess gift.
Lavender Beeswax Tea Candles
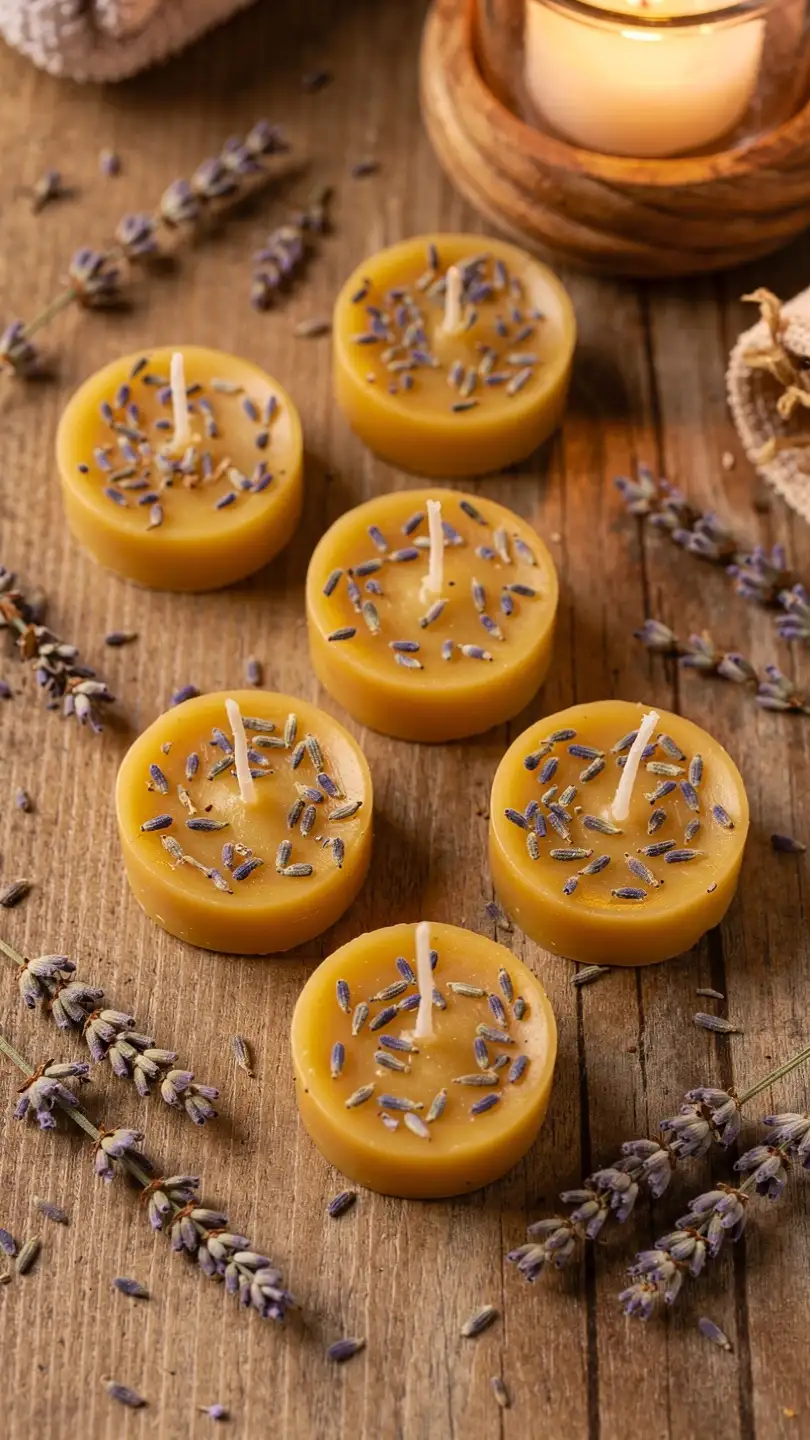
Here’s a fun twist on the classic: infuse your tea candles with dried lavender for a soft, calming scent that pairs beautifully with beeswax’s natural honey undertone.
Essential Candle Making Supplies
- Beeswax pellets
- Cotton wicks
- Dried culinary lavender buds
- Tea light cups
- A few drops of lavender essential oil (optional)
Melt your wax as usual, then stir in a few drops of lavender essential oil once it’s off the heat — adding oil too early can cause it to evaporate before it sets.
Sprinkle a small pinch of dried lavender buds into each cup before pouring for a pretty, textured top.
Pour slowly so the buds settle naturally rather than clumping in one spot, then center your wick and let everything cure.
These make a dreamy addition to a nightstand or bathroom, and they’re a lovely gift for anyone who could use a little relaxation.
Mini Tea Candles in Eggshell Cups
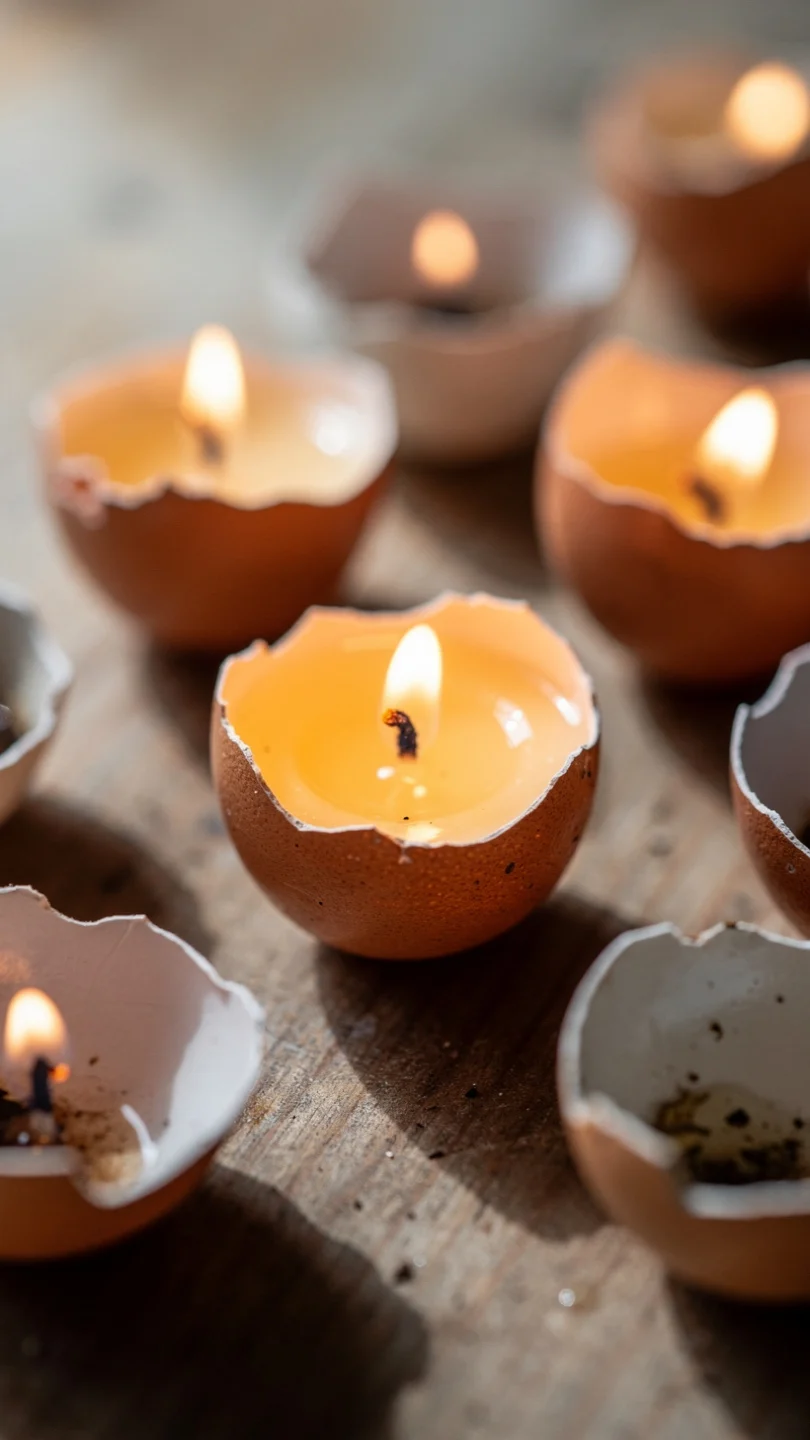
If you want something whimsical and a little unexpected, try pouring your beeswax into cleaned, hollowed eggshells instead of traditional tins.
Candle Making Materials Checklist
- Beeswax pellets
- Cotton wicks
- Empty eggshells (rinsed and dried)
- Egg carton (for stability while pouring)
- Small funnel
Carefully crack eggs near the top, rinse the shells, and let them dry completely — any moisture left inside will cause the wax to sputter.
Set the shells in an egg carton so they stay upright, then use a small funnel to pour melted wax in without spilling.
Center a short wick in each shell before the wax firms up, holding it steady with a toothpick balanced across the top if needed.
These are perfect for a spring brunch table or an Easter-themed gift, and they burn down to reveal the sweet little shell “vessel” underneath.
Rolled Beeswax Sheet Tea Candles
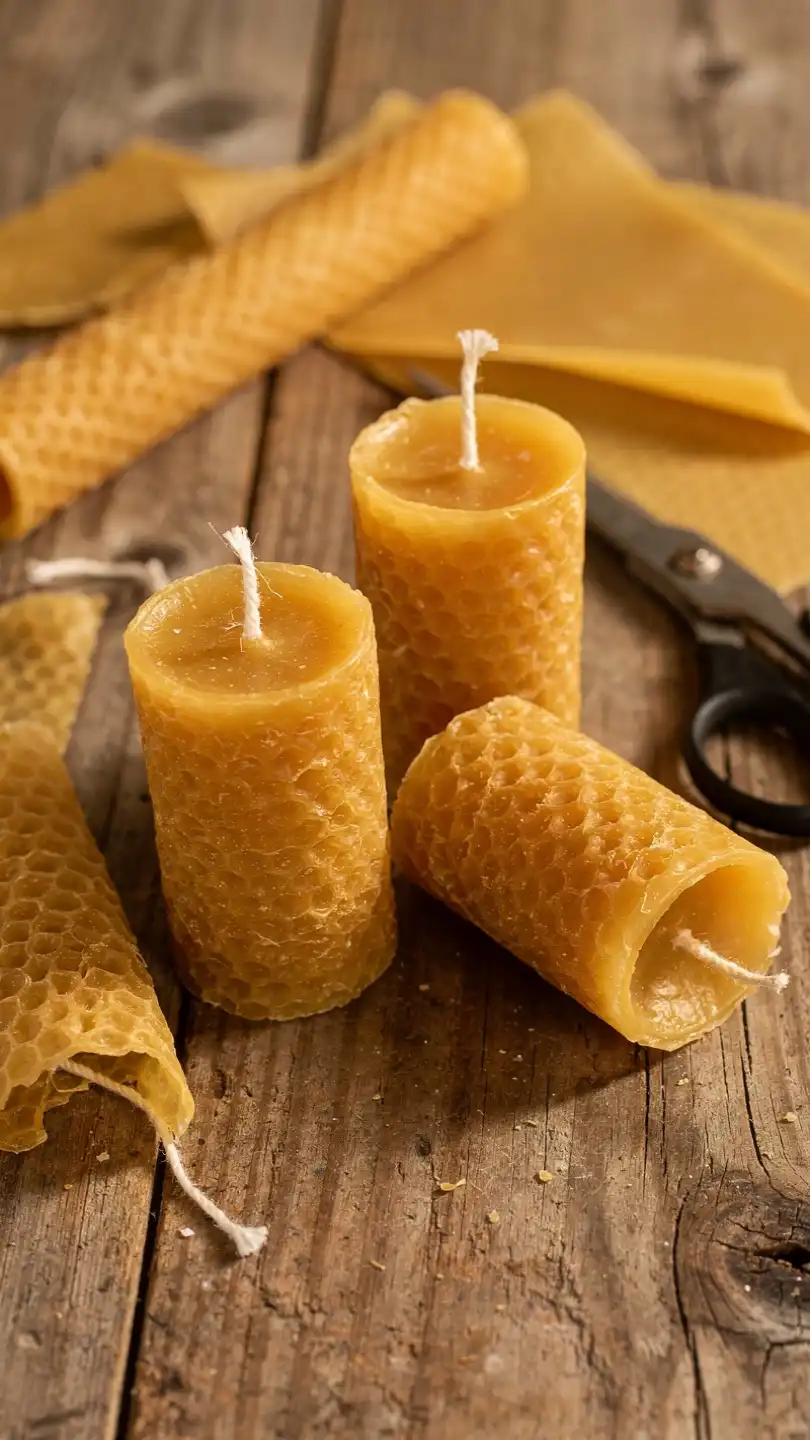
No melting required for this one — just roll a sheet of beeswax around a wick for a rustic, textured candle that’s ideal for beginners or crafting with kids.
Basic Equipment for Making Candles
- Beeswax sheets (sold pre-made for candle rolling)
- Cotton wick, cut to sheet height
- Hair dryer (optional, for softening)
Lay a wick along one edge of the beeswax sheet, leaving a small overhang at the top. If your wax sheet feels stiff, a quick pass with a hair dryer on low heat makes it pliable and easier to roll.
Roll the sheet tightly and evenly around the wick, pressing gently as you go so there are no air gaps, then press the seam closed with your fingers to seal it.
This is the most beginner-friendly option on the list, no hot wax involved, so it’s great for a craft night with kids or a quick gift you can finish in minutes.
Citrus & Clove Beeswax Tea Candles
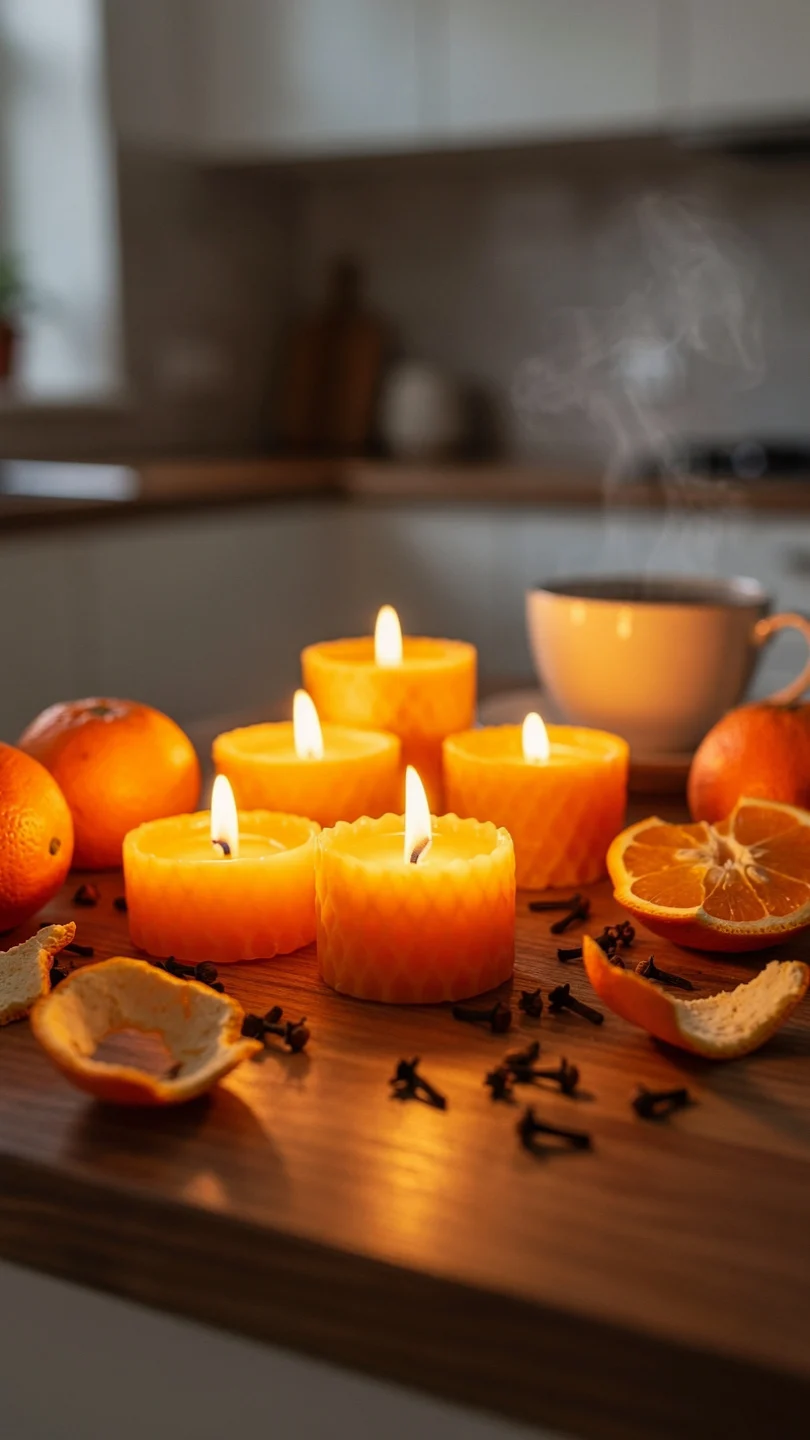
Picture the smell of orange peel and clove drifting through your kitchen — this idea is basically a cozy autumn evening in candle form.
List of Candle Making Supplies
- Beeswax pellets
- Cotton wicks
- Dried orange peel, finely chopped
- Whole cloves
- Tea light cups
Melt your wax and stir in a small amount of finely chopped dried orange peel once it’s off heat, so the citrus oils don’t burn off in the pan.
Press one or two whole cloves into the top of each cup before the wax fully sets, arranging them decoratively.
Center your wick and let the candles cure fully, ideally overnight, so the scent has time to settle into the wax.
These are wonderful for fall gatherings or as part of a holiday gift basket alongside mulled cider mix.
Layered Two-Tone Tea Candles
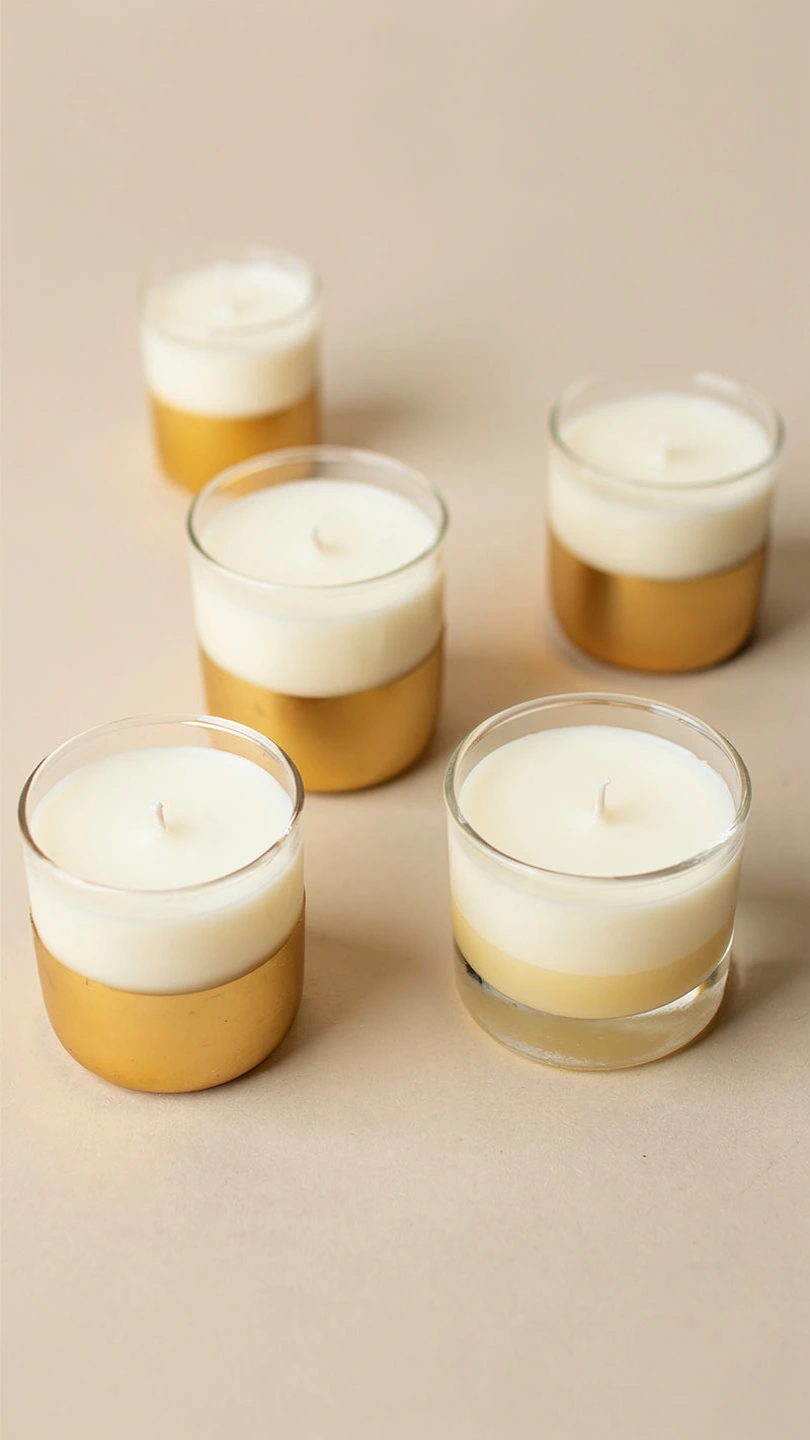
For a modern, minimalist look, try pouring your beeswax in two contrasting layers — natural gold on the bottom, bleached white on top (or vice versa).
Everything You Need to Make Candles
- Natural beeswax pellets
- White (bleached) beeswax pellets
- Cotton wicks
- Tea light cups
- Two small pouring pots
Melt each wax color separately in its own container, keeping them at a similar temperature so they bond cleanly.
Pour the first layer and let it set until just firm to the touch, about 15–20 minutes, before adding the second layer on top.
Center your wick before the first layer fully hardens so it’s anchored through both layers, not just floating on top.
The clean, graphic line between colors makes these feel almost architectural, a great fit for a modern console table or a minimalist-styled gift.
Tea Candles in Recycled Glass Jars
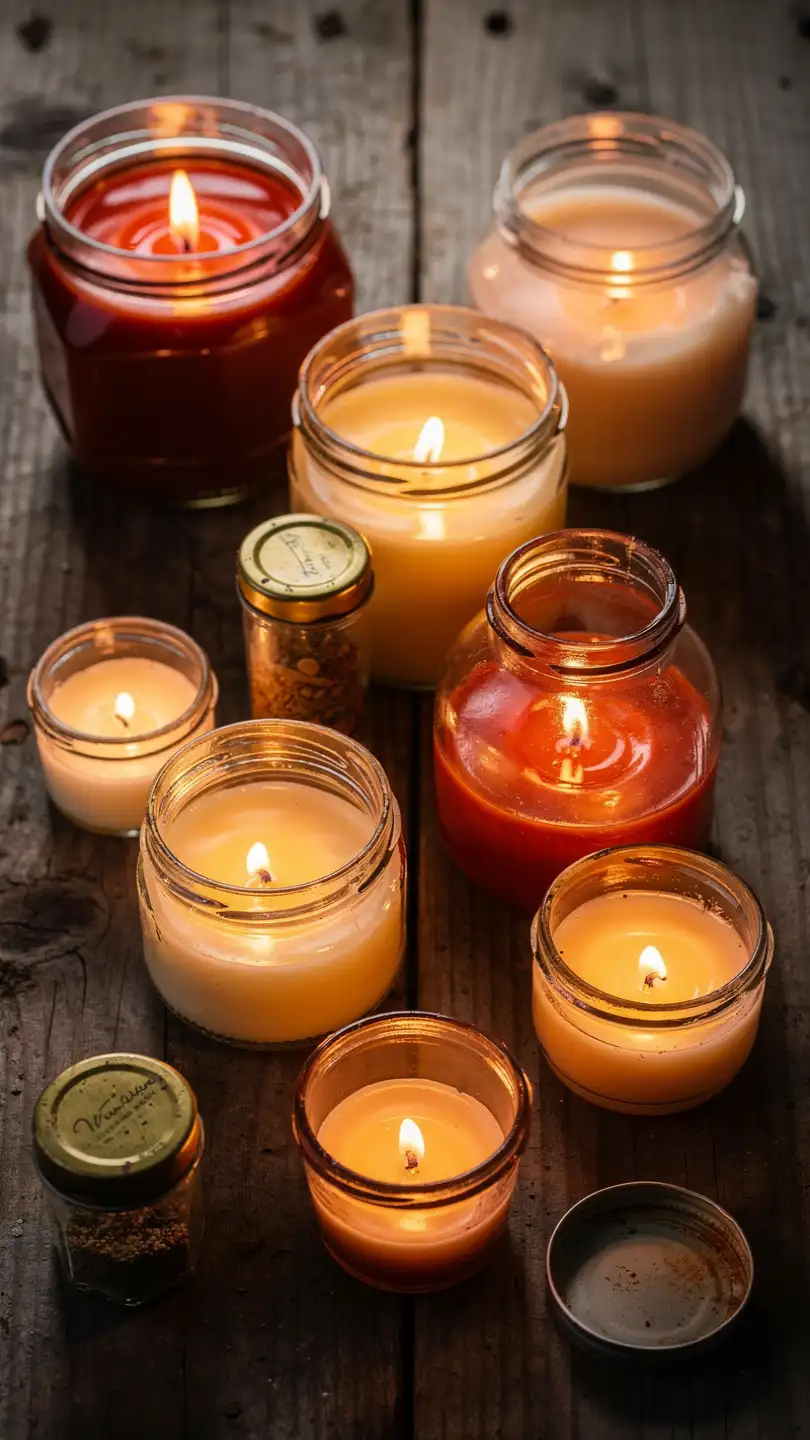
Here’s an easy way to give small jam jars, votive glasses, or spice jars a second life as candle containers.
Tools and Materials
- Beeswax pellets
- Cotton wicks with metal tabs
- Small recycled glass jars, cleaned
- Double boiler
- Hot glue dot or wick sticker
Wash and fully dry your jars, then secure a wick tab to the bottom center using a hot glue dot or wick sticker so it doesn’t drift while pouring.
Melt your wax and let it cool slightly before pouring, since glass can crack from wax that’s too hot.
Pour slowly, holding the wick straight, and let the jar sit undisturbed until fully set, usually a few hours.
This is a satisfying, eco-friendly project for anyone who’s been saving pretty little jars, and it doubles as home decor once the label’s peeled off.
Botanical Pressed-Flower Tea Candles
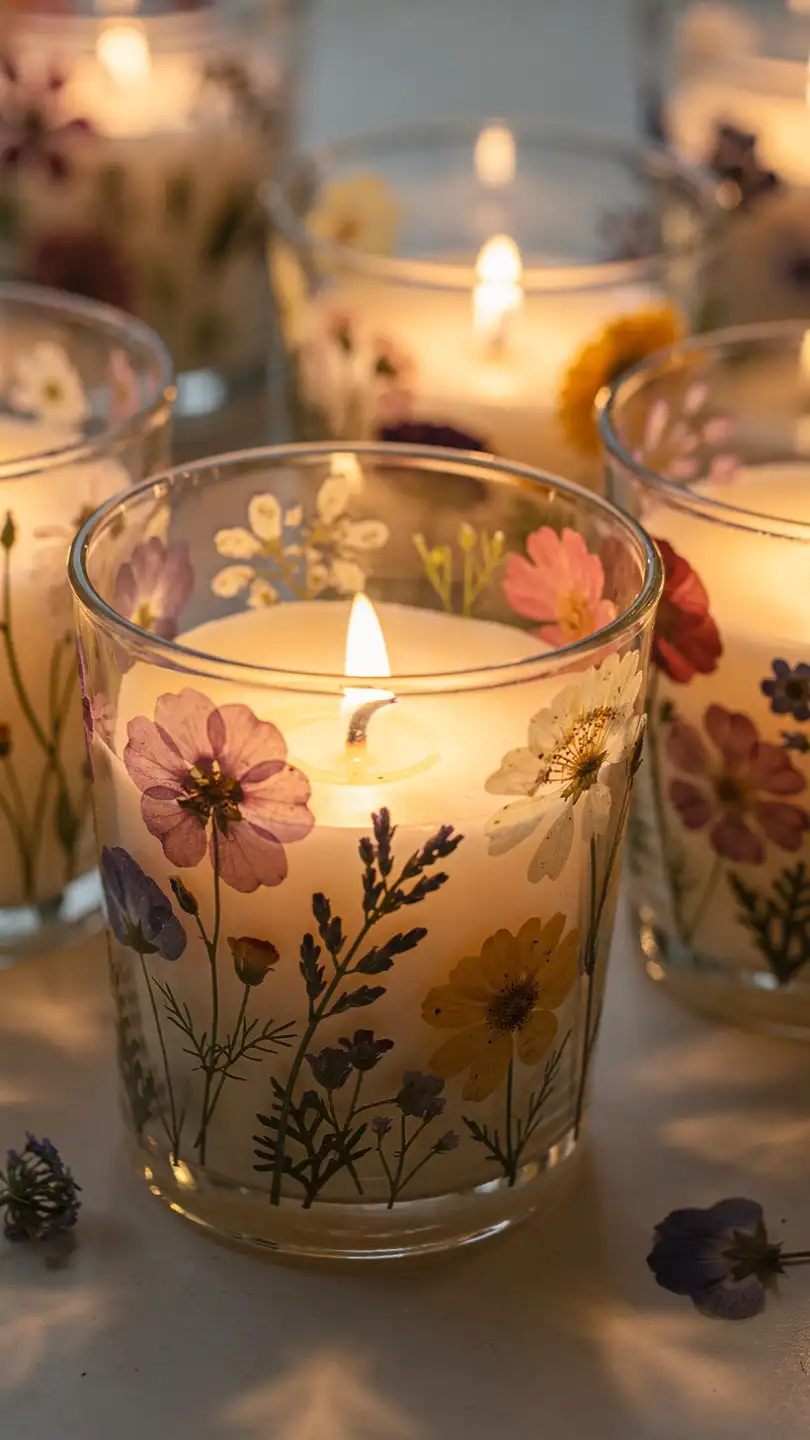
If you love a decorative touch, pressed flowers set into the sides of a candle create a beautiful stained-glass effect once lit.
Essential Tools and Ingredients
- Beeswax pellets
- Cotton wicks
- Small pressed flowers or petals
- Clear glass votive cups
- Thin paintbrush
Press your flowers ahead of time (a heavy book works fine) so they’re completely flat and dry before you begin.
Pour a thin first layer of wax into the glass cup, then use a paintbrush to gently press the pressed flowers against the inside glass wall while the wax is still tacky.
Once the flowers are held in place, pour the remaining wax to fill the cup, centering your wick as you go.
These are a beautiful gift for someone who loves nature-inspired decor, especially set out at a spring or garden-themed event.
Cinnamon Stick Bundle Tea Candles
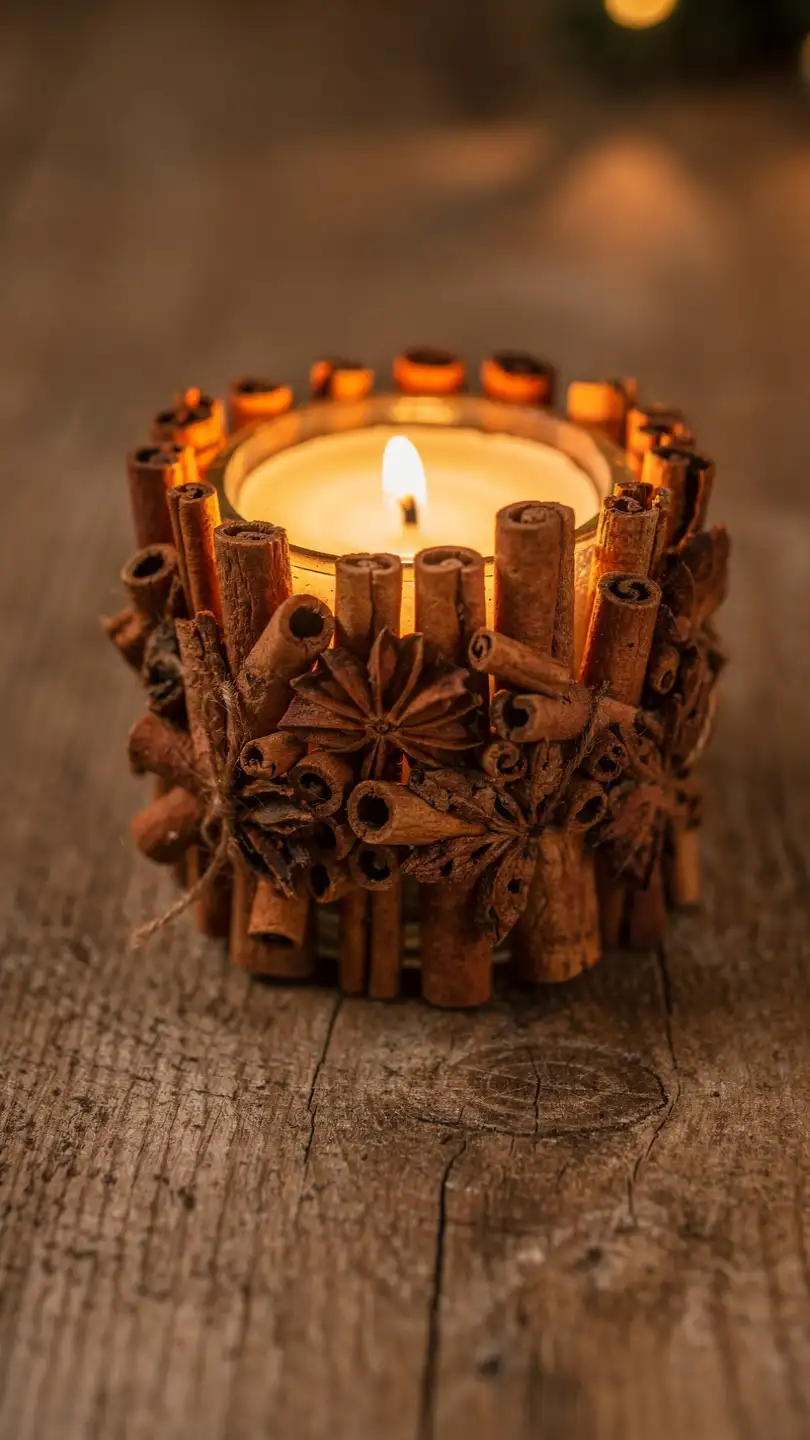
For a rustic, holiday-ready candle, wrap a cluster of mini cinnamon sticks around the outside of your tea light cup for texture and a warm, spiced scent.
Materials Needed
- Beeswax pellets
- Cotton wicks
- Mini cinnamon sticks
- Tea light cups (or small tin containers)
- Twine or thin jute string
Pour and set your beeswax tea candle as usual, letting it fully cure and cool. Once the candle is solid and cool to the touch, arrange cinnamon sticks vertically around the outside of the tin, spacing them evenly.
Wrap twine around the cinnamon sticks a few times to hold them snugly in place, tying it off with a small knot or bow at the front.
These are perfect for a rustic holiday table or tucked into a gift basket alongside other cozy, cold-weather treats.
Time to Create
Whether you’re drawn to the clean, modern lines of the two-tone candles or the cozy, romantic feel of the lavender version, there’s an idea here for every mood and skill level.
Once you’ve got the basics of melting, wicking, and pouring down, the possibilities for colors, scents, and containers are pretty much endless.
So warm up that double boiler and start pouring — your home is about to smell a whole lot better.






