
DIY Clay Jewelry Ideas for a Chic Handmade Look

If you love handmade accessories, DIY clay jewelry is a trend you don’t want to miss. It’s easy, affordable, and incredibly versatile. Explore these creative ideas to craft jewelry that looks beautiful and feels completely personal.
When I first tried making DIY Clay Jewelry, I thought it would be a simple weekend project. But my pieces came out with uneven edges, dull colors, and an unfinished look, far from the polished designs I had in mind.
I quickly realized the issue wasn’t the idea, but the small details. Choosing the right clay, smoothing edges, and understanding how colors change after baking made all the difference.
Once I started adding simple touches like texture, gold accents, and proper finishing, my designs improved instantly.
That’s when it clicked, DIY Clay Jewelry is all about the details. With a little patience, you can turn simple clay into beautiful, wearable art.
Marbled Polymer Clay Drop Earrings With Gold Leaf Accents
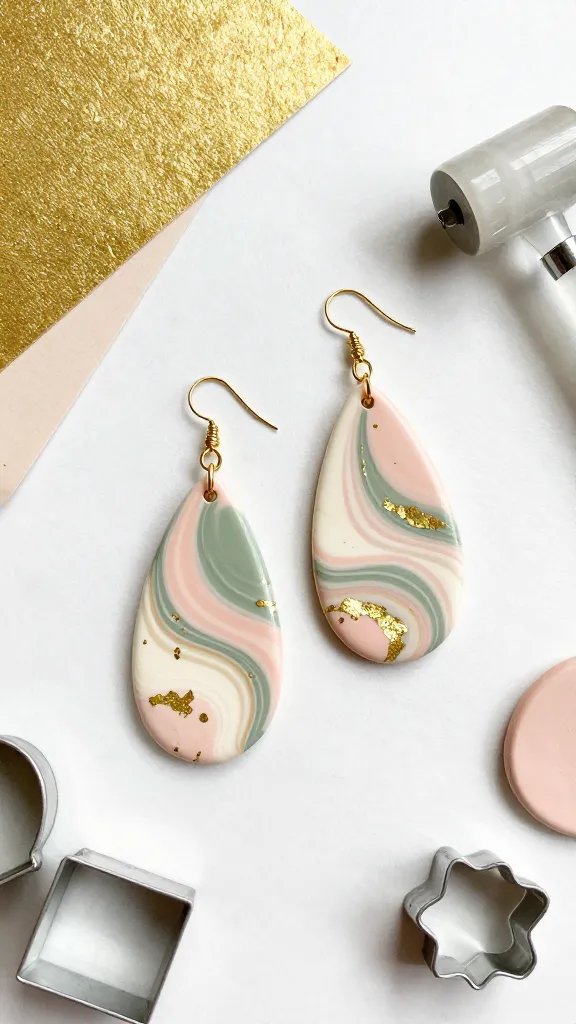
These show-stopping earrings combine swirled marble patterns with tiny flecks of gold leaf for a luxe finish.
The marbling technique creates a unique pattern every single time, so you’ll never make the same pair twice. They’re lightweight enough to wear all day but fancy enough for special occasions.
Materials Needed
- Two or three colors of polymer clay
- Gold leaf sheets
- Clay roller or smooth glass bottle
- Circle or teardrop cookie cutters
- Earring hooks and jump rings
- Small drill bit or toothpick
How to Make It
Twist your clay colors together without fully blending them, then roll flat to reveal gorgeous marble streaks.
Press tiny pieces of gold leaf onto the surface before cutting your shapes. After baking according to package directions, seal with a clear gloss and attach your hardware.
These are perfect for anyone who wants to look effortlessly chic without spending a fortune on handmade jewelry.
Terrazzo-Style Statement Necklace Pendant
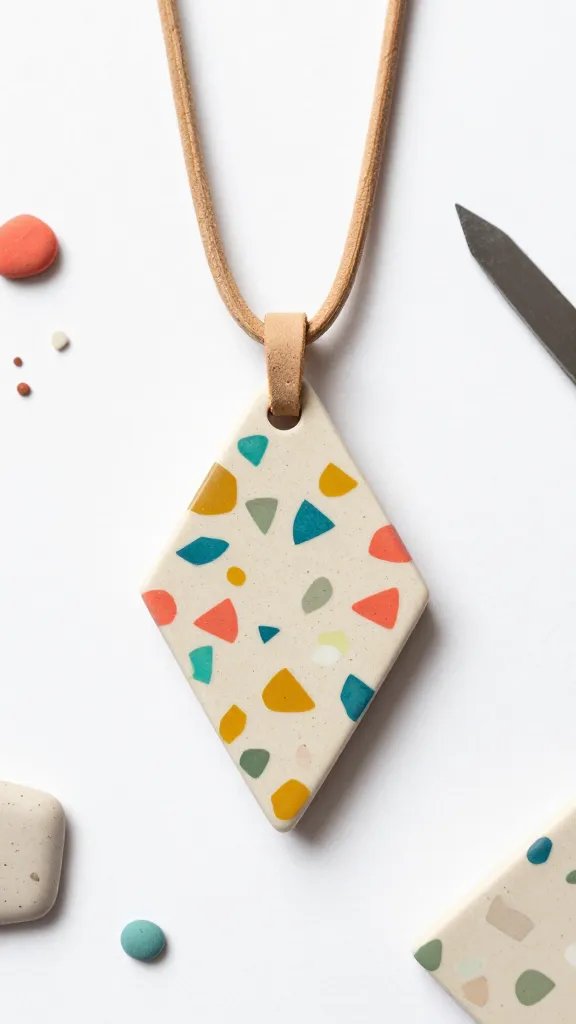
Channel major Italian villa vibes with a terrazzo-inspired clay pendant that looks incredibly sophisticated.
This technique uses tiny pieces of colorful clay pressed into a neutral base to mimic the speckled stone pattern that’s everywhere in home decor right now.
Wear it on a simple leather cord or delicate gold chain for maximum impact.
Materials Needed
- Beige or white polymer clay for the base
- Scraps of colorful clay in various shades
- Clay blade or sharp knife
- Geometric cookie cutter or craft knife
- Sandpaper (fine grit)
- Cord or chain necklace
Chop your colorful clay scraps into tiny irregular pieces, then press them into your rolled base color.
Roll everything smooth, cut your pendant shape, and create a hole for stringing. After baking and cooling, sand the surface for that authentic terrazzo finish.
This is seriously one of the most conversation-starting pieces you can make, and people will be shocked when you tell them it’s clay!
Minimalist Arch Stud Earrings in Matte Pastels
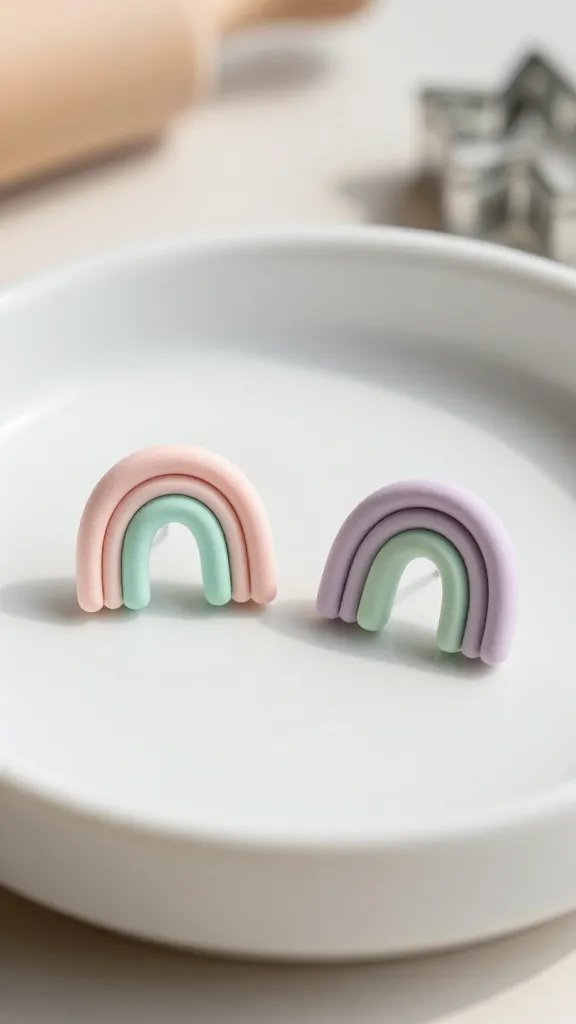
Sometimes simple is best, and these cute arch-shaped studs prove it. They’re perfect for everyday wear and take less than thirty minutes to make from start to finish. The matte finish gives them a modern, high-end look that pairs beautifully with any outfit.
How to Make It
Roll out your chosen pastel clay to about 2mm thickness and cut small arch or rainbow shapes.
Use a straw or tiny tool to create shallow texture if desired, then gently press earring posts into the back before baking. Skip the gloss sealer to maintain that trendy matte aesthetic.
Make several pairs in different colors so you always have options that match your wardrobe!
Boho Feather Earrings With Ombré Color Fade
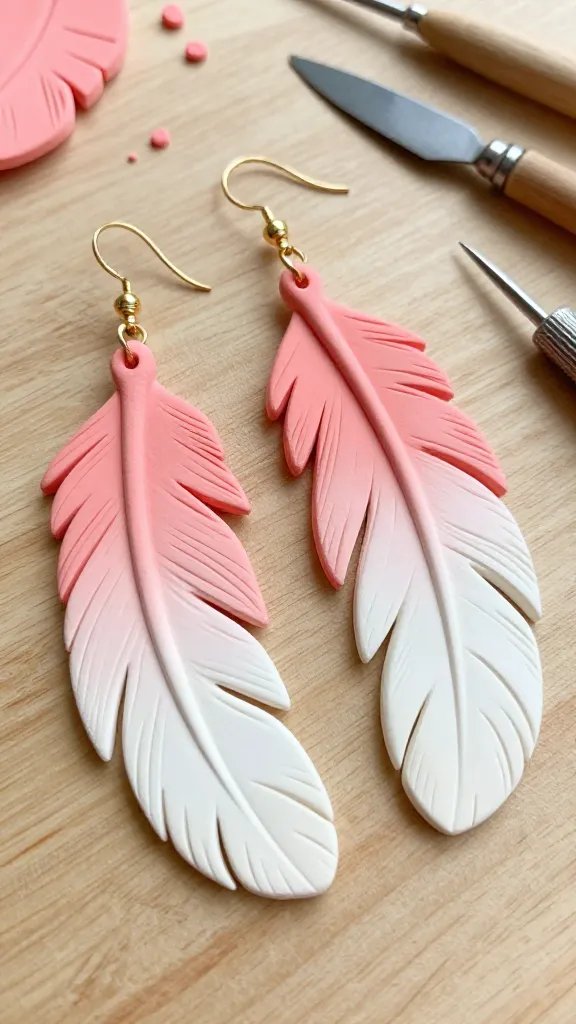
These lightweight feather earrings give major festival vibes with their flowing shape and gradient coloring.
The ombré effect looks complicated but is actually super beginner-friendly using a simple blending technique.
They move beautifully when you wear them and weigh practically nothing despite their dramatic size.
Materials Needed
- Two colors of polymer clay that blend well together
- Clay blade
- Feather template or freehand cutting skills
- Needle tool or toothpick for details
- Earring hooks
Create a color gradient by gradually blending your two clay colors together in sections. Cut feather shapes and use your needle tool to add realistic texture lines.
These work beautifully for summer outdoor concerts or just adding some artistic flair to your everyday look.
Chunky Chain Link Bracelet in Solid Colors
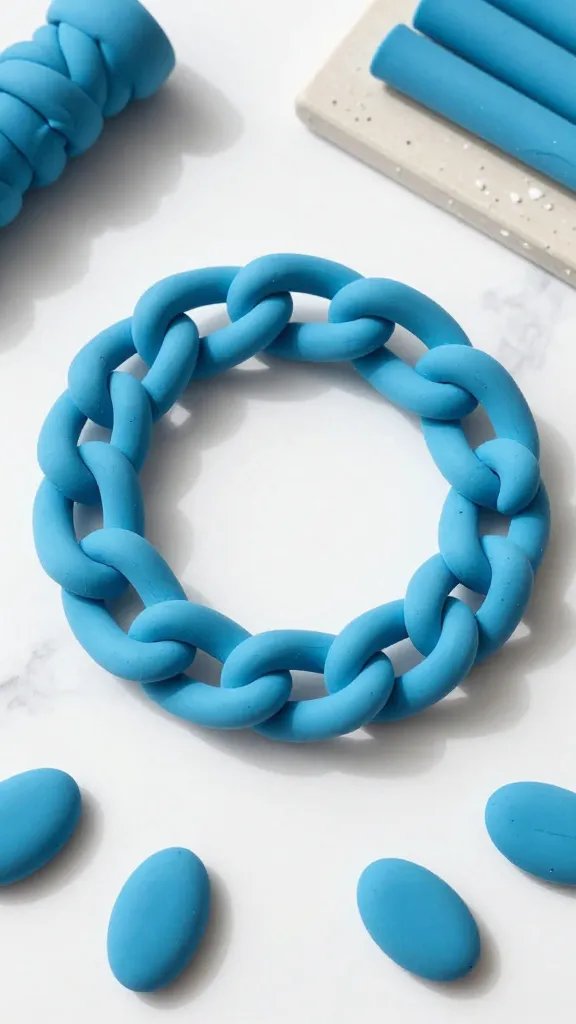
Who says clay is just for earrings? This bold bracelet features interlocking clay links that look like oversized chain jewelry.
Choose a single vibrant color for maximum impact, or mix and match for a playful rainbow effect. It’s a total arm candy statement piece.
How to Make It
Roll clay into thick ropes, then cut equal segments and shape them into ovals or rectangles.
Link them together before baking by threading unbaked links through already-baked ones, working in stages. The chunky proportions make this bracelet impossible to ignore in the best way possible.
FYI, this project requires a bit more patience than earrings, but the result is absolutely worth it for that designer look.
Abstract Face Silhouette Brooch Pin
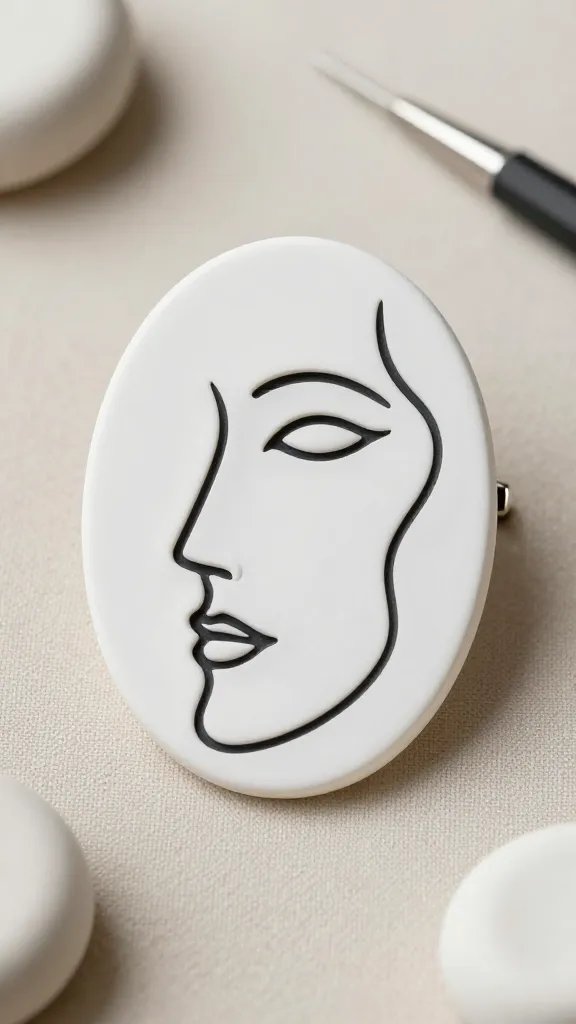
Artistic line-art faces are trending everywhere, and now you can wear one as a unique brooch.
This modern art-inspired piece adds instant sophistication to jackets, bags, or even as a hair accessory. The abstract style means there’s no wrong way to create your face design.
Materials Needed
- White or cream polymer clay
- Black polymer clay or acrylic paint
- Clay tools or toothpicks
- Pin backing hardware
- Strong adhesive
Shape your base into an oval or circle, then add thin black clay lines to create your abstract face outline with minimal features.
Alternatively, bake your base first and paint the design afterward for more control. Attach the pin backing with strong glue after everything is completely cooled.
This is perfect for anyone who loves wearable art and wants something truly one-of-a-kind.
Dainty Clay Bead Stretch Ring With Metallic Accents
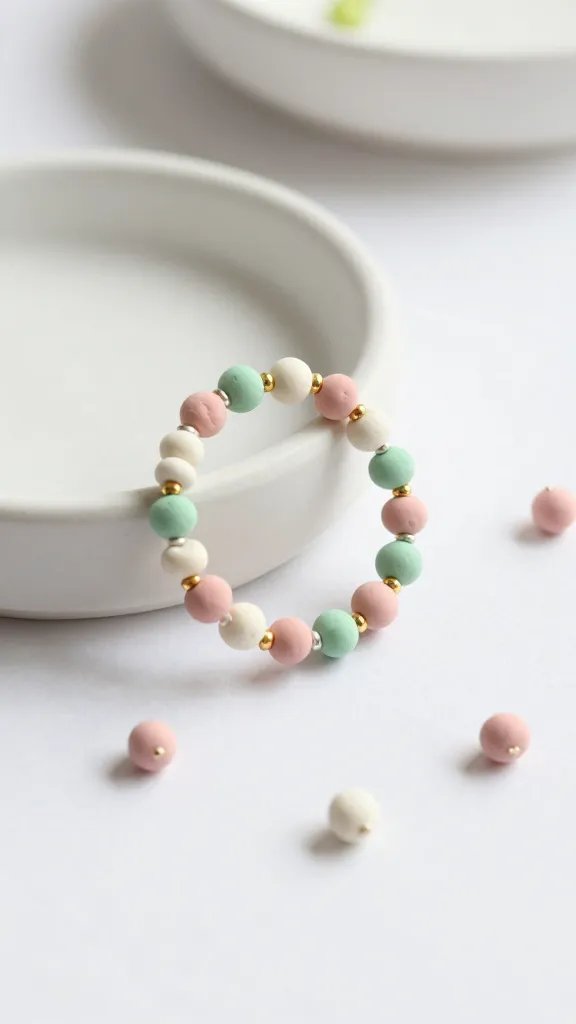
These sweet little rings are made from tiny handrolled clay beads strung on elastic cord. Add some metallic gold or silver beads between your clay ones for a mixed-media look that’s both delicate and interesting. They’re perfect for stacking or wearing alone.
How to Make It
Roll tiny clay balls in your chosen colors, poke holes through the centers with a toothpick, and bake. Once cooled, string them onto jewelry elastic alternating with small metal beads.
Tie securely and trim the excess cord. Make several in coordinating colors for the prettiest ring stack you’ve ever seen!
These also make adorable gifts because they’re adjustable and fit most finger sizes.
Geometric Hexagon Dangle Earrings With Two-Tone Color Blocking
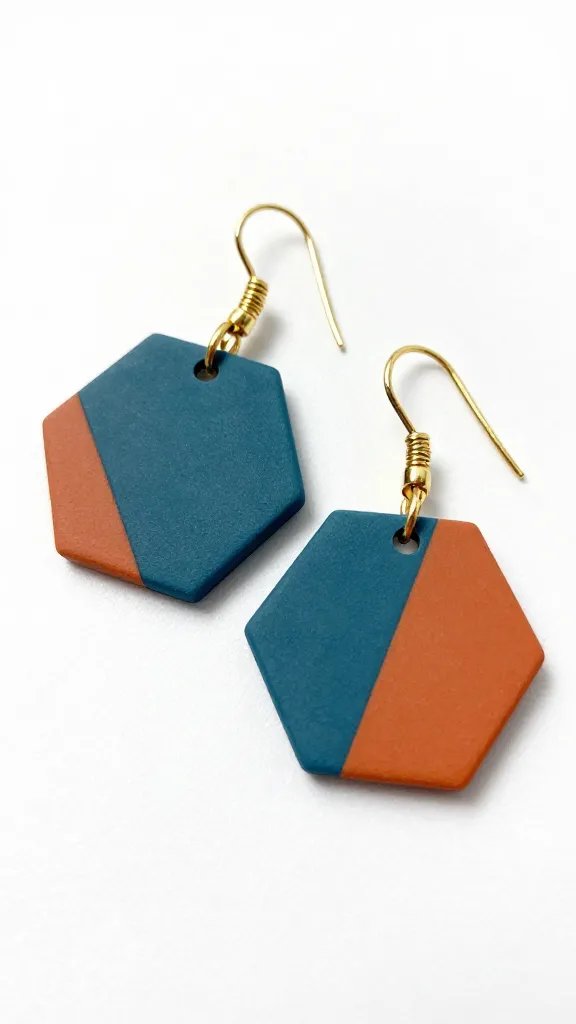
Color blocking is always chic, and these hexagon earrings prove it. By dividing each shape into two contrasting colors, you create a modern graphic look that’s seriously eye-catching.
The geometric precision gives them a polished, professional finish.
Materials Needed
- Two contrasting polymer clay colors
- Hexagon cookie cutter or template
- Clay blade with straight edge
- Earring hardware
Roll out each color separately, then use your blade to cut and piece them together in a half-and-half pattern.
Cut your hexagon shape from this combined sheet. The clean line where the colors meet is what makes these earrings look so sharp and intentional.
Trust me, people will think you bought these from an expensive boutique!
9. Vintage-Inspired Cameo Pendant With Floral Relief
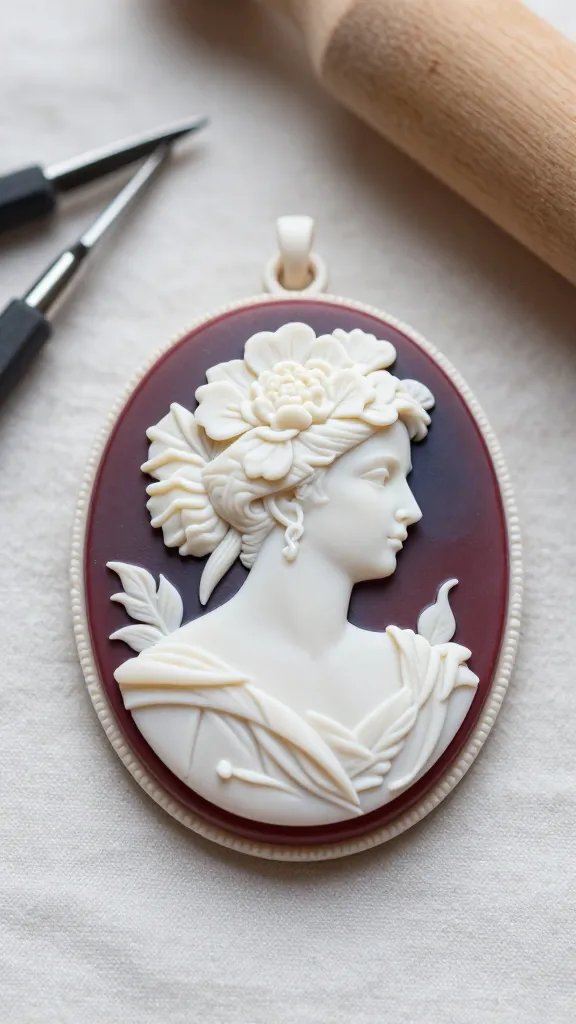
Channel your inner Victorian with a clay cameo that looks like an heirloom piece. This technique uses layered clay colors to create a raised relief design against a contrasting background. The dimensional effect is stunning and way easier to achieve than it looks.
How to Make It
Roll a dark base color for your background, then add thin cut-outs of a lighter clay color on top to create your floral or profile design.
Press gently so they adhere but maintain their raised appearance. Frame it with a decorative clay border or metal bezel setting for that authentic cameo look.
String it on a long chain or ribbon for a romantic vintage vibe.
This piece works beautifully for costume parties, Renaissance faires, or anyone who loves romantic vintage aesthetics.
Ready to Get Crafting?
The best thing about clay jewelry is that it’s endlessly customizable and surprisingly affordable to make.
Start with one project that speaks to you, and before you know it, you’ll have a whole collection of handmade pieces that reflect your personal style.
Your jewelry box (and your friends who’ll be begging you to make them pieces) will thank you!






