
DIY Clay Necklace Ideas: 14 Stylish Designs to Try

Ready to create a necklace that feels truly one-of-a-kind? These DIY clay necklace ideas will inspire you to turn simple clay into beautiful handmade jewelry that is fun to make and easy to personalize.
When I first made a DIY Clay Necklace, I thought it would be a simple afternoon craft. My first beads were uneven, but I loved how personal the finished piece felt.
That’s when I realized you don’t need perfect skills to create beautiful clay jewelry. With simple shapes, colors, and textures, you can make a necklace that matches your style.
If you’re new to handmade jewelry, these DIY Clay Necklace ideas are easy, creative, and fun to customize.
Glossy Retro Floral and Heart Pendants on Beaded Chains
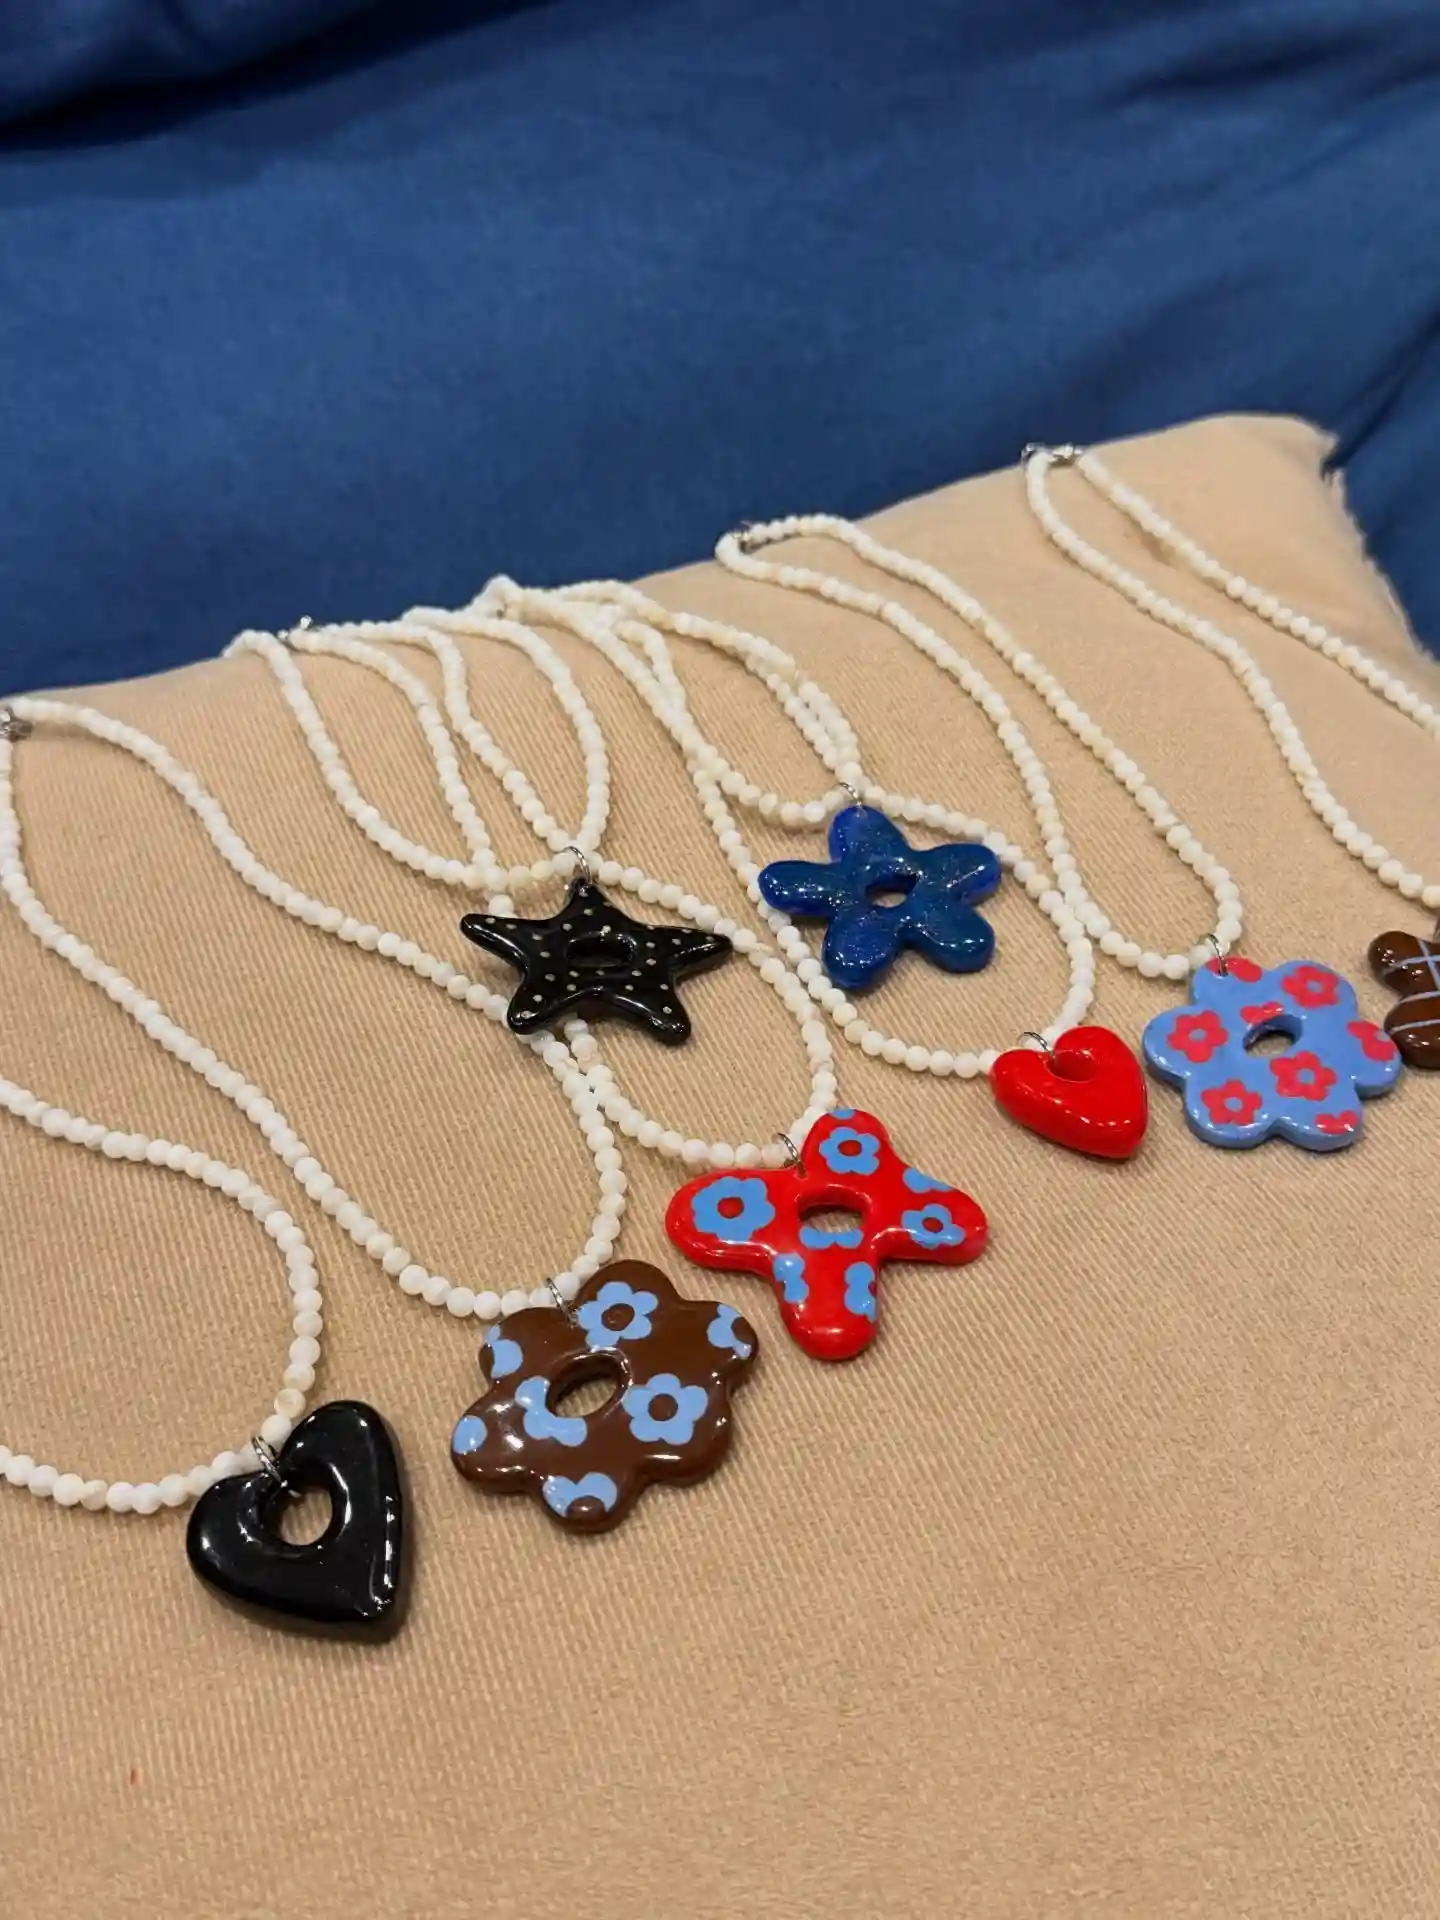
These chunky, glossy clay pendants bring a playful 70s flair straight into your jewelry box.
The contrast between bright acrylic painted designs and creamy white bead strands gives each piece an instantly wearable, handcrafted look.
To recreate this collection, form your clay into chunky cutouts like four-petal flowers, stars, and open hearts. Poke a generous hole near the top for a jump ring before baking or drying.
Once hardened, paint base coats using bold colors like crimson red, chocolate brown, deep navy, and pitch black.
Paint small contrasting floral dots or starbursts across the surface using a fine detail brush or the end of a toothpick. Finish with a thick coat of high-gloss varnish to get that smooth, candy-like glaze.
Recreate this look
Graphic Hand-Painted Coin Medallions on Black Cord
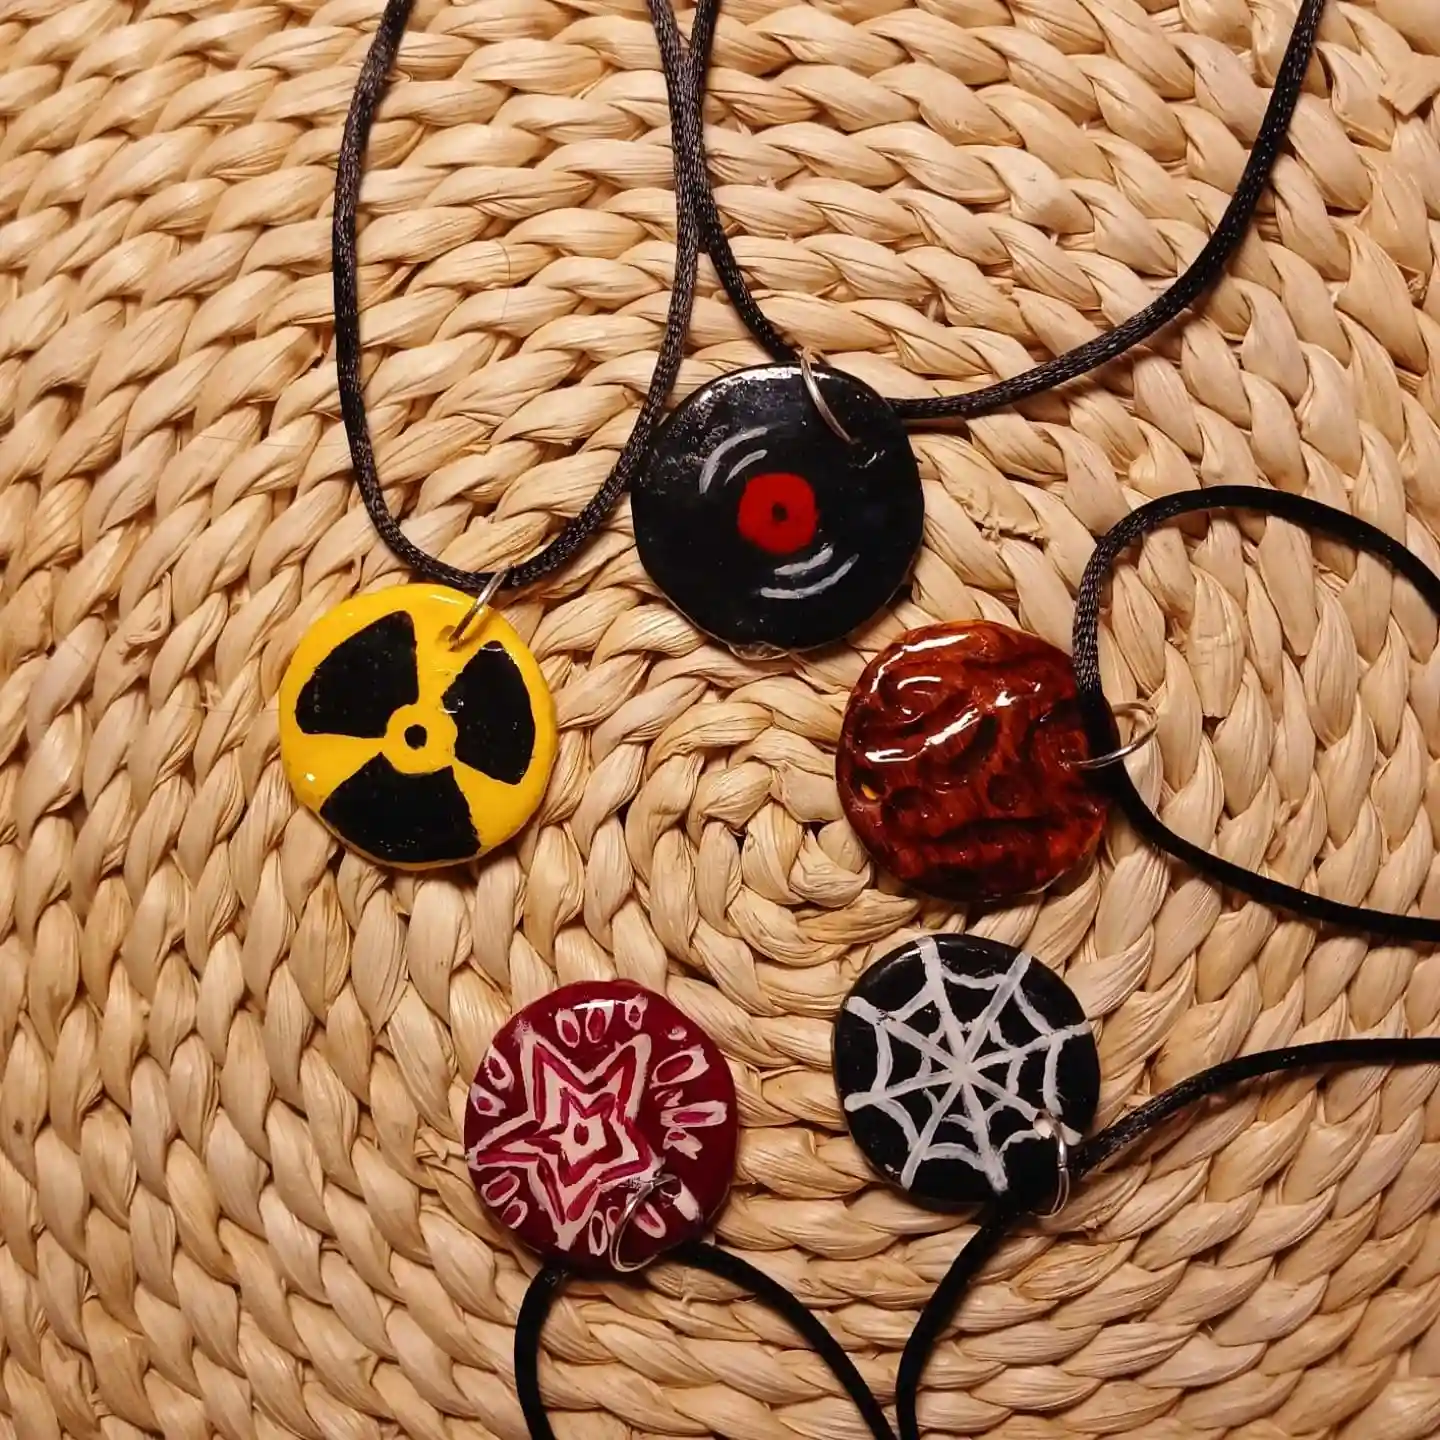
Flat circle pendants serve as an easy blank canvas for detailed hand-painted graphics. Strung simply on thin black satin cord, these coin-style pendants turn bold graphics like vinyl records, spiderwebs, radioactive symbols, textured moon surfaces, and mandala stars into striking statement pieces.
- Base setup: Flatten small balls of clay into uniform rounds using a smooth roller or flat stamp.
- Top detail: Punch a clean hole near the upper edge with a straw or needle tool before hardening.
- Surface work: Smooth out edges with a damp finger, or carve deep texture lines directly into the damp clay using a sculpting tool.
- Paint & Seal: Fill in your graphics using opaque acrylic craft paints, let dry completely, and cover with a glossy clear coat for a durable sheen.
Use fine-liner brushes or paint pens for thin lines like spiderwebs.
Carve groove details into wet clay before painting for realistic depth.
Water down acrylic paint too much, as it causes streaks on smooth clay.
Forget to seal painted designs before threading on cord.
Elegant Sculpted Floral Cameos on Gold Chains
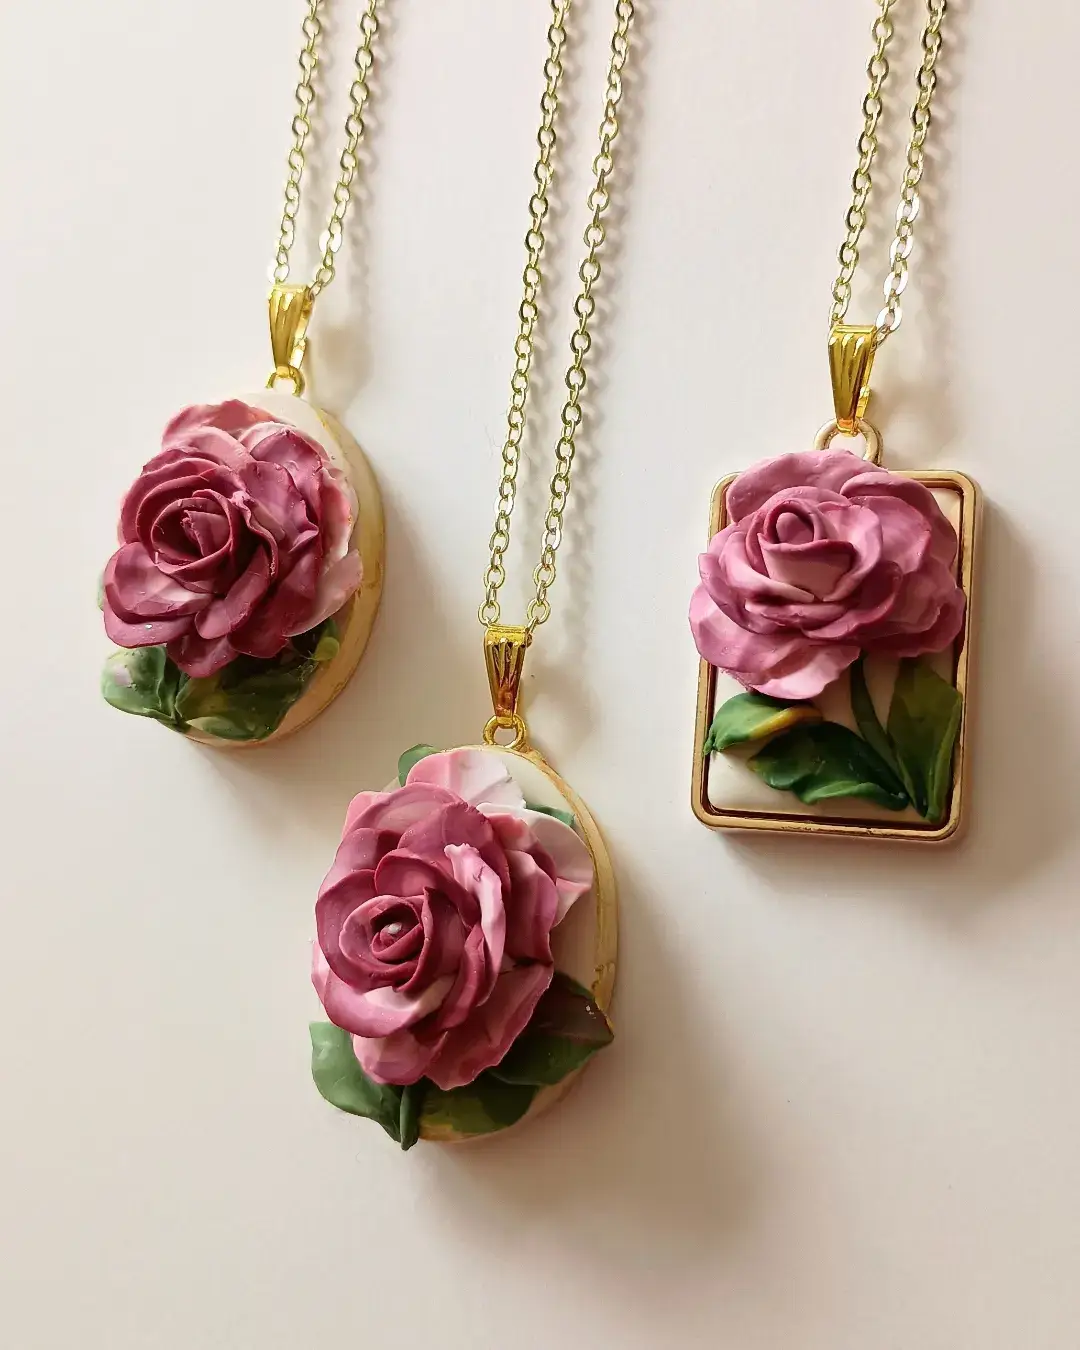
Detailed 3D sculpting transforms simple clay into romantic vintage-style cameos. These pendants feature layered rose petals in dusky pink hues, soft green leaves, and smooth off-white backgrounds set in gold metal bezels or finished with gold pinch bails.
Making these delicate floral pieces comes down to careful layering:
- Base: Fill a gold metal bezel or shape a smooth oval base using cream or off-white clay.
- Leaves: Press tiny bits of green clay into leaf shapes, score subtle vein details with a needle, and press them onto the base.
- Inner Petals: Roll paper-thin ovals of muted pink clay, curving them gently inward around a tiny center core to form a bud.
- Outer Petals: Layer larger, slightly ruffled petals around the center bud, fanning them outward to build a full blooming rose.
- Assembly: Bake or set according to your clay type, then attach a gold bail and hang on a fine gold link chain.
Mystic Carved Stars and Protective Evil Eye Charms
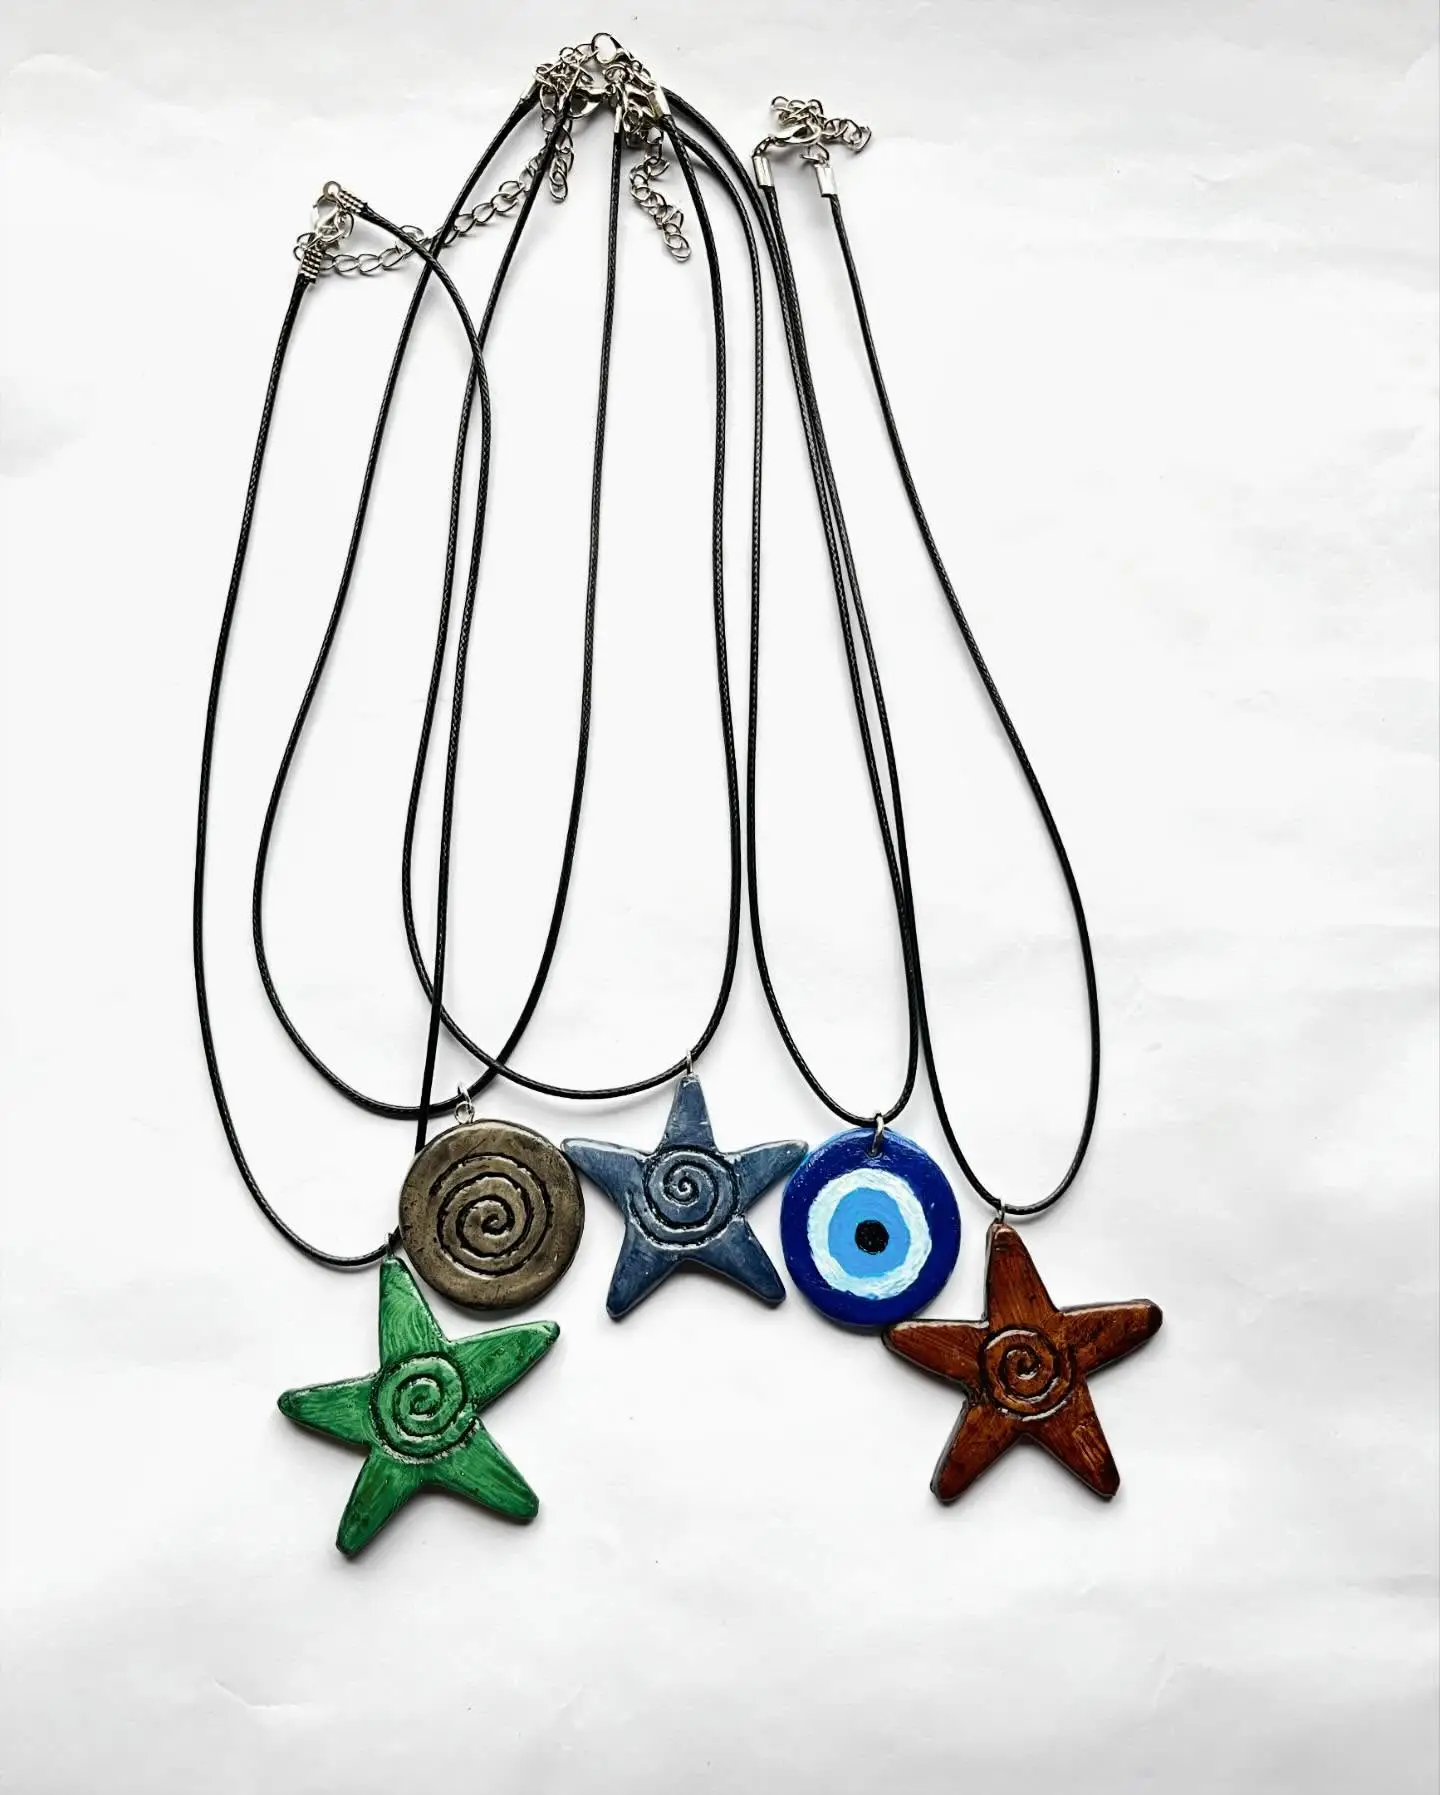
Simple carved line work and deep metallic paints give these pendant charms an ancient, talismanic feel.
Featuring five-pointed stars stamped with centers spirals and a classic cobalt blue evil eye medallion, this collection relies on carved texture to capture and reflect light.
By scoring designs directly into soft clay before baking, you create recessed grooves that hold darker paint washes automatically.
Warm metallic finishes like antique bronze, rustic terracotta, forest green, and slate blue enhance the carved swirls, while crisp white and black paint rings form the classic protective eye pattern. Each piece hangs simply from a black waxed cord with silver hardware.
Carving texture directly into wet clay creates instant depth that holds dark acrylic washes, giving flat shapes a carved stone look.
Delicate Botanical and Illustrated Porcelain-Style Medallions
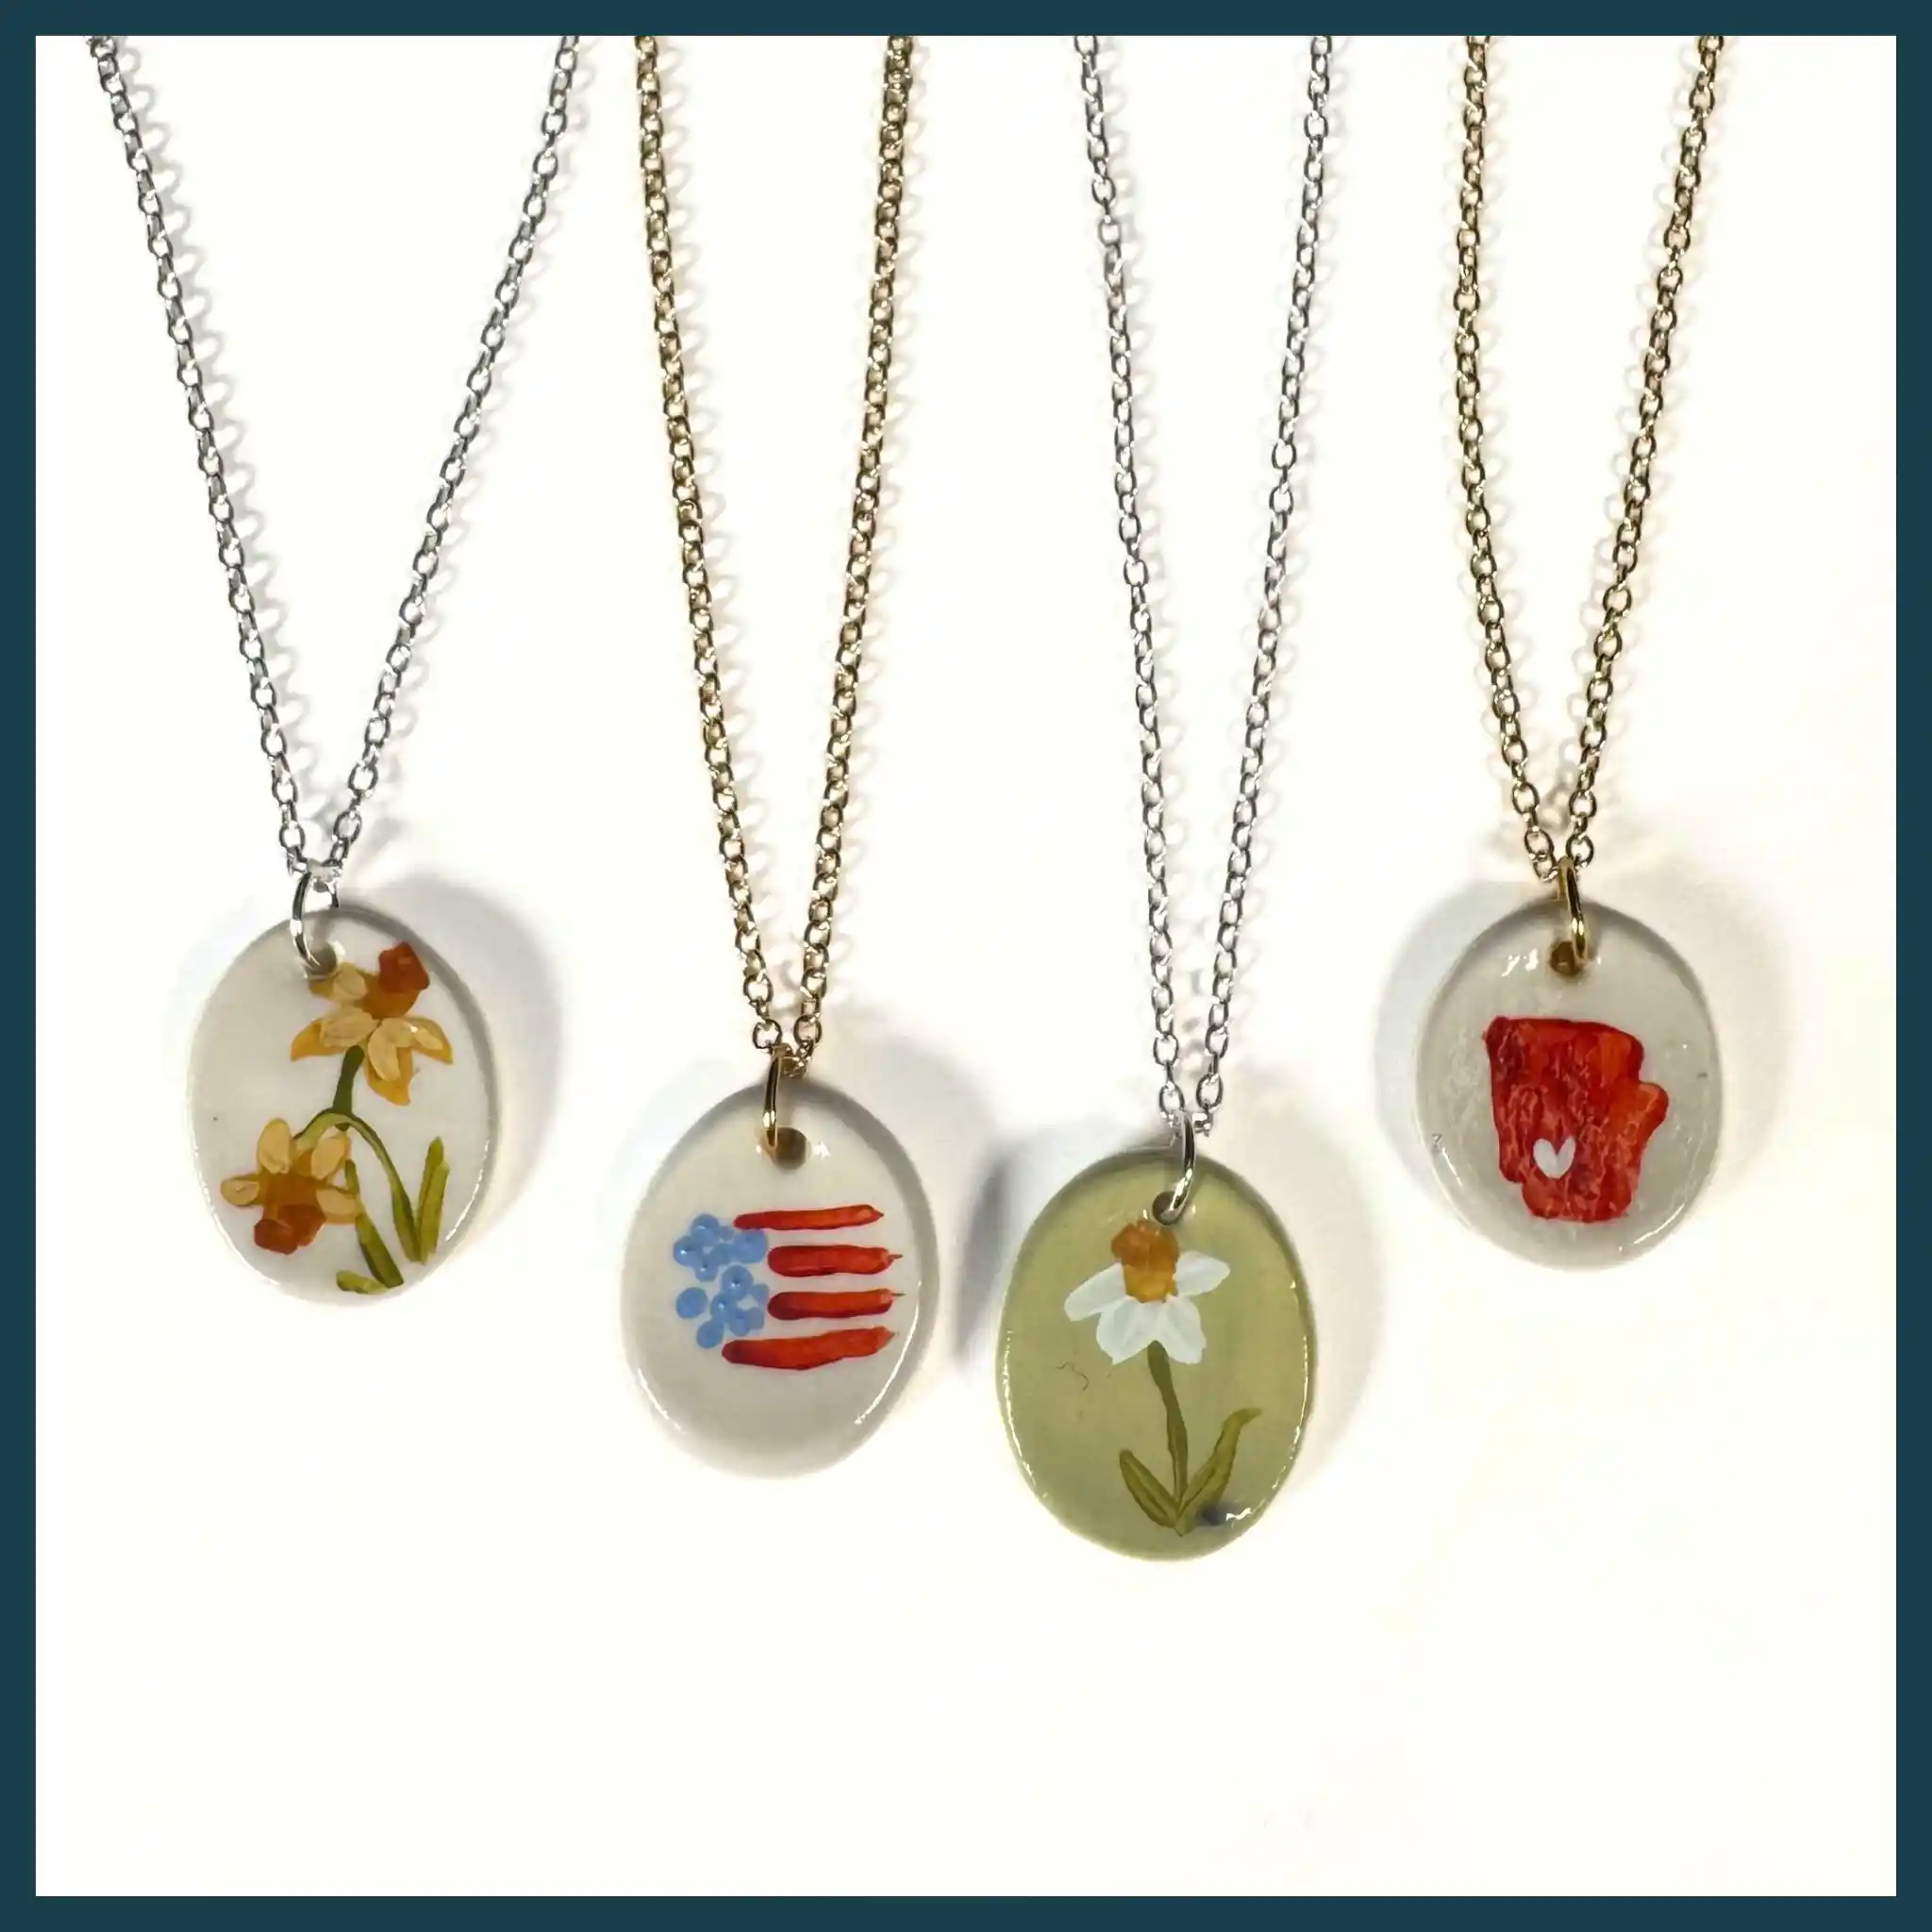
Smooth oval clay discs act like tiny ceramic tiles for delicate watercolor-style illustrations.
From golden daffodils and sage green daisies to festive red-and-blue motifs, these pendants achieve a soft porcelain look through smooth edges and fine brushwork.
Thinly rolled light clay provides the ideal canvas for these dainty designs. Once the oval bases are cut, smoothed, and fully set, paint soft floral details using diluted acrylics or watercolors for a semi-translucent effect.
Sealing the painted surface with a glassy topcoat protects the delicate art and gives it an authentic glazed pottery shine.
Attach silver or gold jump rings directly through the top hole and suspend them from delicate matching metal chains.
💡 Quick Tip
Smooth the edges of your cut oval clay shapes with a drop of water or a damp sponge before baking to get a flawless, faux-ceramic finish.
Marbled Terrazzo Pendant Necklace
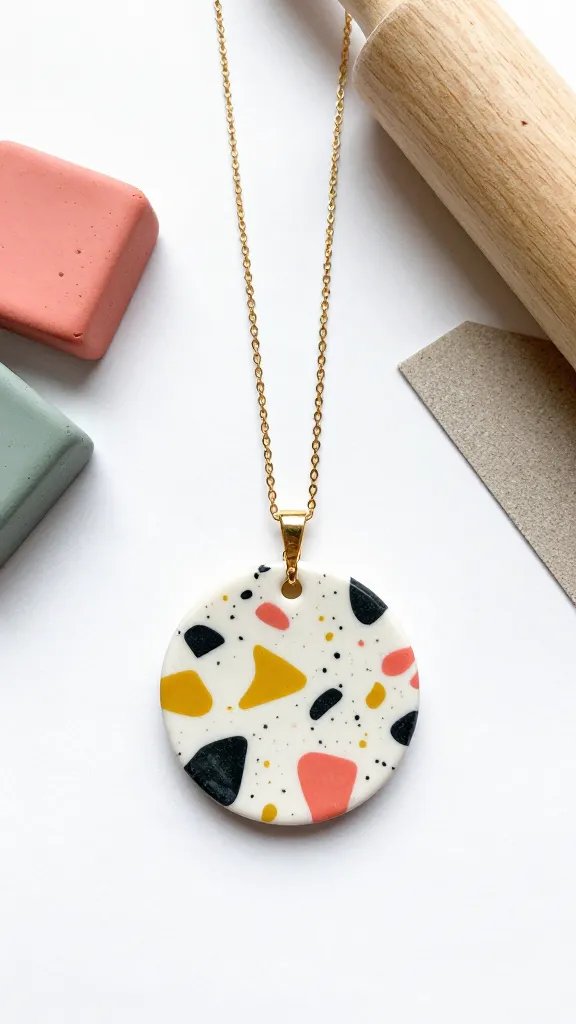
This trendy terrazzo-style pendant looks like you plucked it straight from a high-end boutique.
The speckled, marbled effect is created by mixing tiny pieces of different colored clay together, giving you that modern, artistic vibe that works with literally everything in your wardrobe.
Materials Needed
- Polymer clay in white, black, coral, and mustard yellow
- Rolling pin or clay roller
- Circle cookie cutter or bottle cap
- Toothpick or small straw for hole
- Gold jump ring and chain
- Sandpaper (fine grit)
How to Make It
Tear your colored clays into tiny irregular pieces and press them into your white base clay.
Roll it flat to about 1/4 inch thickness, letting those colorful bits peek through like confetti. Cut your circle shape, punch a hole at the top, then bake according to package directions.
Once cooled, lightly sand the edges for that professional smooth finish. The random pattern means no two pendants will ever look the same—seriously, how cool is that?
Minimalist Geometric Bar Necklace
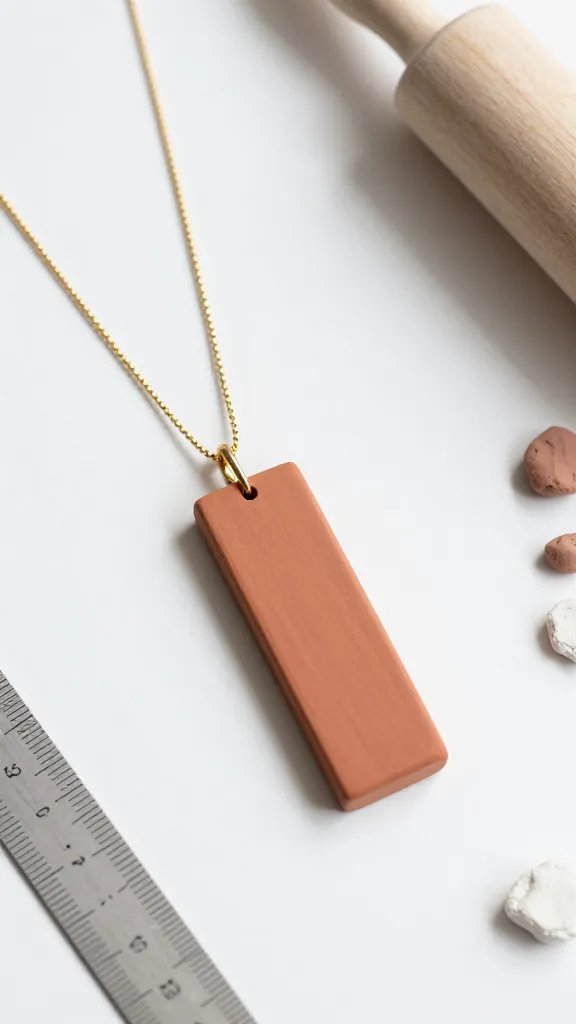
Clean lines and simple shapes are having their moment, and this sleek bar necklace is the definition of understated elegance. It’s perfect for layering or wearing solo when you want that effortlessly chic look.
Roll out clay in a neutral tone like terracotta, dusty rose, or classic white into a long rectangular bar about two inches long and half an inch wide.
The trick here is getting your edges super crisp and even—use a ruler to gently press against the sides before baking.
Pro Tips
- Make two small holes at each end of the bar to thread your chain through
- Try metallic gold or copper clay for an elevated look
- Keep it thin (about 1/8 inch) so it drapes nicely
This necklace pairs beautifully with everything from your favorite white tee to that little black dress. It’s become my go-to piece when I can’t decide on jewelry!
Rainbow Arc Statement Necklace
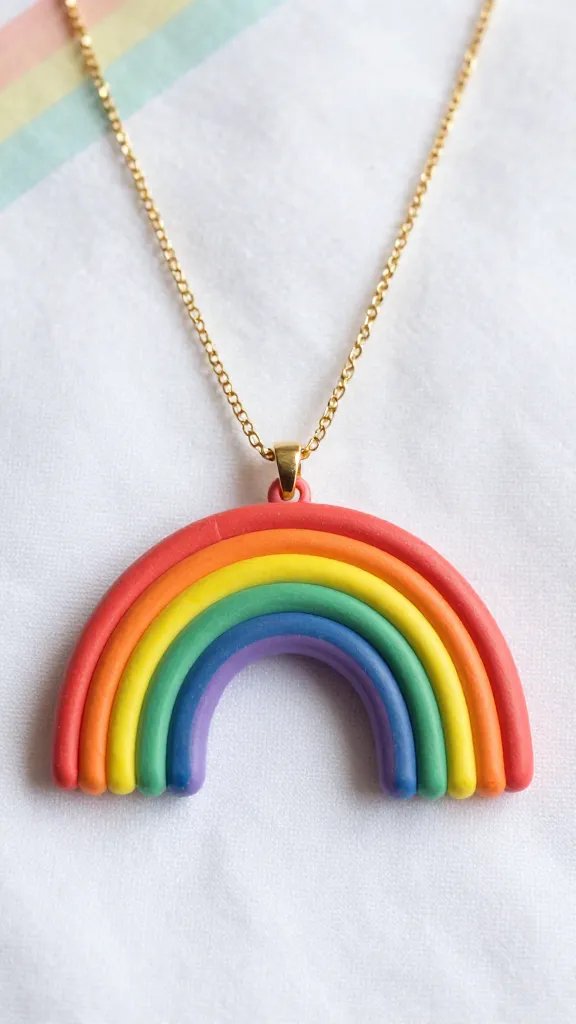
Nothing says “I’m fun and creative” quite like a rainbow arc pendant sitting perfectly on your collarbone.
This cheerful design brings instant joy to any outfit and makes an amazing gift for your color-loving friends.
Create a rainbow using thin clay snakes in all your favorite colors—stack them in an arch shape and gently press them together.
You can go traditional rainbow order or mix it up with your own color palette like sunset shades or ocean blues and greens.
Styling Ideas
Wear this beauty on a simple chain so the rainbow really pops. It looks absolutely adorable against solid-colored clothing, especially white, denim, or black. Trust me, you’ll get compliments every single time you wear it.
Pressed Botanical Clay Medallion
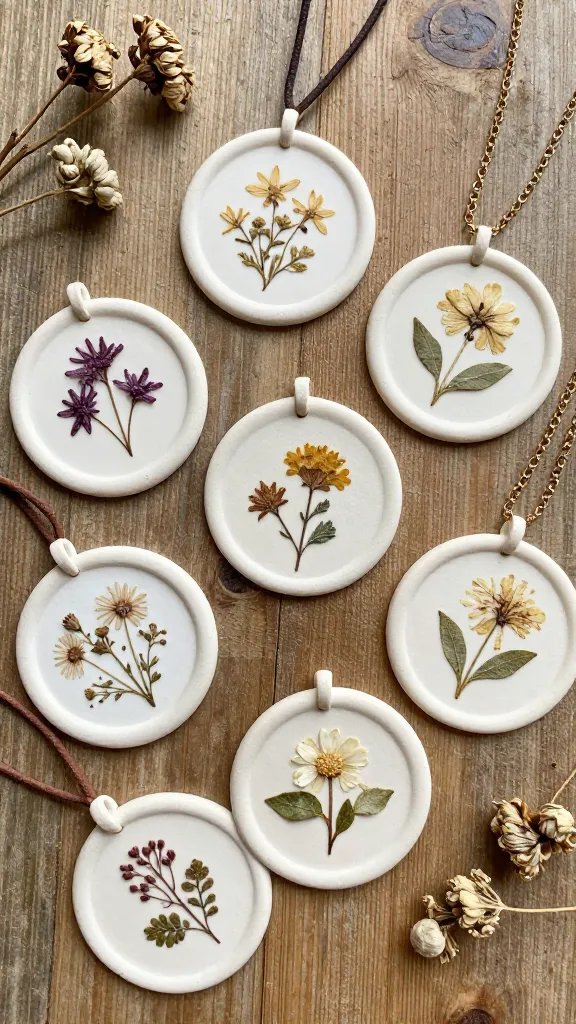
Capture the beauty of nature in a wearable piece of art with this pressed botanical necklace. Real flowers, leaves, or herbs pressed into clay create an organic, earthy pendant that feels both vintage and modern at the same time.
Materials Needed
- Light-colored polymer clay (cream or pale gray works beautifully)
- Dried pressed flowers or small leaves
- Clear glaze or resin
- Round or oval cutter
- Leather cord or delicate chain
How to Make It
Roll your clay into a smooth circle, then gently press your dried botanical element into the surface.
The imprint should be visible but not too deep. Remove the plant material before baking, or leave it in for a more rustic look.
After baking and cooling, seal your pendant with a clear glaze to protect the design and add a subtle shine. This necklace feels like wearing a little piece of a secret garden.
Chunky Tortoiseshell Chain Link Necklace
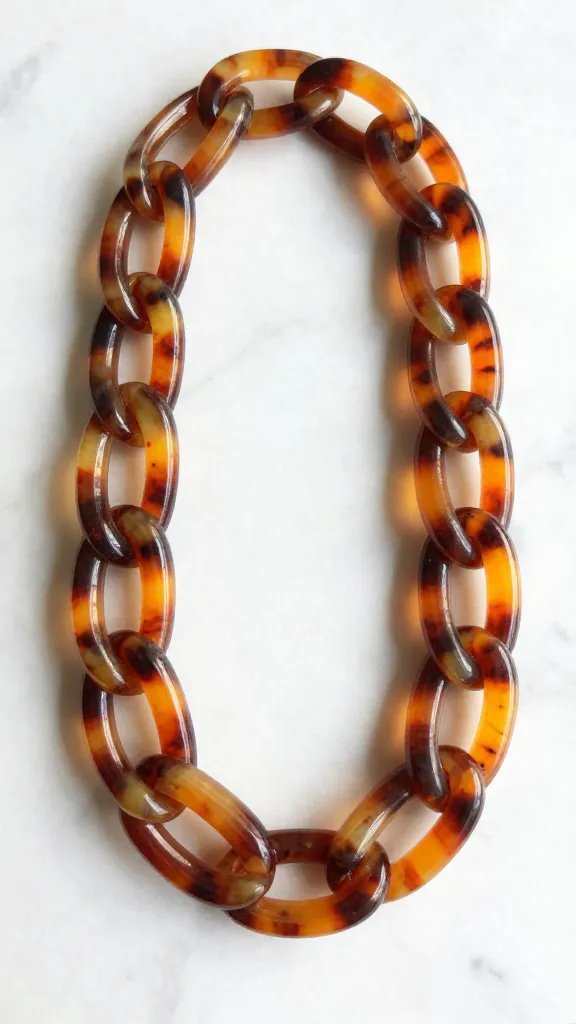
If you love that expensive tortoiseshell look but not the price tag, this clay version is about to become your new obsession.
The rich amber and brown swirls create a sophisticated, vintage-inspired piece that looks way more complicated than it actually is.
Blend brown, translucent, and orange-toned clays in a marbled pattern without fully mixing them—you want those gorgeous swirls.
Cut out chunky oval or rectangular links, making sure to create holes on each end so you can connect them together with jump rings.
Make about five to seven links depending on how long you want your necklace. FYI, this technique also works beautifully for matching earrings if you want a coordinated set!
Moon Phase Cosmic Necklace
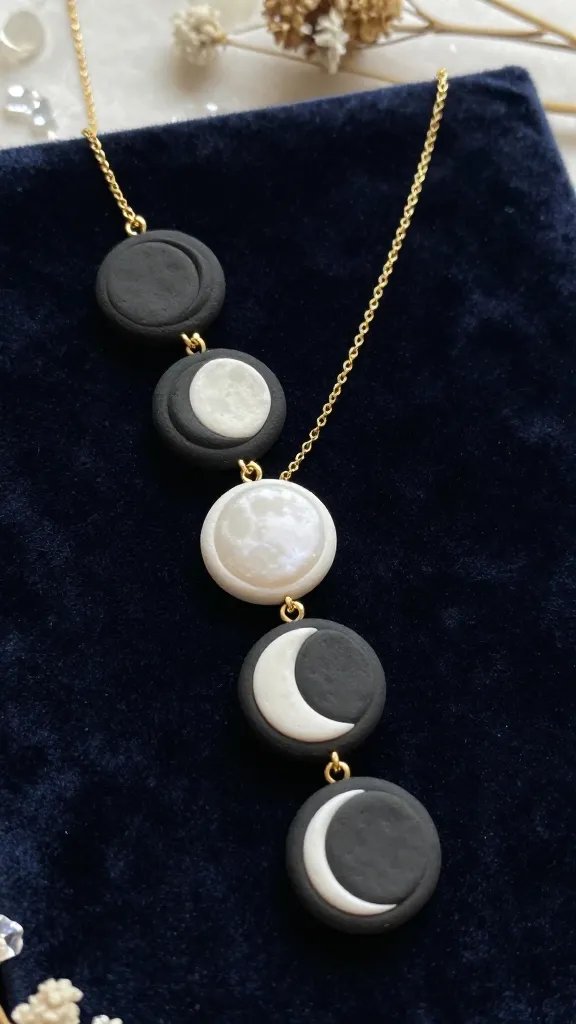
For all you celestial lovers out there, this moon phase necklace is pure magic. Five small clay circles representing different lunar phases strung together create a mystical, bohemian piece that’s totally Instagram-worthy.
How to Make It
Create five small circles from black or deep navy clay. Use white or pearl clay to add the moon phases—new moon (all black), waxing crescent, full moon (all white), waning crescent, and back to new. You can hand-shape the crescents or use a smaller cutter to remove portions of the circle.
String them horizontally on a delicate chain, spacing them evenly. This necklace tells a story and looks absolutely stunning layered with simple gold chains.
Abstract Color Block Pendant
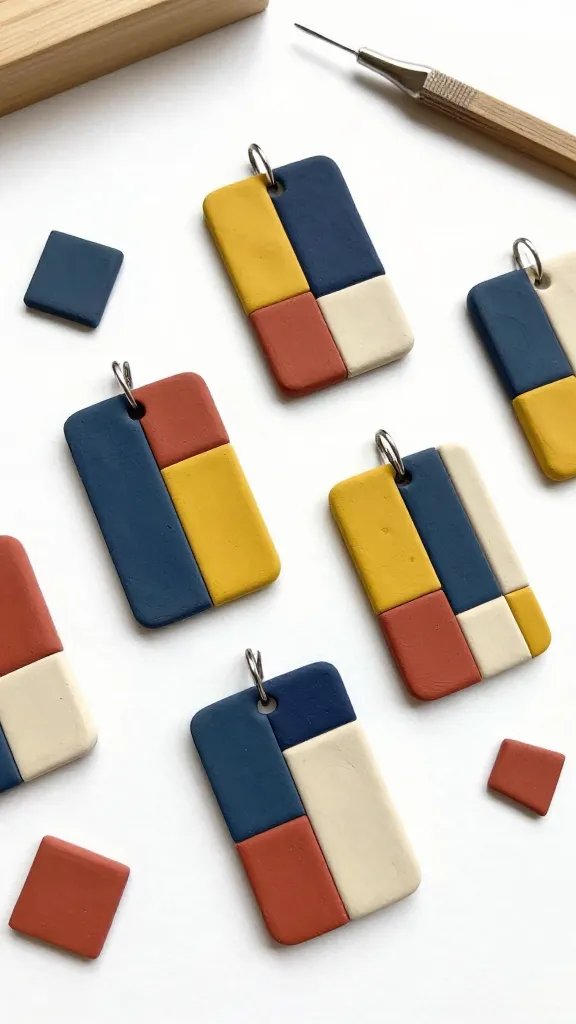
Channel your inner modern artist with this bold, geometric color-blocked design. Think Mondrian meets wearable art—sharp lines, contrasting colors, and a statement-making aesthetic that’s perfect for anyone who loves contemporary style.
Choose three to four contrasting colors like navy, mustard, brick red, and cream. Cut small rectangles and squares, then arrange them in a pleasing composition on your work surface before gently pressing them together into one cohesive pendant shape.
Pro Tips
- Use a craft knife to get super clean edges where colors meet
- Try matte finish clay for a more sophisticated gallery vibe
- Make it chunky (about 2 inches across) for maximum impact
This necklace is a conversation starter and pairs amazingly with minimalist outfits that need just one bold accessory.
Delicate Speckled Egg Necklace
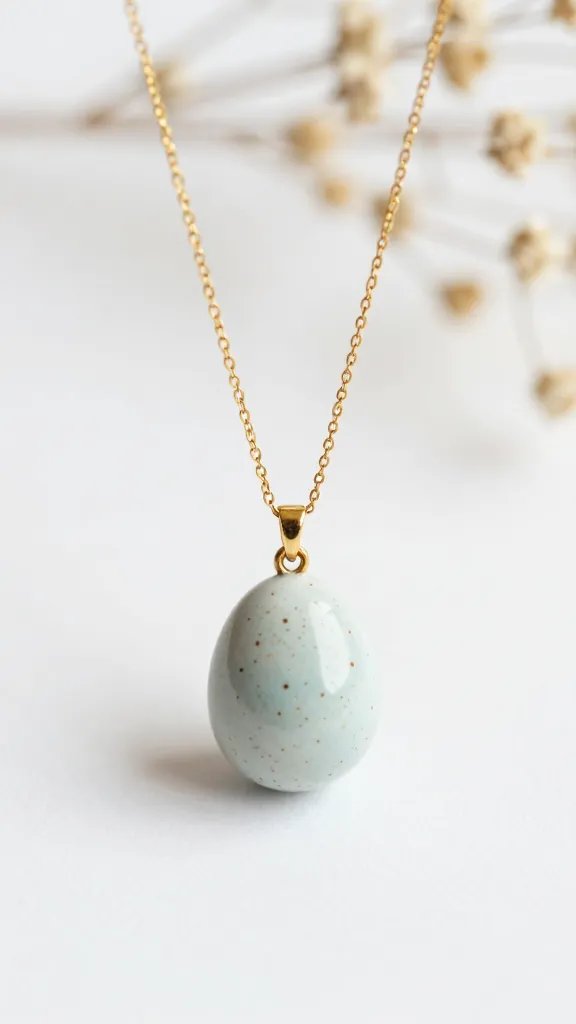
These adorable little egg-shaped pendants have major springtime cottage-core energy. The speckled effect mimics real bird eggs and creates the sweetest, most delicate necklace you’ll ever own.
Start with a pale blue, soft green, or cream base clay and roll it into a small oval egg shape—keep it petite, about the size of your thumbnail.
Use a toothbrush dipped in brown or black acrylic paint to gently speckle the surface before baking.
String it on a dainty gold chain and wear it close to your collarbone. It’s precious without being too cutesy, and it makes the perfect gift for nature lovers or anyone who appreciates understated charm.
Gradient Ombre Disc Necklace
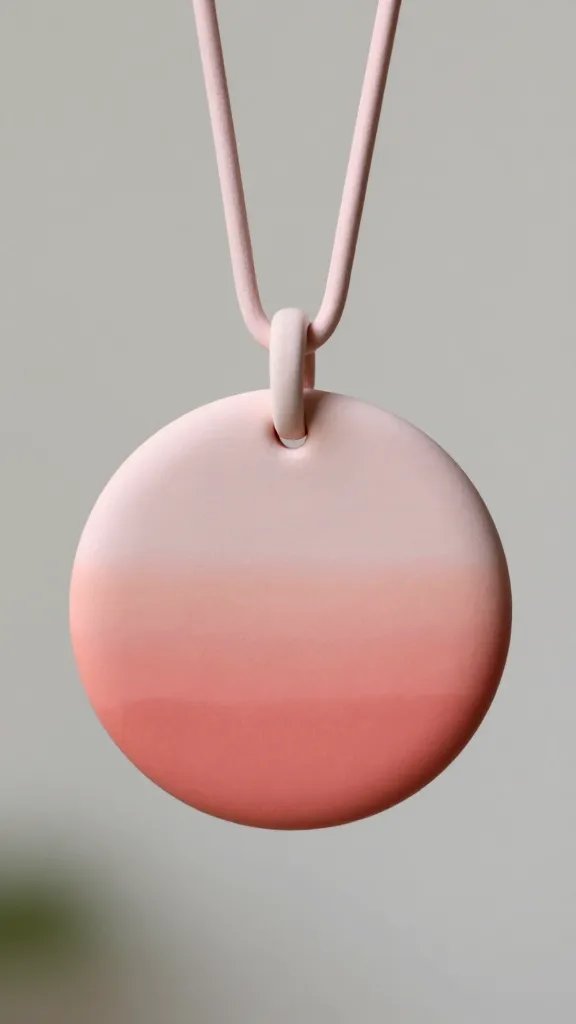
This stunning ombre effect looks incredibly professional but is surprisingly easy to achieve.
Watching colors fade seamlessly from one shade to another never gets old, and wearing it feels like carrying a tiny sunset around your neck.
Materials Needed
- Three shades of clay in a color family (like blush pink, coral, and deep rose)
- Clay blade or sharp knife
- Circle cutter (about 1.5 inches)
- Pasta machine or rolling pin
How to Make It
Create gradient sheets by blending your three colors where they meet—you’ll have distinct color sections that smoothly transition into each other.
Cut your disc from the gradient sheet, positioning it so the colors flow from top to bottom.
The beauty of this technique is you can use any color combination you love—ocean blues, forest greens, or even metallic golds and bronzes. Each pendant becomes a wearable piece of color therapy!
Conclusion
These nine clay necklace ideas prove you don’t need to be a professional artist to create jewelry you’ll actually want to wear every day.
The beauty of working with clay is that mistakes can be squished and re-rolled, and no two pieces will ever be exactly alike.
Grab some polymer clay, set aside an afternoon, and get ready to build your dream necklace collection—your jewelry box will thank you!






