
DIY Candle Molds Ideas That Look Surprisingly Expensive

Looking for creative ways to shape your candles at home? In this post, we have curated DIY candle molds ideas that are perfect for beginners and craft lovers. From simple household items to unique designs, these ideas will help you create beautiful candles with ease.
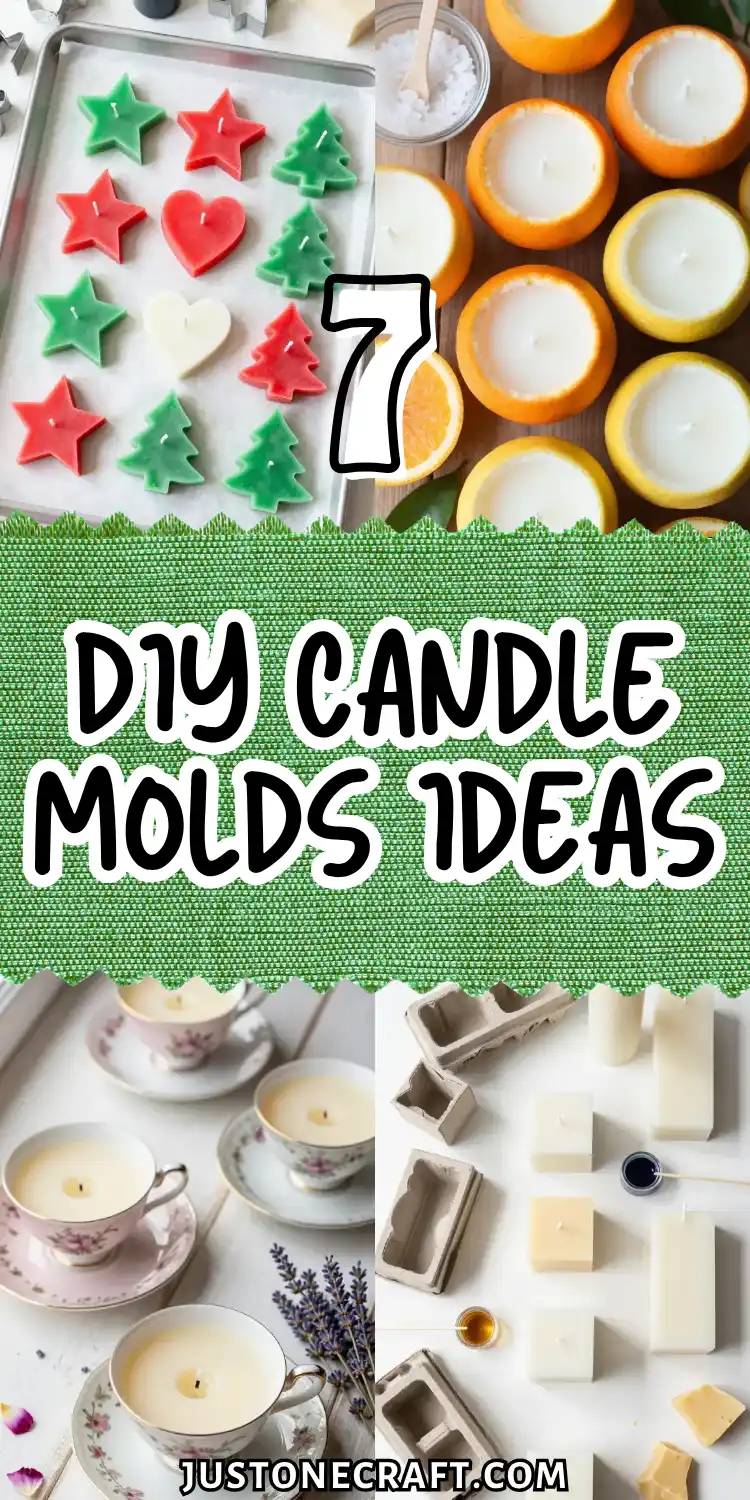
When I first started making candles at home, I thought wax and fragrance were all that mattered. But something felt missing. My candles worked, yet they all looked the same—plain and uncreative.
That’s when I discovered DIY Candle Molds Ideas. Instead of buying expensive molds, I started using things I already had like cups, silicone trays, and cartons.
Suddenly, my candles felt unique. Not every attempt was perfect, but each one taught me something new.
If your candles feel a bit boring, the secret isn’t more supplies—it’s smarter creativity. With the right DIY Candle Molds Ideas, you can turn simple wax into something truly special.
Choosing the Right Materials for DIY Candle Molds
Selecting the right materials is essential when working with DIY candle molds ideas, as different surfaces affect how easily candles release after setting.
Flexible materials like silicone or soft plastics work best for detailed designs, while rigid containers are ideal for simple shapes.
You should also consider heat resistance, as some materials may warp or lose their shape when exposed to hot wax.
Using the correct material ensures a smoother crafting process and helps maintain the quality of your finished candles.
7 DIY Candle Molds Ideas
Seashell Tea Light Holders That Scream Coastal Vibes
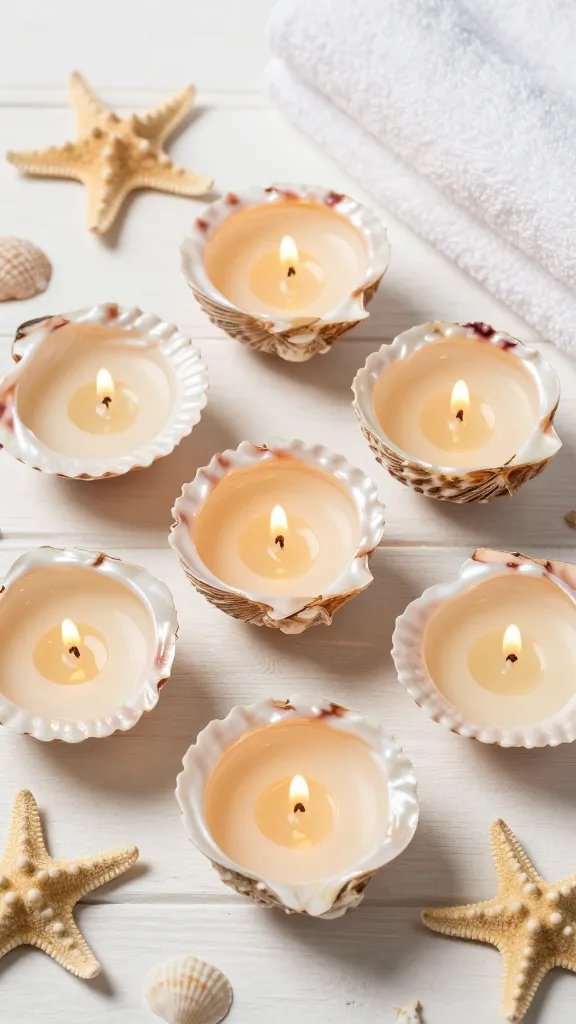
Transform large scallop or clam shells into the prettiest little tea light holders that instantly transport you to a beachside getaway.
These natural beauties work perfectly scattered along a dinner table or clustered on your bathroom counter for serious spa energy. The irregular shape of each shell means every candle becomes a one-of-a-kind piece.
Materials Needed
- Large cleaned seashells (scallop or clam work best)
- Soy or beeswax
- Small wicks with metal tabs
- Essential oils (ocean breeze or vanilla are perfect)
- Hot glue gun
How to Make It
Start by securing your wick to the center of the shell using a tiny dot of hot glue. Melt your wax in a double boiler and add a few drops of your chosen essential oil. Carefully pour the melted wax into each shell, leaving about a quarter inch at the top.
The wax naturally follows the shell’s curves, creating those gorgeous organic ripples as it cools. FYI, using white or cream-colored wax keeps the beachy aesthetic going strong, but you could totally experiment with soft blues or sandy beige tones.
Styling Ideas
Display these babies on a wooden tray filled with sand and starfish for maximum coastal grandmother energy.
They also make incredibly thoughtful hostess gifts when you’re invited to someone’s beach house. Trust me, people go wild for handmade candles that look this expensive.
Citrus Fruit Half Candles With Natural Aromatherapy
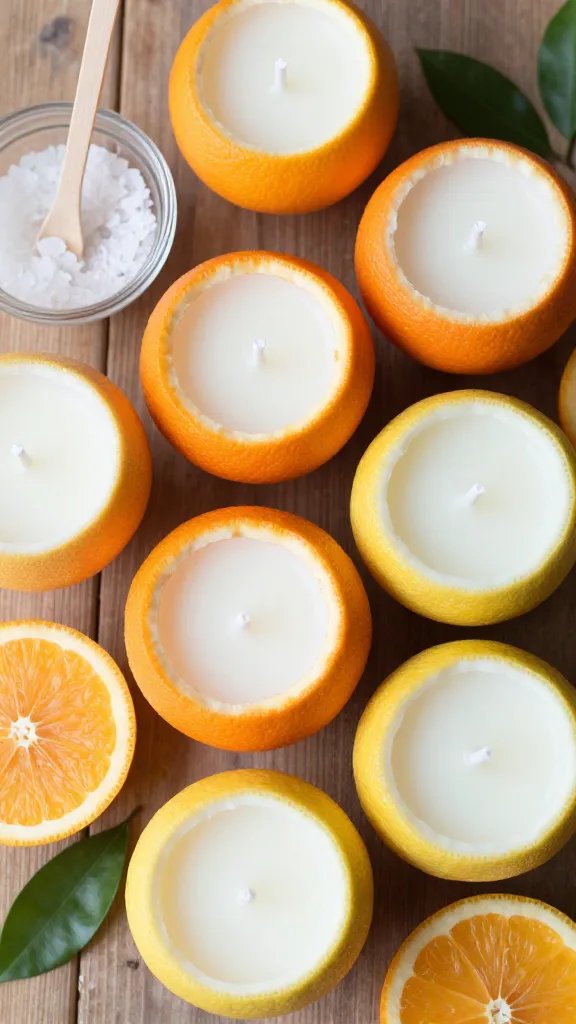
Using hollowed-out citrus rinds as candle molds gives you the freshest-smelling candles imaginable while doubling as adorable seasonal décor.
Think grapefruit halves, orange peels, or even lemon cups filled with naturally scented wax. These work especially well for spring and summer gatherings when you want that bright, zesty atmosphere.
Materials Needed
- Oranges, grapefruits, or lemons
- Soy wax flakes
- Cotton wicks
- Citrus essential oils (optional for extra scent)
- Wick centering tools or chopsticks
How to Make It
Carefully cut your citrus fruits in half and scoop out all the flesh without damaging the peel. Pat the insides dry with paper towels and let them air out for about an hour. Position your wick in the center using a chopstick laid across the top to keep it stable.
Pour your melted wax slowly to avoid disturbing the pith inside. The natural oils in the rind infuse into the wax as it sets, creating the most amazing scent without adding anything extra. Let these cure for at least 24 hours before burning.
Pro Tips
These candles look absolutely stunning grouped together in odd numbers on a serving platter. Just keep in mind they’re best used within a week or two before the rinds start to dry out.
They make perfect centerpieces for brunch parties or outdoor dinner gatherings where the citrus scent keeps bugs at bay naturally.
Vintage Teacup Candles for Cottagecore Dreams
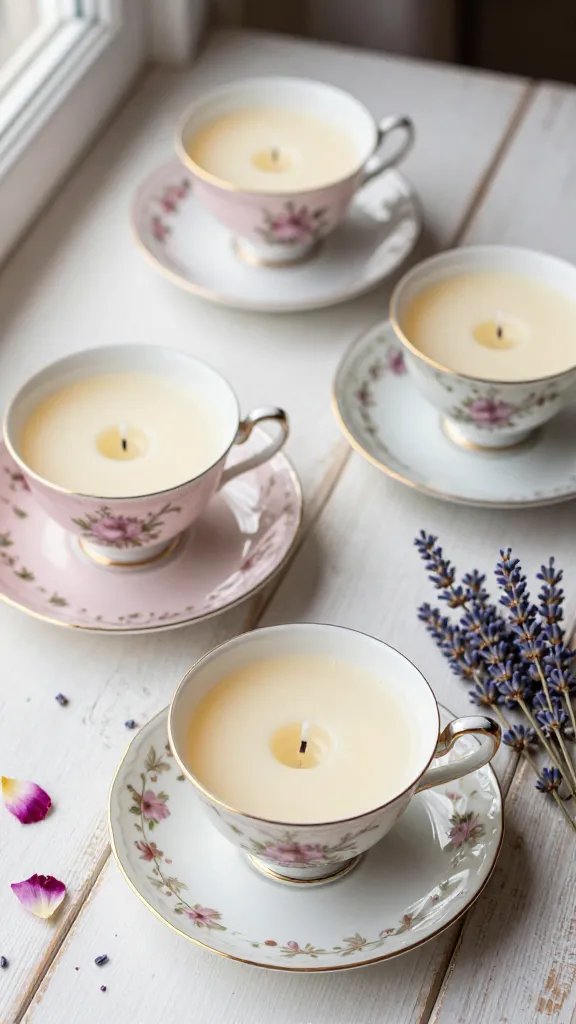
Thrift store teacups get a gorgeous second life as elegant candle holders that belong in a Jane Austen novel.
The delicate patterns and gold trim on vintage china create seriously sophisticated candles perfect for gifting or adding charm to your own space. Each mismatched cup tells its own story while serving up major nostalgia points.
Materials Needed
- Vintage teacups and saucers from thrift stores
- Soy or paraffin wax
- Candle wicks with tabs
- Fragrance oils (rose, lavender, or earl grey tea scents)
- Wick stickers or hot glue
How to Make It
Secure your wick to the bottom center of the teacup using either a wick sticker or hot glue. Melt your wax and add fragrance oil, then pour carefully into each cup until you reach about half an inch from the rim. The existing saucer becomes the perfect catch-all for any wax drips.
What’s amazing about these is how the china itself becomes part of the aesthetic. Floral patterns show through lighter colored wax beautifully, creating a soft glowing effect when lit.
Styling Ideas
Display these on a tiered cake stand for the ultimate afternoon tea setup that never gets old. They’re also incredibly popular at wedding showers and Mother’s Day brunches.
Seriously, grandmas everywhere will absolutely treasure these as gifts, especially if you hunt down cups that match their existing china patterns.
Geometric Silicone Ice Cube Tray Candles
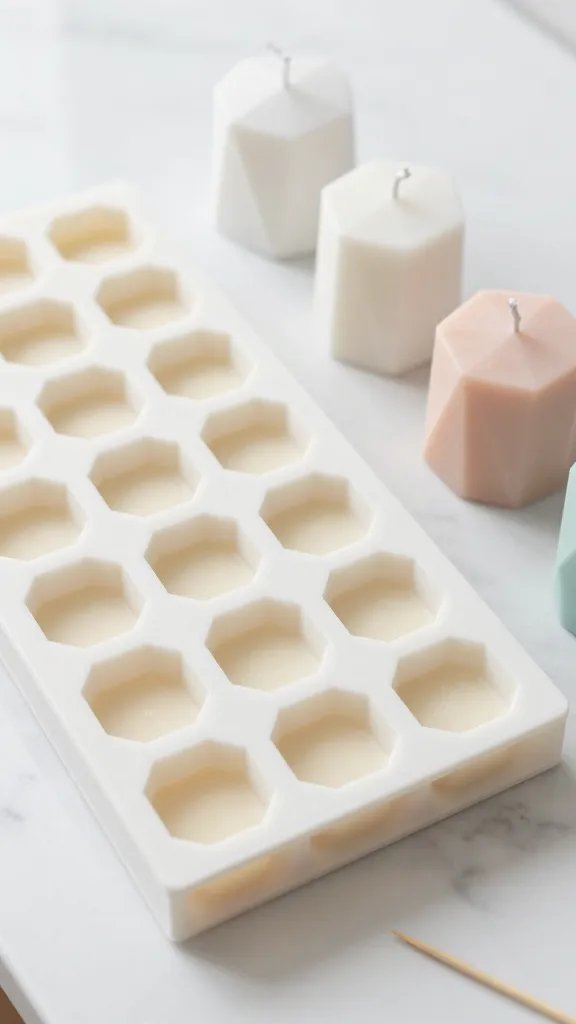
Those trendy geometric ice cube trays sitting in your freezer can moonlight as modern candle molds for sleek, angular designs.
These little sculptural candles look like expensive home décor finds but cost pennies to make. The clean lines and sharp edges give off serious minimalist vibes that fit any contemporary space.
Materials Needed
- Geometric silicone ice cube trays (hexagons, diamonds, spheres)
- Beeswax or soy wax
- Small pre-tabbed wicks
- Candle dye (optional, for color blocking)
- Toothpicks for wick placement
How to Make It
These flexible silicone molds make the whole process ridiculously easy. Just insert your wick into each compartment, using a toothpick laid across the top to keep it centered. Pour your melted wax and let them set completely before popping them out.
The beauty here is in the variety you can create. Make a whole collection in different colors or stick with classic white for a cohesive look. You can even layer different colored waxes for an ombré effect that looks professionally done.
Pro Tips
Arrange multiple geometric candles together on a marble tray for an Instagram-worthy display. These work beautifully as wedding favors when you make them in the couple’s color scheme.
They’re also small enough to scatter around a bathtub for those self-care Sunday soaks everyone keeps talking about.
Concrete Cylinder Candles With Industrial Edge
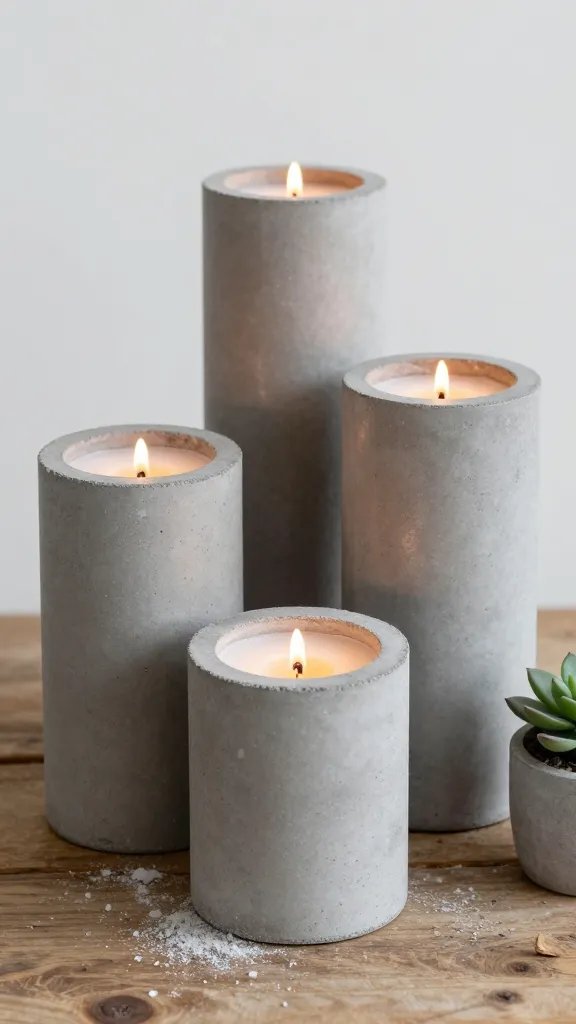
Mixing cement might sound intimidating, but creating concrete candle molds gives you that raw industrial look that’s hugely popular right now.
The contrast between rough concrete and soft glowing wax is absolutely chef’s kiss. Plus, once the candle burns down, you’ve got a cool planter or pen holder left over.
Materials Needed
- Quick-setting concrete mix
- Cardboard tubes or PVC pipes (for outer mold)
- Smaller plastic bottles or tubes (for inner cavity)
- Cooking spray
- Candle wax and wicks
- Sandpaper
How to Make It
Spray your outer tube with cooking spray and place a smaller tube inside to create the candle cavity. Mix your concrete according to package directions and pour it into the gap between the tubes. Let it cure for 24-48 hours before carefully removing both tubes.
Sand down any rough edges for a more polished look, or leave them raw for extra texture. The concrete naturally develops unique color variations and patterns that make each mold special. Pour your wax directly into the concrete cylinder and you’ve got yourself a statement piece.
Styling Ideas
These look incredible grouped in threes on a coffee table or mantel. The weight of concrete makes them feel substantial and expensive, even though they’re super budget-friendly. They’re perfect for guys who claim they don’t like candles but somehow always light these ones.
Paper Carton Pillar Candles That Look Professionally Made
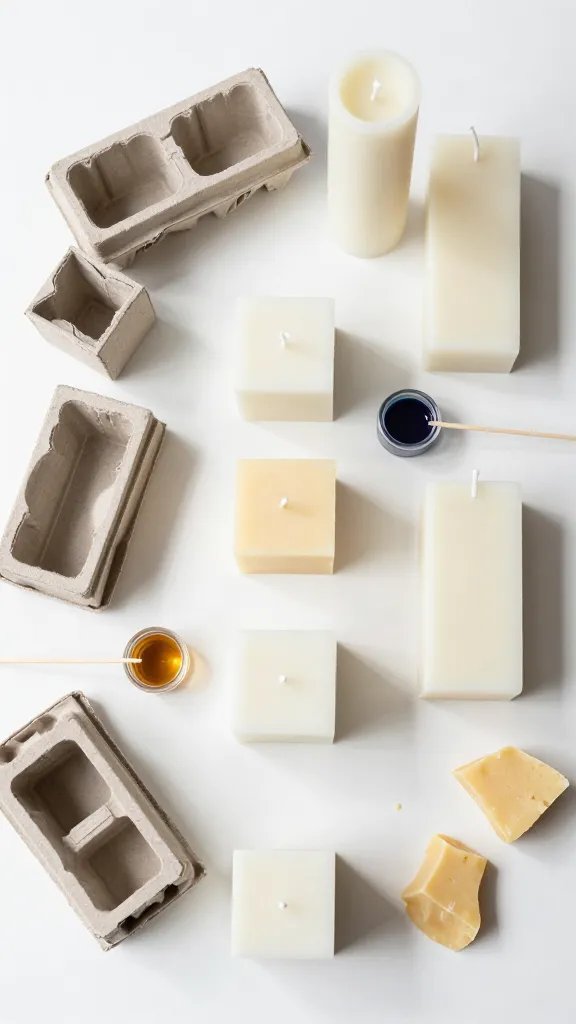
Empty milk or juice cartons transform into perfect molds for creating smooth, professional-looking pillar candles in custom sizes.
This hack is seriously genius because you get that perfect rectangular or square shape without investing in expensive molds. Once you peel away the carton, nobody would ever guess its humble origins.
Materials Needed
- Clean, dry milk or juice cartons (various sizes)
- Pillar wax blend or beeswax
- Square braided wicks
- Wick holder or skewer
- Candle dye and fragrance oils
How to Make It
Cut your carton to your desired candle height and reinforce the seams with tape if needed. Thread your wick through the bottom using a needle, then secure it with tape on the outside. Use a skewer across the top to keep the wick centered and taut while pouring.
Fill the carton with your melted, scented wax and let it cool completely overnight. The waxy coating inside cartons means your candles release easily when you simply tear away the cardboard. You’ll be left with beautifully smooth sides that look totally professional.
Pro Tips
Create layered candles by pouring different colored waxes at different stages of cooling. These make excellent gifts when wrapped in kraft paper and twine for that artisanal market feel. You can also embed dried flowers or coffee beans between layers for added visual interest.
Cookie Cutter Shaped Candles for Every Occasion
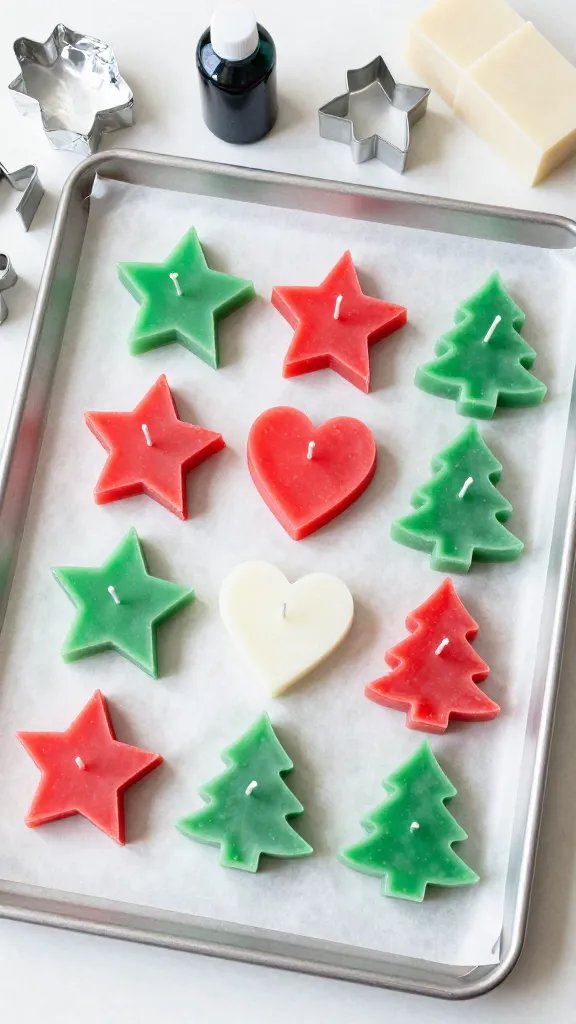
Metal cookie cutters aren’t just for baking anymore—they create adorable shaped candles perfect for holidays, parties, or just because.
Stars, hearts, trees, pumpkins—whatever shape you can find becomes a cute little candle. These are ridiculously fun to make and even more fun to give away.
Materials Needed
- Metal cookie cutters in various shapes
- Aluminum foil and baking sheet
- Soy or paraffin wax
- Pre-tabbed wicks
- Cooking spray
- Candle dye for holiday colors
How to Make It
Line a baking sheet with foil and spray your cookie cutters with cooking spray. Arrange them on the sheet and place a wick in the center of each shape. Carefully pour melted wax into each cutter, making sure not to overflow.
The trick is letting these cool completely before attempting to remove the cutters—patience is key here. Once solid, gently warm the outside of the metal with your hands and lift straight up. You’ll have perfect shaped candles that look like they came from a fancy boutique.
Styling Ideas
Make heart-shaped candles for Valentine’s Day in pink and red. Create star candles for Fourth of July parties or tree shapes for Christmas gift tags.
You’ll love this method because you can theme candles for literally any occasion, and kids can totally help with the pouring part for a fun family craft day.
There you have it—seven totally doable ways to make candles that look way more impressive than the effort required.
Pick whichever style speaks to you and get melting, or challenge yourself to try all seven for a complete handmade candle collection. Your home is about to smell amazing and look even better.






