
7 DIY Paper House Ideas You’ll Love to Make

Never underestimate what a few sheets of paper can become! With these DIY paper house ideas, you can create adorable little homes that add warmth and personality to any corner of your room. Simple, budget-friendly, and surprisingly satisfying.
When I first tried making a DIY Paper House, I didn’t expect much. But what seemed like a simple craft quickly turned into a relaxing and creative experience.
The tricky part wasn’t building it, it was knowing where to start. Choosing the right paper, making it sturdy, and adding small details made all the difference.
With thicker paper, soft colors, and tiny touches like windows and doors, the house instantly came to life.
What began as a basic idea turned into something warm, personal, and surprisingly beautiful.
Putz-Style Glitter Village Houses With Bottle Brush Trees
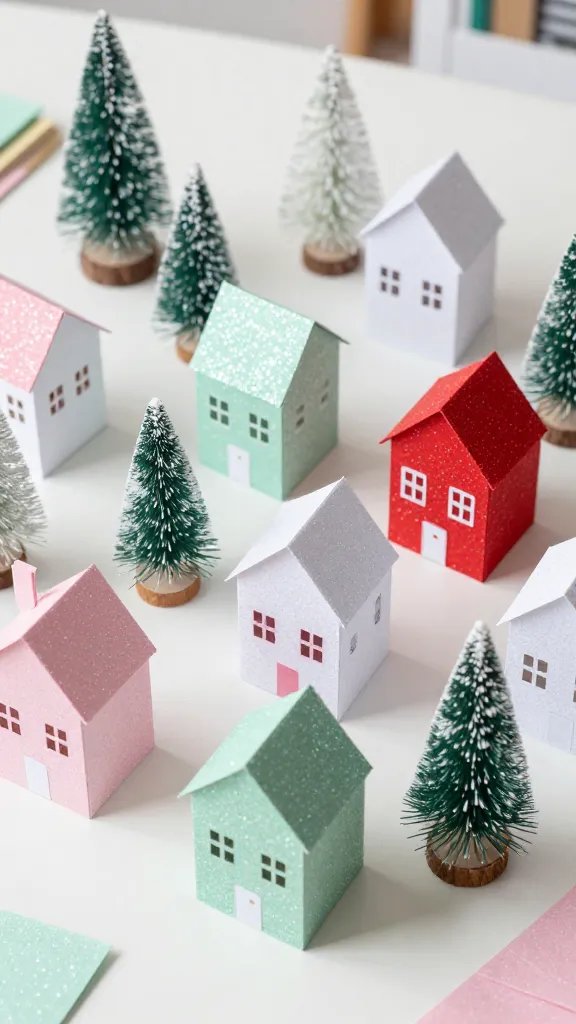
These vintage-inspired paper houses are covered in fine glitter and paired with miniature bottle brush trees for that nostalgic Christmas village vibe.
The simple geometric shapes make them surprisingly easy to construct, even if you’ve never made a paper house before.
The best part? You can customize the colors to match your holiday décor—think pastels for a retro feel or classic red and white for traditional charm.
Materials Needed
- Cardstock or heavy scrapbook paper
- Fine glitter in coordinating colors
- Mod Podge or craft glue
- Small bottle brush trees
- Foam brush for applying glue
- House template (trace from a pattern or create your own)
How to Make It
Cut out your house template pieces including walls, roof panels, and a base. Score the fold lines with a bone folder or the back of a butter knife to get crisp edges.
Assemble the house with hot glue, then brush on a thin layer of Mod Podge and sprinkle glitter generously over the entire surface.
Once dry, arrange your glittery houses on a mantel or windowsill with the bottle brush trees scattered between them.
Add some fake snow or cotton batting underneath for that magical winter wonderland effect. Trust me, these look absolutely stunning when lit from behind with string lights.
Illuminated Paper House Luminary With Cut-Out Windows
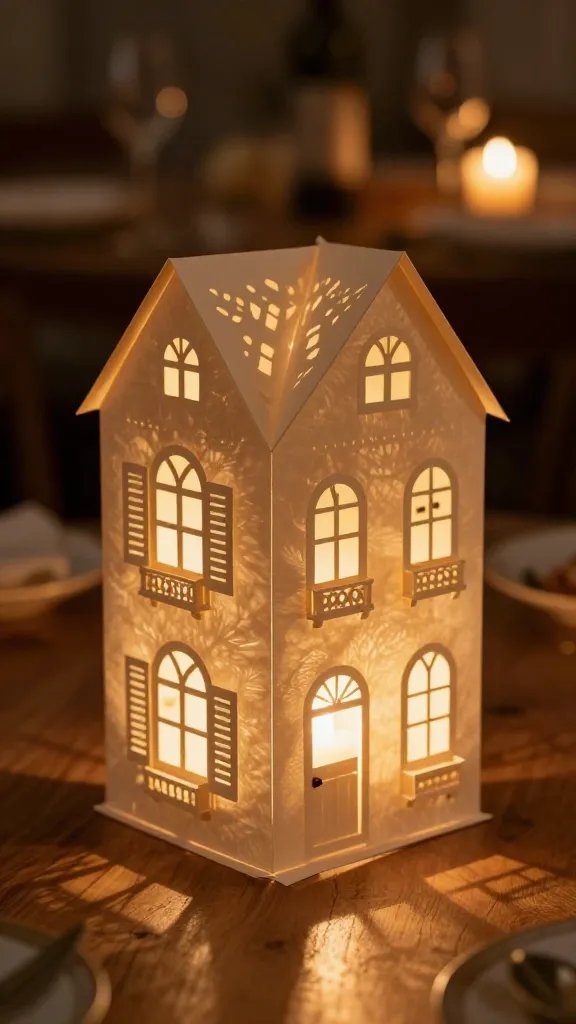
Transform plain cardstock into a glowing luminary that casts the prettiest shadows through intricately cut windows.
This project combines the coziness of candlelight with architectural charm, creating ambient lighting that’s perfect for dinner parties or just making your space feel extra special.
The cut-out technique gives you total creative freedom to design arched doorways, shuttered windows, or even tiny window boxes.
Pro Tips
- Use vellum paper behind the windows for a soft, diffused glow
- Add tiny details like shutters or awnings with paper strips
- Place battery-operated tea lights inside for safety
- Create different house styles for an eclectic neighborhood look
The key to making these look professional is planning your window placement before you assemble the house.
Sketch your design lightly in pencil, then carefully cut out the windows with a craft knife on a cutting mat. You can even add flower boxes or climbing vines with colored paper for extra dimension.
Scrapbook Paper Row Houses For Shelf Décor
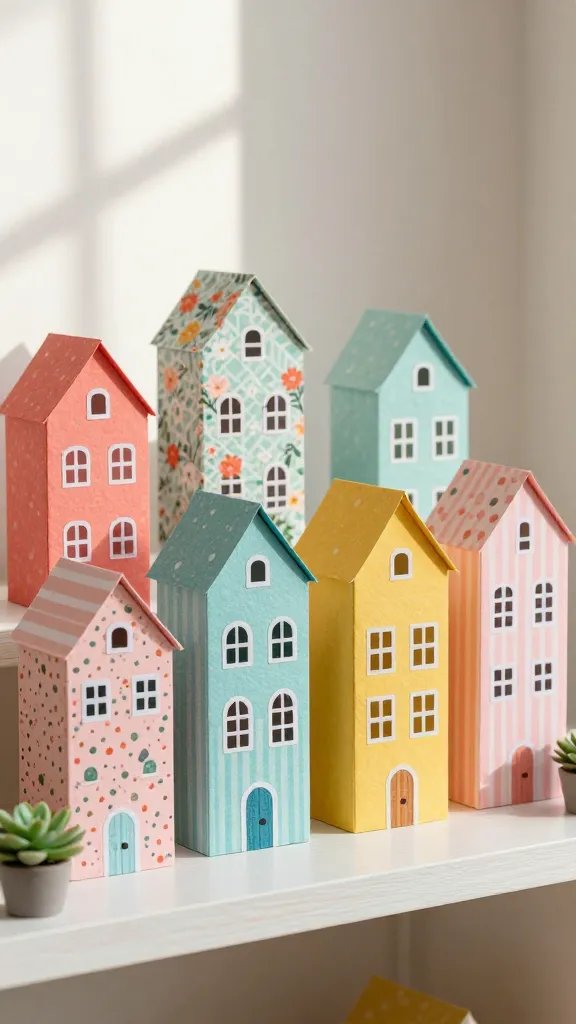
Channel those charming European streets with a collection of skinny row houses made from patterned scrapbook paper.
Each house can be a different height and color, creating visual interest while maintaining a cohesive look.
These are seriously addictive to make—you’ll find yourself wanting to build an entire paper neighborhood.
The beauty of this project is that you can raid your scrapbook paper stash and use up all those gorgeous patterns you’ve been hoarding.
Mix florals with geometrics, stripes with solids, and don’t be afraid to get playful with the color combinations.
Add dimensional details like paper doilies for “gingerbread” trim or tiny paper flowers climbing up the sides.
Styling Ideas
Display these row houses along a bookshelf, creating a whimsical cityscape among your favorite reads.
They also look fantastic as a centerpiece when clustered together on a wooden tray. For seasonal updates, simply swap out the paper patterns—pastels for spring, vibrant colors for summer, warm tones for fall, and metallics for winter.
3D Paper Brownstone With Stoops and Railings
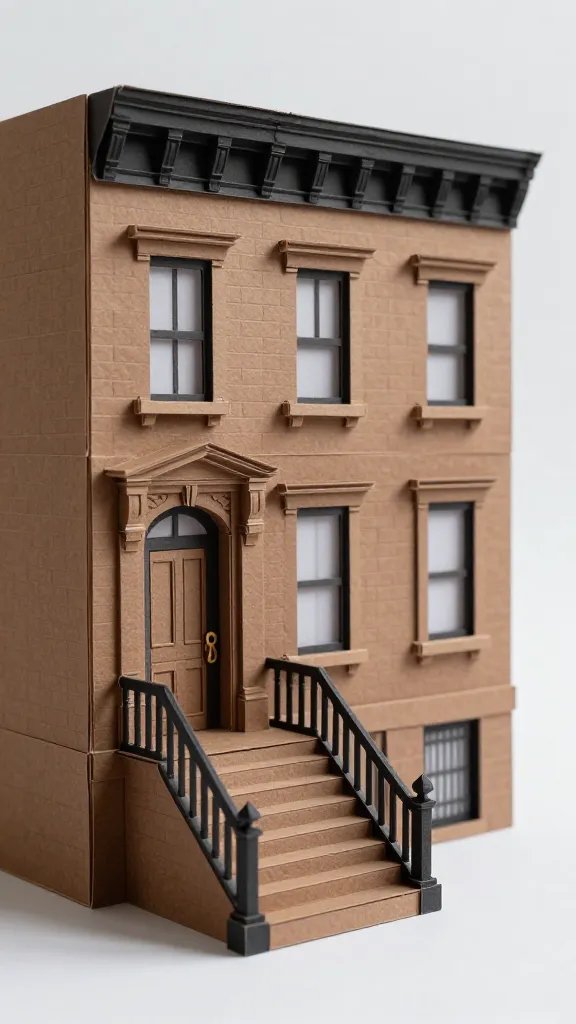
Take your paper house game up a notch with a detailed brownstone complete with a tiny front stoop and delicate railings.
This project requires a bit more precision cutting, but the results are absolutely worth it. You’ll create architectural elements like layered steps, window frames, and even a miniature front door that looks surprisingly realistic.
Materials Needed
- Brown or brick-patterned cardstock
- Black paper for railings and window frames
- Scoring tool and ruler
- Precision craft knife
- Tweezers for handling tiny pieces
- Strong adhesive suitable for paper
The stoop is what really makes this project special. Build it separately using stacked layers of cardstock, then attach it to the front of your house.
Use thin strips of black paper to create railings, and add tiny details like a door knocker or house numbers with a metallic pen. This is the perfect gift for anyone who loves city living or has fond brownstone memories.
Whimsical Fairy House With Toadstool Roof and Vines
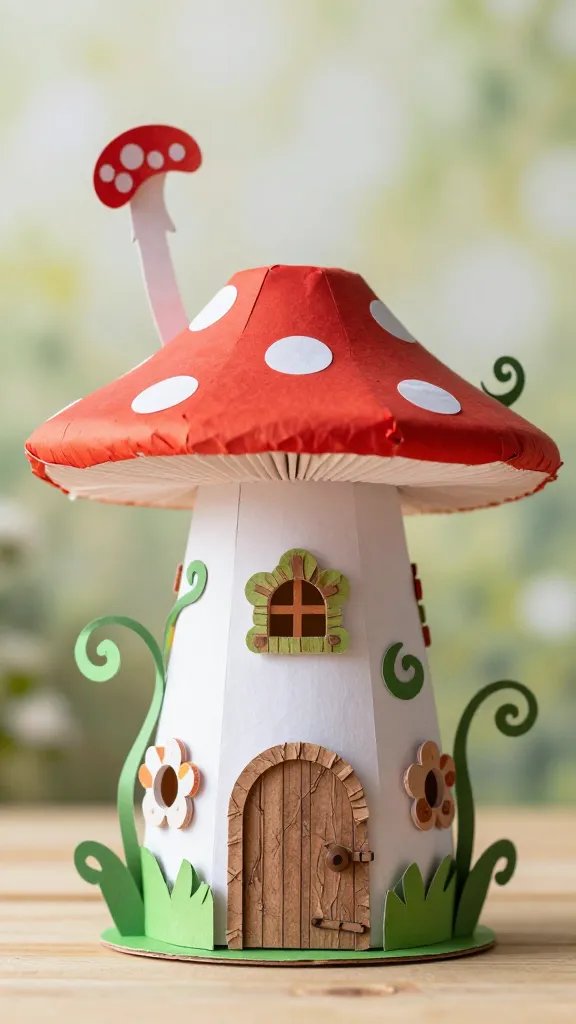
Forget traditional architecture and embrace the magical with a fairy house featuring a curved toadstool roof and curling paper vines.
This project lets you get wildly creative with unconventional shapes and fantasy elements.
The rounded roof can be created by cutting slits in your paper and overlapping them slightly to form a cone shape.
Add details like tiny windows shaped like flowers, a door made from textured bark paper, and delicate vines cut from green cardstock that curl around the structure.
You can even create miniature mushrooms from rolled paper to place around the base. FYI, kids absolutely love helping with this one, especially when it comes to adding the whimsical decorative touches.
How to Make the Toadstool Roof
Cut a large circle from red or orange cardstock and cut a wedge from the center to the edge. Overlap the cut edges to form a cone, adjusting the overlap to control the steepness.
Secure with glue and add white paper dots for that classic toadstool look. Attach to a round or oval base structure, and watch your fairy house come to life.
Modern Minimalist Paper House Sculpture
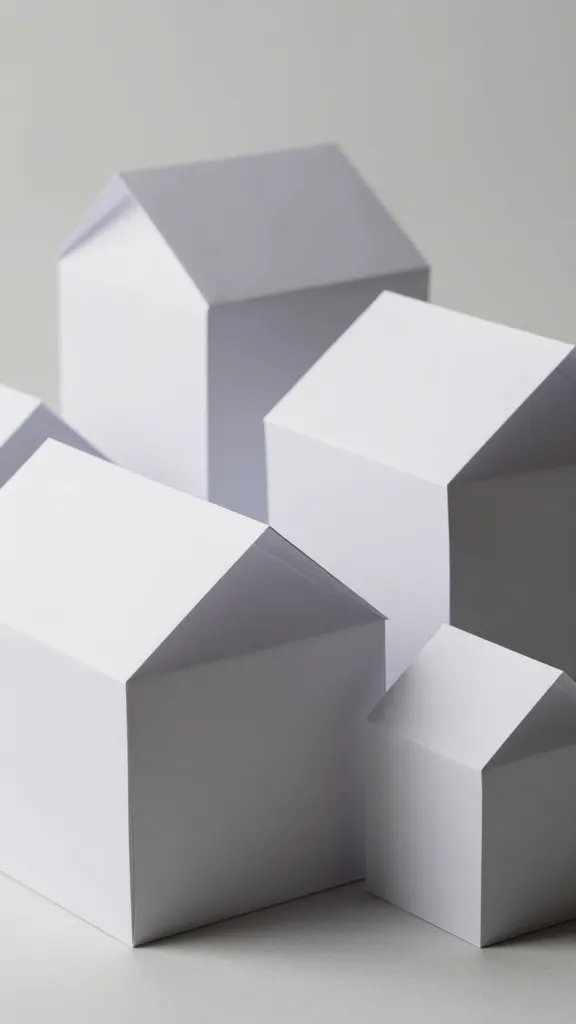
Not everything has to be cottagecore and whimsical. These sleek, geometric paper houses in monochromatic colors make stunning modern art pieces.
Think clean lines, sharp angles, and sophisticated color palettes like all-white, shades of gray, or bold black.
The minimalist approach actually makes these easier to construct since you’re focusing on form rather than fussy details.
Create visual interest through varying heights and roof angles rather than decorative elements.
A collection of white paper houses in different sizes creates an almost architectural model feel that looks incredibly chic on a console table or bookshelf.
Add a single pop of color with one house in sage green or dusty blue for a designer touch.
Display Suggestions
- Arrange on a marble tray for a gallery-worthy vignette
- Create a shadow box display with dramatic lighting
- Mount individual houses on wooden blocks for varying heights
- Pair with natural elements like dried branches or stones
Victorian Paper Mansion With Turret and Wraparound Porch
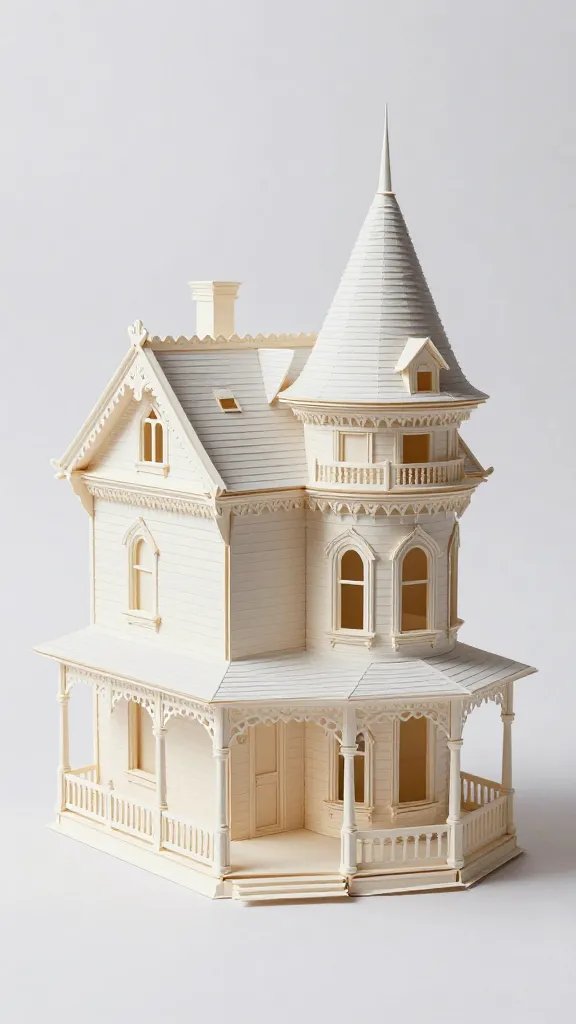
Ready for a challenge? This elaborate Victorian-style mansion features a cylindrical turret, detailed porch railings, and layered roof shingles that create serious wow factor.
This is definitely a weekend project rather than an afternoon craft, but the impressive results make it perfect for a special occasion or as a keepsake piece.
The turret is created by rolling and gluing a rectangular piece of cardstock into a cylinder, then topping it with a cone-shaped roof.
The wraparound porch uses the same technique as the brownstone stoop but extends around two or more sides of the house.
Create individual “shingles” by cutting small rectangles and layering them in overlapping rows for incredible texture and dimension.
This is the kind of project that becomes a family heirloom. Seriously, imagine creating one each year and building an entire Victorian neighborhood over time.
The level of detail you can achieve with just paper, patience, and precision is truly amazing.
Add lace paper trim along the porch edges and roof peaks for authentic gingerbread house vibes without any actual gingerbread.
Pro Tips
Work in stages rather than trying to complete everything in one sitting. Build the basic structure first, let it dry completely, then add architectural details.
Use reference photos of real Victorian houses for inspiration on placement of turrets, porches, and decorative elements. Keep tweezers handy for placing tiny pieces, and don’t rush the gluing process.
Start Crafting Today
There you have it—seven completely different ways to bring paper houses into your crafting life.
Whether you’re drawn to the sparkly nostalgia of glitter villages, the modern simplicity of geometric sculptures, or the intricate challenge of Victorian architecture, there’s a paper house project here calling your name.
Grab some cardstock, put on your favorite playlist, and start building your dream paper neighborhood today!






