
5 DIY Paper Cake Ideas for Stunning Party Decor

Want to create a stunning cake that lasts forever? These DIY paper cake ideas are a perfect way to add charm to your celebrations without any baking involved. From birthdays to special events, you’ll find creative designs that are easy, affordable, and beautiful.
The first time I made a DIY Paper Cake, it wasn’t for decoration—it was a quick, last-minute gift idea that still felt thoughtful. I didn’t have time to bake, and honestly, not everyone needs a real cake.
That’s when I discovered how creative paper crafts can be. A DIY Paper Cake can look just as charming, especially when each slice is decorated or filled with small surprises.
If you’re looking for a unique centerpiece or a handmade gift, this simple idea is beautiful, reusable, and easy to customize for any occasion.
Tiered Birthday Cake Gift Box With Ruffled Layers
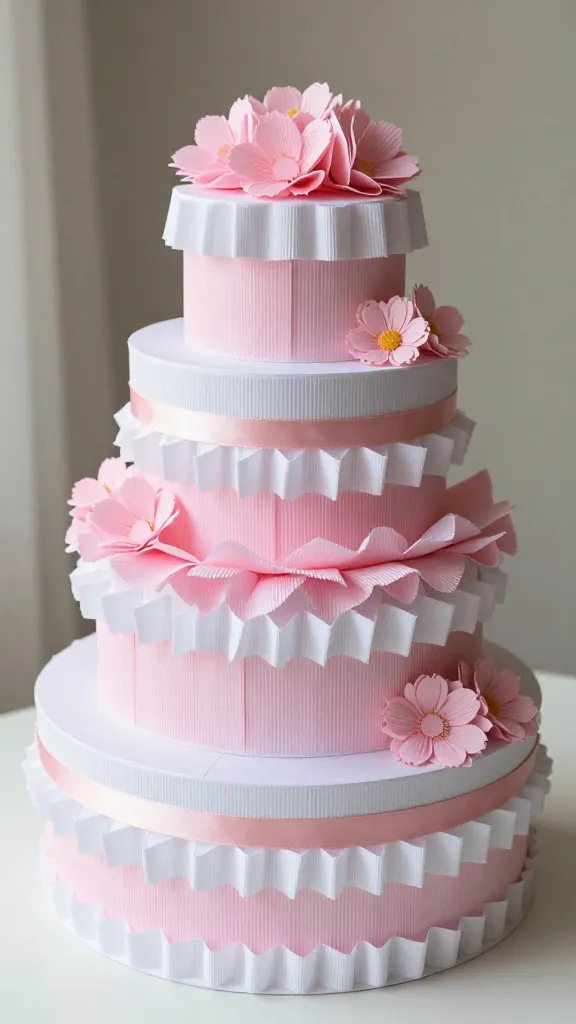
Picture this: a gorgeous three-tiered cake that doubles as gift wrapping. This stunner features delicate paper ruffles cascading down each layer, creating that bakery-fresh texture without any actual baking involved.
The best part? You can hide presents inside each tier for the ultimate surprise gift presentation.
Materials Needed
- Round cardboard boxes in three graduated sizes
- Crepe paper or tissue paper in your favorite colors
- Hot glue gun and glue sticks
- Ribbon for embellishments
- Faux flowers or paper decorations for topper
- Double-sided tape
How to Make It
Start by covering each box with a base layer of colored paper—think pastels for that classic cake vibe.
Then comes the fun part: cut your crepe paper into long strips about two inches wide, and gently stretch one edge to create natural ruffles.
Attach these ruffled strips around each tier in overlapping rows, working from bottom to top so they cascade beautifully.
Stack your tiers using a dab of hot glue between layers for stability. Crown your creation with ribbon “frosting” swirls and top it off with paper flowers or a sparkly cake topper. You can even add faux pearls or glitter for extra glam.
Pro Tips
Use ombre colors for each tier to create a trendy gradient effect. White and gold looks super elegant for weddings, while rainbow layers are perfect for kids’ parties.
This is seriously gorgeous for baby showers when you fill the boxes with tiny gifts or keepsakes!
Geometric Modern Cake Sculpture With Metallic Accents
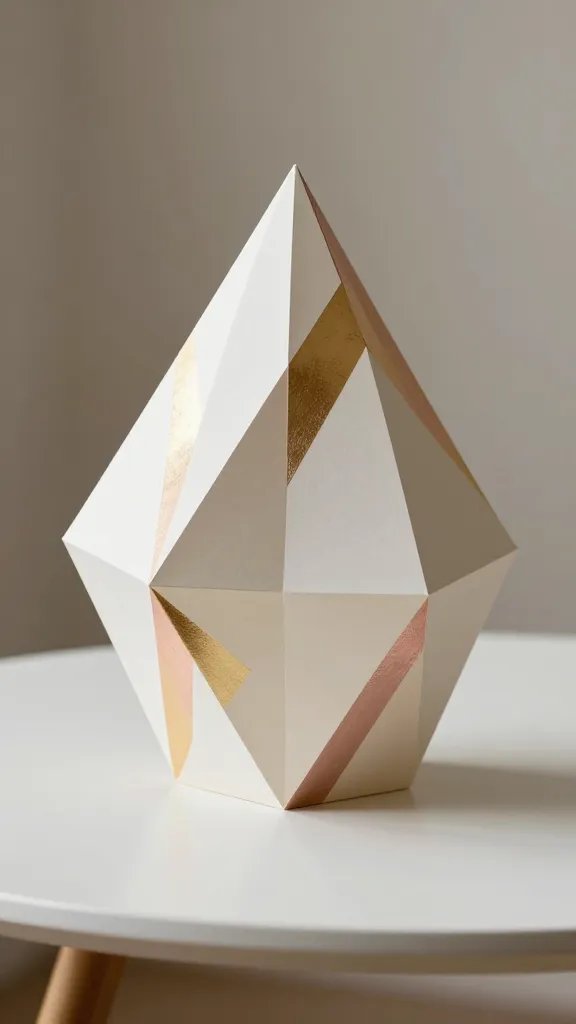
If minimalist design makes your heart sing, this angular paper cake is calling your name. Think clean lines, bold geometric shapes, and a touch of metallic shine that screams contemporary chic.
This isn’t your grandma’s craft project—it’s statement art that belongs on your coffee table or as a trendy photo prop.
Materials Needed
- Thick cardstock or posterboard
- Metallic washi tape (gold, silver, or rose gold)
- Craft knife and cutting mat
- Ruler and pencil
- Strong craft glue
- Optional: acrylic paint in matte colors
How to Make It
Create templates for hexagonal or triangular “cake” tiers using your ruler and cardstock. Cut out multiple panels for each tier, then score and fold them to create three-dimensional geometric shapes.
Assemble each tier separately, then stack them with slight offsets for that modern, asymmetrical look.
Here’s where it gets really fun: wrap sections with metallic washi tape to create stripes, or paint certain facets in contrasting matte colors.
The mix of textures and finishes gives it serious designer vibes. Add a geometric paper topper cut from the same metallic paper for cohesion.
Styling Ideas
Display this beauty on a marble pedestal or acrylic stand for maximum impact. It’s absolutely perfect for modern wedding decor, birthday photoshoots, or even just as permanent shelf decor. Trust me, your Instagram feed needs this.
Vintage Doily Lace Cake Centerpiece With Shabby Chic Charm
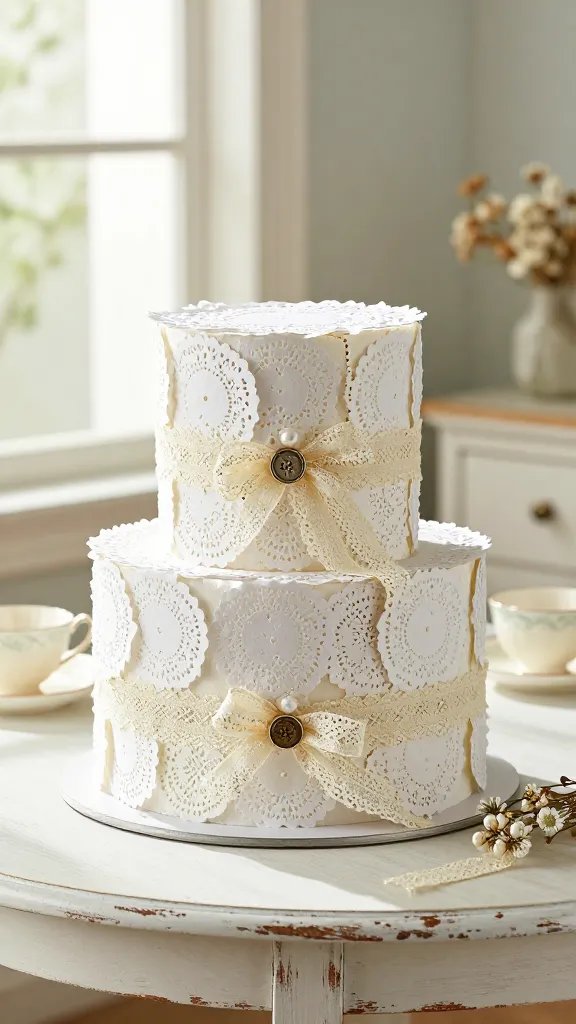
Romance meets craftiness in this dreamy paper cake covered entirely in delicate paper doilies.
It’s giving vintage tea party, cottage core aesthetic, and grandmillennial style all rolled into one gorgeous centerpiece.
The textured layers create incredible depth and that coveted handmade, heirloom quality.
Materials Needed
- Foam cake dummies or sturdy cardboard rounds
- White or cream paper doilies in various sizes
- Mod Podge or white craft glue
- Foam brush
- Pearls, lace ribbon, and vintage buttons
- Optional: diluted tea or coffee for aging effect
How to Make It
If you want that authentic vintage look, lightly stain your doilies with cooled tea before starting—just dip and let dry.
Begin covering your cake base by adhering doilies with Mod Podge, overlapping them slightly to create dimensional texture. Work your way up each tier, mixing different doily patterns for visual interest.
The magic happens when you add ruffled doily edges around the base of each tier, almost like edible lace on a real cake.
Embellish with pearl strands, tiny fabric flowers, or vintage-inspired ribbon bows. For the topper, fold and shape doilies into rosettes or use them to create a delicate banner.
Perfect For
This cake is absolutely made for bridal showers, vintage-themed weddings, or Mother’s Day brunches.
It also makes a stunning (and permanent!) kitchen decoration if you’re into that farmhouse-meets-French-country aesthetic. FYI, it photographs like an absolute dream with soft natural lighting!
Rainbow Rosette Celebration Cake With Paper Flower Layers
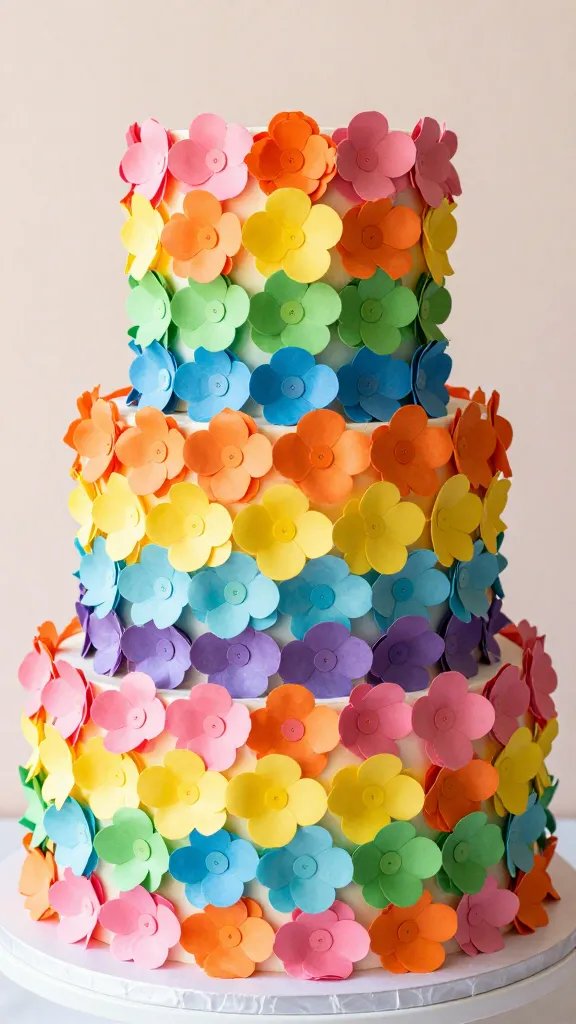
Get ready for serious color therapy! This show-stopping cake is completely covered in vibrant paper rosettes that create an almost fluffy, dimensional texture.
Each “petal” catches the light differently, making the whole thing look alive with color and movement. It’s pure joy in cake form.
Materials Needed
- Cardboard cake rounds or hat boxes
- Colored cardstock or scrapbook paper
- Circle punch (optional but helpful)
- Glue dots or hot glue
- Scissors
- Button or brad centers for rosettes
How to Make It
Cut strips of colored paper about one inch wide and six inches long. Fold each strip accordion-style, then fan it out and glue the ends together to form a circle.
Pinch the center and secure with a button or decorative brad—boom, instant rosette! You’ll need tons of these, so put on your favorite playlist and get folding.
Cover your entire cake base with these rosettes, placing them tightly together so no gaps show.
Go monochromatic for elegance, or create rainbow gradients for maximum happy vibes. The contrast between layers in different colors creates natural definition between tiers.
Customization Ideas
Try ombre effects within a single tier, or alternate rosette sizes for added texture. This design is incredibly versatile—pastels for Easter, red and pink for Valentine’s Day, or traditional rainbow for pride celebrations. Kids absolutely love helping make the rosettes, making this a fun family craft session!
Elegant Quilled Paper Cake With Swirled Frosting Effect
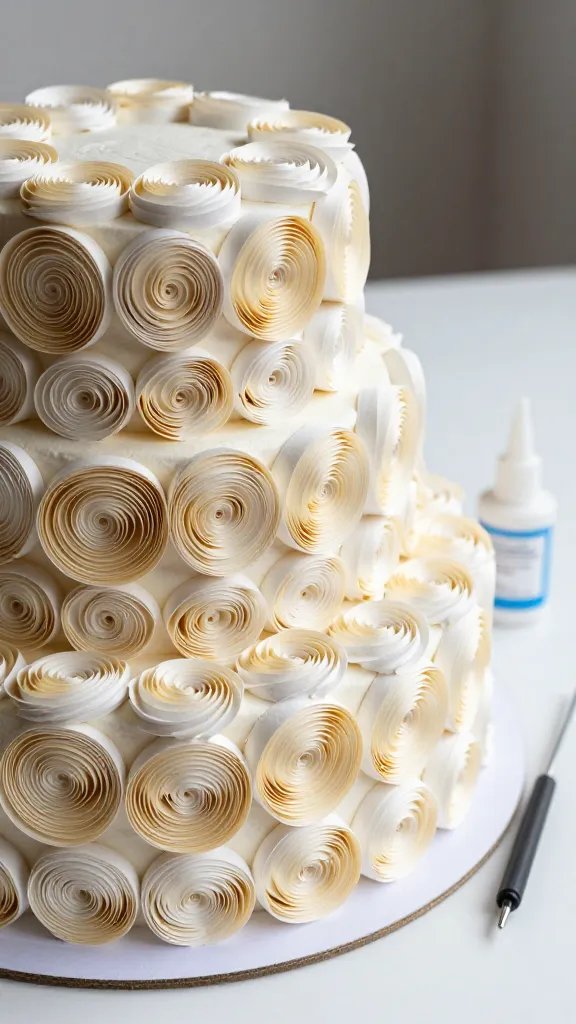
If you’ve never tried paper quilling, prepare to fall down the most satisfying craft rabbit hole ever.
This technique creates those gorgeous swirled “frosting” effects that look impossibly intricate but are actually pretty straightforward once you get the hang of it.
The result? A cake that looks like it took weeks but only requires an afternoon and some patience.
Materials Needed
- Paper quilling strips (or cut your own from cardstock)
- Quilling tool or toothpick
- White craft glue
- Foam or cardboard cake base
- Tweezers for precision placement
- Clear-drying glue
How to Make It
Start by creating tight coils with your quilling strips—just wind the paper around your tool, slide it off, and let it relax slightly before gluing the end.
Make dozens of these in varying sizes. Pinch some into teardrop shapes for flower petals, leave others round for dots and swirls.
Arrange your quilled shapes directly onto your cake base, creating swirled patterns that mimic frosting rosettes and piping details.
Build up borders, create cascading designs down the sides, or spell out messages across the tiers. The dimensional quality of quilling makes everything look professionally decorated.
Why You’ll Love This
This project is wonderfully meditative—seriously, the repetitive coiling is almost therapeutic.
The finished product looks incredibly sophisticated and works beautifully for weddings, anniversaries, or any celebration where you want that “wow” factor.
Plus, you can match any color scheme imaginable since quilling paper comes in every shade under the sun.
Final Thoughts
There you have it—five completely different ways to create stunning paper cakes that’ll impress everyone who sees them.
Whether you’re drawn to the modern geometric vibe, vintage romance, or colorful celebration styles, there’s a project here with your name on it.
The best part? You can customize every single detail to match your exact vision, and unlike real cake, these beauties won’t wilt, melt, or get eaten before the party’s over.
Pick your favorite and get crafting—your next showstopping centerpiece is just some paper and glue away!






